Table of Contents
Advertisement
Quick Links
Check Components
Check Components
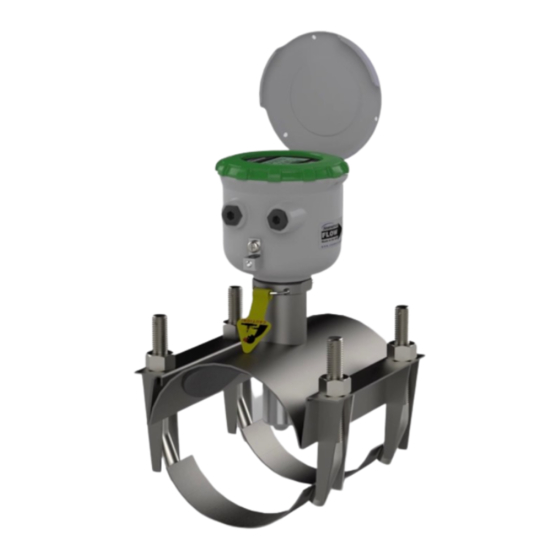
Meter with Indicator
and hinged cover
Saddle Gasket
Recommended Tools
Recommended Tools
Recommended:
• 3/32" or 2.5mm (small) flat head screw driver
• Crescent Wrench
• 5/32" Hex Key
Warnings
Warnings
Refer to instruction manual for further details.
• Confirm that U-clip retainer is installed and never remove the
U-clip retainer when pipe is under pressure—may result in
serious injury.
• Saddle bolts must be tightened evenly. Do not over tighten.
• Install security seals during installation if regulations require.
• Improper sealing of cables or cable glands will void warranty.
253.872.0284
AG90 Propeller Replacement
Saddle Assembly
(Packaged Separately)
Cable Gland
Page 1 of 4
Display Security Seal
Security Tab
Optional:
• Channel locks
• 6" Strap Wrench
• Ensure proper grounding when required.
• Programming pipe ID, pipe insertion hole size and straight pipe
configuration is required for the meter to read.
• To prevent tampering or changes to the program, after initial
set-up, either enter a security pass-code, or remove the display
lid and place a security tab over one of the arrows before
installing the housing security seal.
Quick Start Guide
Security Clip & Seal
(Security Clip has small hole for seal wire)
Optional
Optional
Power/Output Cable
seametrics.com
Advertisement
Table of Contents

Related Manuals for Onicon SeaMetrics AG90


Summary of Contents for Onicon SeaMetrics AG90
- Page 1 AG90 Propeller Replacement Quick Start Guide Check Components Check Components Display Security Seal Security Clip & Seal Meter with Indicator Saddle Assembly and hinged cover (Packaged Separately) (Security Clip has small hole for seal wire) Optional Optional Saddle Gasket Cable Gland Security Tab Power/Output Cable Recommended Tools...
- Page 2 AG90 Propeller Replacement Quick Start Guide Positioning Positioning Flow Choose a position that will ensure a full pipe. Choose a position that will minimize flow distortion. Flow *10X/5X Upstream straight pipe is selected during initial setup. Upstream options are 5X or 10X the diameter and are based on the Side (3 o’clock) and top Flow amount of straight pipe available in either new or propeller meter...
- Page 3 AG90 Propeller Replacement Quick Start Guide Wiring Wiring Unscrew the display lid and remove it from the meter. Unsnap the display assembly and remove it from the meter exposing the internal wiring connector. Install the wires through the cable glands into the 2 pin screw connector. (C1 = power/output cable) Pulse with External DC Power Source With Pulse Output Only...
- Page 4 AG90 Propeller Replacement Quick Start Guide Menu System Menu System The HOME Screen displays flow volume, direction of the flow total and flow RATE 0.0000000 1.2345678 TOTAL TOTAL along with status conditions such as Empty Pipe. Two buttons below the LCD display ACRE CU FT X1000...
Need help?
Do you have a question about the SeaMetrics AG90 and is the answer not in the manual?
Questions and answers