Table of Contents
Advertisement
Quick Links
Advertisement
Table of Contents

Subscribe to Our Youtube Channel
Related Manuals for Pelgrim OVP426RVS


Summary of Contents for Pelgrim OVP426RVS
- Page 1 OVP426RVS Instructions for use Oven...
- Page 2 Manual EN 3 - EN 25 Pictograms used Important information EN 2...
-
Page 3: Table Of Contents
TABLE OF CONTENTS Your oven Introduction Description Guide rails/Telescopic guide rails Accessories Operation Control panel Display Initial use Setting the current time Explanation of the knobs and the keys How to use the oven Oven functions Maintenance Cleaning the appliance Removing and cleaning the guide rails Removal and installation of the oven door Removal and installation of the oven door glass... -
Page 4: Your Oven
YOUR OVEN Introduction Congratulations on choosing this Pelgrim oven. This product is designed with simple operation and optimum comfort in mind. This manual shows how you can best use this oven. In addition to information about operating the appliance, you will also find background information that may be useful when using the appliance. -
Page 5: Description
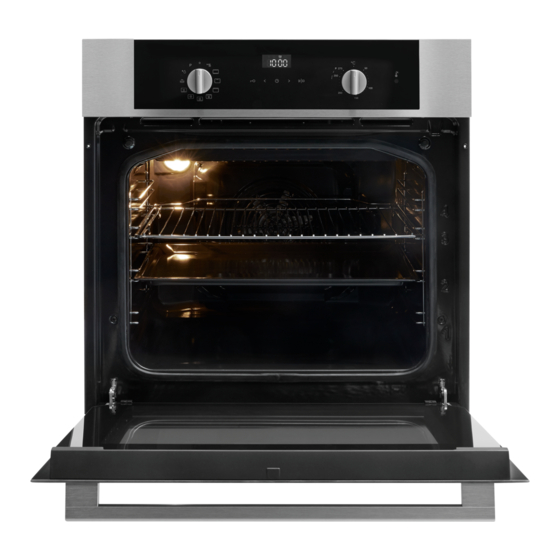
YOUR OVEN Description Level 4 Level 3 Level 2 Level 1 1. Control panel 2. Oven levels 3. Oven door 4. Door handle Guide rails/Telescopic guide rails • The oven has four or five guide rails (Level 1 to 4/5), depending on the model. Level 1 is mainly used in combination with bottom heat. -
Page 6: Guide Rails/Telescopic Guide Rails
YOUR OVEN Accessories Your appliance is accompanied by a range of accessories, depending on the model. Only use original accessories; they are specially suited to your appliance. Be sure that all the accessories that are being used are able to withstand the temperature settings of the chosen oven function. Note! Not all accessories are suitable/available for every appliance (it may also differ by country). -
Page 7: Operation
OPERATION Control panel 6 5 4 Function knob (in ‘Off’ position) 11. Defrosting Fast preheat 12. Pyrolysis Top heat + bottom heat 13. Display Small grill 14. Child lock key Large grill 15. Decrease value key Grill with fan 16. Timer key Hot air + bottom heat 17. -
Page 8: Initial Use
OPERATION Initial use • Remove the packaging materials from the appliance. • Check the appliance for damage. Do not use the appliance if it is damaged, but contact your supplier. • Remove the protective film. • Clean the interior of the appliance and all the accessories with warm water and a dish detergent. -
Page 9: Explanation Of The Knobs And The Keys
OPERATION Explanation of the knobs and the keys Function knob Select a function Turn this knob to select the desired function. • See ‘Oven functions’ for more information. Temperature knob Select a temperature Turn this knob to select the desired temperature. •... - Page 10 OPERATION Value adjustment keys Decrease value Touch or hold this key to decrease the blinking time in the display. Increase value Touch or hold this key to increase the blinking time in the display. Cancel a timer function Touch and hold both keys simultaneously to set the time to ‘00:00’.
- Page 11 OPERATION Example of using a timer function Be sure that the current time has been set correctly! First, select a function and a temperature. Current time: 12:00. Baking/roasting time: 2 hours. End of baking/roasting time: at 18:00. The appliance automatically switches on at the calculated time (at 16:00) and switches off at the preset end time (at 18:00).
-
Page 12: How To Use The Oven
OPERATION Kitchen timer Touch this key (several times) to select the kitchen timer function. • The kitchen timer symbol appears and ‘00:00’ will flash in the display. Touch the value adjustment keys to set the cooking time. The kitchen timer operates independently of the oven; it does not start and/or stop the operation of the oven! Start key / Stop key Start... - Page 13 OPERATION Select a timer function 3. Touch the timer key several times to select a timer function if preferred. If you do not want to use a timer function, you can start the manual operation of the oven immediately. Start the operation of the oven 4.
-
Page 14: Oven Functions
OPERATION Oven functions Consult the table to select the desired oven function. Also consult the instructions for preparation on the dish packaging. Function Description Fast Preheat • This function is used to heat the oven to the desired temperature as quickly as possible. •... - Page 15 OPERATION Function Description Large grill + Fan • The dish is heated by the grill element in combination with the top heating element and the heat is distributed by the fan. • This function is used to grill fish, meat and vegetables.
- Page 16 OPERATION Function Description Plate warmer • This function is used for warming tableware, so that the served food stays hotter for longer. • Suggested temperature: 60 °C. Defrosting • The air circulates with no heating elements activated. Only the fan will be activated. •...
-
Page 17: Maintenance
MAINTENANCE Cleaning the appliance Clean the oven regularly to prevent fat and leftover food from accumulating, especially on the surfaces of the interior and the exterior, the door and the seal. • Clean the exterior surfaces with a soft cloth and warm water with soap. •... -
Page 18: Removal And Installation Of The Oven Door
MAINTENANCE Removal and installation of the oven door Keep your fingers away from the hinges of the oven door. The hinges are spring loaded and can cause injury. Make sure that the hinge latches are applied correctly to lock the hinges. 1. -
Page 19: Removal And Installation Of The Oven Door Glass
MAINTENANCE Removal and installation of the oven door glass The glass in the oven door can be cleaned from the inside, but you do need to remove the glass from the door to do this. First remove the oven door (see chapter ‘Removal and installation of the oven door’). -
Page 20: The Pyrolysis Cleaning Function
MAINTENANCE The pyrolysis cleaning function Instead of cleaning manually, you can clean the oven space or an enamelled baking tray using the ‘Pyrolysis’ oven feature. During pyrolysis the oven space is heated to a very high temperature. Contaminants that are present incinerate at this high temperature and only ash remains. -
Page 21: Replacing The Oven Light Bulb
MAINTENANCE 6. At the end of the cleaning process, you will hear an audible signal. Touch the timer key to stop the audible signal. 7. Turn the function knob and temperature knob to ‘Off’ position. 8. When the oven has cooled down, wipe it with a damp cloth. Wipe the oven door and the adjacent surfaces in the gasket area. -
Page 22: Solving Problems
SOLVING PROBLEMS General Try the solutions below if you have problems with your oven. You could save yourself the time and effort of an unnecessary phone call to customer services. The food is not cooked • Check whether the timer has been set and you have pressed the ‘start button’. •... - Page 23 Storing and repairing the oven • Repairs may only be performed by a qualified service technician. If maintenance is required, remove the plug from the socket and contact Pelgrim customer services. Have the following information to hand when you call: •...
-
Page 24: Your Oven And The Environment
YOUR OVEN AND THE ENVIRONMENT Disposal of the appliance and packaging This product is made from sustainable materials. However, the appliance must be disposed of responsibly at the end of its useful life. The government can provide you with information about this. The packaging of the appliance can be recycled. -
Page 25: Cooking Test
COOKING TEST Food tested in compliance with the EN 60350-1 standard OVP426 Baking Dish Equipment Guide (from Temperature Cooking time System the bottom) (°C) (min) Cookies - single level Shallow enamel-coated 140-150 * 25-40 baking tray Cookies - two levels Shallow enamel-coated 2, 3 140-150 *... - Page 26 EN 26...
- Page 27 EN 27...
- Page 28 The appliance rating label is located on the inside of the appliance. When contacting the service department, have the complete type number to hand. You will find the addresses and phone numbers of the service organisation on the guarantee card. *685328* 685328...
Need help?
Do you have a question about the OVP426RVS and is the answer not in the manual?
Questions and answers