Table of Contents
Advertisement
Quick Links
Advertisement
Table of Contents

Subscribe to Our Youtube Channel
Related Manuals for Pelgrim OVM624RVS


Summary of Contents for Pelgrim OVM624RVS
- Page 1 OVM624RVS OVM624MAT OVM626RVS OVM626MAT OVP626RVS Instructions for use Oven...
- Page 2 Instructions for use EN 3 - EN 37 Pictograms used Important information...
-
Page 3: Table Of Contents
CONTENTS Your oven Introduction Control panel Description Guide rails/Telescopic guide rails Accessories Door switches Soft door closing Cooling fan Operation First use First use Using the oven ‘Auto’ mode and ‘Quick recipes’ mode ‘Pro’ mode Temperature setting Oven settings The timer Multiphase cooking (cooking step by step) Start the program End the program... -
Page 4: Your Oven
YOUR OVEN Introduction Congratulations on your choice of this Pelgrim oven. This product was designed with simple operation and optimum comfort in mind. With the extensive setting options, you can always select the right method of preparation. This manual describes the best way to work with this oven. In addition to information on operation, you will also find background information that may come in handy when using the appliance. -
Page 5: Control Panel
YOUR OVEN Control panel Auto 12:07 1. On/Off 2. Oven lighting on/off 3. ‘Back’ key - Brief touch: return to previous menu level - Long touch: return to starting menu 4. Multi-function selector - Setting is selected by turning the knob - By pressing the knob the setting is confirmed 5. -
Page 6: Description
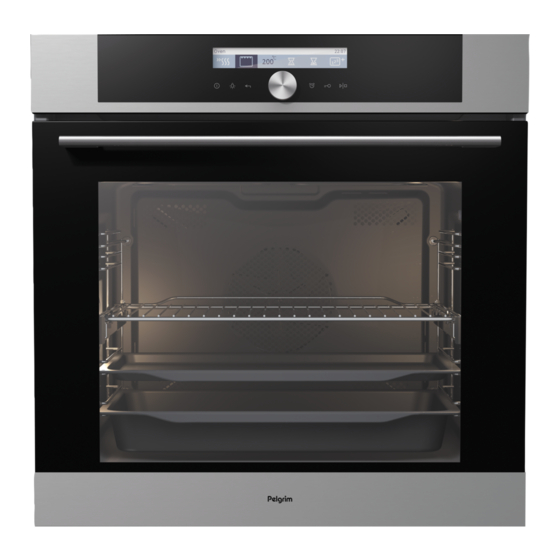
YOUR OVEN Description Level 5 Level 4 Level 3 Level 2 Level 1 1. Control panel 2. Shelf levels 3. Door 4. Door handle Guide rails/Telescopic guide rails • The oven has four or five guide rails (Level 1 to 4/5), depending on the model. -
Page 7: Accessories
YOUR OVEN Accessories Your appliance is accompanied by a range of accessories, depending on the model. Only use original accessories; they are specially suited to your appliance. Be sure that all the accessories that are being used are able to withstand the temperature settings of the chosen oven function. -
Page 8: Door Switches
YOUR OVEN Door switches • The door switches interrupt the operation of the oven when the door is opened during use. Operation resumes when the door is closed. Soft door closing The oven door is fitted with a system that dampens the door closing force, starting at the 75-degree angle. -
Page 9: Operation
YOUR OVEN Operation On/off key (01) • To turn on and off the appliance. Illumination key (02) • The illumination is turned on automatically when you open the door or when you switch on the appliance. The light switches off automatically after approximately 1 minute. - Page 10 YOUR OVEN Minute minder key (05) • The minute minder can be used independently of the appliance operation. The longest possible setting is 10 hours. After the set time expires an acoustic signal will be heard which you may turn off by pressing any key or wait to be switched off automatically after approximately 3 minutes.
-
Page 11: First Use
FIRST USE First use • Remove all equipment, accessories, and utensils from the cavity and clean them with warm water and regular detergent. Do not use any abrasive cleaners. • When the appliance heats up for the first time, the characteristic smell of a new appliance will be emitted. - Page 12 FIRST USE Setting the Language Language 12:07 English Ceski In case you are not comfortable with the language in which text is displayed, you may select another language. • Default setting is ‘English’. 1. Turn the ‘Multi-function selector’ and select your preferred language from the displayed list.
-
Page 13: Use
Using the oven You may control your baking/roasting in several different modes. Rotate the ‘Multi-function selector’ and select the symbol. The symbol turns white. The name of the selected menu appears at the top. Confirm the setting by pressing the ‘Multi-function selector’. ‘Auto’... - Page 14 3. Confirm by pressing the ‘Multi-function selector’. Auto 12:07 Meat Fish & clam 4. Select the type of food and then select the appropriate dish with the ‘Multi-function selector’. 5. Confirm by pressing the ‘Multi-function selector’. ▷ The oven needs to be preheated for most dishes. The display shows a warning: “Selected program includes preheat function”.
-
Page 15: Pro' Mode
7. Place the dish in the oven. ▷ Attention: For most dishes, the oven has to be preheated first. Please do not put the dish in the oven yet, wait until preheating is complete. 8. Press the ‘Start/stop’ key. The display indicates all selected settings. Preheat For certain dishes, the oven must be preheated in ‘Auto’... - Page 16 3. You can now select (and change) the following settings: A. Preheat (black = on / white = off); B. Functions (see the table at ‘Oven settings’); C. Oven temperature. D. Cooking time E. End time F. Multiphase cooking (cooking step by step) 4.
-
Page 17: Temperature Setting
Temperature setting 1. Turn the ‘Multi-function selector’ to select the ‘oven temperature’ icon. 2. Confirm by pressing the ‘Multi-function selector’. 3. Select the desired temperature by turning the ‘Multi-function selector’. 4. Confirm by pressing the ‘Multi-function selector’. Oven settings Consult the table below to choose the correct function. Also read the preparation instructions on the food packaging. - Page 18 Function Description Bottom Heat • The dish is heated by the bottom heating element. Switch to this position just before the end of the baking or roasting time. • This function is used for dishes that require a bottom crust or browning. •...
- Page 19 Function Description Large grill + Fan • The dish is heated by the grill element in combination with the top heating element and the heat is distributed by the fan. • This function is used to grill fish, meat and vegetables.
- Page 20 Function Description ECO Hot air • The dish is heated by hot air. ECO Hot air uses less energy but gives the same result as the hot air setting. Cooking takes several minutes longer. • This function is used to roast meat or to bake pastry. •...
-
Page 21: The Timer
The timer While in basic ‘Pro’ mode you can select ‘cooking time’ function (A) and/or ‘End time’ function (B). Pro l Large grill 12:07 Setting the cooking time (A) • While in ‘cooking time’ mode set the time of oven operation. Pro l Large grill 12:07 •... -
Page 22: Multiphase Cooking (Cooking Step By Step)
Multiphase cooking (cooking step by step) • This mode allows you to combine three different settings successively in a single cooking process. • Choose different settings to cook your food just the way you want it. 1. In the basic ‘Pro’ mode select the option ‘Multiphase cooking’. Pro l Large grill 12:01 2. -
Page 23: Start The Program
Start the program Before starting the program, the ‘Start/stop’ key is blinking. • By pressing the ‘Start/stop’ key, the program will start. If you wish to change the current settings during the cooking, turn the ‘Multi- function selector’. End the program 1. -
Page 24: My Mode (Favourite Recipes)
My mode (favourite recipes) Saving selected settings 1. Select ‘Add to my mode’ at the end of the cooking process with the ‘Multi-function selector’. 2. Confirm by pressing the ‘Multi-function selector’. Add to my mode 12:07 3. Select a number with the ‘Multi-function selector’ and confirm by pressing the ‘Multi-function selector’. - Page 25 Cleaning (depending on the model) This function is used for removing food residues that remain in the oven after baking/roasting (see chapter 'Cleaning'). Extras l Cleaning 12:07 Pyrolysis (depending on the model) This function automatically cleans the oven cavity using high temperatures (approx.
-
Page 26: Settings (General Settings)
Settings (general settings) Select ‘Settings’ with the ‘Multi-function selector’ and confirm by pressing the ‘Multi-function selector’. Settings 12:07 This menu offers the choice of selecting: • Language • Time • Sound • Display • Cooking settings • Other settings Move around the menu by turning the ‘Multi-function selector’. Confirm each selection by pressing the ‘Multi-function selector’. - Page 27 Display In this menu you can set: • Brightness; To adjust the brightness of the display backlight (low, medium or high). • Night mode; Set the period during which you want to reduce the brightness of the display backlight to the lowest setting (this has no effect if the brightness is already at the lowest setting).
-
Page 28: Cleaning
CLEANING Cleaning the appliance Clean the appliance regularly to prevent fat and food particles from accumulating, especially on the surfaces of the interior and the exterior, the door and the seal. • Activate the child lock (to prevent that the appliance is switched on accidentally). -
Page 29: The Pyrolysis Cleaning Function (Depending On The Model)
CLEANING The pyrolysis cleaning function (depending on the model) Instead of cleaning manually, you can clean the oven space or an enamelled baking tray using the ‘Pyrolysis’ oven feature. During pyrolysis the oven space is heated to a very high temperature. Contaminants that are present incinerate at this high temperature and only ash remains. -
Page 30: Removing And Cleaning The Guide Rails
CLEANING 4. Select the desired cleaning intensity and confirm your choice by pressing the ‘Multi-function selector’: • Basic: approx. 90 minutes • Medium: approx. 120 minutes • High: approx. 150 minutes Extras l Pyrolysis 12:07 Only cleaning intensity may be selected. The time is fixed and depends on the cleaning intensity selected. -
Page 31: Removal And Reinsertion Of The Oven Door
CLEANING Removal and reinsertion of the oven door 1. Open the door completely to the horizontal position. 2. Pull the lock pins on each side up slightly (A) and then tilt them all the way forward (B). 3. Close the door slowly until you feel some resistance. 4. -
Page 32: Replacing The Oven Light Bulb
CLEANING Remount the glass in reverse order. Marks engraved on the oven door and the glass (semicircle) must coincide. Replacing the oven light bulb The lamp in this household appliance is only suitable for illumination of this appliance. The lamp is not suitable for household room illumination. -
Page 33: Troubleshooting
TROUBLESHOOTING General If you have problems with your oven, try the solutions suggested below. They may save you the time and inconvenience of an unnecessary service call. Food remains uncooked • Check that the timer has been set correctly and the “Start” key was pressed. - Page 34 • If the error is still indicated, call a service technician. Storing and repairing the oven Repairs should only be performed by a qualified service technician. If the appliance requires servicing, unplug the oven and contact Pelgrim Customer Service. When calling, please have the following information ready: •...
-
Page 35: Your Oven And The Environment
YOUR OVEN AND THE ENVIRONMENT Disposing of the appliance and the packaging This product is made from sustainable materials. However, it must be disposed of in a responsible manner at the end of its useful life. The government can provide you with information about this. The appliance packaging can be recycled. -
Page 36: Cooking Test
COOKING TEST Food tested in compliance with the EN 60350-1 standard OVM626 / OVP626 Baking Dish Equipment Guide (from Temperature Cooking time System the bottom) (°C) (min) Shortbread - single level Shallow enamel-coated 140-150 * 20-35 baking tray Shortbread - single level Shallow enamel-coated 140-150 * 25-40... - Page 37 COOKING TEST Food tested in compliance with the EN 60350-1 standard OVM624 Baking Dish Equipment Guide (from Temperature Cooking time System the bottom) (°C) (min) Shortbread - single level Shallow enamel-coated 140-150 * 25-40 baking tray Shortbread - single level Shallow enamel-coated 140-150 * 25-40...
- Page 38 EN 38...
- Page 39 EN 39...
- Page 40 The appliance identification card is located on the inside of the appliance. When contacting the service department, have the complete type number to hand. You will find the addresses and phone numbers of the service organisation on the guarantee card. *596596* 596596...
Need help?
Do you have a question about the OVM624RVS and is the answer not in the manual?
Questions and answers