Table of Contents
Advertisement
Available languages
Available languages
Quick Links
DO7109S
Handleiding
Mode d'emploi
Gebrauchsanleitung
Instruction booklet
Manual de instrucciones
Istruzioni per l'uso
Návod k použití
Návod na použitie
Strijkijzer met stoomgenerator
Fer à repasser avec centrale vapeur
Bügeleisen mit dampfgenerator
Iron with steam generator
Plancha con Generador de vapor
Ferro da stiro con caldaia a vapore
Žehlička s parním generátorem
Žehlička s parným generátorom
PRODUCT OF
Advertisement
Table of Contents

Related Manuals for Linea 2000 DOMO DO7109S


Summary of Contents for Linea 2000 DOMO DO7109S
- Page 1 DO7109S Handleiding Strijkijzer met stoomgenerator Mode d’emploi Fer à repasser avec centrale vapeur Gebrauchsanleitung Bügeleisen mit dampfgenerator Instruction booklet Iron with steam generator Manual de instrucciones Plancha con Generador de vapor Istruzioni per l’uso Ferro da stiro con caldaia a vapore Návod k použití...
- Page 2 Lees aandachtig alle instructies - bewaar deze handleiding voor latere raadpleging. Lisez attentivement les instructions - gardez le mode d’emploi pour utilisation ultérieur. Lesen Sie genau die Anweisungen - bewahren Sie die Gebrauchsanleitung für spätere heranziehung. Read all instructions carefully - save this instruction manual for future reference. Lea detenidamente todas las instrucciones - Conserve este manual para futura referencia.
-
Page 3: Garantie
GARANTIE Geachte klant, Al onze producten ondergaan steeds een strenge kwaliteitscontrole, alvorens ze aan je worden aangeboden. Mocht je desondanks toch nog problemen hebben met jouw toestel, dan betreuren wij dit ten zeerste. In dat geval verzoeken wij je contact op te nemen met onze klantendienst. Onze medewerkers zullen je met plezier verder helpen. - Page 4 · Dit toestel mag gebruikt worden door kinderen vanaf 16 jaar en personen met een fysieke of sensoriële beperking of mensen met een beperkte mentale capaciteit of gebrek aan ervaring of kennis, op voorwaarde dat deze personen toezicht krijgen of instructies hebben gekregen over het gebruik van het toestel op een veilige manier en dat ze ook de gevaren kennen bij het gebruik van het toestel.
-
Page 5: Voor Het Eerste Gebruik
· Als het toestel niet goed onderhouden wordt, kan dit de levensduur van het toestel drastisch verminderen en een gevaarlijke situatie veroorzaken. · Ongevallen of schade veroorzaakt door het niet volgen van deze regels zijn op eigen risico. Noch de fabrikant, de importeur of leverancier kan daar dan verantwoordelijk voor geacht worden. - Page 6 GEBRUIK Deze stoomgenerator biedt 2 opties: droog strijken of met stoom strijken. Volg hiervoor onderstaande instructies. Lees ook goed de strijktips onderaan deze rubriek alvorens het toestel te gebruiken. DROOG STRIJKEN Zet het strijkijzer op de thermische isolatiekussentjes. Steek de stekker in het stopcontact en druk op de aan-uitknop. Het indicatielampje van de aan-uitknop zal beginnen knipperen.
-
Page 7: Reiniging En Onderhoud
STRIJKTABEL Stel met de draaischijf de juiste temperatuur in voor de juiste stof. Symbool Stof Temperatuurschijf synthetische stof/zijde 70<T<120°C 100<T<160°C katoen 140<T<210°C linnen 170<T<225°C MAX Dit symbool betekent dat het artikel niet gestreken mag worden! STRIJKTIPS · Check altijd eerst of er een etiket aan het kledingstuk hangt met instructies voor het strijken. Als dit het geval is, volg dan altijd deze instructies. - Page 8 worden! Bij gebruik van een “ontharder” en/of geparfumeerd water kunnen bruine vlekken ontstaan, met een beschadiging van de stoomkamer tot gevolg. ZELFREINIGINGSFUNCTIE Na ongeveer 11 strijkuren zal het indicatielampje voor de zelfreinigingsknop beginnen knipperen. Dit geeft aan dat je het strijkijzer moet reinigen. Plaats het strijkijzer boven een gootsteen.
-
Page 9: Consignes De Sécurité
GARANTIE Cher client, Tous nos produits sont soumis à des contrôles qualité stricts avant d’être proposés à la vente. Si vous deviez toutefois rencontrer un problème avec votre appareil, nous le déplorons vivement. Dans ce cas, nous vous invitons à prendre contact avec notre service à la clientèle. Nos collaboratrices se feront un plaisir de vous aider ! +32 14 21 71 91 info@linea2000.be... - Page 10 l’appareil ne peuvent pas être effectués par des enfants, sauf s’ils sont âgés de plus de 16 ans et sous la surveillance d’un adulte. · Gardez l’appareil et le cordon électrique hors de portée des enfants. · Débranchez l’appareil lorsqu’il n’est pas utilisé ainsi qu’avant d’installer ou d’enlever des pièces et avant de nettoyer l’appareil.
-
Page 11: Panneau De Commande
· Les accidents ou dommages causés par le non-respect de ces consignes sont à vos propres risques. Ni le fabricant, ni l’importateur, ni le fournisseur ne peuvent, dans ce cas, en être tenus pour responsables. CONSERVEZ CES CONSIGNES POUR POUVOIR LES CONSULTER ULTÉRIEUREMENT PARTIES Ouverture de remplissage Réservoir d’eau... - Page 12 UTILISATION Cette centrale vapeur offre 2 options: repassage à sec et repassage à la vapeur. Respectez bien les instructions qui suivent. De même, avant d’utiliser l’appareil, lisez attentivement les conseils de repassage à la fin de cette rubrique. REPASSAGE À SEC Placez le fer à...
-
Page 13: Conseils De Repassage
l’appareil entièrement. Si vous n’utilisez pas le bouton de vapeur ou les boutons sur le panneau de contrôle pendant 10 minutes, les témoins lumineux commenceront à clignoter. Si vous poussez un de ces boutons pendant cette période, le fer à repasser restera sur température. Si vous n’avez pas poussé... -
Page 14: Mise Au Rebut
· Essuyez les gouttes sur la centrale vapeur et nettoyez les coussinets d’isolation thermique avec un chiffon sec. · Si vous ne comptez pas utiliser la centrale vapeur pendant une longue période, videz l’eau contenue dans le réservoir et placez le fer à repasser sur les coussinets d’isolation thermique avant de le ranger. ·... - Page 15 GARANTIE Sehr geehrter Kunde, Sämtliche unserer Produkte unterliegen einer strengen Qualitätskontrolle, bevor Sie Ihnen angeboten werden. Sollten dennoch Probleme mit Ihrem Gerät auftreten, bedauern wir dies zutiefst. Wir möchten Sie in diesem Fall bitten, unseren Kundenservice zu kontaktieren. Unsere Mitarbeiter helfen Ihnen gern weiter! +32 14 21 71 91 info@linea2000.be Montag –...
- Page 16 · Diese Gerät darf von Kindern ab 16 Jahren und Menschen mit körperlichen oder sensorischen Behinderungen oder Menschen mit eingeschränkten geistigen Fähigkeiten oder mangelnder Erfahrung bzw. Sachkenntnis unter der Bedingung verwendet werden, dass diese Personen beaufsichtigt werden oder sie eine Anleitung zur sicheren Verwendung des Geräts erhalten haben und sich der Gefahren bei der Verwendung des Geräts bewusst sind.
-
Page 17: Vor Der Ersten Inbetriebnahme
Ziehen Sie nie am Gerät oder am Netzkabel, um den Stecker aus der Steckdose zu ziehen. · Stellen Sie sicher, dass das Gerät vollständig abgekühlt ist, bevor der Wassertank für die Reinigung geöffnet wird. Nach der Reinigung muss überprüft werden, ob der Wassertank wieder korrekt angebracht ist. - Page 18 · Wenn Sie das Gerät anstellen kann es sein, dass der Dampfgenerator ein Pumpgeräusch macht. Dies ist ebenfalls normal. Das Geräusch entsteht, sobald Wasser in den Dampfgenerator gepumpt wird. · Während des Aufwärmens des Bügeleisens wird automatisch etwas Dampf aus der Bügeleisensohle entweichen.
- Page 19 Bitte beachten: · Fassen Sie die Bügelsohle niemals an! · Richten Sie den Dampf nie auf Menschen! Drücken Sie die ECO-Taste, um mit einem geringeren Dampfniveau zu bügeln. Die Kontrollleuchte dieser Taste brennt, um anzugeben, dass diese Funktion verwendet wird. Drücken Sie nach dem Bügeln auf den Ein-/Ausschalter.
-
Page 20: Reinigung Und Wartung
REINIGUNG UND WARTUNG · Ziehen Sie den Stecker aus der Steckdose und lassen Sie das Gerät abkühlen, bevor Sie es reinigen. · Waschen Sie Reste auf der Sohle mit einem feuchten Tuch und einem nicht scheuernden (flüssigen) Reinigungsprodukt ab. ACHTUNG: Benutzen Sie keine chemischen oder scheuernden Produkte, um die Bügeleisensohle zu reinigen. - Page 21 ENTSORGEN Dieses Symbol auf dem Produkt oder seiner Verpackung weist darauf hin, dass dieses Produkt nicht als normaler Haushaltsabfall zu behandeln ist, sondern an einem Sammelpunkt für das Recyling von elektrischen und elektronischen Geräten abgegeben werden muss. Durch Ihren Beitrag zum korrekten Entsorgen dieses Produkts schützen Sie die Umwelt und die Gesundheit Ihrer Mitmenschen.
-
Page 22: Warranty
WARRANTY Dear client , All of our products are always submitted to a strict quality control before they are sold to you. Should you nevertheless experience problems with your device, we sincerely regret this. In that case, we kindly request you to contact our customer service. Our staff will gladly assist you. - Page 23 supervision or instruction concerning use of the appliance in a safe way and understand the hazards involved. Children shall not play with the appliance. Cleaning and user maintenance shall not be made by children unless they are older than 16 and supervised. ·...
-
Page 24: Control Panel
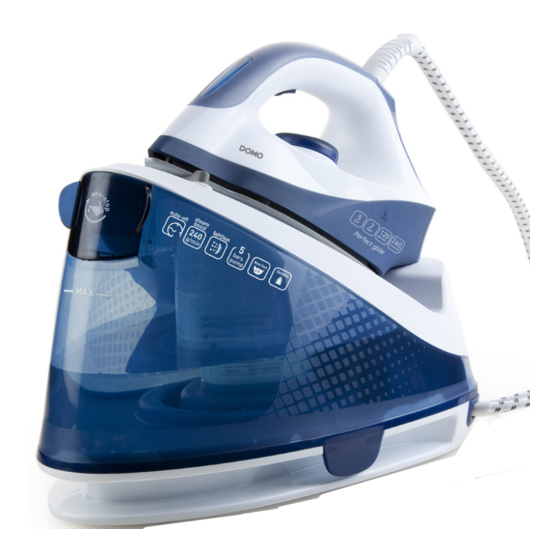
· Any injury or damage caused by failure to comply with these rules are at your own risk. Neither the manufacturer, importer, or the supplier may be held liable. SAVE THESE INSTRUCTIONS FOR FUTURE REFERENCE PARTS Filling opening Water tank Temperature indication light Steam release button Temperature dial... -
Page 25: Dry Ironing
This steam generator offers 2 options: dry ironing or steam ironing. Follow the instructions below. Also carefully read the ironing tips at the end of this section before using the appliance. DRY IRONING Place the iron on the thermal insulation pads of the steam generator. Put the plug into the outlet and press the on/off button. -
Page 26: Ironing Tips
IRONING TABLE Use the dial to select the correct temperature for the correct material. Symbol Fabric Temperature dial synthetic fabric/silk 70<T<120°C wool 100<T<160°C cotton 140<T<210°C linnen 170<T<225°C MAX This symbol means that the article can not be ironed! IRONING TIPS ·... -
Page 27: Self-Cleaning Function
SELF-CLEANING FUNCTION After about 11 ironing hours, the indication light of the self-cleaning button will start flashing. This means you need to clean the iron. Hold the iron over a sink. Press the self-cleaning button for a few seconds. The indication light will flash during the descaling process. -
Page 28: Instrucciones De Seguridad
GARANTIA Este aparato tiene un periodo de garantía de 2 años a partir de la fecha de compra. Durante el periodo de garantía, el distribuidor será completamente responsable de los defectos directamente asignables a errores del material y fabricación. Cuando se detecten este tipo de errores, y siempre que se estime necesario, el aparato se sustituirá... - Page 29 · El orificio de llenado no se puede abrir nunca durante el uso. Siga las instrucciones de este manual para llenar el aparato de manera segura. · La plancha solo se puede colocar y utilizar sobre una superficie plana y estable, resistente al vapor y al calor.
-
Page 30: Panel De Control
PIEZAS Orificio de llenado Depósito de agua Luz indicadora de la temperatura Botón del Vapor Disco de temperatura Suela Tapa del compartimiento de los cartuchos antical Cartucho antical Almohadillas de aislamiento térmico 10. Panel de control Almacenamiento del cable PANEL DE CONTROL 12. -
Page 31: Planchado En Seco
PLANCHADO EN SECO Coloque la plancha sobre las almohadillas de aislamiento térmico del generador de vapor. Introduzca el enchufe en la toma de corriente y pulse el botón de encendido/apagado. La luz indicadora del botón encendido/ apagado comenzará a parpadear. Gire el control de temperatura a la posición deseada, lo que depende del tipo de tejido a planchar. -
Page 32: Consejos De Planchado
TABLA DE PLANCHADO Con la rueda giratoria, ajuste la temperatura correcta para el tejido en cuestión. Símbolo Tejido Disco de temperatura Tejido sintético / seda 70<T<120°C lana 100<T<160°C algodón 140<T<210°C lino 170<T<225°C MAX ¡Este símbolo significa que el artículo no se debe planchar CONSEJOS DE PLANCHADO ·... - Page 33 “ablandador” y/o agua perfumado pueden surgir manchas de agua marrón con daño a la cámara de vapor como resultado. FUNCIÓN AUTOLIMPIANTE Después de más o menos 11 horas de planchar, la luz indicadora del botón autolimpiante comenzará a parpadear, lo que indica que tiene que limpiar la plancha. Coloque la plancha sobre un fregadero.
-
Page 34: Garanzia
GARANZIA La garanzia dell’apparecchio è valida per 2 anni a partire dalla data di acquisto. Durante il periodo di validità della garanzia, il distributore si assume la piena responsabilità dei difetti dei materiali o di quelli di fabbricazione. In caso di presenza di tali difetti, se necessario, si procederà alla sostituzione o alla riparazione dell’apparecchio. - Page 35 · Il ferro non deve essere utilizzato se è caduto, se presenta segni visibili di danni o se perde. Non utilizzare mai l’apparecchio se il cavo di alimentazione o la spina sono danneggiati, dopo un malfunzionamento o quando è danneggiato. Portare l’apparecchio al servizio assistenza post-vendita di DOMO o al centro assistenza autorizzato più...
-
Page 36: Pannello Di Controllo
COMPONENTI Apertura di riempimento Serbatoio dell’acqua Spia luminosa di indicazione della temperatura Tasto del vapore Disco della temperatura Piastra Valvola cassetta anticalcare Cassetta anticalcare Gommini isolamento termico 10. Pannello di controllo Alloggiamento per il cavo PANNELLO DI CONTROLLO 12. Tasto eco con spia luminosa (verde) Tasto on/off con spia luminosa (blu) 12 13... - Page 37 STIRARE A SECCO Mettere il ferro sui gommini di isolamento termico. Inserire la spina nella presa e premere il tasto on/off. La spia luminosa del tasto on/off inizia a lampeggiare. Ruotare il disco della temperatura nella posizione desiderata, che dipende dal tipo di tessuto che deve essere stirato. La spia della temperatura lampeggia e il ferro inizia a riscaldarsi.
-
Page 38: Pulizia E Manutenzione
TABELLA STIRATURA Con il disco, impostare la temperatura corretta per il tessuto da stirare. Simbolo Tessuto Disco della temperatura tessuto sintetico/seta 70<T<120°C lana 100<T<160°C cotone 140<T<210°C lino 170<T<225°C MAX Questo simbolo indica che il capo non deve essere stirato! SUGGERIMENTI ·... -
Page 39: Funzione Di Auto-Pulizia
FUNZIONE DI AUTO-PULIZIA Dopo circa 11 ore di stiratura, la spia luminosa del tasto di auto-pulizia inizia a lampeggiare. Significa che è necessario pulire il ferro. Mettere il ferro sopra un lavandino. Tenere premuto il tasto di auto-pulizia per qualche secondo. La spia luminosa lampeggia durante il processo di decalcificazione. -
Page 40: Bezpečnostní Pokyny
ZÁRUKA Pro záruku začínající dnem prodeje spotřebiče platí na území ČR tyto podmínky: 1. trvání záruky: 2 roky 2. poskytování záruky: a) záruční opravu provedeme podle našeho zvážení opravou nebo výměnou vadných dílů, jestliže tyto závady vznikly prokazatelně vadou materiálu nebo chybou při výrobě b) záruční... - Page 41 · Pokud přístroj nepoužíváte, nebo se jej chystáte rozebírat či měnit součásti, tak přístroj odpojte od el. napětí. Před rozebírání, skládáním i před čistěním, vždy nechte přístroj dostatečně vychladnout. · Pokud je přívodní kabel poškozen, musí být vždy okamžitě opraven v odborném servise nebo proškolenou osobou.
-
Page 42: Ovládací Panel
ČÁSTI Víko na doplňování vody Zásobník na vodu Světelná kontrolka teploty Spoušť páry Nastavení teploty Žehlící plocha Kryt odvápňovací kazety Odvápňovací kazeta Teplu odolné polštářky 10. Ovládací panel Úložný prostor pro kabel OVLÁDACÍ PANEL 12. Tlačítko pro spuštění ECO režimu s kontrolkou (zelená) Hlavní... -
Page 43: Žehlení Bez Páry
POUŽITÍ Tento parní generátor nabízí dvě možnosti žehlení: suché, nebo s párou. Přečtěte si následující instrukce. Také si pozorně přečtěte tipy na žehlení na konci této kapitoly. ŽEHLENÍ BEZ PÁRY Položte žehličku na teplu odolné polštářky na vrchu těla parního generátoru. Přívodní... -
Page 44: Čištění A Údržba
SYMBOLY ŽEHLENÍ Vždy sledujte doporučené teploty žehlení a nastavujte na žehličce správnou teplotu. Symbol Materiál Nastavení teploty umělé vlákno, hedvábí 70<T<120°C vlna 100<T<160°C 140<T<210°C bavlna, ložní prádlo 170<T<225°C MAX Tento symbol znamená, že se tento materiál nesmí žehlit! TIPY K ŽEHLENÍ ·... - Page 45 FUNKCE SAMOČIŠTĚNÍ / ODVÁPNĚNÍ Přibližně po 11 hodinách žehlení se rozbliká kontrolka samočištění. To značí, že je již potřeba žehličku vyčistit/odvápnit. Žehličku vezměte, podržte nad umyvadlem. Stiskněte na několik vteřin tlačítko samočištění a funkce se spustí automaticky. Během procesu odvápnění bude kontrolka blikat. Čerpadlo bude skrze žehličku prohánět vodu a tím se celý...
-
Page 46: Bezpečnostné Pokyny
ZÁRUKA Pre záruku začínajúcich dňom predaja spotrebiča platí na území SR tieto podmienky: 1. trvania záruky: 2 roky 2. poskytovanie záruky: a) záručnú opravu vykonáme podľa nášho zvážení opravou alebo výmenou chybných dielov, ak tieto závady vznikli preukázateľne chybou materiálu alebo chybou pri výrobe b) záručná... - Page 47 · Pokiaľ prístroj nepoužívate, alebo sa ho chystáte rozoberať či meniť súčasti, tak prístroj odpojte od el. napätia. Pred rozoberanie, skladaním aj pred čistením, vždy nechajte prístroj dostatočne vychladnúť. · Pokiaľ je prívodný kábel poškodený, musí byť vždy okamžite opravený v odbornom servise alebo preškolenou osobou.
-
Page 48: Pred Prvým Použitím
ČASTI Veko na doplňovanie vody Zásobník na vodu Svetelná kontrolka teploty Spúšť páry Nastavenie teploty Žehliaca plocha Kryt odvápňovaciu kazety Odvápňovacia kazeta Teplu odolné vankúšiky 10. Ovládací panel Úložný priestor pre kábel OVLÁDACÍ PANEL 12. Tlačidlo pre spustenie ECO režime s kontrolkou (zelená) Hlavné... -
Page 49: Žehlenie Bez Pary
ŽEHLENIE BEZ PARY Položte žehličku na teplu odolné vankúšiky na vrchu tela parného generátora. Prívodný kábel zapojte do el. siete a stlačte hlavný spínač on/off. Kontrolka u hlavného spínača sa rozbliká Nastavte na žehličke otočným kolieskom požadovanú teplotu zodpovedajúce žehlenému materiálu. Kontrolka teploty začne blikať... -
Page 50: Čistenie A Údržba
SYMBOLY ŽEHLENIE Vždy sledujte doporučené teploty žehlenie a nastavujte na žehličke správnu teplotu. Symbol Materiál Nastavenie teploty umelé vlákno, hodváb 70<T<120°C vlna 100<T<160°C 140<T<210°C bavlna, posteľná bielizeň 170<T<225°C MAX Tento symbol znamená, že sa tento materiál nesmie žehliť! TIPY K ŽEHLENIE ·... - Page 51 FUNKCIA SAMOČISTENIA / ODVÁPNENIA Približne po 11 hodinách žehlenia sa rozbliká kontrolka samočistenie. To značí, že je už potrebné žehličku vyčistiť / odvápniť. Žehličku vezmite, podržte nad umývadlom. Stlačte na niekoľko sekúnd tlačidlo samočistenia a funkcia sa spustí automaticky. Počas procesu odvápnenia bude kontrolka blikať.
- Page 52 über: webshop.domo-elektro.be or scan here: oder hier scannen: of scan hier: ou scannez ici: LINEA 2000 bvba - Dompel 9 - 2200 Herentals - Belgium - Tel: +32 14 21 71 91 - Fax: +32 14 21 54 63...
Need help?
Do you have a question about the DOMO DO7109S and is the answer not in the manual?
Questions and answers