Philips AC4558 User Manual
Hide thumbs
Also See for AC4558:
- User manual (222 pages) ,
- User manual (38 pages) ,
- User manual (222 pages)

Subscribe to Our Youtube Channel
Related Manuals for Philips AC4558


Summary of Contents for Philips AC4558
- Page 1 AC4558 User manual ZH-T 使用手冊 © 2019 Koninklijke Philips N.V. All rights reserved. 3000 036 42611...
-
Page 3: Table Of Contents
Contents 7 Storage 1 Important Safety 8 Troubleshooting 2 Your air purifier 9 Guarantee and service Product Overview (fig. a) Order parts or accessories Controls overview (fig. b) 10 Notices 3 Getting started Electromagnetic fields (EMF) Installing the filter Recycling Wi-Fi connection Notice 4 Using the appliance... -
Page 4: Important
Important If the power cord is • damaged, you must have it replaced by Philips, a service center authorized Safety by Philips, or similarly qualified persons in order Read this user manual carefully to avoid a hazard. before you use the appliance, and Do not use the appliance save it for future reference. - Page 5 If the power socket used • Only use the original to power the appliance • Philips filters specially has poor connections, intended for this the plug of the appliance appliance. Do not use any becomes hot. Make other filters.
- Page 6 Always lift or move the To prevent interference, • • appliance by the handle place the appliance at on back side of the least 2 meters away from appliance. electrical appliances that Do not insert your fingers use airborne radio waves •...
-
Page 7: Your Air Purifier
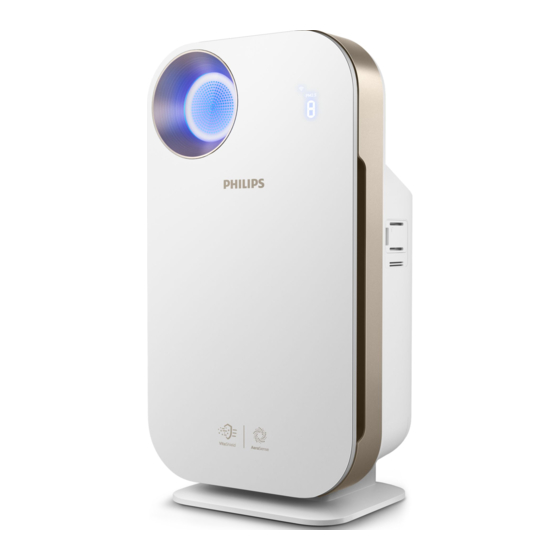
Congratulations on your purchase, Control buttons and welcome to Philips! To fully benefit from the support Power on/off button that Philips offers, register your Light on/off button product at www.philips.com/ welcome. Auto mode button This appliance works with an air Fan speed button filtration system. -
Page 8: Getting Started
3 Getting started To reattach the front cover, mount the cover onto the bottom of the appliance first (1). Then, gently push the top of the cover against the body of the Installing the filter appliance (2) (fig. i). Remove all packaging of the filter Wi-Fi connection before using the appliance. - Page 9 10 m without any obstructions. • This App supports the latest versions of Android and iOS. Please check www.philips.com/ purifier-compatibility for the latest update of supported operating systems and devices.
-
Page 10: Using The Appliance
4 Using the PM2.5 AeraSense sensing technology appliance accurately detects and quickly responds to even the slightest particle change in the air. It provides you with reassurance with real-time PM2.5 feedback. Understanding the air Most of the indoor air pollutants quality light fall under PM2.5 –... -
Page 11: Turning On And Off
Touch the button to switch on the appliance (fig. j). The professional-grade AeraSense » The air purifier operates sensor detects the level of indoor under the general mode by air allergen and with numerical default. feedback from 1 to 12 the potential »... -
Page 12: Changing The Auto Mode Setting
» The Gas level displays on Changing the Auto mode the screen. setting Auto allergen mode You can choose 4 auto modes: the general mode, the Pollution mode, The extra-sensitive Auto allergen the Gas mode or the Allergen mode. mode is designed to react to even a small change in allergen levels in Auto general mode the surrounding air (fig. -
Page 13: Using The Light On/Off Function
Manual Using the light on/off Touch the fan speed button • function repeatedly to select the fan With the light button, you can on/off speed you need (speed 1 or switch on or off the air quality light, speed 2) (fig. q): the display screen and the function »... -
Page 14: Cleaning
5 Cleaning Cleaning the body of the appliance Regularly clean the inside and Note outside of the appliance to prevent • Always unplug the appliance dusts from collecting. before you clean it. Wipe away dust with a soft • Never immerse the appliance in dry cloth from the body of the water or any other liquid. -
Page 15: Cleaning The Pre-Filter
Remove the air quality sensor Note cover (fig. w). • Make sure that the pre-filters Clean the air quality sensor, are completely dry before you the dust inlet and the dust put them back in the appliance. outlet with a damp cotton swab If they are still wet, bacteria may (fig. -
Page 16: Replacing The Air Purification Filter
• If the pre-filter is damaged, sure that the air purification filter is worn or broken, do not use. in optimal condition when the air Visit www.philips.com/support purifier is operating. When the filters or contact the Consumer Care need to be replaced, the filter code Center in your country. -
Page 17: Storage
Storage Remove all packaging material of the new filters (fig. f). Put the unpacked air purification filters back into the Turn off the air purifier and appliance (fig. g). unplug from the wall outlet. Put the plug of the air purifier in Clean the air purifier, air quality the power socket. -
Page 18: Troubleshooting
8 Troubleshooting This chapter summarizes the most common problems you could encounter with the appliance. If you are unable to solve the problem with the information below, contact the Consumer Care Center in your country. Problem Possible solution The appliance •... - Page 19 This is normal. However, if the strange smell. appliance produces a burnt smell even if removing filters, contact your Philips dealer or an authorized Philips service center. The filter may produce smell after being used for a while because of the absorption of indoor gases.
- Page 20 Problem Possible solution • If the router your purifier is connected to is dual – band and currently it is not connecting to a 2.4GHz network, please switch to another band of the same router (2.4GHz) and try to pair your purifier again. 5GHz networks are not supported.
-
Page 21: Guarantee And Service
If electromagnetic fields. there is no Consumer Care Center in your country, go to your local Philips Compliance with EMF dealer. Koninklijke Philips N.V. manufactures and sells many... -
Page 22: Recycling
Google Play is a trademark of Google Inc. “Air Matters” app developed by Air Matters Network Pty Ltd. This Philips appliance and Air Matters app applied multiple open source softwares, Copies of open source software license text used in this product can be derived from website: www.philips.com/purifier-... - Page 23 目錄 9 保養及服務 1 重要事項 訂購零件或配件 安全 10 注意 2 您的空氣清新機 電磁場 (EMF) 產品概要(圖 a) 回收 控制鍵概覽(圖 b) 注意 3 使用入門 安裝濾網 Wi-Fi 連接 4 使用本產品 瞭解空氣質素燈 開關 更改自動模式設定 改變風速 使用開燈/關燈功能 設定童鎖 5 清潔 清潔時間表 清潔本產品機身 清潔空氣質素感應器 清潔前層濾網 6 更換空氣清新機濾網 了解清新空氣保護鎖...
-
Page 24: 重要事項
使用的抽油煙機或風扇的 劑或芳香劑等易燃物品。 代替品。 警告 若為本產品提供電力的電源 • 在連接本產品前,請檢查產 • 插座沒有妥善連接,本產品 品註明的指示電壓與當地電 的插頭便會發熱。請確保您 源電壓是否對應。 已妥善連接電源插座。 如果電源線損壞,為避免 • 在乾燥、穩定、平滑和水平 • 危險,必須由 Philips、 表面上使用產品。 Philips 授權的維修中心或類 在本產品的後面和兩側至少 • 似的合資格人士來更換。 留出 20 厘米的自由空間, 若插頭、電源線或產品本身 • 本產品上方至少留出 30 厘 已受損,請勿使用。 米空間。 此產品可供八歲及以上兒 • 請勿在裝置上放置任何 • 童,體能、感官或心智能力... - Page 25 請勿在冷氣機正下方放置 為了防止干擾,放置產品的 • • 產品,以避免冷凝滴水到 地方應與使用空中無線電波 產品上。 電器(如電視、收音機及無 在開啟產品前,確保已正確 線電控制的時鐘)距離兩米 • 安裝所有濾網。 以外。 僅使用本產品專用的原裝 本產品只適合一般操作環境 • • Philips 濾網。請勿使用任何 下的家居使用。 其他濾網。 請勿在洗手間或廚房等 • 燃燒濾網可能造成對健康無 濕潤環境或高溫環境使用 • 可挽回的危害及/或危及他 本產品。 人生命。不要使用濾網作為 本產品不會去除一氧化碳 • (CO) 或氡 (Rn)。本產品不能 燃料或類似用途。 避免以硬物碰撞產品 在含有燃燒過程和危險化學 • (尤其是產品的進氣口或 品的意外中充當安全裝置。...
-
Page 26: 您的空氣清新機
2 您的空氣清新機 控制鍵概覽(圖 b) 控制按鈕 感謝您購買 Philips 產品,歡迎來到 Philips 世界! 電源開 / 關按鈕 請前往以下網址註冊您的產品,以獲得 開燈/關燈按鈕 Philips 的完整支援: www.philips.com/welcome。 自動模式按鈕 本產品適用於空氣過濾系統。使用本產 風速按鈕 品前請先閱讀本用戶手冊,並保管以作 將來參考。 重設按鈕 產品概要(圖 a) 顯示面板: Wi-Fi 指示燈 A 顯示面板 B 空氣質素燈 氣體顯示 NanoProtect 濾網 Pro S3* PM2.5 顯示... -
Page 27: 使用入門
3 使用入門 Wi-Fi 連接 首次設定 Wi-Fi 連線 安裝濾網 從 App Store 或 Google Play 下載並安裝「在意空氣」應用程 式。 使用裝置前,請移除濾網的所有包裝。 從包裝中取出,並將濾網放入裝置中, 如下所示: 備註 • 確保先將空氣清新機濾網放入產品 將空氣清新機的插頭插入電源插 中,然後再放入前層濾網。 座,輕按 以啟動空氣清新機。 • 安裝濾網時,請確保貼有標籤的一 » Wi-Fi 指示燈 於首次使用時 面面向自己。 會亮橙燈。 拉出前蓋的頂部,將濾網從裝置中 請確保您的智能手機或平板電腦已 取出(圖 c)。 成功連線至 Wi-Fi 網絡。 向下按兩個夾子,然後將前層濾網... -
Page 28: 使用本產品
藍色-紫色 一般 • 請確保流動智能電話或平板裝置與 紫色-紅色 差 空氣清新機的距離在 10 米以內, 而且沒有任何障礙物。 紅色 非常差 • 本應用程式支援最新版本 的 Android 和 iOS。請查閱 開啟空氣清新機時,空氣質素燈將自動 www.philips.com/puri er- 亮起,並順序顯示所有顏色。約 30 秒 compatibility,以了解支援的作業 後,空氣質素感應器會根據周遭空中粒 系統和裝置的最新資料。 子的空氣質素,選擇相應的顏色。 空氣質素燈的顏色由 PM2.5、氣體和 IAI 讀數的最高水平決定。 重設 Wi-Fi 連線 PM2.5 備註 AeraSense 感應技術能夠準確地偵測 • 本提示只在空氣清新機已連接的預... - Page 29 氣體 開關 裝置設有先進的氣體感應器,從螢幕上 L1 到 L4 的數值顯示潛在有害氣體的水 備註 平變化(包括VOC、臭氣等)。L1 代表 最佳的空氣質素。 • 空氣清新機必須放置在穩定、平坦 及水平的表面上,淨化器前方不得 氣體水平 空氣質素指示燈 面向牆壁或家具。 的顏色 • 請關閉門窗,以獲得最佳的空氣淨 藍色 化效果。 藍色-紫色 • 窗簾必須遠離進氣口或排氣口。 • 不要用衣服遮擋進氣口或排氣口。 紫色-紅色 紅色 將空氣清新機的插頭插入牆身 插座。 » 空氣清新機發出嗶聲。 專業級的 AeraSense 感應器可偵測室 » 所有燈會亮起一次,然後再 內空氣過敏原的水平,透過 1 至 12 的 熄滅。...
-
Page 30: 更改自動模式設定
更改自動模式設定 改變風速 您可以選擇 4 種自動模式: 備有多段風速。 一般模式、除污模式、氣體模式或 當使用手動風速設定時,空氣清新機仍 防敏模式。 然會監控空氣質素,但如果偵測到空氣 自動一般模式 質素有變化,也不會自動調節風速。 即使是最輕微的空氣變化,自動一般模 睡眠模式( ) 式都可快速回應,並可自動調節風扇速 在睡眠模式下,空氣清新機以非常低的 度,以確保最佳表現。 速度安靜地運作。 點按自動模式按鈕 ,選擇自動一 • 般模式。 (圖 l)。 • 按下風速按鈕 以選擇睡眠模式( 圖 p)。 » 將會自動( )顯示在螢幕上 » 「 」將會在螢幕顯示 3 秒, 3 秒。 »... -
Page 31: 使用開燈/關燈功能
5 清潔 使用開燈/關燈功能 透過開燈/關燈按鈕,您可以開啟或 關閉空氣質素燈、顯示畫面及功能 指示燈。 備註 按下開燈/關燈按鈕 一次,空氣 • 必需在清潔前拔出產品插頭。 質素燈和所有按鈕將熄滅,螢幕變 • 切勿將本產品侵入水中或任何其他 暗(圖 s)。 液體中。 再次按下開燈/關燈按鈕 ,所有 • 請勿使用磨蝕性、侵略性或易燃清 燈將會再次亮起(圖 t)。 潔劑(如漂白劑或酒精)清洗本產 品的任何一部分。 • 只有前層濾網是可清洗的。請勿清 設定童鎖 洗空氣清新機濾網,也切勿使用吸 您可以在「在意空氣」應用程式使用此 塵機清潔。 功能。啟用功能後,螢幕會顯示童鎖指 示燈, 所有其他按鈕都沒有反應。 清潔時間表 (圖 u)。 頻率 清潔方法 用柔軟的乾布抹乾 淨本產品表面... -
Page 32: 清潔空氣質素感應器
清潔空氣質素感應器 清潔前層濾網 亮起且螢幕顯示 F0 時,請清潔 當 每 2 個月清潔一次空氣質素感應器, 前層濾網(圖 z)。 讓本產品發揮出最佳功能。若在多塵的 關閉空氣清新機,並將插頭從牆身 地方使用本產品,請更頻密清潔。 插座拔出。 備註 拉出前蓋的頂部,將濾網從裝置中 取出(圖 c)。 • 如在多塵的環境內使用空氣清新 向下按兩個夾子,然後將前層濾網 機,則可能需要更常清潔。 拉向自己(圖 d)。 • 如房間濕度非常高,水滴便會凝結 在空氣質素感應器上,即使實際空 如果前層濾網內部十分骯髒,可用 氣質素良好,空氣質素燈仍可能會 軟刷將塵埃刷走。然後利用自來水 顯示較差的空氣質素。在此情況 沖洗前層濾網(圖 {)。 下,請清潔空氣質素感應器或以手 先徹底風乾前層濾網,然後將其裝 動設定空氣清新機的速度。 回空氣清新機內。 將前層濾網放回本產品內 使用柔軟毛刷清潔空氣質素感應器 (圖... -
Page 33: 更換空氣清新機濾網
按鈕以啟動本產品。 更換濾網 3 秒以重新設定 按住重設按鈕 濾網使用時間。 備註 備註 • 請勿清洗或重用空氣清新機濾網。 • 更換濾網後,必須洗手。 • 更換濾網前,必須關閉空氣清新 機,並將插頭從電源插座拔出。 • 請勿以吸塵機清潔濾網。 • 如果前層濾網已損壞、磨損或破 裂,請勿使用。請瀏覽 www.philips.com/support 或 聯絡您所在國家/地區的客戶服務 中心。 濾網警示說明表(圖 |) 濾網指示燈狀態 動作 請更換 螢幕上顯示 A3, NanoProtect 而且濾網更換指示 濾網 Pro S3 燈 亮起 (FY4152) ZH-T... - Page 34 存放 關閉空氣清新機,並將插頭從牆身 插座拔出。 清潔空氣清新機、空氣質素感應器 和前層濾網(請參閱「清潔」章 節)。 必須讓所有部件風乾方可存放。 將濾網和前層濾網分開放入密封的 膠袋中。 將空氣清新機、濾網和前層濾網存 放於陰涼乾爽的地方。 處理濾網後,必須徹底洗淨雙手。 ZH-T...
-
Page 35: 疑難排解
1) NanoProtect 濾網 Pro S3 (FY4152); 2) 前層濾網。 • 空氣質量感測器變濕。您的房間濕度高,導致水分凝結。 確保空氣質素感應器清潔和保持乾燥(請參閱「清潔」 一章)。 • 空氣質量感測器處於骯髒的狀態。清潔空氣質素感應器 空氣質素光環的 顏色永遠保持同一 (請參閱「清潔」一章)。 顏色。 • 在您最初數次使用本產品時,它可能會發出一點塑膠氣 本產品發出一陣 怪味。 味。此為正常。可是,如果本產品在更換濾網後發出燒焦 的氣味,請聯絡您的 Philips 經銷商或認可的 Philips 服務 中心。由於吸收了室內氣體,濾網使用一段時間後可能會 產生氣味。建議您將濾網置於陽光下晾曬,然後再重新使 用。如果仍有異味,請更換濾網。 • 如果產品太吵,可調低風速。如晚上在睡房使用裝置,選 本產品聲浪太大。 擇寧靜速度。 • 可能您沒有重設濾網的使用時間。開啟本產品按住重設按 即使我已替換濾 網,本產品仍表示 鈕( )3 秒。 需要替換。 螢幕顯示「E1」的... - Page 36 問題 可行解決方案 螢幕上顯示了 • 感應器出現故障。請聯絡您所在國家/地區的客戶服務 「E2」、「E3」、 「E4」或「E5」的 中心。 錯誤代碼。 • 如果本產品所連接的路由器為雙頻,而目前不是連接 2.4GHz 網絡的話,請將該路由器的頻段切換至 2.4GHz, 然後再次嘗試進行配對。不支援 5GHz 網絡。 • Web 驗證網絡不受支援。 • 檢查本產品是否在 Wi-Fi 路由器所覆蓋的範圍內。您可以 嘗試將空氣清新機移近 Wi-Fi 路由器。 • 請檢查網絡名稱是否正確。網絡名稱有大小寫之分。 • 請檢查 Wi-Fi 密碼是否正確。密碼有大小寫之分。 未能成功設定 Wi-Fi。 • 根據「網絡改變後設定 Wi-Fi 連線」部分的指示,嘗試重 新設定。 •...
-
Page 37: 保養及服務
9 保養及服務 10 注意 如需其他資訊或有其他疑問,請瀏覽 Philips 網站 www.philips.com 請聯絡 電磁場 (EMF) 您所在國家/地區的 Philips 客戶服務 中心(您可在全球保障小冊子上找到其 這款 Philips 產品符合一切有關電磁場 電話號碼)。如果您的國家/地區沒有 暴露的適用安全標準及條例。 客戶服務中心,請前往當地的 Philips 經銷商。 符合 EMF 標準 Koninklijke Philips N.V.專為消費者製 訂購零件或配件 造及銷售許多產品(例如任何電器用 品),而這些產品都能發出與接收電 如果您需要更換零件或想訂購額外配 磁訊號。 件,請洽 Philips 經銷商或瀏覽 Philips 貫徹執行的一項主要商業準則 www.philips.com/support。... - Page 38 注意 App Store 是 Apple Inc. 的服務標誌。 Google Play 是 Google Inc. 的商標。 「在意空氣」應用程式由 Air Matters Network Pty Ltd. 開發。 此 Philips 電器和「在意空氣」應用程 式套用多個開源軟件;如需此產品中 使用之開源軟件授權內容副本,請參 閱網站:www.philips.com/puri er- compatibility。 ZH-T...
Need help?
Do you have a question about the AC4558 and is the answer not in the manual?
Questions and answers