Table of Contents
Advertisement
Quick Links
INSTRUCTIONS-PARTS LIST
This manual contains important
warnings and information.
READ AND KEEP FOR REFERENCE.
INSTRUCTIONS
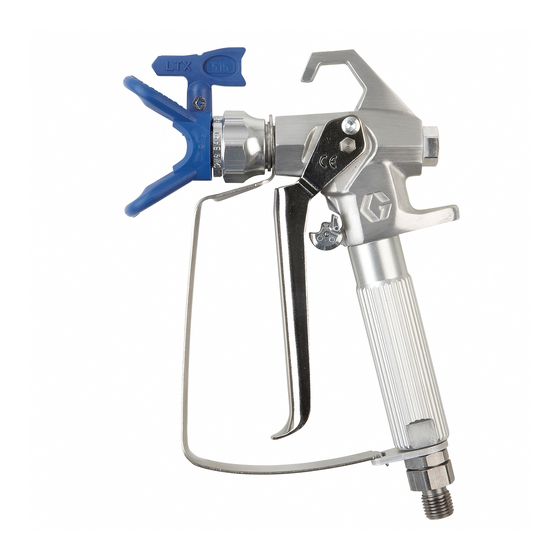
Contractor FTx Airless Spray Gun
3600 psi (252 bar) MAXIMUM WORKING PRESSURE
Model 238350, Series A
Includes Performance Series RACr DripLesst Guard, 515 size
SwitchTipt, and 4-finger trigger.
Model 824004, Series A
Includes Performance Series RACr DripLesst Guard, 515 size
SwitchTipt, and 4-finger trigger.
Model 239045, Series A
Includes Flat Tip Guard and 4-finger trigger.
GRACO INC. P.O. BOX 1441 MINNEAPOLIS, MN 55440–1441
ECOPYRIGHT 1996, GRACO INC.
Graco Inc. is registered to I.S. EN ISO 9001
308645
05963
Models 238350, 824004
Rev. D
Advertisement
Table of Contents

Related Manuals for Graco Contractor FTx


Summary of Contents for Graco Contractor FTx
- Page 1 SwitchTipt, and 4-finger trigger. Model 239045, Series A Includes Flat Tip Guard and 4-finger trigger. 05963 Models 238350, 824004 GRACO INC. P.O. BOX 1441 MINNEAPOLIS, MN 55440–1441 ECOPYRIGHT 1996, GRACO INC. Graco Inc. is registered to I.S. EN ISO 9001...
- Page 2 D This equipment is for professional use only. D Read all instruction manuals, tags, and labels before operating the equipment. D Use the equipment only for its intended purpose. If you are not sure, call your Graco distributor. D Do not alter or modify this equipment.
- Page 3 WARNING INJECTION HAZARD Spray from the gun, leaks or ruptured components can inject fluid into your body and cause extremely serious injury, including the need for amputation. Fluid splashed in the eyes or on the skin can also cause serious injury. D Fluid injected into the skin might look like just a cut, but it is a serious injury.
- Page 4 WARNING FIRE AND EXPLOSION HAZARD Improper grounding, poor ventilation, open flames or sparks can cause a hazardous condition and result in a fire or explosion and serious injury. D If there is any static sparking or you feel an electric shock while using this equipment, stop spray- ing immediately.
-
Page 5: System Requirements
Additional cards are available 4. Disengage the gun safety latch. Hold a metal part at no charge from Graco Inc. of the gun firmly to a grounded metal pail. Trigger the gun to relieve pressure. - Page 6 5. Be sure the gun trigger safety is en- gaged. See Fig. 1. How to Adjust the Spray Pattern 4. Graco Flat Tip Style Driplesst Guard 1. To adjust the spray pattern direction, follow the Install the tip (A) and the gasket (B) in the nut of Pressure Relief Procedure on page 5.
- Page 7 Installation/Operation How to Clean the Spray Tip 2. Remove the spray tip and blow out the obstruction by applying air to the front of the spray tip. Or, let and Clear a Spray Tip Obstruction the spray tip and gun nozzle soak to dissolve the obstruction.
-
Page 8: How To Check The Gun Diffuser Operation
Installation/Operation How to Check the Gun Diffuser Operation 4. Apply lithium-base grease to the threads of the gun handle (14) and reassemble the gun. Check the diffuser operation weekly. The gun diffuser/ seat (A) breaks up spray and reduces the risk of fluid injection when the tip is not installed. -
Page 9: How To Flush The Gun
Installation/Operation How to Flush the Gun WARNING WARNING Do not spray paint from the gun with the gun safety To reduce the risk of serious bodily Ä Ä latch set to the cleaning position. injury, including splashing fluid in the eyes or on the skin, or static electric 7. - Page 10 Service 4. If the gun handle (6) was removed, hand tighten it into the fluid housing (26); it should fit easily. 5. Adjust the needle before using the gun. Procedure below. 6. Be sure the trigger guard and tip guard are installed before using the gun.
- Page 11 Service Replace Swivel Reassembly (See Fig. 10) 1. Clean internal thread of handle (6). Disassembly 2. Install guard retainer (42), cushion o-ring (43) and 1. Follow Pressure Relief Procedure on page 5. swivel (15). 2. Push up on trigger guard (12) and swing trigger 3.
-
Page 12: Parts Drawing
Parts Drawing Model 238350, Series A Model 824004, Series A Model 239045, Series A Included with 1 05962 Purchase separately Included with 239045 308645... -
Page 13: Parts List
Parts List Model 238350, Series A; Model 824004, Series A Ref. Ref. Part No. Description Qty. Part No. Description Qty. 218070 NEEDLE–DIFFUSER/SEAT KIT 105334 LOCKNUT; M4 x 0.7 thread 238199 4-FINGER TRIGGER 177538 TRIGGER STUD (standard) 195788 HANDLE, round 179737 ACTUATOR PIN 222385 KIT, warning card... - Page 14 HEAVY DUTY EXTENSIONS TIP GUARDS Provides extended spraying for hard to reach These tip guards fit all Graco airless spray guns. applications. Choose the one that’s right for your application. One of these tip guards is included with every Graco airless gun.
-
Page 15: Technical Data
0.125 in. (3.18 mm) Wetted Parts ..Stainless steel, Polyethylene, TO PLACE AN ORDER, contact your Graco distrib- Aluminum, Polyurethane, Nylon, PTFE utor, or call this number to identify the distributor Brass, Tungsten carbide, UHMW closest to you: 1–800–690–2894 Toll Free. -
Page 16: Graco Warranty
Graco distributor to the original purchaser for use. With the exception of any special extended or limited warranty published by Graco, Graco will, for a period of twelve months from the date of sale, repair or replace any part of the equipment determined by Graco to be defective.
Need help?
Do you have a question about the Contractor FTx and is the answer not in the manual?
Questions and answers