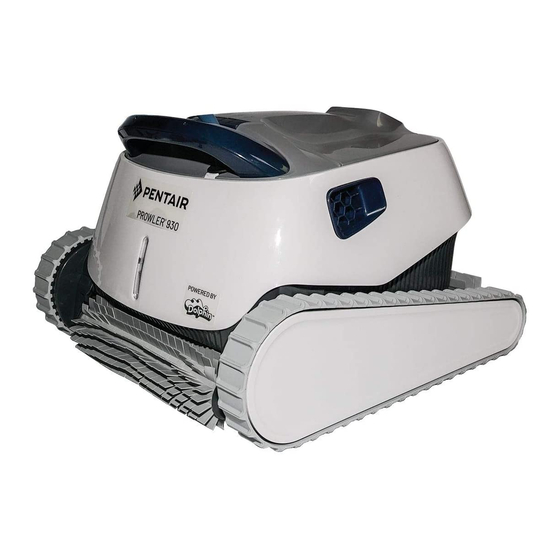
Pentair PROWLER 930 Installation And User Manual
Robotic inground pool cleaner
Hide thumbs
Also See for PROWLER 930:
- Installation and user manual (20 pages) ,
- Installation and user manual (20 pages)
Table of Contents
Advertisement
Available languages
Available languages
2
PROWLER
930
™
ROBOTIC INGROUND POOL CLEANER
ROBOT NETTOYEUR POUR PISCINE ENTERRÉE
LIMPIADOR ROBÓTICO DE PISCINA ENTERRADA
11
25
INSTALLATION AND USER'S GUIDE
GUIDE D'INSTALLATION
GUIA DE INSTALACION
IMPORTANT SAFETY INSTRUCTIONS
READ AND FOLLOW ALL INSTRUCTIONS / SAVE THESE INSTRUCTIONS
CONSIGNES DE SÉCURITÉ IMPORTANTES
LIRE ET SUIVRE TOUTES LES INSTRUCTIONS / CONSERVER CES INSTRUCTIONS
INSTRUCCIONES IMPORTANTES DE SEGURIDAD
LEA Y SIGA TODAS LAS INSTRUCCIONES / GUARDA ESTAS INSTRUCCIONES
Advertisement
Chapters
Table of Contents

Subscribe to Our Youtube Channel
Related Manuals for Pentair PROWLER 930


Summary of Contents for Pentair PROWLER 930
- Page 1 PROWLER ™ ROBOTIC INGROUND POOL CLEANER ROBOT NETTOYEUR POUR PISCINE ENTERRÉE LIMPIADOR ROBÓTICO DE PISCINA ENTERRADA INSTALLATION AND USER’S GUIDE GUIDE D’INSTALLATION GUIA DE INSTALACION IMPORTANT SAFETY INSTRUCTIONS READ AND FOLLOW ALL INSTRUCTIONS / SAVE THESE INSTRUCTIONS CONSIGNES DE SÉCURITÉ IMPORTANTES LIRE ET SUIVRE TOUTES LES INSTRUCTIONS / CONSERVER CES INSTRUCTIONS INSTRUCCIONES IMPORTANTES DE SEGURIDAD LEA Y SIGA TODAS LAS INSTRUCCIONES / GUARDA ESTAS INSTRUCCIONES...
-
Page 2: Declaration Of Conformity
Unless indicated otherwise, names and brands of others that may be used in this document are not used to indicate an affiliation or endorsement between the owners of these names and brands and Pentair. Those names and brands may be the trademarks or the registered trademarks of these parties, or others. -
Page 3: Table Of Contents
CUSTOMER SERVICE / TECHNICAL SUPPORT If you have questions about ordering Pentair Aquatic Systems, (“Pentair”) replacement parts, and pool products, please use the following contact information: Customer Service Technical Support +39 050716166 / +39 050716169 e-mail: techsupport.poolemea@pentair.com orders.pooleu@pentair.com Hotline: +33 184280940 poolemea@pentair.com... -
Page 4: Important Warning And Safety Instructions
30mA. result in damage to the pool finish or the vinyl liner, Pentair HAZARDOUS SUCTION. Do not disclaims any liability for repairs or replacement to any of these play with cleaner or apply to structures or components of the customer’... - Page 5 - Roll up the cable so that it has no kinks cleaners. Pentair is not responsible for any pattern removal, - Store the Pool Cleaner in a protected area out of direct sun / abrasions or markings on vinyl liners.
-
Page 6: Preparation Of The Pool And Cleaner
STEP 2: Power Supply or Caddy Placement Unroll Communication Cable The Prowler 930 cleaner comes with a cleaner caddy Unroll the cable and stretch it out completely so that is that will need to be assembled before continuing fur- has no kinks. See Figure 2. - Page 7 PREPARATION OF THE POOL AND CLEANER STEP 3: STEP 5: Connect Power Supply to Cleaner Placing the Cleaner in the Pool Connect the communication cable to the power supply. Do not switch the pool cleaner to “ON” Ensure the connector notch is lined up with the if it is not fully immersed in water.
-
Page 8: Caddy Assembly
PREPARATION OF THE POOL AND CLEANER Caddy Assembly The following section contains instructions for assembling the Prowler™ 930 cleaner caddy: STEP 1: STEP 3: Removing the Communication Cable Holder Installing the Handle Support While holding the caddy chassis in place, pull the top Slide the handle support into it’... - Page 9 PREPARATION OF THE POOL AND CLEANER STEP 5: STEP 7: Install the Caddy Handle Install the Power Cable Holder Insert the caddy handle into the handle support. Using the final two shorter Phillips-head screws See Figure 12 . provided with the caddy, secure the power cable holder to the caddy handle.
-
Page 10: Operation
OPERATION Control Panel Overview 3 Schedule 2 Cleaning LEDs Speed LEDs Bluetooth® Wireless Technology Connection Indicator Weekly Schedule Cleaning Speed ON/OFF Button Button Button Weekly Timer The power supply has a timer control that allows you to set an automatic cleaning schedule each week. Be sure the cleaner is fully immersed in water before turning on the power. -
Page 11: Bluetooth® Operation
OPERATION Bluetooth® Operation 3. After successfully connecting your smartphone to the desired cleaner, the Welcome screen will The Prowler™ 930 Inground Pool Cleaners contain a display. Bluetooth® Wireless Technology receiver that allows You’ll have three options on this screen: the cleaner to communicate with most smartphones. The following guide provides instructions on how to pair •... -
Page 12: Maintenance
MAINTENANCE Make sure the cleaner’ s power supply is turned “OFF” and is disconnected from the electrical source/outlet before servicing the cleaner. Moving parts may injure hands or fingers if cleaner inadvertently powers on during servicing. LED Indicator Lights The Prowler™ 930 Robotic Pool Cleaner includes an LED indicator just above the scrubber on the front side of the cleaner. -
Page 13: Cleaning The Filter Baskets
MAINTENANCE Cleaning the Filter Baskets Note: It is highly recommended that you clean the filter basket after each cleaning cycle. Too much debris in the filter will restrict the suction power of the Prowler™ 930 Robotic Pool Cleaner and reduce its effectiveness. To clean the filter basket, follow the instructions given below: STEP 1: STEP 3:... -
Page 14: Periodic Filter Screen Cleaning
MAINTENANCE Periodic Filter Screen Cleaning Note: It is recommended that you clean the filter screens at least once a month. Too much debris in the filter screens will restrict the suction power of the Prowler™ 930 Robotic Pool Cleaner and reduce its effectiveness. To dismantle and clean the four filter screens, follow the instructions given below. -
Page 15: Cleaning The Impeller
MAINTENANCE Cleaning the Impeller Always disconnect power to the cleaner before servicing, disassembly, or reassembly. Failure to do so could result in death or serious injury to servicemen, pool users or others due to electrical shock. Read all servicing instructions before servicing the cleaner. Every so often debris may become trapped in the Prowler™... -
Page 16: Storing The Cleaner
MAINTENANCE STEP 5: Remount the Impeller Cover STEP 6 Gently push the impeller cover back onto the impeller Remount the Intermediate Cover and Manifold Assembly assembly. See Figure 34. Reseat the intermediate cover and manifold assembly The tabs on the motor unit will lock the cover into place. and reinstall the two screws that hold the cover and manifold assembly in place. -
Page 17: Troubleshooting
TROUBLESHOOTING Problem Possible Cause Corrective Action Cable twisting or cable Obstruction in pool Remove obstruction in pool. coils up Gets stuck on main drain cover Turn off filter and install main drain cover ring. Straighten cable and lay in sun periodically. Excess cable in the pool Remove excess cable from pool. - Page 18 Manuel d’installation et d’utilisation du nettoyeur robotisé pour piscine enterrée PROWLER ™...
- Page 19 PROWLER ™ ROBOT NETTOYEUR POUR PISCINE ENTERRÉE GUIDE D’INSTALLATION CONSIGNES DE SÉCURITÉ IMPORTANTES LIRE ET SUIVRE TOUTES LES INSTRUCTIONS / CONSERVER CES INSTRUCTIONS...
- Page 20 Pentair. Ces noms et marques peuvent être les marques déposées de ces parties ou de tiers.
- Page 21 SERVICE À LA CLIENTÈLE / SOUTIEN TECHNIQUE Pour toute question concernant la commande de pièces de rechange et les produits pour piscine Pentair, veuillez utiliser les coordonnées suivantes : Service à la clientèle Soutien technique +39 050716166 / +39 050716169 e-mail: techsupport.poolemea@pentair.com...
-
Page 22: Avertissements & Consignes De Sécurité
à la finition de la des personnes n’ayant pas d’ e xpérience et de connaissances piscine ou au revêtement en vinyle. Pentair Aquatic Systems l’utiliser sans supervision et compréhension adéquates des décline toute responsabilité à l’égard des réparations ou instructions. - Page 23 Pentair Aquatic Systems n’ e st pas responsable de Avant d’installer le nettoyeur dans une piscine en gunite l’ e ffacement de motifs, des abrasions ou des marques sur les ou une piscine partiellement ou complètement carrelée :...
-
Page 24: Préparation De La Piscine Et Du Nettoyeur
ÉTAPE 2 : Mise en place du bloc d’alimentation ou du chariot Déroulez le câble de communication Le nettoyeur Prowler 930 est livré avec un chariot Déroulez le câble de communication et étendez-le qui doit être assemblé avant de procéder aux étapes complètement de façon à... - Page 25 PRÉPARATION DE LA PISCINE ET DU NETTOYEUR ÉTAPE 3 : ÉTAPE 5: Branchez l’alimentation électrique au nettoyeur Mise en place du nettoyeur dans la piscine Branchez le câble de communication au bloc TOUJOURS s’assurer que le nettoyeur d’ a limentation. Assurez-vous que l’ e ncoche du connecteur est complètement immergé...
-
Page 26: Assemblage Du Chariot
PRÉPARATION DE LA PISCINE ET DU NETTOYEUR Assemblage du chariot La section qui suit contient les instructions d’assemblage du chariot du nettoyeur : ÉTAPE 1 : ÉTAPE 3 : Retirez le support du câble de communication Installez le support de la poignée Tout en maintenant le châssis du chariot en place, tirez Faites glisser le support de la poignée dans sa sur le haut du support du câble de communication... - Page 27 PRÉPARATION DE LA PISCINE ET DU NETTOYEUR ÉTAPE 5 : ÉTAPE 7 : Installez la poignée du chariot Installez le support du câble d’alimentation Insérez la poignée du chariot dans le support de la À l’aide des deux dernières vis cruciformes les plus poignée.
-
Page 28: Utilisation
UTILISATION Aperçu du panneau de commande 3 voyants 2 voyants de d’intervalles vitesse de Indicateur de connexion à la nettoyage technologie sans fil Bluetooth® Bouton de Bouton de la Bouton la minuterie vitesse de marche/arrêt hebdomadaire nettoyage Fonction de minuterie hebdomadaire Vitesse de nettoyage (fonction de nettoyage rapide) Lorsque le bloc d’alimentation est allumé, vous pouvez... -
Page 29: Utilisation Bluetooth
• Links and Info (Liens et information) : Ce bouton le mot clé «Prowler 930» ou vous dirigera vers une liste de liens utiles concernant «Kreepy Krauly». votre nettoyeur. Un lien vers le Guide d’installation et d’utilisation du nettoyeur se trouve ici. -
Page 30: Indicateur À Led
ENTRETIEN Avant de procéder à l’ e ntretien du nettoyeur, assurez-vous que le bloc d’alimentation du nettoyeur est en position « ARRÊT » et qu’il est débranché de la source/prise de courant. Des pièces en mouvement risquent de provoquer des blessures aux mains ou aux doigts si le nettoyeur se remet accidentellement en marche pendant l’... -
Page 31: Nettoyer Les Paniers Filtres
ENTRETIEN Nettoyer les paniers filtres Remarque : Il est vivement recommandé de nettoyer le panier filtre après chaque cycle de nettoyage. Trop de débris dans le filtre réduisent le pouvoir d’aspiration du nettoyeur Prowler™ 930 ainsi que son efficacité. Pour nettoyer le panier filtre, suivez les indications ci-dessous. ÉTAPE 1 : ÉTAPE 3 : Ouvrez le couvercle du filtre... -
Page 32: Nettoyage Périodique Des Tamis Du Filtre
ENTRETIEN Nettoyage périodique des tamis du filtre Remarque: Il est recommandé de nettoyer les tamis du filtre au moins une fois par mois. Trop de débris dans les tamis du filtre réduisent la puissance d’aspiration du robot nettoyeur Prowler™ 930 ainsi que son efficacité. Pour démonter et nettoyer les quatre tamis du filtre, suivez les instructions ci-dessous. -
Page 33: Nettoyage De La Turbine
ENTRETIEN Nettoyage de la turbine Débranchez toujours l’alimentation électrique du nettoyeur avant l’ e ntretien, le démontage ou le remontage. Le non-respect de cette directive pourrait provoquer des blessures graves, voire la mort, aux personnes responsables de l’ e ntretien, aux utilisateurs de la piscine ou à d’autres personnes des suites d’un choc électrique. -
Page 34: Ranger Le Nettoyeur
ENTRETIEN ÉTAPE 5 : Remontez le couvercle de la turbine ÉTAPE 6 : Pressez doucement le couvercle de la roue sur l’ e n- Remontez le couvercle intermédiaire et l’ensemble semble de la roue. Voir Illustration 34. collecteur Les languettes sur l’unité de moteur verrouilleront le Replacez l’ensemble collecteur, puis le couvercle couvercle. -
Page 35: Dépannage
DÉPANNAGE Problème Cause Possible Mesure corrective Le câble se tord ou Obstruction dans la piscine Enlevez ce qui fait obstruction dans la piscine. s’enroule Se coince dans le couvercle de l’éva- Éteignez le filtre et installez un anneau de cuation principale recouvrement de l’évacuation principale. - Page 37 PROWLER™ 930 LIMPIADOR ROBÓTICO DE PISCINA ENTERRADA GUIA DE INSTALACION INSTRUCCIONES IMPORTANTES DE SEGURIDAD LEA Y SIGA TODAS LAS INSTRUCCIONES / GUARDA ESTAS INSTRUCCIONES...
- Page 38 Pentair. Dichos nombres y marcas pueden ser marcas registradas de la o de las marcas registradas de estas partes o de otras.
- Page 39 SERVICIO AL CLIENTE / SOPORTE TÉCNICO Si tiene alguna pregunta sobre cómo ordenar partes de repuesto y productos para piscina de Pentair, use la siguiente información de contacto: Servicio al cliente Apoyo técnico +39 050716166 / +39 050716169 e-mail: techsupport.poolemea@pentair.com orders.pooleu@pentair.com...
-
Page 40: Advertencia E Instrucciones De Seguridad
Pentair Aquatic Systems capacidades físicas, sensoriales o mentales reducidas o falta de experiencia y conocimiento, sin supervisión adecuada y rechaza toda responsabilidad por reparaciones o el reemplazo compresión de las instrucciones. - Page 41 Antes de instalar el limpiafondo en una piscina de gunita o una na. Pentair Aquatic Systems no es responsable del borrado, la piscina que esté parcial o totalmente revestida con azulejos: abrasión o las marcas en el diseño de revestimientos de vinilo.
-
Page 42: Preparación Para La Piscina Y El Limpiafondo
PASO 2: Ubicación del carrito o la fuente de alimentación Desenrolle el cable de comunicación El limpiafondo Prowler 930 viene con un carrito que Desenrolle el cable de comunicación y extiéndalo por deberá ser ensamblado antes de continuar con esta completo para que no haya torceduras. - Page 43 31 31 31 PREPARACIÓN PARA LA PISCINA Y EL LIMPIAFONDO PASO 3: PASO 5: Conecte el cable de comunicación a la fuente de Colocación del limpiafondo en la piscina alimentación No accione el botón ON (encendido) Asegúrese de que la muesca del conector coincida con del limpiafondo para piscina si no está...
-
Page 44: Ensamblaje Del Carrito
32 32 32 PREPARACIÓN PARA LA PISCINA Y EL LIMPIAFONDO Ensamblaje del carrito La siguiente sección contiene instrucciones para ensamblar el carrito de Prowler 930 incluido: PASO 1: PASO 3: Cómo quitar el soporte del cable de comunicación Cómo instalar el soporte del mango... - Page 45 33 33 33 PREPARACIÓN PARA LA PISCINA Y EL LIMPIAFONDO PASO 5: PASO 7: Cómo instalar el mango del carrito Cómo instalar el soporte del cable de alimentación Inserte el mango del carrito en el soporte del mango. Utilizando los dos últimos tornillos Phillips más Ver Figura 12 .
-
Page 46: Funcionamiento
34 34 34 FUNCIONAMIENTO Descripción del panel de control 2 LED indicadores de 3 tipos de la velocidad de programación Indicador de conexión con limpieza para luces LED tecnología inalámbrica Bluetooth® Botón Weekly Botón de Botón Timer velocidad de Encendido/apagado limpieza Característica de temporizador semanal Velocidad de limpieza (característica... -
Page 47: Funcionamiento Con Bluetooth
Para ello, ingrese continúe a Funcionamiento la palabra clave “Prowler 930” o d e l l i m p i a fo n d o c o n “Kreepy Krauly”. accionamiento manual. -
Page 48: Luces Led Indicadoras
36 36 36 FUNCIONAMIENTO Asegúrese de que la fuente de alimentación del limpiafondo esté apagada y desconectada del tomacorriente antes de hacer el mantenimiento del equipo. Las partes móviles pueden dañar las manos o los dedos si el limpiafondo se enciende involuntariamente durante el mantenimiento. Luces LED indicadoras El limpiafondo robótico para piscina Prowler™... -
Page 49: Cómo Limpiar La Canasta Del Filtro
37 37 37 MANTENIMIENTO Cómo limpiar la canasta del filtro Nota: Le recomendamos que limpie la canasta del filtro luego de cada ciclo de limpieza. El exceso de desechos en e filtro limitará la capacidad de succión del limpiafondo Prowler™ 930 y reducirá su efectividad. Para limpiar la canasta del filtro, siga las instrucciones que aparecen a continuación: PASO 1: PASO 3:... -
Page 50: Limpieza Periódica De La Malla Para Filtro
38 38 38 MANTENIMIENTO Limpieza periódica de la malla para filtro Nota: Le recomendamos que limpie las mallas del filtro al menos una vez al mes. Si hay demasiados desechos en las mallas del filtro, se restringe la potencia de succión del limpiafondo robótico para piscina Prowler™ 930 y se reduce su efectividad. -
Page 51: Cómo Limpiar El Impulsor
39 39 39 MANTENIMIENTO Cómo limpiar el impulsor Siempre desconecte el limpiafondo de la fuente de alimentación antes de hacer un mantenimiento, desmontar y volver a montar el equipo. Si no lo hace, una descarga eléctrica podría provocar la muerte o lesiones graves a las personas de mantenimiento, los usuarios de las piscinas u otras personas. Lea todas las instrucciones de mantenimiento antes de trabajar en el limpiafondo. -
Page 52: Cómo Guardar El Limpiafondo
40 40 40 MANTENIMIENTO PASO 5: Vuelva a montar la tapa del impulsor PASO 6: Jale suavemente la cubierta del impulsor para volver a Vuelva a montar la cubierta intermedia y el ensamblaje ponerlo en el ensamblaje del impulsor. Ver Figura 34. del tubo colector Las pestañas de la unidad del motor sujetarán la cubierta. -
Page 53: Resolución De Problemas
41 41 41 RESOLUCIÓN DE PROBLEMAS Problème Cause probable Solution El cable está torcido o Obstrucción en la piscina Elimine la obstrucción en la piscina. se enrosca Se atasca en la tapa del drenaje de Apague el filtro e instale el aro en la tapa del drena- fondo je de fondo. - Page 56 Pentair reserves the right to change specifications without prior notice. Pentair is an equal opportunity employer. L’ e nsemble des marques et logos Pentair mentionnés sont la propriété de Pentair Inc. ou de ses filiales mondiales aux États-Unis et/ou dans d’ a utres pays.
Need help?
Do you have a question about the PROWLER 930 and is the answer not in the manual?
Questions and answers