Table of Contents

Subscribe to Our Youtube Channel
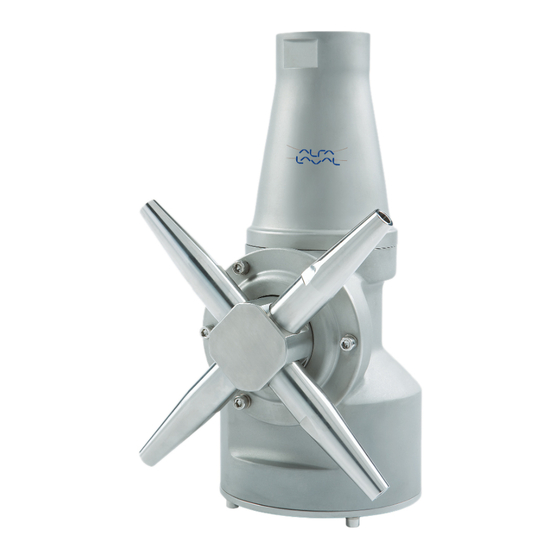
Related Manuals for Alfa Laval Toftejorg MultiJet 50


Summary of Contents for Alfa Laval Toftejorg MultiJet 50
- Page 1 Instruction Manual Alfa Laval Toftejorg MultiJet 50 Covering: Standard Machines Machines delivered with ATEX/IECEx Certification in accordance with Directive 2014/34/EU First published: 2010 ESE02851-EN5 2019-07 Original manual...
-
Page 3: Table Of Contents
6.9. Replacement of Ball Races ..............6.10. Replacement of Main Collars ..............7. Trouble shooting guide ................8. Technical data ..................8.1. Toftejorg MultiJet 50 with 2 nozzles ............. 8.2. Toftejorg MultiJet 50 with 4 nozzles ............. 9. Product programme .................. 9.1. Standard Configurations ................. - Page 4 The information herein is correct at the time of issue but may be subject to change without prior notice 11. General information ................... 11.1. Service and repair ................11.2. How to order spare parts ................ 11.3. How to contact Alfa Laval Kolding A/S ............
-
Page 5: Ec/Eu Declaration Of Conformity
Phone No. hereby declare that Tank Cleaning Machine Designation Alfa Laval Toftejorg MultiJet 50 Type From serial number 2019-0001 to 2030-99999 is in conformity with Machinery Directive 2006/42/EC and the following harmonized standard is used: DS/EN ISO 12100:2011 Safety of Machinery - Risk Assessment is in conformity with (Ex / ATEX) Directive 2014/34/EU and the following harmonized standards are used: EN ISO 80079-36:2016, EN ISO 80079-37:2016, DS/EN ISO/IEC 80079-34:2011, Annex A, paragraph A.5.3 Rotating machines... -
Page 6: Safety
2 Safety Unsafe practices and other important information are emphasized in this manual. Warnings are emphasized by means of special signs. Always read the manual before using the tank cleaning machine! 2.1 Important information WARNING Indicates that special procedures must be followed to avoid serious personal injury. CAUTION Indicates that special procedures must be followed to avoid damage to the tank cleaning machine NOTE... -
Page 7: Introduction
This Instruction Manual is published by Alfa Laval without any warranty. Improvements and changes to this Instruction Manual may at any time be made by Alfa Laval without prior notice. Such changes will, however, be incorporated in new editions of this Instruction Manual. -
Page 8: Marking
3 Introduction 3.4 Marking Alfa Laval tank cleaning machines are all marked to allow for recognition of type of machine, machine name, serial number and manufacturing address. The marking is placed on the gear house of the tank cleaning machine. -
Page 9: Atex/Iecex Marking
3 Introduction 3.5 ATEX/IECEx marking The Alfa Laval Toftejorg MultiJet 50 is certified as category I component. The ATEX certification is carried out by the Notified Body SGS Fimko Oy, who has issued the certificate no. Baseefa10ATEX0188X. The IECEx certification is carried out by the Certification Body SGS Baseefa Ltd., who has issued the certificate no. IECEx BAS xx.xxxxX. -
Page 10: Atex/Iecex Temperature Class And Code
ATEX/IECEx marking on the equipment: II 1G Ex h IIC 85°C…175°C Ga II 1D Ex h IIIC T85°C…T140°C Da 3.7 Quality system The Alfa Laval Toftejorg tank cleaning machines are produced according to Alfa Laval Kolding´s ISO 9001 international Standard certified quality system. -
Page 11: Installation
4.1 General Description The Alfa Laval Toftejorg MultiJet 50 is a media driven and media lubricated tank cleaning machine. As it is self lubricating, there is no lubricating substances such as oil, grease etc. in the machine which needs to be regularly changed. - Page 12 4 Installation Machines with 4 nozzles The combined motion of the machine body and the nozzles ensures a fully indexed tank cleaning coverage. After 5 5/8 revolutions of the Hub with nozzles (5 3/8 revolutions of the machine body) one coarse cleaning pattern is laid out on the tank surface.
-
Page 13: General Safety And Installation Instructions
4 Installation 4.3 General Safety and Installation Instructions The tank cleaning machine should be installed in a vertical position (upright or upside down). It is recommended to install a filter with a mesh size of max. 3 mm in the supply line in order to avoid large particles to clog inside the machine. Before connecting the machine into the system, all supply lines and valves should be flushed to remove foreign matter. - Page 14 4 Installation The machine as delivered has been tested at the factory before shipping. For transportation reasons, the nozzles have been screwed off after the test. In order to secure the nozzles against falling off due to vibrations and other external strains it is important that the nozzles are tightened properly after mounting.
-
Page 15: Specific Conditions For Safe Use In Accordance With Atex/Iecex Certification
4 Installation 4.4 Specific conditions for safe use in accordance with ATEX/IECEx certification Directive 2014/34/EU NOTE Explosion protection type is constructional safety “c”. Warning: Operated in a hazardous area The unit my be operated in a hazardous area only when completely filled with cleaning fluid/steam. If a medium other than the cleaning fluid/steam is passed through the equipment the flow must not be high enough to cause the equipment to operate. - Page 16 4 Installation 4.4 Specific conditions for safe use in accordance with ATEX/IECEx certification Warning: Max. permitted steaming temperature The maximum permitted steam temperature through the machine and ambient temperature is 140°C. Warning: Steaming tanks larger than 100 m³ Tanks with capacities larger than 100 m³ that could contain a flammable atmosphere should not be steam cleaned, as steam cleaning tanks produces an electrostatically charged mist.
- Page 17 4 Installation 4.4 Specific conditions for safe use in accordance with ATEX/IECEx certification Warning: Process generated electrostatic The user must address the electrostatic hazards generated from the process of the equipment in accordance with guidance document IEC/TS 60079-32-1:2013. Warning: Electrostatically charged liquid Liquids can become electrostatically charged when they move relative to contacting solids or the spraying of liquids can also create a highly charged mist or spray.
-
Page 18: Operation
Aggressive chemicals, excessive concentrations of chemicals at elevated temperatures, as well as certain dissolvents and hypochlorids should be avoided. If you are in doubt, contact your local Alfa Laval sales office. Pressure Avoid hydraulic shocks. -
Page 19: Safety Precautions
5.2 Safety precautions The machine is intended for use inside a tank only. As peak velocity of main jets reaches 40 m/sec., The Alfa Laval Toftejorg MultiJet 50 must not be operated in open air or when tank is open. -
Page 20: Maintenance
Changes to the machine are not allowed without approval by the person responsible for the ATEX/IECEx certification at Alfa Laval. If changes are made – or spare parts other than Alfa Laval original spare parts are used - the EC Type Examination certification (the ATEX/IECEx Directive) is no longer valid. -
Page 21: Preventive Maintenance
6 Maintenance 6.2 Preventive Maintenance In order to keep your tank cleaning machine servicing you as an efficient tool in your tank cleaning operations, it is essential to maintain its high performance by following a simple preventive maintenance programme, which will always keep your tank cleaning machine in good condition. -
Page 22: Top Assembly
6 Maintenance 6.3 Top Assembly Disassembly 1. Remove Screws (pos. 10). Loosen with Key (tool No. TE135) and unscrew with Screwdriver (tool No. TE135A). 2. Lift off Nipple (pos. 1). 3. Remove Guide /Guide ring (pos. 2). The Guide has a groove in the outer diameter. The Guide is easily lifted out of the Stem by means of two ordinary Screwdrivers inserted into the groove. - Page 23 6 Maintenance Top Assembly...
-
Page 24: Bottom Assembly
6 Maintenance 6.4 Bottom Assembly Disassembly 1. Turn machine upside down. 2. Remove Screws (pos. 17) and Spring washer (pos. 16) from Bottom cover (pos. 33). 3. Remove Bottom cover (pos. 33). 4. Remove Screw (pos. 17) and Spring washers (pos. 16) along the circumference of Gear frame (pos. 31). Draw out Gear Subassembly (holes in Gear frame are excellent for holding Gear subassembly). - Page 25 6 Maintenance Bottom Assembly TD523346...
-
Page 26: Hub Subassembly
If blue liners on Stem are extremely worn, they can be replaced. This part requires that a precise procedure is followed to accomplish installation. It is highly recommended that an authorized Alfa Laval Tank Equipment Service Center perform the replacement when necessary. - Page 27 6 Maintenance Hub Assembly TD523347...
-
Page 28: Stem Subassembly
If blue liners on Stem are extremely worn, they can be replaced. This part requires that a precise procedure is followed to accomplish installation. It is highly recommended that an authorized Alfa Laval Tank Equipment Service Center perform the replacement when necessary. - Page 29 6 Maintenance Stem Subassembly TD523326...
-
Page 30: Gear Subassembly
6 Maintenance 6.7 Gear Subassembly Disassembly 1. Hold Turbine shaft (pos. 7) against 1st stage Worm wheel (pos. 14) with one hand and loosen Screws (pos. 17) in Pinion (pos. 11) and Horizontal shaft (pos. 29) with the other hand. 2. - Page 31 6 Maintenance Gear Subassembly TD523327 3. Insert 1st stage Worm wheel (pos. 14) and Horizontal shaft (pos. 29). Mount Washer (pos. 18), Spring washer (pos. 16) and fix with Screw (pos. 17). Check rotation. 4. Insert Turbine shaft (pos. 7). Mount Washer (pos. 18), Spring washer (pos. 16) and fix with Screw (pos. 17). Use faces on Turbine shaft to hold against rotation when tightening screw.
-
Page 32: Replacement Of Collar Bushes
6 Maintenance 6.8 Replacement of Collar Bushes Replacement of Collar Bushes 1. Place Gear frame (pos. 31) upside down with a firm support under the flange. Use for instance jaws of a vice. Do not clamp on machined surfaces. With Pusher (tool No. TE81B031, see page 53) knock out Collar bush. 2. - Page 33 6 Maintenance Removal of old Collar bushes Support TD523310 Support TD523311 Support TD523312 Mounting of new Collar bushes TD523309...
-
Page 34: Replacement Of Ball Races
6 Maintenance 6.9 Replacement of Ball Races In body A. With big end downwards knock several times Body with bearings (pos. 28) hard against firm wooden support until Ball race (pos. 28.3) drops out. B. If it is not possible to knock out Ball race in this way , it is necessary first to screw out Main collar lower (pos. 28.2) – see page 36. - Page 35 6 Maintenance Replacement of Ball races Support TD523329 Support TD52333...
-
Page 36: Replacement Of Main Collars
Warning: Replacement of Main collars involves risk of damaging the special threads and accordingly the body. It is recommended to let an authorized Alfa Laval sales office do the replacement. Main collar upper 1. Place Body (pos. 28) in a vice upright position. Do not clamp on machined faces. Insert tool into Main collar upper (pos. -
Page 37: Trouble Shooting Guide
7 Trouble shooting guide Slow rotation or failure of machine to rotate Fault finding Possible Causes No or insufficient liquid flow a). Check if supply valve is fully open b). Check if inlet pressure to machine is correct c). Check supply line and filter for restriction/clogging d). -
Page 38: Technical Data
8 Technical data 8.1 Toftejorg MultiJet 50 with 2 nozzles Weight of machine: 11.3 kg (25.1 lb) Working pressure: 5-12 bar (72-174 psi) Recommended inlet pressure: 5-10 bar (72-145 psi) Working temperature max.: 95°C (200°F) Ambient temperature: 0 -140°C (95°C - 140°C when not operated) - Page 39 8 Technical data Toftejorg MultiJet 50 with 2 nozzles Flow rate Inlet pressure B: USgpm D: psi A: m3/h C: nozzle sizes E: bar...
- Page 40 8 Technical data Toftejorg MultiJet 50 with 2 nozzles Throw length Inlet pressure A: m B: ft C: nozzle sizes D: psi E: bar Note: Throw lengths are measured as horizontal throw length at static condition. Vertical throw length upwards is approx.
- Page 41 8 Technical data Toftejorg MultiJet 50 with 2 nozzles Cleaning Time, f. complete Pattern (= 4 cycles) Inlet pressure B: RPM of machine body D: psi A: min. C: nozzle sizes E: bar...
-
Page 42: Toftejorg Multijet 50 With 4 Nozzles
8 Technical data 8.2 Toftejorg MultiJet 50 with 4 nozzles Weight of machine: 12.2 kg (27 lb) Working pressure: 3-12 bar (44-175 psi) Recommended inlet pressure: 5-6.5 bar (72-94 psi) Working temperature max.: 95°C (200°F) Ambient temperature: 0 -140°C (95°C - 140°C when not operated) - Page 43 8 Technical data Toftejorg MultiJet 50 with 4 nozzles Flow rate Inlet pressure B: USgpm D: psi A: m3/h C: nozzle sizes E: bar...
- Page 44 8 Technical data Toftejorg MultiJet 50 with 4 nozzles Throw length Inlet pressure A: m B: ft C: nozzle sizes D: psi E: bar * Max. static **Effective Note: Throw lengths are measured as horizontal throw length at static condition. Vertical throw length upwards is approx.
- Page 45 8 Technical data Toftejorg MultiJet 50 with 4 nozzles Cleaning Time, f. complete Pattern (= 8 cycles) Inlet pressure A: min. B: RPM of machine body C: nozzle sizes D: psi E: bar...
-
Page 46: Product Programme
9 Product programme 9.1 Standard Configurations Standard configurations, Toftejorg MultiJet 50 with 2 nozzles Nozzles (mm) Connection Turbine/ Inlet Guide Article No. (3/4" thread connection) 2 x ø11 TE22M162 100% 2 x ø12 TE22M164 Nipple: 2 x ø12 TE22M168 2” Rp (BSP) 2 x ø13... -
Page 47: Available Add-Ons
9 Product programme 9.2 Available add-ons TE22MXXX70: ATEX/IECEx Explanation to Add-ons ATEX/IECEx includes: ATEX/IECEx certified machine for use in explosive atmospheres. Category 1 for installation in zone 0/20 in accordance with directive 2014/34/EU. ATEX/IECEx II 1G Ex h IIC 85°C…175°C Ga II 1D Ex h IIIC T85°C…T140°C Da... -
Page 48: Parts List And Drawing, Service Kits And Tools
10 Parts list and drawing, service kits and tools 10.1 MultiJet 50 with 2 nozzles 4109-0024... - Page 49 See page 47 for more information on available add-ons. Please refer to the Spare Part Manual for information on item numbers and materials. The Spare Part Manual is available from the online Alfa Laval product catalogue Anytime or the Close at hand spare part catalogue.
-
Page 50: Multijet 50 With 4 Nozzles
10 Parts list and drawing, service kits and tools 10.2 MultiJet 50 with 4 nozzles 4109-0025... - Page 51 See page 47 for more information on available add-ons. Please refer to the Spare Part Manual for information on item numbers and materials. The Spare Part Manual is available from the online Alfa Laval product catalogue Anytime or the Close at hand spare part catalogue.
-
Page 52: Service Intervals
Major Service Kit TE55M010 TE55M010 TE55M010 Please refer to the Spare Part Manual for information on item numbers and materials. The Spare Part Manual is available from the online Alfa Laval product catalogue Anytime or the Close at hand spare part catalogue. -
Page 53: Tools
10 Parts list and drawing, service kits and tools 10.4 Tools Standard Tool kit for Toftejord MultiJet 50 Article no. TE81B080 Description Tool No. Unbraco key for screw 1 pcs. TE134 1 pcs. TE134A Unbraco Screwdriver Unbraco key for screw 1 pcs. - Page 54 10 Parts list and drawing, service kits and tools Sketch of tools for replacement of Main collars A: TE81B131 - Tool for Upper collar B: TE81B132: Tool for Lower collar TD523315...
- Page 55 11 General information 11.1 Service and repair Upon every return of a product, no matter if for modifications or repair, it is necessary to contact your local Alfa Laval office to guarantee a quick execution of your request. You will receive instructions regarding the return procedure from your local Alfa Laval office. Be sure to follow the instructions closely.
- Page 56 © Alfa Laval Corporate AB This document and its contents is owned by Alfa Laval Corporate AB and protected by laws governing intellectual property and thereto related rights. It is the responsibility of the user of this document to comply with all applicable intellectual property laws. Without limiting any rights related to this document, no part of this document may be copied, reproduced or transmitted in any form or by any means (electronic, mechanical, photocopying, recording, or otherwise), or for any purpose, without the expressed permission of Alfa Laval Corporate AB.
Need help?
Do you have a question about the Toftejorg MultiJet 50 and is the answer not in the manual?
Questions and answers