Table of Contents
Advertisement
Quick Links
Advertisement
Table of Contents

Subscribe to Our Youtube Channel
Related Manuals for STOLZENBERG KSV 1000

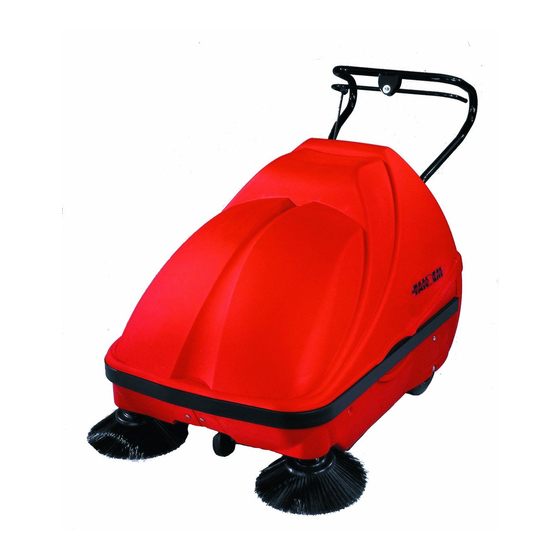
Summary of Contents for STOLZENBERG KSV 1000
- Page 1 Operating manual (Translation of the original version) KSV 1000 Stolzenberg GmbH & Co. KG Reinigungsmaschinen - Maschinenbau Hamburger Str. 15 - 17 D-49124 Georgsmarienhütte Telefon +49 (0 54 01) 83 53-0 Telefax +49 (0 54 01) 83 53-11 E-Mail: info@stolzenberg.de...
- Page 2 11/12/2017 KSV 1000...
-
Page 3: Table Of Contents
Removing the filter ..................... 17 5.3.2 Fitting the filter ....................17 Replacing the Side Brush ....................18 5.4.1 Dismounting the Side Brush ................18 5.4.2 Mounting the Side Brush ................... 19 5.4.3 Adjustment of the Side Brush ................19 11/12/2017 KSV 1000... - Page 4 Technical Data ........................31 5.12 Product Marking ........................ 32 5.13 Disposal ..........................32 5.14 Accessories and spare parts .................... 32 5.15 Service ..........................32 5.16 Transport ........................... 32 EC Declaration of conformity (Translation of the original version) .......... 33 KSV 1000...
-
Page 5: Introduction
Usage conformant with intended purpose also includes compliance with the operating manual and the inspection and maintenance specifica- tions. Drive the sweeper only along expressly marked routes and spaces. Excessive vibration due to uneven ground is to be avoided. 11/12/2017 KSV 1000... -
Page 6: Safety Information
Caution: loose clothing can be caught and drawn in on rotat- ing parts. Personal safety equipment, particularly hearing protection, must be worn when operating the machines. The machine should only be used outdoors or in ade- quately-ventilated rooms. KSV 1000... - Page 7 Warning: parts of the machine become hot during use. There is a risk of burn injuries. 11/12/2017 KSV 1000...
-
Page 8: Sweeper Description
The suction sweeper is driven by an internal combustion engine and features forward and reverse gears. The sweeping mechanism of the KSV 1000 features two lateral brushes which carry the refuse to two sweeping rollers mounted parallel to the direction of motion. These project the sweepings overhead into the dustcontainer positioned behind it. -
Page 9: Safety Devices
In doing so observe the following: Upper most position: driving hoop low. Lowest position: driving hoop high (tall operators). Push the driving hoop and the driving linkage through the opening of the control panel. 11/12/2017 KSV 1000... - Page 10 If you change the screw connection, the drive of the machine will be effected! Push the four carriage bolts through the boreholes of the driving hoop. KSV 1000...
- Page 11 Should you neglect to adhere to this distance, it will result in poor sweeping or increased wear and tear of the brushes! Use unleaded fuel only Re-attach the main panelling. Close the main panelling. The suction sweeper is ready for operation. 11/12/2017 KSV 1000...
-
Page 12: Operation
Insert the key into the key-operated switch. Turn the key clockwise. The machine starts. Release the key. Moving forward: Pull the right-hand part of the driving lever upwards. The suction sweeper moves forward. 1 Moving forward 6 Driving lever 2 Driving hoop KSV 1000... -
Page 13: Sweeping Operation
Do not sweep up mate- rials that may cause health impairment. 1 lever for ventilation flap 2 switch for side brushes 3 switch for sweeping rollers 4 lever for filter cleaning 11/12/2017 KSV 1000... -
Page 14: Operatting The Sweeping Rollers
If the ventilation is on, the dust extraction will be turned off. To turn on the ventilation, pull the lever of the ventilation flap up- wards. If you want to sweep on a dry surface again, you will have to push down the lever down. KSV 1000... -
Page 15: Operating The Filter-Cleaning Device
Pull the machine towards in yourself, to ensure that the front wheel is straight. Secure the machine from rolling by kicking down the brake lever of the front wheel. If the brake is relieved afterwards, the brake lever has to remain depressed position. 11/12/2017 KSV 1000... -
Page 16: Emptying The Dustbin
4.4.1 Removing the dustbin Pull the attachment lugs off the holding knobs on both sides Pull the dustbin out of the suction sweeper by the handle until the front dustbin guides are free. Dustbin fixing knob Dustbin arrest KSV 1000... -
Page 17: Inserting The Dustbin
Raise the front dustbin guides to the height of the guide rails. Push the arrests to the side Push the dustbin into the suction sweeper. Push the arrests onto the fixing knobs of the dustbin. Dustbin arrest Dustbin guide rail 11/12/2017 KSV 1000... -
Page 18: Maintenance
The suction sweeper may only be cleaned in the off state, when it is dry. The suction sweeper is a machine with electrical components. Moisture damages the eletronics of the device. Moisture can result WARNING in leakage currents and short-circuits.! Do not use any high-pressure cleaners KSV 1000... -
Page 19: Replacing The Filter
Remove the filter from the frame. Tension closure Filter frame arrest 5.3.2 Fitting the filter Place the filter on the frame. Fold the frame upwards. Push the threaded hooks over the filter frame arrests. Press the clips of the tension closures upwards. 11/12/2017 KSV 1000... -
Page 20: Replacing The Side Brush
Arrest the lowering lever. Pull off the spring plug from the axle of the lateral brushes. 1 Borehole 2 Borehole 3 Flange of the lateral 4 Spring plug brushes Pull the side brush down and off. Replace the side brush. KSV 1000... -
Page 21: Mounting The Side Brush
To raise the lateral brushes, you will have to turn the screw of the height-adjustment of the lateral brushes counterclockwise. Set the lateral brushes to their desired position. Tighten the back nuts. Put on the main panelling. 11/12/2017 KSV 1000... -
Page 22: Sweeping Rollers Replacement
6 fastening bolts of side trim panel The roller swing is held in place by three star handles. Loosen the star handles. Remove the roller swing. 1 open star handle 6 roller swing 2 star handle 7 turning lever KSV 1000... -
Page 23: Installing The Sweeping Rollers
Set the front roller swing onto the free sweeping roller ends. The roller swing is equipped with two turning levers. Each turning lever end is equipped with one pick-up pin. 1 threaded rods 6 sweeping roller keyway 2 pick-up pin 11/12/2017 KSV 1000... -
Page 24: Setting The Sweeping Rollers
Lift the sweeping rollers and arrest the lowering lever of the sweep- ing rollers. Let the lever snap in arresting position. Open the hood. Secure the hood position by the hood arresting device. Remove the right side trim panel facing in the direction of motion. KSV 1000... - Page 25 Park the suction sweeper as described on page 10. Take the key out of the key-operated switch. Lift the sweeping rollers and arrest the lowering lever of the sweep- ing rollers Let the lever snap in arresting position. 11/12/2017 KSV 1000...
-
Page 26: Drive
If the driving performance is not satisfactory in reverse, check the driv- ing belt for dirt or damage. KSV 1000... -
Page 27: Inspecting The Drive
Inspection is necessary to prevent the suction sweeper from moving forward or backward, if the driving lever is in neutral position (horizontal position) when the engine is running. Park the suction sweeper as described. Take the key out of the key-operated switch. Remove the main panelling. 11/12/2017 KSV 1000... - Page 28 The swivel lever cannot push the frictional wheel against the fric- tional roller. The driving belt has to be freely movable. Should this not be the case, continue as described in adjustments. If the swivel lever is positioned correctly: park the suction sweeper. Re-attach the main panelling. KSV 1000...
-
Page 29: Adjustment Of The Drive
Check the position of the swivel lever: Insert the key into the key-operated switch. Start up the suction sweeper. Carefully actuate the driving lever to move forward. 11/12/2017 KSV 1000... -
Page 30: Maintenance Chart
If the machine "creeps" forward: turn the screw of the free wheel adjustment clockwise to tighten the pull-back spring. If the free wheel works properly again: tighten the back nuts. Maintenance chart 5.9.1 Daily maintenance Check fuel level, refill if necessary. KSV 1000... -
Page 31: After Each 50 Operating Hours Also
Check all bearings for wear. Check if seals are damaged or dislocated. 5.9.4 After each 200 operating hours also Check for proper functioning of the engine. Observe the maintenance instructions provided by the manufac- turer of the motor. 11/12/2017 KSV 1000... -
Page 32: Malfunctions / Error Messages And Troubleshooting
Fril wheel worn outctiona Re-adjust at the swivel lever or replace the frictional wheel Drive of frictional wheel oily or Cleaning ( with nitro-thinner, dirty benzene or brake cleaner) Driving belt dirty or damaged Check, replace if necessary KSV 1000... -
Page 33: Technical Data
60 x 42 mm Max. power output: 3,0 KW Max. torque: 7,4 Nm Filling amounts Fuel tank: 2,5 Liter Oil filling: 0,6 Liter Type of fuel: See annex Oil spezificationl: Maximum Airborne Sound Level: dB (A): 86 dB(A) 11/12/2017 KSV 1000... -
Page 34: Product Marking
Accessories and spare parts must conform to the requirements of the manufacturer. This is ensured by using genuine replacement parts. 5.15 Service Stolzenberg GmbH & Co. KG Hamburger Straße 15-17 D-49124 Georgsmarienhütte Telefon: 0049 / (0)5401 83 53-0 Fax: 0049 / (0)5401 83 53-11 www.Stolzenberg.de... -
Page 35: Ec Declaration Of Conformity (Translation Of The Original Version)
EC Machine Directive 2006/42/EC, Appendix II, No. 1A Mr. Kai Stolzenberg – Management of the Stolzenberg GmbH & Co. KG, Hamburger Straße 15-17, D-49124 Georgsmarienhütte - is authorized to arrange technical information. We hereby declare that the machine described below corresponds, in its...
Need help?
Do you have a question about the KSV 1000 and is the answer not in the manual?
Questions and answers