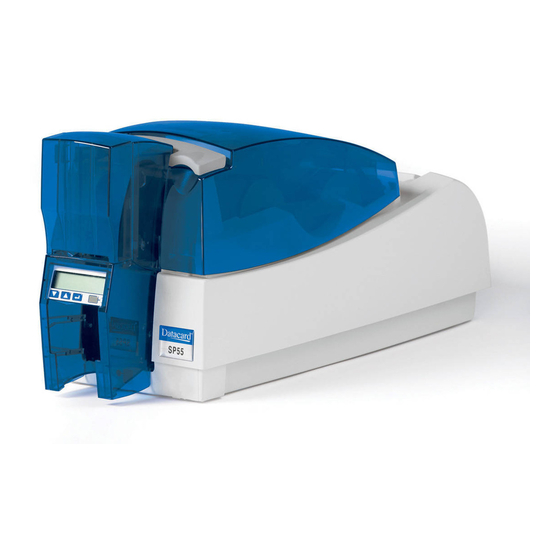
DataCard SP55 Plus Printer Manual
Datacard sp55 plus: printer guide
Hide thumbs
Also See for SP55 Plus:
- Quick install manual (20 pages) ,
- Supplementary manual (2 pages) ,
- Printer manual (134 pages)
Table of Contents
Advertisement
Advertisement
Table of Contents

Related Manuals for DataCard SP55 Plus


Summary of Contents for DataCard SP55 Plus
- Page 1 SP55 Printer Guide 554733-001 August 2004...
- Page 2 Service and Support FAQs at www.datacard.com provide answers to questions about the SP55 printer. Dealer For help with questions not addressed by other SP55 information, contact your dealer. Customer Care Contact the Datacard Customer Care Center at 1.800.328.3996 (U.S. & Canada) or 1.952.988.2316 (worldwide).
-
Page 3: Table Of Contents
Contents About the printer ..... 1 Loading cards ..... . . 5 Loading print ribbon . -
Page 4: About The Printer
Duplex Module: Optional module at the back of the printer. Printer Cover. Latch: Lift the latch to open the printer cover. Input Hopper: Open the cover to load blank cards. Output Hopper: Remove completed cards. Ready button: Push to pause or resume the printer. - Page 5 (not visible in this drawing). Optional Smart Card USB Port: See “Features and options” on page 4. Optional Smart Card Serial Port: See “Features and options” on page 4. Tip: Lift the latch to open the printer and see inside. Page 2...
-
Page 6: The Inside Of The Printer
Print Ribbon Cartridge (shown with color print ribbon). Printer Label: Includes the serial number and model information (located on the left side of the printer and not visible in this drawing). Cleaning roller (not visible in this drawing): Removes dust... -
Page 7: Features And Options
Features and options are identified on the printer label. • Printers with “U” printing can print one color (monochrome) only. “C” printing is full-color or monochrome printing. • All SP55 printers have a USB connection. • SP55 printers can include a duplex module. -
Page 8: Loading Cards
Loading cards 1 Open the input hopper cover. 2 Remove cards from the original package. Tips: Handling cards • Do not touch the surface of cards before printing them. (Oils on hands will reduce printing quality.) • Handle cards by the edges or wear gloves. •... - Page 9 The diagram shows the typical locations for the magnetic stripe and smart card chip. 4 Push the input hopper cover closed until it latches. See SP Series Info Central for current information about cards to use in the printer. Magnetic stripe Smart card chip Page 6...
-
Page 10: Loading Print Ribbon
Don’t place ribbon on a dusty or dirty surface–dirt could damage the printhead. 4 Run a cleaning card and replace the cleaning sleeve at the same time that you load a new print ribbon. See “Cleaning the printer” on page 17 for the steps to follow. Page 7... - Page 11 — Make sure the ribbon cartridge handle rests in the supports on the right side of the printer. — Make sure to install the full, new spool toward the input hopper of the printer. 7 Close the printer cover. Press down firmly to latch it. Page 8...
-
Page 12: Check The Pc Connection
The USB data cable should be connected to a USB port on the PC and to the USB data port on the printer. The printer can be connected in these other ways: Through a direct network connection, where the... -
Page 13: Power On The Printer
Tips for printer power Wait while the printer initializes. The printer Status Light displays steady green when the printer is ready to print cards. See “Status light” on page 11 for details. Follow the guidelines for your organization about when to power the printer on and off. -
Page 14: Status Light
Status light The front of the printer has a light that provides information about the current state of the printer. At startup, the status light displays steady amber for several seconds, a red-amber-green sequence, and then blinking green for several seconds. When the printer is ready to print, the status light is steady green. - Page 15 If you changed the printer name, power the PC off and on. The printer has a condition that requires service or the printer did not power-on correctly. To attempt to correct the condition, power the printer off and on before calling for service.
-
Page 16: Opening Properties Or Printing Preferences
Opening Properties or Printing Preferences Begin with the printer connected to the PC and powered on so values are saved correctly. Choose Start from the Windows task bar. Choose Settings and then Printers (and Faxes). The Printers (and Faxes) window opens. - Page 17 Make sure that driver settings match printer features and supplies used. • The Print Ribbon Type setting is read from the printer and cannot be changed (for most connection types). • If you change the card design, review and update all settings for the new card design.
-
Page 18: Open The Printer Toolbox
Open the Printer Toolbox The Printer Toolbox icon is located in the lower right corner of the Windows desktop. The icon shows the status of communication between the printer and driver. See SP Series Info Central for details about the icon. - Page 19 Properties or Printing Preferences dialog box. Buttons on the Printer Toolbox are grayed out when a card is ready to print or is printing, when there is a message, or when the printer is powered off. Wait until printing is done before printing a sample card, running a cleaning card, or using advanced setup.
-
Page 20: Cleaning The Printer
Insert the cleaning card into the input hopper (3), just past the roller. Click OK on the message box. The printer moves the card through the printer several times and ejects the card. Wait a few minutes to allow the rollers to dry. - Page 21 Some card features, such as signature panels and magnetic stripes, can require more frequent cleaning of the printer. Clean printer rollers regularly, such as every time you change the ribbon. If you use StickICards™, use a cleaning card after every 100 cards.
-
Page 22: Printer Supplies
Printer supplies Datacard-certified ribbon kits and cleaning supplies are available for the printer. Ribbon kits contain a roll of print ribbon, a cleaning card, and a replaceable cleaning sleeve. Datacard recommends that you run a cleaning card and replace the cleaning sleeve each time you change the print ribbon. -
Page 23: Cleaning Supplies
552954-506 For use only in SP Series color card printers Cleaning supplies In addition to the cleaning supplies included in the ribbon kit, Datacard recommends that you order additional cleaning supplies to have on hand to address unusual situations. •... -
Page 24: Getting The Most Out Of Your Printer
Getting the most out of your printer To get the best quality cards and to maintain printer performance, follow these tips for success: • Use the best quality cards available with a smooth, glossy PVC surface and print them only once. Make sure options, such as a Mylar® signature panel or a magnetic stripe, are high quality. - Page 25 • Use cables that meet specifications and connect them correctly. • Keep cards and Datacard-certified supplies on hand and store them safely. • Keep the printer clean and keep the area around the printer clean. See SP Series Info Central for detailed information about: •...
-
Page 26: Troubleshooting
See the “Related Topics” to fix the problem. • If you moved the ribbon while the printer was powered off, print another card. If the problem persists, see the SP Series Info Central for detailed information about solving card appearance problems. - Page 27 “Resume” on the Printer Toolbox. The printer cover will not close. Try this: • Make sure the printer is plugged in. See “Power on the printer” on page 10. • Make sure the printer is connected to the computer. “Check the PC connection”...
-
Page 28: Site Requirements
10.5 inches (267 mm) above the printer latch to open the cover. Do not use the printer in a dirty environment. Do not use the printer in a closed compartment. Do not block air flow around the printer. -
Page 29: Legal Notices (Fcc)
Please do not attempt to operate or repair this equipment without adequate training. Liability statement This Datacard® product has been built to the high standards of DataCard® Corporation. See SP Series Info Central for the statement of liability. Regulatory compliance This Datacard®... - Page 30 11111 Bren Road West Dealer information: Minnetonka, MN 55343-9015 952.933.1223 952.933.7971 FAX www.datacard.com Datacard is a registered trademark of DataCard Corporation. August 2004 554773-001 Rev. C...
Need help?
Do you have a question about the SP55 Plus and is the answer not in the manual?
Questions and answers
I replaced the ribbon correctly, but when I attempt to print a card, it prints a portion of the top of the front of the card. The printer serial number is: H102552 Firmware version: 33.36
The issue may be caused by the print ribbon spools not being pushed completely onto the cartridge spindles. Push each print ribbon spool onto its spindle until it clicks into place. If the issue continues, contact your service provider.
This answer is automatically generated