Table of Contents
Advertisement
215-1844 Rev. C; ECN 17-08-017
© 2017 Bradley
Page 1 of 25
8/24/2017
Installation
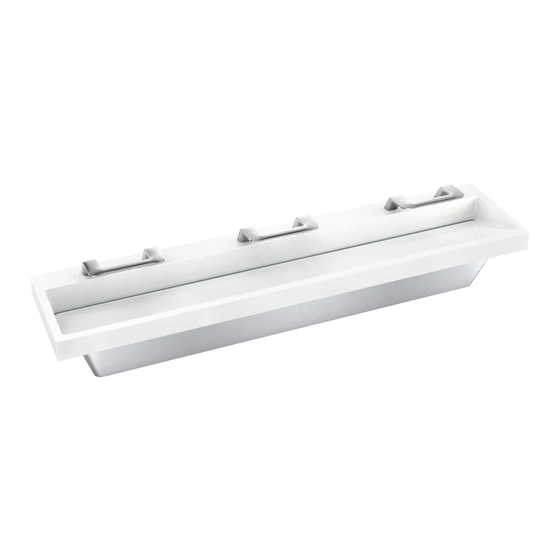
LVQD3
Verge
Lavatory System - LVQ-Series
®
with WashBar
Technology
™
Table of Contents
Pre-Installation Information ................................................2
Supplies Required .............................................................2
Components ...................................................................3-4
Dimensions .....................................................................5-6
Structural Rough-Ins ..........................................................7
Plumbing and Electrical Rough-Ins ...................................8
Bracket Mounting ...............................................................9
Drain Assembly .................................................................9
WashBar Installation ........................................................10
Aerator Installation ...........................................................10
Attach Soap Motor and Soap Container Bracket ............11
Bowl Mounting with WashBar ..........................................12
Install P-Trap ....................................................................12
Strainer and Drain Cap ....................................................12
Dryer Motor Assembly .....................................................13
Attach Power Line Filter ..................................................14
Control Box and Valve Installation ...................................15
Soap Installation ..............................................................16
Electrical Connections .....................................................17
Adjust Temperature with Water Running .........................17
Access Panel ...................................................................18
Master Control Box .....................................................19-23
Cleaning and Maintenance .........................................24-25
Menomonee Falls, WI 53052 USA
800 BRADLEY (800 272 3539)
P.O. Box 309
+1 262 251 6000
bradleycorp.com
Advertisement
Table of Contents

Subscribe to Our Youtube Channel
Related Manuals for Bradley Verge WashBar LVQ Series


Summary of Contents for Bradley Verge WashBar LVQ Series
-
Page 1: Table Of Contents
Access Panel ..............18 Master Control Box .............19-23 Cleaning and Maintenance .........24-25 P.O. Box 309 215-1844 Rev. C; ECN 17-08-017 Menomonee Falls, WI 53052 USA © 2017 Bradley 800 BRADLEY (800 272 3539) +1 262 251 6000 Page 1 of 25 8/24/2017 bradleycorp.com... -
Page 2: Pre-Installation Information
• (2) Grounding Wires • Drill • Basin Wrench • Tape Measure • Phillips Screw Driver • Flat Head Screw Driver • Level • 5/16" nut driver • 5/16" socket (with or without extension) Bradley • 215-1844 Rev. C; ECN 17-08-017 8/24/2017... -
Page 3: Components
(261-147) Box (3x) (S39-845) DC Lead Free Valve DC Lead Free Valve Assembly, Single TMA Assembly, Single TL (S08-2403TMA) (S08-2403TL) Hose/90 Stop Lead Free TMA Hose/90 Stop Lead Free TL (S45-2730) (S45-2731) Bradley • 215-1844 Rev. C; ECN 17-08-017 8/24/2017... - Page 4 Foam Pump with Internal Press Fit Connection (269-2519) Dryer Motor (S39-844) Dryer Vibration Pad 4" x 10" (124-105) Gallon Jug (Not Shown) (Supplied by Others) Hook and Loop Strap (269-2574) Soap Tank Bracket (140-1171) Bradley • 215-1844 Rev. C; ECN 17-08-017 8/24/2017...
-
Page 5: Dimensions
2-3/4" (762) (762) (70) 11" (279) 5" (127) 21" (533) 14-3/8" (366) 13-1/2" (343) 86-3/4" (2206) Front View 89-3/4" 3-3/4" (2280) (95) 5" 5" (127) (127) 20" 90" (508) (2286) 80" (2032) Bradley • 215-1844 Rev. C; ECN 17-08-017 8/24/2017... - Page 6 Dryer 11-3/4" 3-7/8" (299) (99) Faucet 20° 6-1/2" (165) 3-3/4" (95) CSA Standard Height 20" Dim A 33-1/2" (851mm) (507) Dim B 29-29/32" (760mm) 28-15/16" (735) 7-1/2" Dim C 13-1/2" (536mm) (189) Bradley • 215-1844 Rev. C; ECN 17-08-017 8/24/2017...
-
Page 7: Structural Rough-Ins
#10 Wall Anchors for Soap Tank Bracket (100 lb pull out) RIM HEIGHT VERTICAL HEIGHT ADJUSTMENTS FIXTURE STYLE 33½" No Adjustment Standard Height, ADA, TAS and CSA 30½" Subtract 3" Juvenile, ADA and TAS Bradley • 215-1844 Rev. C; ECN 17-08-017 8/24/2017... -
Page 8: Plumbing And Electrical Rough-Ins
Finished Floor CODE DESCRIPTION QTY. 1½" NPT Drain, Stub-out 2" from wall ½" Nominal (⁵⁄₈" O.D. Comp.) Hot/Cold supplies, Stub-out 2" from wall 110V GFI protected electrical outlet (15 amp circuit breaker) Bradley • 215-1844 Rev. C; ECN 17-08-017 8/24/2017... -
Page 9: Bracket Mounting
Assemble the remaining components as shown and thread the four screws through the drain adapter and into the basin inserts. Ensure the screws compress the drain adapter evenly onto the basin. Do not overtighten. Bradley • 215-1844 Rev. C; ECN 17-08-017 8/24/2017... -
Page 10: Washbar Installation
1/4" union elbow. Aerator Installation Carefully thread the aerator into the WashBar casting using the red service key provided. Ensure no leaks after installation. Aerator (0.35 gpm or 0.5 gpm) Red Service Key Bradley • 215-1844 Rev. C; ECN 17-08-017 8/24/2017... -
Page 11: Attach Soap Motor And Soap Container Bracket
Control Box Tube aside. Soap container will be installed in a later step. Soap Container Motor Control Bracket Box Lever Soap Pump Flange Soap Control Box Flange Soap Pump Groove Bradley • 215-1844 Rev. C; ECN 17-08-017 8/24/2017... -
Page 12: Bowl Mounting With Washbar
Grommets should hold drain cap securely against drain trough walls. To remove drain cap, carefully slip flat screwdriver into left or right hand corner of drain cap and gently lift upwards. Bradley • 215-1844 Rev. C; ECN 17-08-017 8/24/2017... -
Page 13: Dryer Motor Assembly
RJ45 connector cable from motor and discard. Dryer Motor Feet RJ45 Connector Cable (unplug and discard) Dryer Motor, 120V/60Hz Water Detector Wire Power Cord to GFCI Outlet Power Cord to DC Adapter Only Bradley • 215-1844 Rev. C; ECN 17-08-017 8/24/2017... -
Page 14: Attach Power Line Filter
LVQD3 Installation Attach Power Line Filter Secure dryer power line filter to underside of bowl using (2) #10 x 1" screws provided. Bradley • 215-1844 Rev. C; ECN 17-08-017 8/24/2017... -
Page 15: Control Box And Valve Installation
Tube for Center WashBar Connects Here until it is fully seated. Tighten WashBar the compression nut by hand. Repeat this step for Center and RH WashBar supply tube. 1/4" Supply Tube for RH WashBar Bradley • 215-1844 Rev. C; ECN 17-08-017 8/24/2017... -
Page 16: Soap Installation
6 to 8 times. For ease of soap container removal, pull tank while rotating bottom of tank out. Cable Tie Hook and Loop Strap Soap Container Top Flange Bracket Cable Tie Slot Bradley • 215-1844 Rev. C; ECN 17-08-017 8/24/2017... -
Page 17: Electrical Connections
Using cover, turn cartridge gently until desired water temperature is reached. Water in excess of 110°F Do not turn past stops as this may (43°C) may cause scalding. damage unit. Push cover down and tighten screw. Bradley • 215-1844 Rev. C; ECN 17-08-017 8/24/2017... -
Page 18: Access Panel
Do not remove all 3 functions work properly. thumbscrews. Check for water leaks. Bradley • 215-1844 Rev. C; ECN 17-08-017 8/24/2017... -
Page 19: Master Control Box
WashBar LEDs will return to blue indicating that the WashBar is in Standby/Idle Mode. • The power LED on the master control box will be GREEN indicating the unit has power. Bradley • 215-1844 Rev. C; ECN 17-08-017 8/24/2017... - Page 20 Dryer, water or soap has timed-out. This is caused by a Remove obstruction or wipe sensors obstructed sensor. with microfiber cloth to prevent from scratching sensor. System will return operational automatically once cleared. Bradley • 215-1844 Rev. C; ECN 17-08-017 8/24/2017...
- Page 21 • Red LED: Liquid Soap (3200 dispensing cycles occur before low soap counter needs to be reset. This is the Default setting when WashBar is reset.) • Blue LED: Foam Soap (4000 dispensing cycles occur before low soap counter needs to be reset.) Bradley • 215-1844 Rev. C; ECN 17-08-017 8/24/2017...
- Page 22 4. Remove USB flash drive if desired. Leaving USB flash drive in master control board will not affect WashBar performance. Software version will display on the LCD screen. Software can be reversed to a previous version by having only an earlier version of the software on the USB flash drive. Bradley • 215-1844 Rev. C; ECN 17-08-017 8/24/2017...
- Page 23 Cycle counts are displayed x1000 (ex. 65 = 65,000) • REV followed by the software revision • SOP followed by the soap cycle count • H2O followed by the water cycle count • AIR followed by the dryer cycle count Bradley • 215-1844 Rev. C; ECN 17-08-017 8/24/2017...
-
Page 24: Cleaning And Maintenance
Protecting the Surface: To optimize material performance in high use areas, it is recommended to apply DryTreat Stain-Proof Original or equivalent as needed. Repair Kits: Evero repair kits are available. Contact your Bradley representative or distributor for part numbers and pricing. Repair kits are made to order and have a shelf life of 30 days. - Page 25 Soap thickness is determined by a measurement called viscosity. Soap viscosity should be between 100 cps (centipoise) and 2500 cps for all Bradley soap dispensers. Thick soaps flow slower and inhibit the “flushing” action of the valves, which allows the soap to congeal in the valve and cause clogs.
Need help?
Do you have a question about the Verge WashBar LVQ Series and is the answer not in the manual?
Questions and answers