
Related Manuals for SELT Venetian Blind Z90


Summary of Contents for SELT Venetian Blind Z90
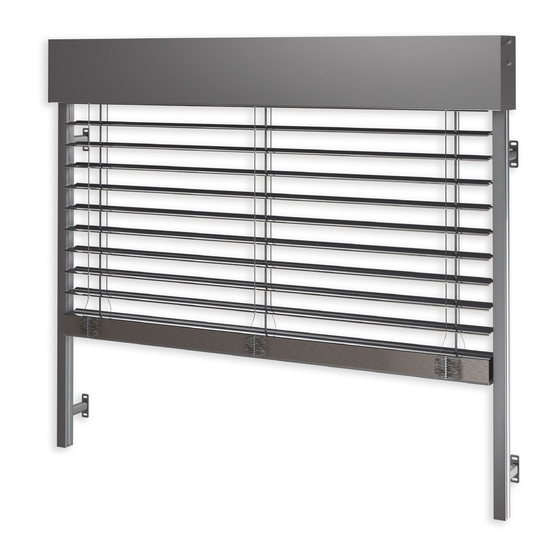
- Page 1 DT-E DT-E TECHNICAL AND OPERATIONAL DOCUMENTATION INSTALLATION AND OPERATING MANUAL AND INSTRUCTIONS FOR SAFE USE Sun protection screen Venetian Blind 1.4. Venetian Blind Z90...
- Page 2 SUN PROTECTION SCREEN VENETIAN BLIND Z90 PRODUCT MANUFACTURER’S MARKING: Manufacturer’s name: SELT Sp. z o. o. Manufacturer’s head office: 45- 449 Opole, ul. Wschodnia 23A Plant address: Wydział Żaluzji Fasadowych i Refleksoli [Façade and External Textile Roller Blind Department] 45- 449 Opole, ul.
-
Page 3: Table Of Contents
4.5.2. Installation of venetian blind Z90 with cube and oval guide rail (self-supporting product) ... 15 4.5.3. Installation of venetian blind Z90 with cube and oval guide rail – group installation ....21 4.5.4. Concealed guide rail installation ..................... 30 4.5.5. -
Page 4: Introduction
INTRODUCTION 1.1. PRODUCT SAFETY TIPS The product was manufactured in accordance with the latest know-how in the area of constructing and manufacturing and is delivered in condition allowing for its safe use. Safe construction of the product is achieved by: Subject European legal basis Polish legal basis... -
Page 5: Definitions
SELT Sp. z o. o. with a head office in Opole shall hold the copyrights to this documentation. The documentation cannot be used without permission, either partially or as a whole, for any concurrent business activity nor can it be made available to third parties. -
Page 6: Product Technical Information
PRODUCT TECHNICAL IN FORMATION Product technical specification is available at www.selt.com after log in. 2.1. TECHNICAL PARAMETERS : Dimensions: Width Height Max. area Electric drive 4500 mm 4500 mm 3200 mm 5000mm Manual drive (max. 9m 4500 mm 5000 mm... - Page 7 The products are characterised by the following qualities: they are designed for installation in the window area, they limit the sun light coming into the room, they provide disperse light in the room they prevent rooms from overheating, thus contributing to the improvement of thermal comfort in rooms, ...
-
Page 8: Product Transport And Storage
COMPLETENESS AND QUALITATIVE STATE OF DE LIVERY Selt Sp. z o. o. makes every effort to ensure that the goods are produced in accordance with the order. To check the completeness of the product is purchaser’s duty and it should be conducted at the time of delivery. Any discrepancies of the product with the order should be reported immediately to the driver/warehouseman/installers and noted in the proof of delivery at the risk of losing warranty. -
Page 9: Product Installation
PRODUCT INSTALLATION The following part covers general requirements of the product installation. Proper installation is necessary for efficient operation of the product. SELT Sp. z o. o. recommends to use services of skilled installation crews what guarantees the Purchaser proper installation. -
Page 10: General Guidelines For Installation
INSTALLATION Installation and operating manual and instructions for safe use is available after log in on www.selt.com Internal mechanisms in the head rail can move during incorrect transport of the product (in vertical position). Therefore one should check the placement if mechanisms in the head rail before commencing the installation. - Page 11 Rys 2 Img. 1 Put silencing cap on the auxiliary bracket. Standard head rail bracket Elastic head rail bracket Connect head rail bracket with main bracket. Fit the complete brackets to cover panel and secure tightly. Img. 2 DT-E 1.4: SUN PROTECTION SCREEN – VENETIAN BLINDS Z90 Issue 2 / April 2017 / EN page 11 / 58...
- Page 12 Install the brackets and cover panel and end caps if added to wall or niche with appropriate fixing system. Install tightly main brackets to the wall/ceiling. Img. 3 Check the level of installed cover panels and brackets, correct if necessary. Appropriate leveling of the product is necessary for its correct functioning.
- Page 13 Install cover panel with end caps if added. Img. 7 Img. 8 Guide rails types for Z90 Venetian Blind with cover panel Single guide rail Double guide rail (for modular installation) Single and double guide rail bracket types Type 2 Type 3 Type 1 standard Type 4...
- Page 14 Slide brackets to guide rails. Install brackets to guide rails by fixing the screw. Img. 9 Img. 10 Slide the guide rail on the slat pins. Img. 11 Set the vertical level of the guide rail axis Img. 12 DT-E 1.4: SUN PROTECTION SCREEN – VENETIAN BLINDS Z90 Issue 2 / April 2017 / EN page 14 / 58...
-
Page 15: Installation Of Venetian Blind Z90 With Cube And Oval Guide Rail (Self-Supporting Product)
Fasten the guide rail brackets to the base Img. 13 Measure correctly the guide rail axis, then secure the bracket. Img. 14 Install guide rail end caps 1.set screw Img. 15 After the installation is finished set the end positions and check the correct functioning of the blind. 4.5.2. - Page 16 Oval guide rail Cube guide rail Self-supporting bracket Manner of installation Slide the fixing element into guide rail channel. Loosely secure self-locking nut until resistance appears. Proper tightening should be performed with a wrench (10") and maximum 4 full turns (1440°). NOTE: bigger turn will result in tearing out the threaded stud! Measure and mark the spots for guide rail brackets installation.
- Page 17 Img. 4 Img. 3 Img. 6 Img. 5 Img. 8 Img. 7 Loosen cone shaped screws securing the bolts Img. 9 DT-E 1.4: SUN PROTECTION SCREEN – VENETIAN BLINDS Z90 Issue 2 / April 2017 / EN page 17 / 58...
- Page 18 Pull the bolt out. Img. 10 Slide the guide rails on brackets and secure the cone shaped screw. Img. 11, 12 and 13. Img. 11 Img. 12 Img. 13 . Img. 14 Check the vertical level of the guide rail Repeat points 6 and 7 to install the second guide rail.
- Page 19 Check the alignement of the installed guide rails. Img. 15 Connect head rail brackets to flat bars placed in the (brackets should be placed in the axis cassette of the cassette). Img. 16 Loosen the installation flat bar on the cassette side. Img.
- Page 20 Img. 19 Img. 20 Check the horizontal level of the cassette. It is necessary for correct functioning of the product. Img. 21 Install top end caps in the guide rails. Img. 22 Put the head rail with bundle into the guide rails so that the label „strona od okna”...
-
Page 21: Installation Of Venetian Blind Z90 With Cube And Oval Guide Rail - Group Installation
Img. 24 Connect the installation cable and open round 30 cm of the blind to facilitate the installation of the bundle to the cassette Img. 25 Install the head rail with bundle to open head rail brackets. Close the bracket and tighten the screws. Img. - Page 22 Img. 2 Img. 1 Img. 3 Install the bracket to facade with appropriate fixing system. Img. 4 Measure and mark the installation spot of the (Img. 5-6). second bracket Img. 5 DT-E 1.4: SUN PROTECTION SCREEN – VENETIAN BLINDS Z90 Issue 2 / April 2017 / EN page 22 / 58...
- Page 23 Img. 6 Install the second bracket Img. 7 Measure and mark the installation spot of the next bracket (img. 8), install the bracket (img. 7) Img. 8 Check the vertical level of the installed brackets, correct if necessary Img. 9 DT-E 1.4: SUN PROTECTION SCREEN –...
- Page 24 Measure and mark the installation place of the second guide rail (Img. 10-11). Img. 10 Img. 11 Install the next bracket (img. 12). Measurement and marking for the following brackets should be done similarly to the previous ones. Img. 12 10.
- Page 25 11. Check the vertical level of installed brackets. Img. 14 12. Loosen cone shaped screws securing the bolts and pull the bolts out. Img. 15 Img. 16 13. Slide the guide rails on bracket bolts (img. 17), settle the guide rail (img. 18) and with allen wrench tighten the cone shaped screws (img.
- Page 26 Img. 18 Img. 19 14. Check the level of installed guide rails. Img. 20 15. Loosen the installation flat bar in the cassette so that it can be slide on the guide rails. Img. 21 16. Install to the cassette elastic head rail brackets and guide rail brackets.
- Page 27 17. Put the cassette on guide rails. Img. 23 18. Check the vertical and horizontal level of the cassette. Img. 24-25 Img. 24 Img. 25 19. Tighten the fixing screws. Img. 26 DT-E 1.4: SUN PROTECTION SCREEN – VENETIAN BLINDS Z90 Issue 2 / April 2017 / EN page 27 / 58...
- Page 28 20. Install the middle guide rail. Img. 27 21. Insert the head rail with bundle to the guides (Img. 28 and 29) Img. 28 22. Put the head rail with bundle into the open brackets, so that the label „strona od okna” faces the window.
- Page 29 24. Install consecutive bundles to brackets. Img. 31 25. Slide the cover profile to external guides (Img. 32), and cut the excess. (Img. 33). Img. 32 Img. 33 26. Put the guide rails end caps (Img. 34) and secure them with allen wrench (Img. 35). Img.
-
Page 30: Concealed Guide Rail Installation
Img. 35 27. Install the revision cover. (Img. 36-37) Img. 36 Img. 37 Check if the brackets are installed in a secure manner – their movement apart can cause threat to people After finished installation check the correct functioning of the blind and set end positions according to the motor manual 4.5.4. - Page 31 Fig. 1. Concealed side guide system: 1 – Mounting profile, 2 – Concealed guide rail, 3 – Gasket, 4 – Plaster/ Insulation, 5 – Concrete/ Brick wall Guidelines for installation of mounting profile: Length of mounting profile equals total height of venetian blind minus 50 mm. ...
- Page 32 Fig. 2. Installation of mounting profile in window niche. Fig. 3. Positioning of the mounting profile in window niche: 1 – Mounting profile, 2 – Concealed guide rail, 3 – Gasket, 4 – Plaster/ Insulation, 5 – Concrete/ Wall. DT-E 1.4: SUN PROTECTION SCREEN – VENETIAN BLINDS Z90 Issue 2 / April 2017 / EN page 32 / 58...
- Page 33 Measurements are taken by the Ordering Party who is responsible for their correctness. In case of dimensional inconsistency of the ordered system that is caused by measurements quality, SELT Sp. z. o. o Company is not responsible for venetian blinds not being possible to be mounted correctly.
- Page 34 Before installation you must determine and mark location of the cover panel’s main brackets, so they don’t interfere with lifting mechanisms and with the motor. Initially fix the auxiliary bracket to the main bracket. Then put them against cover panel, adjust to proper length and tighten the screw.
- Page 35 Measure the distance from the bottom of head rail to the underneath of bottom bar (of the rolled up blind). Picture 4 From the guide rail cut off a length measured in Step 5. Follow the step for the second guide rail. ATTENTION: In the bottom part of guide rail the edges that guide the gasket are kneaded.
- Page 36 10. Loosen the screw in elastic bracket of head rail to easily open the lock in the bracket. 11. Insert the bundle in head rail bracket and secure the bracket. 12. Connect the motor to the power supply. Attention: The bundle should end at the same height as the mounted top part of the guide rail ends.
-
Page 37: Window Frame Guide Rail Installation
Guide rail profiles must be installed in parallel to each other in all planes. SELT Sp. z o.o. company is not responsible for incorrect operation of the blinds with guide rail if the substructure does not provide straight and parallel installation of guide rail profiles. - Page 38 Installation of Venetian Blind with window frame guide rail. Before commencing the installation of Venetian Blind it is necessary to measure and mark the placement of main brackets for cover panel in such place so that they do not collide afterwards with rolling mechanisms and motor. Join the main bracket with auxiliary bracket loosely.
- Page 39 Drill mounting holes in the guide rails according to the above description. NOTE: Guide rails can be delivered pre-drilled if agreed with advance. Preparation of mounting holes is a service subject to additional costs. Img. 4 Measure and mark mounting places for guide rail. Make installation holes for window frame guide rail.
- Page 40 13. Place guiding profile inside the guide rail according to img. 9 and fig. 8, profile should be aligned with the upper Edge of guide rail. Img. 9 NOTE: Pay particular attention so that during guiding profile installation it is not damaged by pins. Fig.
-
Page 41: Z90 With Under-Plaster Cassette Installation
Scheme of the system is presented by Fig. 10. Fig. 9. Guide rail for under-plaster cassette – elements Fig. 10. Venetian Blind Z90 BOX – with under-plaster cassette. DT-E 1.4: SUN PROTECTION SCREEN – VENETIAN BLINDS Z90 Issue 2 / April 2017 / EN... - Page 42 Fig. 11. Dimensions of Venetian Blind Z90 BOX – with under-plaster cassette. * - Variable dimension, usually 30 mm. Guidelines for under-plaster cassette installation: Length of the guiding profile installed in guide rails equals height of the system -50 mm.
- Page 43 Recommendations for installation of Venetian Blind with under-plaster cassette Fig. 12. Guide rail installation: a) – window frame installation b) – niche installation Instructions for under-plaster cassette installation: Under-plaster cassette is delivered without installation holes. They have to be done individually according to the below guidelines (Fig.
- Page 44 Fig. 13. Scheme of preparation of the installation holes in the under-plaster cassette. * - variable dimension, usually 30 mm. Fig. 14. Scheme of preparation of the installation holes in the guide rail profiles. Installation Measure and mark places for installation holes for the under-plaster cassette.
- Page 45 Install head rail brackets in the cassette. Fig. 16 Drill installation holes in guide rails according to Fig.14. NOTE: Guide rails can be delivered pre-drilled if agreed with advance. Preparation of mounting holes is a service subject to additional costs. Img.
- Page 46 10. Lift the bundle and install head rail in brackets. Pay attention so that the pins are introduced correctly into the guide rail. 11. Install head rail with closed bundle in bracket and secure the previously loosened screws. Img. 4 12.
- Page 47 14. Immobilise the ends of guiding profile with silicone installation glue or silicone hot glue Img. 7 NOTE: Make sure that the guiding profile is placed against guide rail end cap. Its upper part should freely protrude from the guide rail in the cassette. Fig.
-
Page 48: Electric Drive
Electrical connection and setup of the motors must be done in accordance with the manual of motor manufacturer. Manuals are added to the product as well as are available on motor manufacturer’s website and: www.selt.com → PRODUCTS → AUTOMATION Environmental conditions of increased threat: bathrooms and showers, kitchens, garages, cellars, saunas, rooms for domestic animals, operating theatres in hospitals, pump rooms, heat exchange rooms, spaces limited by conducing areas, campsites, open spaces, etc. -
Page 49: Manual Drive
The engine has a thermal switch, which turns off the drive after about 4 minutes of continuous work to protect against overheating. After turning off by the thermal protection appropriate time should pass before turning on again, depending on the type of engine and atmospheric conditions (about 16 minutes). -
Page 50: System Operation And Product Safety
SYSTEM OPERATION AND PRODUCT SAFETY 5.1. GENERAL SAFETY REQUIREMENTS During product transport, assembly and disassembly, operation, care and maintenance, suitable regulations of industrial safety and environmental protection should be observed, The product should be maintained and repaired solely by the trained and suitably qualified personnel, ... - Page 51 Centrally controlled products can activate automatically. Make sure no dangerous situation arises. SELT Sp. z o. o. shall not be responsible for damage due to improper use. Operating the system out of one’s sight can result in heavy injuries as well as system damage.
-
Page 52: Supervision Of Safe Product Use
5.4. SUPERVISION OF SAFE PRODUCT USE The Buyer should: in case safe product use depends on the conditions in which it is installed, submit the product to: preliminary check (after it has been assembled and before handing it over to operation), ... -
Page 53: System Use And Maintenance
SYSTEM USE AND MAINTENANCE 6.1. USING THE PRODUCT IN ACCORDANCE WITH ITS INTENDED USE The system should be used in accordance with its intended use determined by the manufacturer. If the system is used and modified in a manner different from the one described within this documentation, the system is used incorrectly. - Page 54 Products manufactured by SELT Sp. z o. o. do not require special maintenance treatment. Using the product in accordance with the manufacturer’s recommendations assures the user log-term and fault-free operation. Routine maintenance activities should be carried out on a maximally opened system.
-
Page 55: General Warranty Conditions
GENERAL WARRANTY CON DITIONS General warranty conditions are available on www.selt.com In case of no access to the SELT website, the warranty conditions can be obtained from the sales representative of SELT Sp. z o. o. 7.1. EXCLUSIONS FOR WARRA NTY Warranty does not cover: ... -
Page 56: Complaints / Technical Faults
notifications can be sent to the email address reklamacje@selt.com or directly to the sales representative Complaints / faults should be made on the ‘complaint notification form’ which can be found on the website: www.selt.com,... -
Page 57: Product Disassembly / Utilisation / Disposal
PRODUC T DISASSEMBLY / UTIL ISATION / DISPOSAL Improper system disassembly can result in severe injuries and system damage. System disassembly should be commissioned to a properly qualified assembly team or to a person suitably trained within industrial safety and with the knowledge concerning recovery. Disposal of worn electrical and electronic equipment After the end of product lifetime it must be disassembled and separate material must be segregated according to Regulation of the Minister of Environment of 9 December 2014 on waste catalogue –... -
Page 58: 10. Marking And Labelling The Product With The Ce Mark
10.1. PRODUCT COMPLIANCE W ITH THE CE STANDARD Products manufactured by SELT company meet the essential requirements of the standard introduced by the Polish Committee for Standardization as PN-EN 13659, which is confirmed by the manufacturer’s declaration of performance and marking the product with the CE mark.
Need help?
Do you have a question about the Venetian Blind Z90 and is the answer not in the manual?
Questions and answers