Table of Contents
Advertisement
Quick Links
Advertisement
Table of Contents

Related Manuals for AEG KPK742220M


Summary of Contents for AEG KPK742220M
- Page 1 KPE742220M User Manual Oven KPK742220M USER MANUAL...
-
Page 2: Table Of Contents
14. ENERGY EFFICIENCY..................... 39 FOR PERFECT RESULTS Thank you for choosing this AEG product. We have created it to give you impeccable performance for many years, with innovative technologies that help make life simpler - features you might not find on ordinary appliances. Please spend a few minutes reading to get the very best from it. - Page 3 ENGLISH manufacturer is not responsible for any injuries or damage that are the result of incorrect installation or usage. Always keep the instructions in a safe and accessible location for future reference. 1.1 Children and vulnerable people safety This appliance can be used by children aged from 8 •...
-
Page 4: Safety Instructions
Before carrying out any maintenance, disconnect the • appliance from the power supply. WARNING: Ensure that the appliance is switched off • before replacing the lamp to avoid the possibility of electric shock. Do not use the appliance before installing it in the •... - Page 5 ENGLISH to be replaced, this must be carried out by our Authorised Service Centre. Cabinet depth 550 (550) mm • Do not let mains cables touch or Height of the front of 455 mm come near the appliance door or the niche below the appliance, especially the appliance when it operates or the door is hot.
- Page 6 • Do not operate the appliance with appliance has cooled down wet hands or when it has contact with completely after use. water. 2.4 Care and cleaning • Do not apply pressure on the open door. WARNING! • Do not use the appliance as a work Risk of injury, fire, or damage surface or as a storage surface.
- Page 7 ENGLISH • Keep children away from the described are not harmful to humans, appliance while the Pyrolytic cleaning including children, or persons with operates. medical conditions. The appliance becomes very hot and 2.6 Internal lighting hot air is released from the front cooling vents.
-
Page 8: Product Description
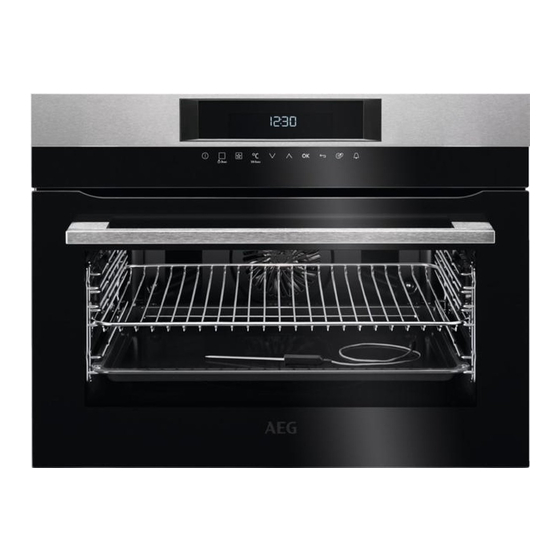
3. PRODUCT DESCRIPTION 3.1 General overview Control panel Electronic programmer Socket for the core temperature sensor Heating element Lamp Shelf support, removable Shelf positions 3.2 Accessories To bake and roast or as a pan to collect fat. Wire shelf Trivet For cookware, cake tins, roasts. -
Page 9: Control Panel
ENGLISH 4. CONTROL PANEL 4.1 Electronic programmer Use the sensor fields to operate the oven. Sensor Function Comment field Display Shows the current settings of the oven. ON / OFF To turn on and off the oven. Heating Functions Press the sensor field to choose the menu: Assis- or Assisted Cook- ted Cooking or Heating Functions. - Page 10 Sensor Function Comment field Time and addi- To set different functions. When a heating func- tional functions tion operates, press the sensor field to set the tim- er or the functions: Function Lock, Favourites, Heat + Hold, Set + Go. You can also change the settings of the core temperature sensor.
-
Page 11: Before First Use
ENGLISH Symbol Function Heat + Hold The function is on. 5. BEFORE FIRST USE 5.2 First Connection WARNING! Refer to Safety chapters. When you connect the oven to the mains or after the power cut, you have to set 5.1 Initial Cleaning the language, the display contrast, the display brightness and the time of the Remove all accessories and removable... - Page 12 Symbol / Menu Description Symbol / Menu Description item item When ON, the display Shows the software shows the current time version and configura- Time Indication Service when you deactivate tion. the appliance. Resets all settings to To set a function and factory settings.
- Page 13 ENGLISH 6.4 Specials Heating func- Application tion Heating func- Application tion To bake cakes with crispy bottom and to To keep food warm. preserve food. Bottom Heat Keep Warm This function is de- signed to save energy To preheat plates for during cooking.
-
Page 14: Clock Functions
5. Press to confirm. Do not put food in the oven 6. Set the temperature. when the Fast heat up function works. 7. Press to confirm. 6.6 Heat-up indicator To turn on the function, hold for 3 seconds. The heat-up indicator When you turn on a heating function, the alternates. -
Page 15: Automatic Programmes
ENGLISH 4. Press to confirm. 5. Press to confirm. When the time ends, a signal sounds. When the function ends, a signal sounds. The oven turns off. The display shows a 7.4 Time Extension message. 5. Press any symbol to stop the signal. The function: Time Extension makes the heating function continue after the end 7.3 Heat + Hold... - Page 16 There are two temperatures to be set: • the oven temperature (minimum 120 °C), • the food core temperature. CAUTION! Use only the food sensor supplied and the original replacement parts. Directions for the best results: • Ingredients should be at room temperature.
- Page 17 ENGLISH 3. Insert the tip of the food sensor 9. Touch any symbol to stop the signal. exactly in the centre of the casserole. 10. Remove the food sensor plug from The food sensor should be stabilized the socket and remove the dish from in one place during baking.
-
Page 18: Additional Functions
Small indentation at the top 2. Put the deep pan into the oven on increase safety. The the necessary shelf position. indentations are also anti-tip You can use the trivet to grill flat dishes devices. The high rim in large quantities and to toast. - Page 19 ENGLISH You can change the name of a When you turn off the oven, programme in the menu: Edit the function also turns off. Programme Name. 10.4 Set + Go Activating the programme The function lets you set a heating 1.
-
Page 20: Hints And Tips
10.6 Brightness of the display – if the oven is turned off and you set the function: Minute Minder. There are two modes of display When the function ends, the brightness: display goes back to the night brightness. • Night brightness - when the oven is turned off, the brightness of the 10.7 Cooling fan... - Page 21 ENGLISH 11.4 Tips on baking Baking results Possible cause Remedy The bottom of the cake The shelf position is incor- Put the cake on a lower shelf. is not baked sufficiently. rect. The cake sinks and be- The oven temperature is Next time set slightly lower oven comes soggy or streaky.
- Page 22 BAKING IN TINS (°C) (min) Cheesecake, use a deep pan Conventional 160 - 170 70 - 90 Cooking CAKE / PASTRIES / BREADS ON BAKING TRAYS Preheat the empty oven. (°C) (min) Plaited bread / Bread crown Conventional 170 - 190...
- Page 23 ENGLISH BISCUITS Use the second shelf position. (°C) (min) Short pastry biscuits True Fan Cooking 150 - 160 10 - 20 Short pastry / Pastry strips True Fan Cooking 20 - 35 Short pastry / Pastry strips, pre- Conventional Cook- 20 - 30 heat the empty oven Biscuits made of sponge cake...
- Page 24 Use the first shelf position. (°C) (min) Baguettes with melted True Fan Cooking 160 - 170 15 - 30 cheese Milk rice Conventional Cooking 180 - 200 40 - 60 Fish bakes Conventional Cooking 180 - 200 30 - 60...
- Page 25 ENGLISH 11.9 Roasting tables Use the first shelf position. BEEF (°C) (min) Pot roast 1 - 1.5 kg Conventional 120 - 150 Cooking Roast beef or fil- per cm of thick- Turbo Grilling 190 - 200 5 - 6 let, rare, preheat ness the empty oven Roast beef or fil-...
- Page 26 VEAL Use the function: Turbo Grilling. (kg) (°C) (min) Roast veal 160 - 180 120 - 150 Veal knuckle 1.5 - 2 160 - 180 120 - 150 LAMB Use the function: Turbo Grilling. (kg) (°C) (min) Lamb leg / Roast lamb 1 - 1.5...
- Page 27 ENGLISH POULTRY Use the function: Turbo Grilling. (kg) (°C) (min) Chicken 0.2 - 0.25 each piece 200 - 220 30 - 50 Chicken, half 0.4 - 0.5 each piece 190 - 210 35 - 50 Poultry, portions 1 - 1.5 190 - 210 50 - 70 Duck...
- Page 28 PIZZA BREAD Preheat the empty oven before Use the second shelf position. cooking. Use the second shelf position. (°C) (min) Baguette 200 - 220 35 - 45 Brioche 160 - 180 40 - 60 (°C) (min) Ciabatta 200 - 220 35 - 45...
- Page 29 ENGLISH GRILL Use the first shelf position. (°C) (min) 1st side 2nd side Roast beef, medium 210 - 230 30 - 40 30 - 40 Beef fillet, medium 20 - 30 20 - 30 Pork loin 210 - 230 30 - 40 30 - 40 Veal loin 210 - 230...
- Page 30 11.14 Frozen Foods Do not cover the food, as this can extend the defrost time. Remove the food packaging. Put the food on a plate. DEFROSTING Use the second shelf position. (°C) (min) Pizza, frozen 200 - 220 15 - 25...
- Page 31 ENGLISH (kg) (min) (min) Defrosting Further de- time frosting time Meat 100 - 140 20 - 30 Turn halfway through. Meat 90 - 120 20 - 30 Turn halfway through. Trout 0.15 25 - 35 10 - 15 Strawberries 30 - 40 10 - 20 Butter 0.25...
- Page 32 VEGETABLES VEGETABLES (min) (min) (min) (min) Cooking Continue to Cooking Continue to time until cook at 100 time until cook at 100 simmering °C simmering °C Carrots 50 - 60 5 - 10 Kohlrabi / 50 - 60 15 - 20...
- Page 33 ENGLISH BEEF Food core temperature (°C) Less Medium More Meatloaf PORK Food core temperature (°C) Less Medium More Ham / Roast Saddle chop / Pork loin, smoked / Pork loin, poached VEAL Food core temperature (°C) Less Medium More Roast veal Veal knuckle MUTTON / LAMB Food core temperature (°C)
- Page 34 POULTRY Food core temperature (°C) Less Medium More Chicken Duck, whole / half / Turkey, whole / breast Duck, breast FISH (SALMON, TROUT, Food core temperature (°C) ZANDER) Less Medium More Fish, whole / large / steamed / Fish, whole / large / roasted CASSEROLES - PRE- Food core temperature (°C)
-
Page 35: Care And Cleaning
ENGLISH Ramekins Pizza pan Baking dish Flan base tin Ceramic Dark, non-reflective Dark, non-reflective Dark, non-reflective 8 cm diameter, 28 cm diameter 26 cm diameter 28 cm diameter 5 cm height 11.20 Moist Fan Baking Use the first shelf position. Use the first shelf position. - Page 36 Clean the oven cavity after each use. Fat accumulation or other food re- mains may cause fire. The risk is higher for the grill pan. Dry the cavity with a soft cloth after each use. Everyday Use Clean all accessories after each use and let them dry. Use a soft cloth with warm water and a cleaning agent.
- Page 37 ENGLISH and push inwards to release the clip Intense For a thor- seal. ough clean- ing: 2 h 30 min. 6. Press When the cleaning starts, the oven door is locked and the lamp does not work. To stop the cleaning before it is completed, turn off the oven.
-
Page 38: Troubleshooting
2. Clean the glass cover. 3. Replace the lamp with a suitable 300 °C heat-resistant lamp. 4. Install the glass cover. 13. TROUBLESHOOTING WARNING! Refer to Safety chapters. 13.1 What to do if... Problem Possible cause Remedy You cannot activate or oper-... -
Page 39: Energy Efficiency
ENGLISH Problem Possible cause Remedy The display shows F111. The plug of the core tem- Put the plug of the core tem- perature sensor is not cor- perature sensor as far as rectly installed into the sock- possible into the socket. The display shows an error There is an electrical fault. - Page 40 KPE742220M Model identification KPK742220M Energy Efficiency Index 80.8 Energy efficiency class Energy consumption with a standard load, conven- 0.89 kWh/cycle tional mode Energy consumption with a standard load, fan-forced 0.59 kWh/cycle mode Number of cavities Heat source Electricity Volume...
- Page 41 ENGLISH action will reduce the expected energy savings. 15. ENVIRONMENTAL CONCERNS appliances marked with the symbol Recycle materials with the symbol with the household waste. Return the Put the packaging in relevant containers product to your local recycling facility or to recycle it.
- Page 42 www.aeg.com...
- Page 43 ENGLISH...
- Page 44 www.aeg.com/shop...
Need help?
Do you have a question about the KPK742220M and is the answer not in the manual?
Questions and answers