Xylem Bell & Gossett e-1510 Series Instruction Manual
Hide thumbs
Also See for Bell & Gossett e-1510 Series:
- Instruction manual (2 pages) ,
- Quick start manual (2 pages)
Table of Contents
Advertisement
Advertisement
Table of Contents

Related Manuals for Xylem Bell & Gossett e-1510 Series


Summary of Contents for Xylem Bell & Gossett e-1510 Series
- Page 1 INSTRUCTION MANUAL P2001406 Rev E Series e-1510...
-
Page 3: Table Of Contents
Table of Contents Table of Contents 1 Introduction and Safety......................3 1.1 Introduction.......................... 3 1.2 Safety............................. 3 1.2.1 Safety message levels....................3 1.2.2 Safety instruction decals....................4 1.2.3 User safety........................5 1.2.4 Protecting the environment..................7 2 Transportation and Storage...................... 8 2.1 Examine the delivery......................8 2.1.1 Examine the package.................... - Page 4 Table of Contents 6.2.2 Drain the pump......................25 6.2.3 Remove the hex coupling guard................25 6.2.4 Remove the coupling....................26 6.2.5 Remove the bearing frame and impeller assembly ..........26 6.2.6 Remove the impeller....................27 6.2.7 Remove the mechanical seal (e-1510 and e-1510-F)..........27 6.2.8 Remove the seal or packing rings (e-1510-S and e-1510-PF).......27 6.3 Pre-assembly inspections....................
-
Page 5: Introduction And Safety
This includes any modification to the equipment or use of parts not provided by Xylem. If there is a question regarding the intended use of the equipment, please contact a Xylem representative before proceeding. -
Page 6: Safety Instruction Decals
1 Introduction and Safety Safety message level Indication A hazardous situation which, if not avoided, could result WARNING: in death or serious injury A hazardous situation which, if not avoided, could result CAUTION: in minor or moderate injury The possibility of electrical risks if instructions are not Electrical Hazard: followed in a proper manner •... -
Page 7: User Safety
1 Introduction and Safety DO NOT RUN PUMP DRY, SEAL DAMAGE MAY OCCUR. INSPECT PUMP SEAL REGULARLY FOR LEAKS, REPLACE AS REQUIRED. LUBRICATION REQUIREMENTS CONSULT MANUALS. PUMP: POLYUREA-BASED GREASE FAILURE TO FOLLOW INSTRUCTIONS COULD RESULT IN INJURY OR PROPERTY DAMAGE. P70642 P2002458 (2) Required... - Page 8 1 Introduction and Safety NOTICE: Never operate a unit unless safety devices are installed. Also see specific information about safety devices in other chapters of this manual. Electrical connections Electrical connections must be made by certified electricians in compliance with all international, national, state, and local regulations.
-
Page 9: Protecting The Environment
• Clean-up of spills Exceptional sites CAUTION: Radiation Hazard Do NOT send the product to Xylem if it has been exposed to nuclear radiation, unless Xylem has been informed and appropriate actions have been agreed upon. Recycling guidelines Always follow local laws and regulations regarding recycling. -
Page 10: Transportation And Storage
2 Transportation and Storage 2 Transportation and Storage 2.1 Examine the delivery 2.1.1 Examine the package 1. Examine the package for damaged or missing items upon delivery. 2. Record any damaged or missing items on the receipt and freight bill. 3. -
Page 11: Storage Requirements
2 Transportation and Storage Pump type Lifting method A base-mounted pump. Lifting the pump less motor or the pump, motor, & baseplate should be done by using lifting lugs provided on the baseplate, or by utilizing a forklift under the entire unit. -
Page 12: Product Description
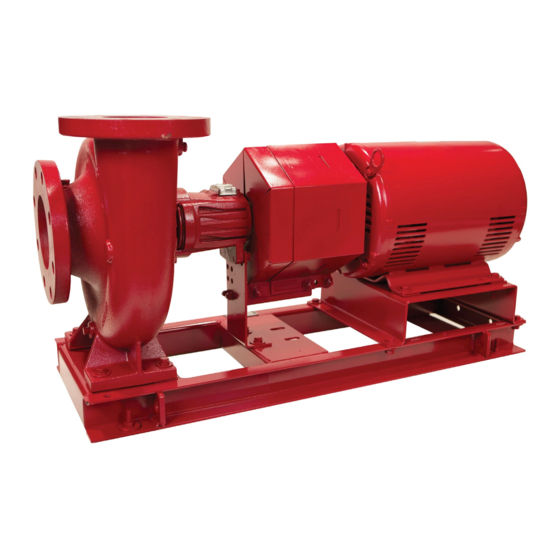
3 Product Description 3 Product Description 3.1 General description Description The pump is a centrifugal, frame-mounted pump. The following pump features make it easy to install, operate, and service: • High efficiency • Rugged stainless steel-fitted construction • Foot-mounted volute with back pullout bearing frame •... - Page 13 3 Product Description 1. An external flush is required on low pressure systems that contain a high concentration of abrasives. 2. Use packing on open or closed systems which require a large amount of makeup water, as well as systems that are subjected to a wide variety of chemical conditions and solids buildup.
-
Page 14: Installation
NOTICE: Supervision by an authorized Xylem representative is recommended to ensure proper installation. Failure to do so may result in equipment damage or decreased performance. Evaluate the installation in order to determine that the Net Positive Suction Head Available... -
Page 15: Foundation Requirements
4 Installation 4.1.2 Foundation requirements Requirements • The foundation must be able to absorb any type of vibration and form a permanent, rigid support for the unit. • The foundation must weigh at least 2-1/2 times the weight of the pump unit. •... -
Page 16: Pump Insulation Checklist
4 Installation Check Explanation/comment Checked Check that the suction and discharge pipes are This eliminates pipe strain on the pump . supported independently by use of pipe hangers near the pump . Check that there is a strong, rigid support for the As a rule, ordinary wire or band hangers are not suction and discharge lines. -
Page 17: Typical Installation
4 Installation 4.1.5 Typical installation 1. Expansion tank ® 2. B&G Rolairtrol air separator 3. Supply to system 4. TPV Tank Purge Valve 5. B&G Triple Duty ® valve 6. B&G Series e-1510 Pump 7. B&G Suction Diffuser 8. Isolation valve 9. -
Page 18: Level The Base On A Concrete Foundation
4 Installation 1. Mount and fasten the pump on the baseplate. Use applicable bolts. Center pump on baseplate. 2. Mount the driver on the baseplate. Use applicable bolts and hand tighten. 3. Install the coupling. See the installation instructions from the coupling manufacturer. 4.3 Level the base on a concrete foundation Before leveling and grouting the base, perform an initial alignment. -
Page 19: Pump-To-Driver Alignment
4 Installation 4.5 Pump-to-driver alignment Precautions WARNING: • Follow shaft alignment procedures in order to prevent catastrophic failure of drive components or unintended contact of rotating parts. Follow the coupling installation and operation procedures from the coupling manufacturer. • Always disconnect and lock out power to the driver before you perform any installation or maintenance tasks. - Page 20 4 Installation NOTICE: • Do not rotate the coupler to make adjustments. This may result in equipment damage. • Do not move or shim the driver unless you need to make adjustments. This may result in decreased performance. Make sure you have the following before you start this procedure: •...
-
Page 21: Additional Alignment Instructions
4 Installation 1. Amount of Parallel Misalignment 2. Straight Edge Figure 4: Example of parallel misalignment c) Move or shim the drive unit, if necessary, until the permitted reading value is obtained. When the procedure is complete, both the angular and parallel alignment must meet the permitted tolerances. -
Page 22: Commissioning, Startup, Operation, And Shutdown
5 Commissioning, Startup, Operation, and Shutdown 5 Commissioning, Startup, Operation, and Shutdown 5.1 Preparation for startup WARNING: • Failure to follow these precautions before you start the unit will lead to serious personal injury and equipment failure. • Do not run the pump dry. •... -
Page 23: Start The Pump
5 Commissioning, Startup, Operation, and Shutdown 5.2 Start the pump CAUTION: • Immediately observe the pressure gauges. If discharge pressure is not quickly attained, stop the driver, reprime, and attempt to restart the pump. • Observe the pump for vibration levels, bearing temperature, and excessive noise. If normal levels are exceeded, shut down the pump and resolve the issue. -
Page 24: Shut Down The Pump
5 Commissioning, Startup, Operation, and Shutdown NOTICE: • Avoid increased radial load. Failure to do so can cause stress on the shaft and bearings. • Avoid heat build-up. Failure to do so can cause rotating parts to score or seize. •... - Page 25 5 Commissioning, Startup, Operation, and Shutdown temperatures in the range of 32°F to 190°F (0°C to 88°C), average leakage rates of 60 to 80 drops per minute are recommended. However, each individual pump and installation has unique operating conditions that result in widely-variable leakage rate requirements. Maximum fluid temperature At fluid operating temperatures near the upper limit of 190°F (88°C), the maximum temperature rise of the leakage is important.
-
Page 26: Maintenance
6 Maintenance 6 Maintenance 6.1 Bearing maintenance Bearing lubrication schedule Type of bearing First lubrication, First lubrication, Lubrication interval, pump, polyurea-based grease, assembled pumps replacement bearings operating hours and replacement bearing frames Grease- Not applicable, Hand pack bearings • 3600 hours, 2 pole lubricated lubricated before before pressing on the... -
Page 27: Disassembly
6 Maintenance Specifications — grease types Polyurea-based greases Lithium-based greases, NLGI 2 Pumps built on or after Dec 1, 2014 use Polyurea-based Pumps built before Dec 1, 2014 were built with Lithium- greases. See date code label and lubrication label on based greases, NLGI 2, and do not have lubrication label pump or bearing frame indicating polyurea-base grease on pump or bearing frame indicating pump grease type... -
Page 28: Remove The Coupling
6 Maintenance Do not spread the outer and inner guards more than necessary to remove the guard. It could alter their fit and appearance. 3. Remove the capscrew that holds the inner guard to the support bracket. 4. Spread the inner guard apart and pull it over the coupling. 1. -
Page 29: Remove The Impeller
6 Maintenance WARNING: Make certain that the internal pressure of the pump is relieved before you continue. Failure to follow these instructions could result in serious personal injury or death, or property damage. 5. Remove the seal flush piping if it is used. 6. -
Page 30: Replacement Guidelines
When it is necessary to reduce the pump flow rate and generated head by trimming the impeller diameter, the following guidelines apply for stainless steel impellers: • Review the pump hydraulic selection data and consult your local Xylem representative to select the proper reduced diameter. -
Page 31: Reassembly
6 Maintenance • Recommended rough cut feed rate per revolution is 0.008 in. (0.20 mm) and depth of cut is 0.050 in (1.27 mm). • Recommended finish cut feed rate per revolution is 0.015 in. (0.38 mm) and depth of cut is 0.010 in (0.25 mm). - Page 32 6 Maintenance 1. Impeller 2. Vent Plug 3. Volute 4. Volute Gasket 5. Coverplate 6. Seal Assembly 7. Bearing Frame 8. Shaft 9. Support Foot 10.Support Foot Capscrews 11.Slinger 12.Bearing Frame Capscrews 13.Shaft Sleeve 14.Impeller Key 15.Impeller Washer 16.Impeller Lock Washer 17.Drain Plug 18.Impeller Capscrew or Nut 6.4.1.2 Assemble the single mechanical seal (e-1510-S)
-
Page 33: Impeller Installation
6 Maintenance 1. O-ring 2. Coverplate 3. For 1-1/4 in. seal: 1-13/32 in. (3.571 cm) 4. For 1-5/8 in. seal and 2-2/3 in. seal; 1-1/4 in. (3.175 cm) 5. Seal locking collar 6. Seal cap bolt 7. Seal cap 8. O-ring 9. -
Page 34: Assemble The Packed Stuffing Box (E-1510-Pf)
6 Maintenance 6.4.3 Assemble the packed stuffing box (e-1510-PF) 1. Impeller 2. Volute 3. Volute Gasket 4. Coverplate 5. Coverplate Capscrews 6. Flushing Tube 7. Lantern Ring 8. Packing 9. Packing Gland 10.Bearing Frame 11.Shaft 12.Slinger 13.Shaft Sleeve 14.Bracket 15.Impeller Key 16.Impeller Washer 17.Volute Capscrews 18.Impeller Lock Washer... -
Page 35: Install The Hex Coupling Guard
6 Maintenance 4. Install a flush piping if it is used. 5. Install the support foot capscrews and tighten them according to the Capscrew torque values table. 6. Install and align the coupling. 7. Install the drain plug and close the drain valve. 6.4.5 Install the hex coupling guard 1. -
Page 36: Dealer Servicing
6 Maintenance Size Turns past finger tight Approximate torque 1/2 in NPT 1.5 to 3 54 (73) 6.4.7 Dealer servicing If trouble occurs that cannot be rectified, contact your local sales and service representative and be prepared to provide this information: 1. -
Page 37: Product Warranty
7 Product warranty 7 Product warranty Commercial warranty Warranty. For goods sold to commercial buyers, Seller warrants the goods sold to Buyer hereunder (with the exception of membranes, seals, gaskets, elastomer materials, coatings and other "wear parts" or consumables all of which are not warranted except as otherwise provided in the quotation or sales form) will be (i) be built in accordance with the specifications referred to in the quotation or sales form, if such specifications are expressly made a part of this Agreement, and (ii) free from defects in material and... - Page 38 7 Product warranty Limited consumer warranty Warranty. For goods sold for personal, family or household purposes, Seller warrants the goods purchased hereunder (with the exception of membranes, seals, gaskets, elastomer materials, coatings and other "wear parts" or consumables all of which are not warranted except as otherwise provided in the quotation or sales form) will be free from defects in material and workmanship for a period of one (1) year from the date of installation or eighteen (18) months from the product date code, whichever shall occur first, unless a...
- Page 39 7 Product warranty To make a warranty claim, check first with the dealer from whom you purchased the product or visit www.xyleminc.com for the name and location of the nearest dealer providing warranty service. Series e-1510 INSTRUCTION MANUAL...
- Page 40 The original instruction is in English. All non-English instructions are translations of the original instruction. Tel: (847) 966–3700 Fax: (847) 965–8379 © 2019 Xylem Inc www.xylem.com/bellgossett Bell & Gossett is a trademark of Xylem Inc or one of its subsidiaries. P2001406_E_en-US_2019-02_IOM.e1510...
Need help?
Do you have a question about the Bell & Gossett e-1510 Series and is the answer not in the manual?
Questions and answers