Table of Contents
Advertisement
Operating Instructions
Built in Oven
Please read this instruction manual carefully before using the oven.
This will ensure that you know the important safety information and the
correct operation of the oven.
Please keep this manual in a easily accessible place and refer to it
anytime. Please transfer this manual to new owner if you sell the oven.
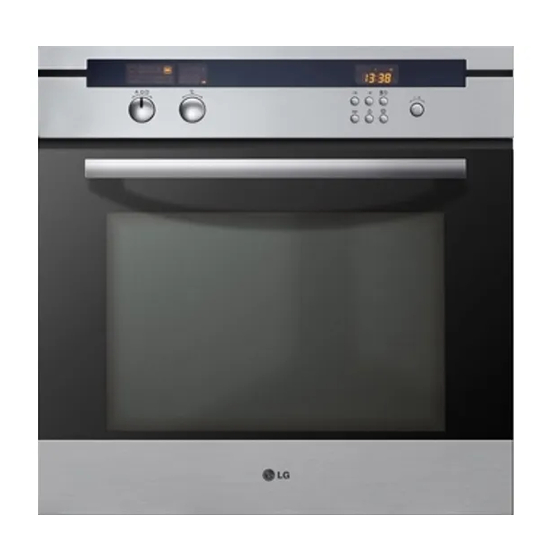
ES551SP
MFL30298505
www.lg.com
Advertisement
Table of Contents

Related Manuals for LG ES551SP


Summary of Contents for LG ES551SP
- Page 1 This will ensure that you know the important safety information and the correct operation of the oven. Please keep this manual in a easily accessible place and refer to it anytime. Please transfer this manual to new owner if you sell the oven. ES551SP www.lg.com MFL30298505...
-
Page 2: Table Of Contents
Contents Safety ................4~8 Description of the feature ..........9 Control panel ..............10~11 Accessories ..............12~13 Telescopic runners (Feature not available in all countries.) ..14~15 Setting the clock ............. 16 Prior cleaning ..............17 Operating the oven ............18 Oven functions .............. - Page 3 Grilling ................48 Grilling table ..............49 Defrosting ................ 50 Yogurt ................51 Cleaning and care ............52~55 Using the self cleaning function ........56~57 Oven light ................. 58~60 Oven door ................ 61~67 What should I do if… ............68~71...
-
Page 4: Safety
• Repairs of the appliance should be carried out by a licensed technician only. Wrong repairs may result in considerable danger. If you need repairs, contact an LG Service Center or your dealer. • If the supply cord is defective, it must be replaced by a special cord or assembly available from manufacturer or substance or its service agent. - Page 5 • Rating plate is located on the left side of door or on the back cover. • The power supply of the appliance should be turned off when it is being repaired or cleaned. • Be careful in connecting electrical appliances to sockets near to this appliance.
- Page 6 Safety Safety during Operation • This oven has been designed only for the cooking of household foods and for Domestic use. • When in use, the oven interior surfaces become very hot! Care should be taken to avoid touching heating elements inside the oven.
- Page 7 • Children should be kept at a safe distance when the oven operates. • Frozen foods such as pizzas should be cooked on the wire grill. If the Baking tray is used, it may become deformed due to the great difference in temperature. •...
- Page 8 Safety Disposal Packaging material • Your new oven has been correctly packaged for transportation. Remove all of the packaging material before putting the appliance into use. • The packaging material can be completely recycled. You can obtain addresses for environmentally-friendly disposal operations from your local authority.
-
Page 9: Description Of The Feature
Description of the Feature Structure Control panel Oven light Top heating elements Air outlet filter Level 5 Level 4 Door seal Oven levels Level 3 Rear wall heating Level 2 element Level 1 Fat Filter Side runner Oven light Rating plate Full glass door Door handle... -
Page 10: Control Panel
Control Panel 1. Function display 2. Temperature display 3. Function selector 4. Temperature selector... - Page 11 10 11 5. Time display 6. Cook time button 7. End time button 8. Clock button 9. Timer button 10. Enter button 11. Oven light button 12. Control dial knob...
-
Page 12: Accessories
Accessories Wire grill For dishes, cake tins, roasting and grilling trays. Baking tray For cakes and biscuits. Deep pan For roasting or collecting meat juices or fat. Grill rack For fatty meat (for positioning in the Deep pan). For grilling and/or roasting, we recommend using the grill/roast system provided. - Page 13 The baking tray,deep pan and wire grill should be inserted correctly into side runners. When taking out the cooked foods from the oven, be careful of the Baking tray hot utensil and cooking. Example: Deep pan Level 1: Deep pan gap 2cm Level 4: Baking tray Note:...
-
Page 14: Telescopic Runners (Feature Not Available In All Countries.)
Telescopic Runners(Feature not avai l a bl e i n al l countri e s. ) Attaching the telescopic runners When purchasing for the first time, attach the telescopic runners as following procedures. 1. Put the inserting bar of the telescopic slide into the hole. - Page 15 3. Trays and shelves must be placed on the telescopic slide arms with care so as to avoid any accidental tipping over. To prevent this, place trays and shelves on the telescopic slide arms as shown in the illustration below, so that the securing pins on the slide arm catch the tray or shelf to prevent any slipping.
-
Page 16: Setting The Clock
Setting the Clock The oven only operates when the clock has been set. <0> flash on the time display when the appliance is first connected, or after a power cut. Turn the control dial knob to Press the clock button( set hour of current time. -
Page 17: Prior Cleaning
Prior Cleaning You should clean the oven thoroughly before using for the first time. Important: do not use sharp or abrasive cleaning materials! These could damage the oven surface. For ovens with metal fronts, use commercially available cleaning agents. To clean the oven 1. -
Page 18: Operating The Oven
Operating the Oven The Electronic Oven Control Display Field Conventional Convection Bottom Heat Heat Convection 3D Hot Air Grill *Small Self Grill Cleaning *Large Defrost Self Grill Cleaning High Useful Guide • After setting a function, the oven automatically starts after 8 seconds. -
Page 19: Oven Functions
Oven Functions The following functions are available for this oven: Conventional Heat Suggested temperature: 190°C For baking and roasting on one level. The top and bottom heaters are in operation. 3D Hot Air Suggested temperature: 150°C For baking on up to two levels at the same time. Set the oven temperature 20-40°C lower than with the top/bottom function.The top, bottom and rear heaters are in operation and in addition the fan is turned on. - Page 20 Oven Functions Large Grill (1, 2, 3) (Radiant Grill Large Area) For grilling flat food in large quantities, such as steaks, schnitzel, fish or for toasting. Both top heaters and grill are in operation. Small Grill (1, 2, 3) (Radiant Grill Small Area) For grilling flat food in the middle of the tray, such as steaks, schnitzel, fish or toast.
-
Page 21: Operation
Operation Changing the Oven Function Turn the function selector The symbol for the selected knob to select the desired function appears in the cooking function. function display. A suggested temperature appears in the temperature display. The symbol ( ) will blink. (example: conventional heat) After 8 seconds elapses... -
Page 22: Changing The Oven Temperature
Operation Changing the Oven Temperature Turn the function selector Turn the temperature knob to select desired cook selector knob to select function. desired cooking temperature. (example: Conventional (example: 205°C) heat) The setting range can be After 8 seconds elapses adjusted by 5°C increments. without pressing any button, the oven will start on the selected temperature. -
Page 23: Switching Off The Oven
Switching off the Oven To switch off the oven, turn the function selector knob to the “O” position. Cooling fan When the oven is switched on, the fan comes on automatically to keep the oven surfaces cool. Although the oven is switched off, the fan will continue running to cool the appliance down, and then switches itself off. -
Page 24: Maximum Operation Times For Safety
Operation Maximum operation times for safety • If a cooking time is not entered, the oven will turn off after a predetermined time according to the guide below. Max. cut-out times for each temperature: Under 100°C after 16 hours From 100°C up to 240°C after 8 hours From 240°C to 300°C... -
Page 25: Clock Functions
Clock Functions End time Oven light Child safety Cook time Hour Kitchen Minute timer Clock Weight Kitchen Timer To set a kitchen timer. A signal sounds after the time has elapsed. This function does not interfere the operation of the oven. Cook time To set how long the oven is to be in use. -
Page 26: Kitchen Timer
Operation Kitchen timer Press the timer button( Turn the control dial knob to once. set desired time. (example 5 minutes) Press the timer button( to start the kitchen timer. When the set time has elapsed an audible signal sounds. * To turn off the kitchen timer: press the timer button. -
Page 27: Cook Time
Cook time Select the desired oven Press the cook time button. function and temperature. (See also section “Changing the oven function and temperature) Note: If there is no further entry on the control panel for 8 seconds, the oven will start on the temperature indicated. -
Page 28: End Time
Operation End time Select the desired oven Press the end time button function and temperature. (example: current time is 13:30) The current time’s hour digit ( 1 3 ) will blink. Turn the control dial knob to Press the end time button set desired hour (14:40). - Page 29 Turn the control dial knob to Press the end time button to set desired minute (14:40). start the oven. The oven will start promptly. The operating cooking time will count down in the time display. When the set time has elapsed, an audible signal sounds and the oven switches itself off.
-
Page 30: Combining The Cook Time And End Time Functions
Operation Combining the cook time and end time functions The cook time ( ) and end time ( ) functions can be combined, to switch the oven on or off automatically at a later time. Select the desired oven Using cook time button( function and temperature. - Page 31 The oven will start cooking ahead of 60 minutes before the end time (12:05). When the set cooking time (60 minutes) has elapsed, an audible signal sounds and the oven switches itself off, the current time appears in the time display.
-
Page 32: Adjusting The Clock Time
Operation Adjusting the clock time Turn the function selector Turn the control dial knob to knob to the “O” point. set hour of the current time. (example: current time is (example: desired new 12:10) current time is 11:20) To set the current time, press the clock button twice. -
Page 33: Child Safety Function
Child Safety Function The oven is fitted with a child safety function. When the child safety function is engaged, the oven cannot be switched on. Activating the child safety function. 1. Press and hold the timer and enter button at the same time for around 5 seconds, until appears on the display field. -
Page 34: Auto Cook
Operation Auto Cook Set the function selector to Turn the control dial knob to “A”. select a desired cook number. Note: Each number indicates a cooking name. Please refer to the auto cooking table on the next page. Press the enter button to set After 8 seconds, the oven weight and turn the control automatically start. - Page 35 Note: During auto cooking, you can further add or subtract the cooking time than first set time with the control dial knob for good cooking performane. Auto cooking function allows you to cook 10 menus of your favorite foods without selecting cooking function, temperature and times. For the best results, follow the instructions.
-
Page 36: Auto Cooking Table
Auto Cooking Table Menu Category Weight limit Utensil Food Temp. Roast beef 1.0~2.5 kg Deep pan Refrigerated Roast pork 1.0~2.5 kg Wire grill + Refrigerated heat proof glass dish with cover Chicken, 1.0~2.0 kg Deep pan Refrigerated whole + Grill rack Chicken, legs 0.6~1.8 kg Deep pan... - Page 37 Oven level, Instructions from bottom Brush the beef with oil or melted butter. Place the beef on Deep pan in the oven. After cooking, season as desired and let stand covered with foil for 10 minutes out of the oven. Use the generated juice for gravy or sauce.
- Page 38 Auto Cooking Table Menu Category Weight limit Utensil Food Temp. French fries, 0.25~0.75 kg Baking tray Frozen frozen Hamburgers 0.25~1.5 kg Deep pan + Refrigerated Grill rack Grilled fish, 0.6~1.2 kg Deep pan Refrigerated whole + Grill rack Pizza, frozen 0.3~0.9 kg Wire grill Frozen...
- Page 39 Oven level, Instructions from bottom Spread frozen potato products out on Baking tray. For the best results, cook in a single layer. Place Baking tray in the oven. When the oven beeps, turn the food over. After cooking, season with salt or as desired.
-
Page 40: Baking
Baking Use either the Conventional Heat( ) or 3D Hot Air( ) function. Oven levels • At Conventional Heat( ), baking is only possible on one tray at a time. • At 3D Hot Air( ), baking of biscuits and cookies is possible on two baking trays at the same time. - Page 41 Tips: • When baking cakes in tins, place the tin in the middle of the wire grill. • Before baking the cakes or biscuits, remove the fat filter from the front of the fan for even cooking. • You can adjust the cooking times, temperatures and oven level according to conventional experiences, because these recommendations in the baking table may not cover various types of the cookings.
-
Page 42: Baking Table
Baking Table Baking on one level Conventional Heat ( Oven level, Temperature Time, Recipe type Dish from bottom °C minutes Light fruit cake 20 cm tin 70-80 Fruit crumble glass dish 35-45 Jam tarts* 12 hole bun tin 15-20 Pizza** pizza pan 18-24 Tarts**... - Page 43 3D Hot Air ( Oven level, Temperature Time, Recipe type Dish from bottom °C minutes Meringues deep pan 20-40 Jacket deep pan 60-70 Potatoes Bread rolls baking tray 25-30 Swiss roll swiss roll tin 18-22 Scones baking tray 18-22 Apple pie* 20 cm tin 40-50 Plain bread...
- Page 44 Baking Table 3D Hot Air ( Baking on more than one level Oven level, Temperature Time, Recipe type Dish from bottom °C minutes Victoria 20 cm tins 30-40 sandwich Scones* baking tray+ 20-30 deep pan Jacket wire grill + 60-90 Potatoes deep pan Biscuits...
- Page 45 Tips on Baking Baking Results Possible Cause Remedy The cake is not Wrong oven level Place cake further in or, browned enough Place the shelf at a at the bottom different level The cake sinks Oven temperature Use a slightly lower setting (becomes soggy, too high lumpy, streaky)
-
Page 46: Roasting
Roasting Use either the Convection Grill ( ) function. Roasting cookwares • Cookwares for roasting are heat-resistant up to 300°C. • Select the suitable cookwares in accordance with the manufacturer’s instructions. • Suitable cookwares may be made from heat-resistant glass, ceramic, enamelled steel, cast-iron, pressed aluminium materials. -
Page 47: Roasting Table
Roasting Table Convection Grill ( Food Oven level, Temperature Cooking time from bottom °C min per 500g Beef rare 220-240 15+15 Beef medium 210-230 15+20 Beef well done 200-220 20+25 Beef fillet 210-230 15+20 Lamb medium 170-190 25+25 Lamb well done 150-170 30+30 Pork... -
Page 48: Grilling
Grilling To perform an effective grilling, select either the Small grill ( Large grill ( ) function. Tip: If the oven is cooled down, the 3~5 minutes pre-heating makes a good cooking result. Oven levels • You can use level 5 or 4 according to the height of foods. For speedy cooking, the level 5 is effective. -
Page 49: Grilling Table
Grilling Table Food Oven level, Function Cooking time from bottom min per 500g Meat steaks, bacon Large grill 3 12-22 Sausages and Fish fingers Large grill 3 15-20 Fish Large grill 3 10-20 Toast, 4 pieces Large grill 3 Toast, 9 pieces Large grill 3... -
Page 50: Defrosting
Defrosting Use the Defrost function ( Oven levels • According to the quantity of foods, place the wire grill on the level 1 or 2. Defrosting dishes • Unpack the food and set it on a dish on the wire grill. Tip: These defrosting times are only recommendations, you can add or subtract defrosting times according to the quantity of foods. -
Page 51: Yogurt
Yogurt How to make Yogurt Use the Conventional heat ( ) function. • Pour a 1000ml milk into a proper heat-resistant bowl with cover. • Boil it to proper temperature(up to 60-70°C) and then cool down to about 40°C. • Add 150ml natural yogurt into the bowl and stir well. •... -
Page 52: Cleaning And Care
Cleaning and Care WARNING: • Do not use high-pressure water cleaners or steam jet cleaners for cleaning the oven. Oven exterior • For cleaning both, the interior and exterior of the oven, use a cloth with a mild cleaning agent or warm soapy water. •... - Page 53 Accessories Wash all cookwares after each use and dry with kitchen towel. To clean easily, soak them in warm soapy water for about 30 minutes.
- Page 54 Cleaning and Care Side Runners To clean the interior of the oven, the both side runners can be removed. Detaching side runners 1. Remove the screw holding each of the shelf supports in place. 2. Take out the shelf supports.
- Page 55 Attaching the side runners Note: When using the oven for the first time, attach the side runners by the following method. 1. Put the inserting bar of the shelf support into the hole. 2. Slip the recesses in the shelf supports over the screw heads.
-
Page 56: Using The Self Cleaning Function
Using the Self Cleaning Function WARNING! During this process the oven becomes very hot. Small children must be kept at a safe distance. Attention: Before carrying out the self cleaning function, all *accessory parts and the fat filter must be taken out of the oven. Important: If you use the baking pan available as special accessories, these must be removed before carrying out the Self Cleaning function. - Page 57 Important: The oven light turns on for 20 seconds only first as soon as the self-cleaning starts. For safety during self-cleaning function, the door is locked at approx 320°C and unlocked at approx 300°C automatically. During self-cleaning (Pyrolysis), if the door is opened, all heating elements will be quited.
-
Page 58: Oven Light
Oven Light WARNING! Before replacing the oven light, disconnect the oven from the main supply, by either removing the fuse or switching off circuit breaker. Tip: To protect the oven light and the glass, spread a towel on the bottom of the oven in advance. Replacing the upper oven light. - Page 59 3. Replace the failed oven light to new one (12V, 20W Halogen oven light).
- Page 60 Oven Light Replacing the left side oven light. 1. Remove the 4 screws with a screw driver. 2. Take off the glass assembly. 3. Replace the failed oven light to new one (12V, 20W Halogen oven light). 4. Fasten the screws with a screw driver.
-
Page 61: Oven Door
Oven Door The oven door can be taken off from the oven for cleaning. The separating procedures of door for cleaning Step. 1 Insert the separating pins into the holes on both hinges. Note: these pins are attached in the accessory box. - Page 62 Oven Door Step. 2 With both hands, grasp the middle sides of the oven door. Step. 3 Rotate the door upward by approx. 15 degree and lift its hinge area vertically upwards about 2 mm. Step 3...
- Page 63 Step. 4 Rotate the door now by approx. 80 degree again until the hinges can be taken out completely from the hinge holes. WARNING: The separating pins should not be removed from the hinges of the disassembled door. Attempting to do so may result in hand injuries.
- Page 64 Oven Door The attaching procedures of door Step. 1 Whilst the pins are still attached, align the door hinges into the hinge holes. Step. 2 Rotate the door toward the horizontal line, and remove the separating pins from the hinges. The hinge is normally inserted.
- Page 65 Oven Door Glass The oven door is equipped with four sheets of glass placed behind each other. The inner sheets can be removed for cleaning. WARNING: Whenever the door is separated from the oven, the separating pins should always be inserted to the hinges. When the door is mounted, if some of the parts (Door glass or other parts) are removed from the door, it could spring up suddenly and cause injury due to the lighter weight.
- Page 66 Oven Door 3. Detach the inner glass #1(number 1) from the door. 4. Remove the two spring brackets from the top of the glass #2 and #3. And then take off the glass #2 and #3 in order. Door bracket Spring bracket Glass #1...
- Page 67 The procedures of assembling the door 5. Clean the glasses and interior parts with warm soapy water. Note: Do not use abrasive cleaners or pan scourers, use a sponge with liquid detergent or warm soapy water. 6. Place the glass #3 and #2 on their positions in order and attach the spring brackets between them .
-
Page 68: What Should I Do
What should I do if… Fault Possible Cause Solution The oven does not The oven is not Switch the oven off heat up. switched on. and then on again. The clock is not set Set the clock before cooking. (see Chapter "Setting the Clock"). - Page 69 Fault Possible Cause Solution The time display Power cut some time Set the clock flashes on the ago. (see Chapter "Setting electronic clock. the Clock"). The oven light The oven light is Replace the oven light does not come on. faulty.
- Page 70 What should I do if… Error Code Possible Cause Solution Sensor(Thermistor) is Call your local LG short. service center. Sensor(Thermistor) is Call your local LG open. service center. The door will be locked as if the oven is in self- cleaning mode.
- Page 71 CAUTION • Repairs to the appliance must be carried out by a specially licensed technician only! Considerable danger may result from incorrect repairs. • Do not use the appliance if damaged. In the event of a fault or failure, switch off at the mains. In the event of a fault, visits by technicians from Customer Service or dealers may not be covered by the warranty, if the cause of failure is the result of abnormal customer use.
- Page 72 Memo...
- Page 73 Memo...
- Page 74 Memo...
- Page 76 FOR CUSTOMER SERVICE PLEASE CONTACT LG Service on 1300 LG CARE (1300 54 2273) AUSTRALIA or 0800 LG CARE (0800 54 2273) NEW ZEALAND www.lg.com LG Electronics Australia 2 Wonderland Drive Eastern Creek NSW 2766 (ABN : 98 064 531 264) Printed in korea...
Need help?
Do you have a question about the ES551SP and is the answer not in the manual?
Questions and answers