LG LDE3037ST Owner's Manual
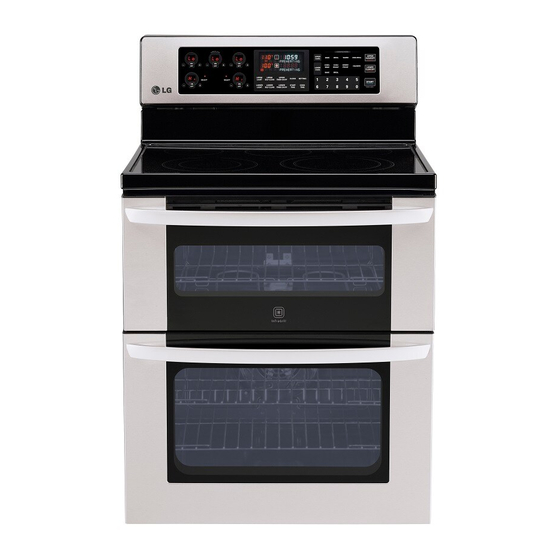
Electric double oven range
Hide thumbs
Also See for LDE3037ST:
- Owner's manual (92 pages) ,
- Installation manual (32 pages) ,
- Specification (2 pages)

Related Manuals for LG LDE3037ST


Summary of Contents for LG LDE3037ST
- Page 1 OWNER’S MANUAL ELECTRIC DOUBLE OVEN RANGE Please read this guide thoroughly before operating and keep it handy for reference at all times. LDE3037ST LDE3031ST LDE3037BD www.lg.com (REV.06 150513)
-
Page 2: Table Of Contents
TABLE OF CONTENTS TABLE OF CONTENTS 22 Recommended Convection Roast Guide IMPORTANT SAFETY INSTRUCTIONS (on some models) 23 Recommended Baking and Roasting Guide OVERVIEW 24 Broil 24 Speed Broil (on some models) Accessories 25 Recommended Broiling Guide Range Overview 26 Warm Control Panel Overview 26 Proof Kids Meal (on some models) -
Page 3: Important Safety Instructions
Always contact your service agent or manufacturer about problems that you do not understand. Download this owner's manual at: http://www.lg.com. This is the safety alert symbol. This symbol alerts you to potential hazards that can result in property damage and/or serious bodily harm or death. -
Page 4: Safety Precautions
IMPORTANT SAFETY INSTRUCTIONS Anti-tip Wall plate • Be cer tain that your appliance is bracket Screw must properly installed and grounded by a enter wood qualified technician. approximately or concrete 0.65”(16.5mm) • Do not repair or replace any part of the appliance unless specifically recommended in the manual. - Page 5 IMPORTANT SAFETY INSTRUCTIONS WARNING • DO NOT step or sit on the oven door. Install the anti-tip bracket packed with range. - The range could be tipped and injury might result from spilled hot liquid, food, or the range itself. - If the range is pulled away from the wall for cleaning, service, or any other reason, ensure that the anti-tip bracket are properly re-engage when the range is pushed back against the wall.
-
Page 6: Electrical Safety
IMPORTANT SAFETY INSTRUCTIONS ELECTRICAL SAFETY • Protective Liners. Do not use aluminum foil or any other material to line the oven bottoms. Improper installation of these liners may result in a risk of electric shock or fire. • Do Not allow aluminum foil or the temperature probe to contact heating elements. •... -
Page 7: Child Safety
IMPORTANT SAFETY INSTRUCTIONS • If an oven fire occurs, leave the oven door closed and turn the oven off. If the fire continues, throw baking soda on the fire or use a fire extinguisher. • If an oven fire occur, DO NOT put water or flour on the fire. Flour may be explosive and water can spread a grease fire and cause personal injury. - Page 8 IMPORTANT SAFETY INSTRUCTIONS • NEVER store items of interest to children in cabinets above the range. Children climbing on the range or on the oven door to reach items could be seriously injured. • Let hot utensils cool in a safe place, out of reach of small children. •...
-
Page 9: Safety When Cleaning
IMPORTANT SAFETY INSTRUCTIONS • If cabinet storage is provided directly above the cooking surface, use it only for items that are not frequently used and can be safely stored in an area subjected to heat. Temperatures may be unsafe for volatile items such as flammable liquids, cleaners or aerosol sprays. •... -
Page 10: Overview
Installation manual NOTE • Contact LG Customer Service if any accessories are missing. • For your safety and for extended product life, only use authorized components. • The manufacturer is not responsible for product malfunction or accidents caused by the use of separately purchased, unauthorized components or parts. -
Page 11: 1 Range Overview
OVERVIEW RANGE OVERVIEW Make sure to understand the names and function of each part. * Throughout this manual, the features and appearance may vary depending on your model. For model : LDE3037 Warming Zone Element Single element Single element Double element Double element Ceramic glass Automatic oven light switch... -
Page 12: Control Panel Overview
OVERVIEW CONTROL PANEL OVERVIEW For model : LDE3037 Cooktop Element Control Features Oven Controls Clear Off Button Start/ Lockout Button Number Buttons For model : LDE3031 NOTE Cooktop Element Controls are set up in the same order as the corresponding elements. HS (Hot Surface) Indicator The HS indicator will appear in the display once the element is turned off or during the self clean cycle. -
Page 13: Features
FEATURES FEATURES Minimum & Maximum default settings All of the features listed have a minimum and a maximum time or temperature setting that may be entered into the SETTINGS control. An entry acceptance beep will sound each time a control key is pressed. Use the SETTING button to set Convection Auto Conversion (on some models), Language (on some An entry error tone (two short tones) will sound if the... -
Page 14: Timer On/Off
FEATURES TIMER ON/OFF CONVECTION AUTO CONVERSION (ON SOME MODELS) The UPPER or LOWER TIMER ON/OFF serves as an extra timer in the kitchen that will beep when the set time has When cooking using a convection cycle (Conv. bake and run out. -
Page 15: Language (On Some Models)
FEATURES LANGUAGE (ON SOME MODELS) OVEN LIGHT The default language of the display is English. It can be The interior oven light automatically turns ON when the changed to Spanish or French. door is opened. The oven light may also be manually turned ON or OFF by pressing the OVEN LIGHT button. -
Page 16: Start Time (Delayed Timed Cook)
FEATURES START TIME (Delayed timed COOK) COOK TIME (TIMED COOK) The automatic timer of the DELAYED TIMED COOK The TIMED COOK feature allows you to set the oven to function will turn the oven ON and OFF at the time you cook for a specific length of time. -
Page 17: Using The Cooktop
USING THE COOKTOP USING THE COOKTOP Hot surface indicator HS (Hot Surface) will appear in the display once the element is turned off or during the self clean cycle. The COOKING AREAS HS indicator will stay on until the surface has cooled to approximately 150°F (66°C) or when the self clean cycle The cooking areas on your range are identified by ends. - Page 18 USING THE COOKTOP To turn on a DUAL element (on some model) To turn on the Warming Zone (on some models) WARM DUAL ZONE Adjust the dual element according to the pot/pan size Use the Warming Zone to keep food warm after it has that you are using.
-
Page 19: Using The Proper Cookware
USING THE COOKTOP The recommended surface cooking USING THE PROPER COOKWARE setting Using the proper cookware can prevent many problems, such as food taking longer to cook or achieving Element Temp. Recommended Use inconsistent results. Proper pans will reduce cooking 8.5-Hi •... -
Page 20: Using The Oven
USING THE OVEN USING THE OVEN OVEN CONTROLS SABBATH MODE BEFORE USING THE OVEN Sabbath mode is typically used on the Jewish Sabbath NOTE and Holidays. When the SABBATH mode is activated, the oven does not turn off until the SABBATH mode is •... -
Page 21: Bake
USING THE OVEN BAKE CONVECTION BAKE (ON SOME MODELS) BAKE is used to prepare foods such as pastries, breads and casseroles. The oven can be programmed to bake at The convection system uses a fan to circulate the heat any temperature from 170°F (77°C) to 550°F (288°C). The evenly within the oven. -
Page 22: Convection Roast (On Some Models)
USING THE OVEN CONVECTION ROAST RECOMMENDED CONVECTION (ON SOME MODELS) ROAST GUIDE (ON SOME MODELS) The CONVECTION ROAST feature is designed to give When preparing meats for convection roasting, use the optimum roasting performance. CONVECTION ROAST broiler pan, grid and roasting rack. The broiler pan will combines cooking with the convection fan to roast meats catch grease spills and the grid will help prevent grease and poultry. -
Page 23: Recommended Baking And Roasting Guide
USING THE OVEN RECOMMENDED BAKING AND For model : LDE3037 ROASTING GUIDE Baking results will be better if baking pans are centered in the oven as much as possible. If cooking on multiple racks, place the oven racks in positions AS SHOWN BELOW FIGURE. -
Page 24: Broil
USING THE OVEN BROIL Smoking Due to the intense heat associated with broiling, it is The Broil function uses intense heat from the upper normal to experience smoke during the cooking process. heating element to cook food. BROIL works best for This smoke is a natural byproduct of searing and should tender cuts of meat, fish, and thinly cut vegetables. -
Page 25: Recommended Broiling Guide
USING THE OVEN RECOMMENDED BROILING GUIDE The size, weight, thickness, starting temperature, and your preference of doneness will affect broiling times. This guide is based on meats at refrigerator temperature. For best results when broiling, use a pan designed for broiling (refer to Fig.1) Fig.1 Broiling Chart... -
Page 26: Warm
USING THE OVEN Broiling Tips To set the WARM function after timed cooking: 1. Select the cooking function. Beef 2. Enter the oven temperature using the number • Steaks and chops should always be allowed to rest for buttons. five minutes before cutting into them and eating. This allows the heat to distribute evenly through the food 3. -
Page 27: Kids Meal (On Some Models)
USING THE OVEN KIDS MEAL (ON SOME MODELS) FAVORITES (ON SOME MODELS) This function is specially designed to cook popular kids The FAVORITES function is used to record and recall your foods such as regular crust pizza, rising crust pizza, fresh favorite recipe settings. -
Page 28: Pizza (On Some Models)
USING THE OVEN PIZZA (ON SOME MODELS) Setting the PIZZA function 1. Press PIZZA once. P1 will appear in the display. The Pizza function is specially designed for cooking pizza. Whenever you touch PIZZA one more time, the It heats from both the top and bottom to brown food display will appear P1, P2, P1, P2, …... -
Page 29: Care And Cleaning
CARE AND CLEANING CARE AND CLEANING Burned-on Residue 1. While the cooktop is still hot, remove any burnt- on deposits or spilled food from the glass/ceramic CLEANING THE GLASS/CERAMIC cooking surface with a suitable metal razor scraper COOKTOP (similar to scraping paint off of a windowpane - it will not damage the decorated cooking surface). -
Page 30: Self Clean
CARE AND CLEANING Metal Marks and Scratches CAUTION 1. Be careful not to slide pots and pans across the • DO NOT leave small children unattended near the cooktop. Doing so will leave metal markings on the appliance. During the Self Clean cycle, the outside cooktop surface. - Page 31 CARE AND CLEANING Setting Self Clean During Self Clean • The self clean cycle uses extremely hot temperatures The Self- Clean function has cycle times of 3, 4, or 5 hours. to clean the oven cavity. While running the Self Clean cycle, you may notice smoking or an odor.
-
Page 32: Easyclean
- Can allow shorter Self Clean time Compared to the more intense Self Clean process, your LG oven gives you the option of cleaning with LESS HEAT, LESS TIME, and virtually NO SMOKE OR FUMES. WHEN TO USE EasyClean™... - Page 33 CARE AND CLEANING EasyClean™ INSTRUCTION GUIDE 7. A tone will sound at the end of the 20-minute cycle. Press the CLEAR OFF button to clear the display and 1. Remove oven racks and accessories from the oven. end the tone. 2.
-
Page 34: Cleaning The Exterior
CARE AND CLEANING CLEANING THE EXTERIOR Broiler Pan and Grid Painted and Decorative Trim For general cleaning, use a cloth with hot soapy water. For more difficult soils and built-up grease, apply a liquid • Do not store a soiled broiler pan or grid anywhere in detergent directly onto the soil. - Page 35 CARE AND CLEANING REMOVING & REPLACING THE To replace the door: LIFT-OFF OVEN DOOR 1. Be sure both hinges are in a 30 degree position. CAUTION 2. Slide the door back onto the hinges until you hear a solid click and the release buttons have engaged. •...
-
Page 36: Door Care Instructions
CARE AND CLEANING LOWER OVEN To replace the door: 1. Firmly grasp both sides of the door at the top. To remove the door: 1. Fully open the door. 2. With the door at the same angle as the removal 2. -
Page 37: Faqs
FAQs FAQs What types of cookware are recommended During convection cooking the fan stops for use with my cook top? when I open the door. Is that normal? • The pans must have a flat bottom and straight sides. Yes, this is normal. When the door is opened, the •... - Page 38 FAQs Why aren't the function buttons working? Is it safe for my convection fan, broil burner or heater element to get wet during Make sure that the range is not in Lockout mode. The lock EasyClean™? symbol will show in the display if Lockout is activated. To deactivate Lockout, press and hold the START button Yes.
-
Page 39: Troubleshooting
TROUBLESHOOTING TROUBLESHOOTING BEFORE CALLING FOR SERVICE Before you call for service, review this list. It may save you time and expense. The list includes common occurrences that are not the result of defective workmanship or materials in this appliance. Problem Possible Causes / Solutions Range is not level. - Page 40 TROUBLESHOOTING Problem Possible Causes / Solutions Oven will not work • Plug on range is not completely inserted in the electrical outlet. - Make sure electrical plug is plugged into a live, properly grounded outlet. • A fuse in your home may be blown or the circuit breaker tripped. - Replace the fuse or reset the circuit breaker.
- Page 41 TROUBLESHOOTING Problem Possible Causes / Solutions Food does not broil • Aluminum foil used on the broiling pan and grid has not been fitted properly and slit as properly recommended. - See the Using the Oven section. • In some areas the power voltage may be low. - Preheat the broil element for 5-7 minutes - See the Broiling Guide.
- Page 42 TROUBLESHOOTING Problem Possible Causes / Solutions Excessive smoking • Excessive soil. during a self clean cycle - Press the CLEAR OFF button. Open the windows to rid the room of smoke. Wait until the self clean mode is cancelled. Wipe up the excess soil and reset the clean. Oven door does not •...
-
Page 43: Warranty
WARRANTY: Should your LG Electric Oven (“Product ”) fail due to a defect in material or workmanship under normal home use during the warranty period set forth below, LG Canada will at its option repair or replace the Product upon receipt of proof of original retail purchase. This warranty is valid only to the original retail purchaser of the product and applies only to a product distributed in Canada by LG Canada or an authorized Canadian distributor thereof. - Page 44 LG Customer Information Center 1-800-243-0000 USA, Consumer User 1-888-542-2623 CANADA Register your product Online! www.lg.com Printed in Mexico...
Need help?
Do you have a question about the LDE3037ST and is the answer not in the manual?
Questions and answers