Hyundai VELOSTER Owner's Manual
Hide thumbs
Also See for VELOSTER:
- Owner's manual (406 pages) ,
- User manual (140 pages) ,
- Brochure & specs (27 pages)

Related Manuals for Hyundai VELOSTER


Summary of Contents for Hyundai VELOSTER
- Page 1 ENGLISH Car Navigation System OWNER’S MANUAL VELOSTER *XXXXXXXXX* PIO JS CIS PIO JS CIS ENG MFLXXXXXXXX.indd 1 ENG MFLXXXXXXXX.indd 1 2017-11-24 2017-11-24 3:41:57 3:41:57...
- Page 2 Thank you for purchasing this Car Navigation system. This owner’s manual explains how to use the Hyundai Vehicle’s Navigation system. Before using the product, read the contents of this owner’s manual carefully and use this product safely. The screens shown in this manual may differ from the actual screens of the product.
-
Page 3: Precautions For Safety
Precautions for safety Precautions for safety Safety notes Always operate the vehicle in a safe manner. Do When driving your vehicle, be sure to keep the CAUTION not be distracted by the vehicle while driving and volume of the unit low enough to allow you to always be fully aware of all driving conditions. - Page 4 Precautions for safety WARNING: The navigation system does not take the CAUTION: relative safety of the suggested routes into Don’t use a mobile phone when you are driving. Do not keep the navigation system running with consideration: You must stop at a safe place to use a mobile the engine stopped.
-
Page 5: Table Of Contents
Table of contents Table of contents Precautions for safety Configuration for Home screen ....14 Repeat ..............23 Basic operation for [Home] screen ..15 Shuffle .............23 Safety notes ......3 Sound settings ..........23 Editing the [All menus] ........15 Viewing USB video . - Page 6 Table of contents Bluetooth audio History ..............34 Bluetooth Wireless Technology 44 Favorites ............34 Playing Bluetooth audio ....27 Before using the Bluetooth hands-free..44 By coordinates ..........34 Starting the Bluetooth audio ......27 What is Bluetooth Wireless Technology? ..44...
- Page 7 Table of contents Settings Troubleshooting [Settings] menu overview ....51 Sound ......51 Trademarks and licenses Display .
-
Page 8: General Information
General information General information About USB Repeated connecting/disconnecting of USB Charging through the USB may not work for devices within short periods of time may result some mobile devices. Take precautions regarding static electricity in product malfunction. The device may not support normal operation when connecting/disconnecting external USB The amount of time required to recognise the when using a USB memory type other than... -
Page 9: Music File Information
General information Music file information During ACC ON state, connecting the iPod iPod Nano (1st through~ 7th generation) through the iPod cable (The cable that is iPod Classic (1st through~ 6th generation) Sampling frequency: supplied when purchasing iPod/iPhone iPad WiFi (1st through~ 4th generation) - 32, 44.1, 48 kHz (MP3, WMA, OGG, WAV) product.) will charge the iPod through the iPad Air WiFi (1st ~2nd generation) -
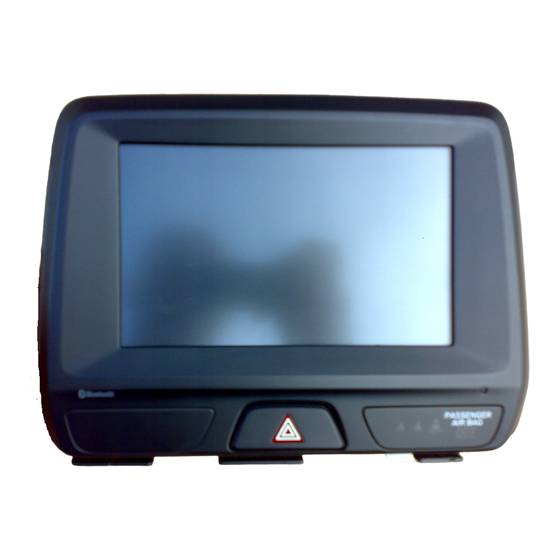
Page 10: Name Of Each Component
Name of each component Name of each component Head unit 1. Cover for protecting SD card (SD POWER PUSH button 4. MEDIA button card insert slot) - Power on If the playable media source is one, it Press this button in system OFF status. moves to the corresponding screen. - Page 11 Name of each component 6. Reset hole - When it is pressed and held 9. ENTER/TUNE/FILE button - AM mode: turn left/right to tune manually. AM mode: plays previous/next available Press with a thin object to reset the unit frequency. when it does not operate normally.
-
Page 12: Steering Wheel Remote Control
Name of each component Steering wheel remote control Volume (VOL+/VOL-) button MEDIA mode (except for Bluetooth, AUX (MODE) button and Android Auto): rewinds or fast Increases or decreases the volume level. Each time this button is pressed, the radio forwards the file. or media mode is changed. -
Page 13: Basic Operation
Basic operation Basic operation Starting the system for the AV ON warnings are related to safety, please closely read and comply with the safety warnings. first time Press [POWER PUSH] on the head unit to turn If there is no operation for 10 seconds in the AV on in AV OFF status. -
Page 14: Resetting The System
Basic operation Resetting the system 1. Date/Time [Music]: Converts to the last played music mode. Shows the current date and time. This feature is used to reset the system in the [USB Video]: Converts to the last played occurrence of an unforeseen error or problem. Press the area to move to date and clock video mode. -
Page 15: Basic Operation For [Home] Screen
Basic operation Basic operation for [Home] screen Editing 3. Select the desired menu item from the list, the [All menus] then drag and drop it to a desired place. 1. Press [All menus] on the [Home] screen. 1. Press [ ] on the screen. -
Page 16: [My Menu]
Basic operation Adding your favourite menu items to 3. Select one of the [Radio favourites], or Note [Menu shortcuts] on the screen. Press [ ] to move to the previous screen. My Menu Up to 24 menu items can be added to [My 1. -
Page 17: Rearraging The Favourite Menu Items Of
Basic operation Rearraging the favourite menu items Deleting the favourite menu items Playing last media source of [ of [ My Menu My Menu When you press the Engine Start button or set the ignition key to ON/ACC ON, the media source 1. -
Page 18: Listening To Am
Radio operation Radio operation Listening to AM Favourites tuning: Auto search Press [Favourites]. Press the favourites This function lets you automatically search the 1. Press [RADIO] on the head unit. numbers of the desired broadcast station. broadcast stations with superior reception. 2. -
Page 19: Listening To Fm
Radio operation Saving AM favourites Manual tuning: In the FM mode, press [Menu] > [Manual It manually saves the listening frequency to tune FM]. desired favourites list. 1. Select the AM band. Station bar 2. Select the frequency to save. 3. -
Page 20: Scan
Radio operation Scan Opening the station list Saving FM favourites You can see the station list with superior It saves the listening station to the desired This function scans all stations and plays only reception. favourites list. stations with good signal strength for 5 seconds each. -
Page 21: Playing Usb Music
USB operation USB operation Playing USB music Skip Search You can play the previous or next file. You can fast rewind/forward to a specific point You can play music files stored in a USB memory of a file. device. Position Description Connect a USB device to the USB port and Position... -
Page 22: Delete Current File
USB operation Delete current file List Using the list menu 1. Press [Menu] in list screen. You can delete the currently playing file in a USB. You can play the desired file by searching for the file list of the USB menu. 1. -
Page 23: Repeat
USB operation Viewing USB video Repeat Shuffle You can play a set of files repeatedly. You can play files in random order. You can watch video files saved in a USB memory device. 1. Press [Repeat]. 1. Press [Shuffle]. 1. Connect a USB device to the USB port. 2. -
Page 24: Search
USB operation Search Repeat Info You can fast forward/rewind to a specific point You can play a set of files repeatedly. This menu shows File name, Resolution and Total of a file. time of the currently playing video. 1. Press [Repeat]. For details refer to page 21 ("Search"). -
Page 25: Playing Ipod
iPod operation iPod operation Playing iPod 1. Press [List]. 2. Select the desired mode by pressing [Repeat] repeatedly. 1. Use an iPod exclusive cable to connect an ]: Plays all files sequentially. iPod to the USB connector. 2. Press [MEDIA]. ]: Repeats the current file, only. -
Page 26: Auxiliary Device Operation
Auxiliary device operation Auxiliary device operation Playing an AUX source 1. Connect an auxiliary device to the AUX terminal. 2. Play the auxiliary device. Note To play an auxiliary device while a different source is playing, press [MEDIA] > [AUX]. Sound settings 1. -
Page 27: Bluetooth Audio
Bluetooth audio Bluetooth audio Playing Bluetooth audio Starting the Bluetooth audio Repeat 1. Connect your Bluetooth device to the head You can play a set of files repeatedly. Music stored in the mobile phone can be played unit. Select the desired mode by pressing [Repeat] in the car through Bluetooth audio streaming. -
Page 28: Getting Started With Navigation
Getting started with navigation Getting started with navigation Precautions for safe driving About satellite signals The position of the vehicle within the navigation may differ from your actual location depending Please observe and comply with local traffic Your unit must acquire satellite signals to on various reasons, including the satellite rules and regulations. -
Page 29: Operating Navigation Screen
Getting started with navigation Operating navigation screen 3. Information panel 10. Speed limit and camera A sign of the upcoming maneuver. In excess of the established speed, displays The navigation system displays various the speed limit on that road section. There are various turns, distance to the next information on the map screen. -
Page 30: Zoom In / Zoom Out
Getting started with navigation Zoom in / Zoom out Navigation volume Scrolling the map screen To set the zoom level on the map screen, turn Drag and drop the map screen to the desired 1. Press [ ] on the map screen. the right knob clockwise/counterclockwise. -
Page 31: Main Menu
Getting started with navigation Main menu [Settings]: This menu contains some functions and program main settings. 1. Press [NAV] on the head unit or press [ Colour and type of some icons may depend on the map screen. on function status and current Skin-file. Menu operation All the menus in the navigation system have the following features at the top of the screen. -
Page 32: Searching For Destination
Searching for destination Searching for destination Find By Address 2. Select city City selection is similar to country selection. This program implements the search of all sorts start typing the name of the city and choose of the objects on the map according to different it from the list. -
Page 33: Nearest Places
Searching for destination 5. Select intersection Nearest Places 3. Result After selecting the street that is a part of After the object is found, you can see its Search nearest to the specified point objects is a required intersection you can begin the also performed in a several steps. -
Page 34: History
Searching for destination History [Route through]: If there is a route, it re-routes taking into account passing the point with the All objects ever found using any types of search. coordinates. In this type of search objects are sorted by date [Set finish]: Mark on the map becomes the end of search, later found objects are at the top. -
Page 35: Using The Route Menu
Using the route menu Using the route menu Routes [Set finish]: Point is added in the end of the Manual route creation route as it’s continue. This type of route is the same automatic, as the For route preview there is a route simulation in [Copy]: Copies the coordinates of the selected first two, with only one difference - here you the program. -
Page 36: Edit Route
Using the route menu Edit route [Demo route]: This menu item is only available when you turn off the GPS. Using this menu Press the maneuver sign to edit the route. item you can see the route, turns on the route The context menu that appears when you click, and some rough information on the route. -
Page 37: Setting For Navigation
Setting for navigation Setting for navigation Settings Top of the map Map tilt [Map’s north is on top]: The top of the map This menu item is used to set the degree of “Settings” menu contains some functions and always will focus on the north inclination of the maps while viewing it in program main settings. -
Page 38: Navigation
Setting for navigation Navigation Interface Skin In the «Navitel Navigator» you can change The navigation system and a route settings. Interface settings menu will allow you to use the the appearance of the program by installing «Map» page and all of its elements effectively. additional theme (skin files). -
Page 39: Pol Filter
Setting for navigation POl filter Alerts Setting up the display of infrastructure objects The voice and visual warnings settings. on the map. In the left part of each group and subgroup is the symbol that indicates whether the group displays or net. -
Page 40: Regional Settings
Setting for navigation Traffic lanes Map language Measurement units «Show traffic lanes»: sets up the display of Select the language of the map. The default On this page you can select the units of traffic lanes, with information about maneuvers language is set as the program interface measurement of coordinates, azimuth length/ at the next intersection. -
Page 41: System
Setting for navigation System [Keep screen backlight on while the application is active]: Similar to the previous paragraph, but Setting up General program functions. in this case the backlight will not turn off. Sound This menu allows to set the sound in Navitel. [Turn off sound]: This function is intended for switching off the sound of the program;... -
Page 42: Android Auto/Apple Carplay - Option
Android Auto/Apple CarPlay - option Android Auto/Apple CarPlay - option Your phone may not be recognised if its battery The following problems may occur due to ※ Android Auto and Apple CarPlay aren't available in some countries. is low. Charge your phone then try again. phone-related issues: [Android Auto] If your phone is shut down due to a defect... -
Page 43: Using Android Auto Or Apple Carplay
Android Auto/Apple CarPlay - option Using Android Auto or Apple NOTICE-Android Auto NOTICE-Apple CarPlay CarPlay Bluetooth media features will be disabled when Bluetooth phone/media features will be Android Auto is activated. After removing the disabled when Apple CarPlay is activated. After 1. -
Page 44: Bluetooth Wireless Technology
(The default vehicle name is having to use a connector cable. your Bluetooth device, turn the Bluetooth HYUNDAI MOTORS.) Bluetooth hands-free refers to a device which feature off on the Bluetooth device. 3. 1) If the SSP (Secure Simple Pairing) is not... -
Page 45: When A Phone Is Already Paired
[Add new]. Follow the steps 3-4 of “When devices. (The default vehicle name is phones. no phones have been paired”. HYUNDAI MOTORS.) Some functions may not be supported due to 4. 1) If the SSP (Secure Simple Pairing) is not limited Bluetooth compatibility. -
Page 46: Disconnecting The Connected Phone
Bluetooth Wireless Technology Making a call by entering Disconnecting the connected phone Deleting Bluetooth devices phone number 1. Press [SETUP] > [Bluetooth] > [Bluetooth If you do not need to use a phone any longer, you can delete it. Note that deleting a Bluetooth connections]. -
Page 47: Answering/Rejecting A Call
Bluetooth Wireless Technology Answering/Rejecting a call Using the menu during a As shown below, the call is switched to the mobile phone. phone call 1. If there is an incoming call, a pop-up message will appear. When making a call, you can use the following 2. -
Page 48: Calling List
Bluetooth Wireless Technology Calling list Contacts Downloading call history You can download the call history information Making a call from calling list from your mobile phone. Making a call from contacts 1. Press [ ] on the phone screen. 1. Press [ ] on the phone screen. -
Page 49: Downloading Mobile Phone Contacts
Bluetooth Wireless Technology Favourites Downloading mobile phone contacts Searching by name or number You can download contacts from your mobile You can search contacts for the name or number phone. Calling favourites that you enter. 1. Press [ ] on the phone screen. 1. -
Page 50: Adding As A Favourite
Bluetooth Wireless Technology Phone settings Adding as a favourite Note If the phone numbers have already been stored Up to 10 contacts can be added to favourites This menu describes phone settings. in the favourites, you can add or delete them by menu. -
Page 51: Settings
Settings Settings [Settings] menu overview Sound [Equaliser]: This menu allows you to set the Bass [BASS]/Middle [MID]/Treble This menu is used to adjust the sound effects for [Settings] menu [TREBLE]. the whole system. (It may vary depending on the - Press [-]/[+] to control bass/middle/ Sound type of vehicle.) treble settings. -
Page 52: Display
Settings Display [Brightness]: - Press [-]/[+] to set display brightness This menu is used to change the display for daylight or night mode. environment settings. - Drag the slide bar to control the display 1. Press [SETUP] > [Display]. brightness settings. - Press [Centre] to initialize the settings. -
Page 53: Bluetooth
Settings Bluetooth D [Add new]: Registers a new Bluetooth Auto connection priority device. If auto connection priority is turned on, This menu describes Bluetooth phone settings. E [Delete devices]: Moves to "Delete devices". a Bluetooth device will automatically be connected according to the option setting when Bluetooth connections F [Help]: Switches to the Bluetooth connection the car ignition is turned on. -
Page 54: System Bluetooth Info
The default passkey is set iPhone with a USB cable connected. Note to 0000. The default vehicle name is set to HYUNDAI MOTORS. Default This menu is used to reset the Bluetooth settings to factory default. -
Page 55: Custom Button
Settings Custom button Date/Time Language You can assign a function to custom button. This menu describes date and clock settings. This menu is used to set the language of the system. 1. Press [SETUP] > [Custom button]. 1. Press [SETUP] > [Date/Time]. 1. -
Page 56: Keyboard
Settings Keyboard Screensaver Advanced This menu is used to configure the keyboard This menu is used to select the screen displayed This menu describes advanced settings. layout for each language. when the screen or power is turned off. 1. Press [SETUP] > [Advanced]. 1. -
Page 57: System Info
Settings System info Update Please use only the SD card that was included with the vehicle purchase. For system’s software security, new function Version info addition, and map update, you need an update. The use of a separately purchased SD card You can view software version and firmware may result in damage due to heat related 1. -
Page 58: Using Rear Camera
Using rear camera Using rear camera About rear camera Note When driving backwards, it displays drive and Rear camera is parking guide system, when the neutral steering path. ignition switch is on and a car start-up with being in R position of a transmission lever. Notes Rear camera has an optical lens to secure wide view, so there is a little difference in the... -
Page 59: Before Thinking There Is A Product Defect
Before thinking there is a product defect Before thinking there is a product defect The current car position as shown on When the tire pressure for the 4 tires are A route guidance signaling for a U-turn may different. occur in some no U-turn intersections. the navigation may differ from the actual position under the following When the replacement tire is worn or used... - Page 60 If the screen is very dark, contact your nearest authorised Hyundai dealer for assistance. Sound is working from only one speaker Are the positions of fader or balance sound controls adjusted to only one side?
-
Page 61: Troubleshooting
The fuse is disconnected. Replace with a suitable fuse. turn on. If the fuse is disconnected again, please contact your authorised Hyundai dealer. Device is not properly connected. Check to see that the device has been properly connected. The system does not The vehicle battery is low. - Page 62 Troubleshooting Problem Possible Cause Countermeasure The sound or image Vibration is occurring from where the conversion The sound may be short circuited and the image distorted if the device vibrates. quality is low. switch has been installed. Image colour/tone quality is low. The device will return to normal once vibrations stop.
-
Page 63: Trademarks And Licenses
Trademarks and licenses Trademarks and licenses Bluetooth Wireless Technology DivX The Bluetooth Wireless Technology word mark and logos are registered trademarks owned by This DivX Certified® device can play DivX® HD Bluetooth Wireless Technology SIG, Inc. video files (including .avi, .divx). Download free software at www.divx.com to iPod create, play and stream digital videos. - Page 64 Specification Specification Power supply DC 12 V Operating power DC 9 V ~ DC 16 V Tuning range 522 kHz ~ 1620 kHz Current consumption Maximum 5 A Usable sensitivity 35 dBuV Dark current Maximum 0.5 mA Signal-to-noise ratio Minimum 45 dB Radio Common Operating temperature -20 °C ~ +70 °C...
- Page 65 LIMITED WARRANTY ORIGINAL NAVIGATION HEAD UNIT SUPPLIED BY VEHICLE DEALER Product : Product No. : WHAT THIS WARRANTY COVERS 1. Vehicle Dealer Shop (“Dealer”) warrants to you that the Hardware will be free from defects in workmanship and materials under normal use (“Defects”) for a period of three (3) years/60,000km from the date that the Hardware was first installed by DEALER (“Warranty Period”).
- Page 66 DEALER LIMITED WARRANTY YOUR LEGAL RIGHTS 4. Some countries may not allow the exclusion or limitation of damages. If any part of this Limited Warranty is held to be invalid or unenforceable, the remainder of the Limited Warranty shall nonetheless remain in full force and effect. 5.
- Page 67 PIO JS CIS PIO JS CIS ENG MFLXXXXXXXX.indd 67 ENG MFLXXXXXXXX.indd 67 2017-11-24 2017-11-24 3:42:07 3:42:07...
- Page 68 <Technical support> 117303 Russia, Moscow, Ul.Bolshaya Yushunskaya, Dom 1A, K.1, office 410 Tel : +7 495 318 1527 e-mail : motrex@mail.ru P/N:MFLXXXXXXXX (O/M) PIO JS CIS PIO JS CIS ENG MFLXXXXXXXX.indd 68 ENG MFLXXXXXXXX.indd 68 2017-11-24 2017-11-24 3:42:07 3:42:07...
- Page 69 WARNING STATEMENT Part 15.19 statement This device complies with Part 15 of the FCC Rules. Operation is subject to the following two conditions: (1) this device may not cause harmful interference, and (2) this device must accept any interference received, including interference that may cause undesired operation.
Need help?
Do you have a question about the VELOSTER and is the answer not in the manual?
Questions and answers