
Related Manuals for D-Link DKVM-16


Summary of Contents for D-Link DKVM-16
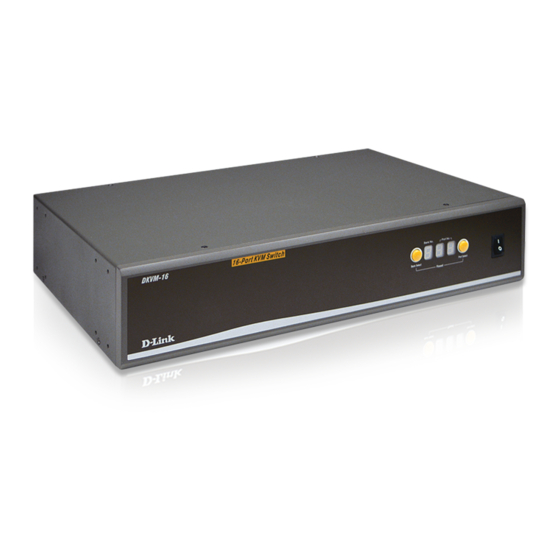
- Page 1 D-Link DKVM-16 16-Port Keyboard, Video, and Mouse Switch Manual Version 1.2 Building Networks for People 08/26/03...
-
Page 2: Table Of Contents
Contents Package Contents ...3 Introduction...4 Features and Benefits ...5 Hardware Installation ...6 Using the DKVM-16 ...12 Daisy-Chaining the DKVM-16 ...16 Hot Plug ...17 Troubleshooting ...21 Specifications ...25 Warranty and Registration ...26 Contacting Technical Support ...29... -
Page 3: Package Contents
Package Contents D-Link DKVM-16 16-Port Keyboard, Video, and Mouse Switch 1 DC12V, 1A Power Adapter 3 sets of 3 in1 KVM Cable Kits (1 set: 3 ft. 3-in-1 Cable Kit to daisy chain, 2 sets: 6 ft. 3 in 1... -
Page 4: Introduction
PCs and the user-friendly on-screen display menu allows you to configure your DKVM-16 switch’s settings. The daisy chain port allows up to 8 DKVM-16 KVM switches to be stacked together for controlling as many as 128 computers. Featuring hot- plug, auto-scan, keyboard hot keys and audible feedback, the DKVM-16 makes it simple to manage all of your server computers. -
Page 5: Features And Benefits
PCs Daisy-chain ports allow control over as many as 128 computers through 8 banks of DKVM-16 units Hot Plug provides the ability to add PCs or remove connected PCs for... -
Page 6: Hardware Installation
Hardware Installation Front Panel Layout Current Active Bank Display Current Active Port Display Bank Select Port Select Power Switch Rear Panel Layout PS/2 Keyboard Input VGA Monitor Connector VGA Signal PS/2 Mouse PS/2 Keyboard PS/2 Mouse Input Input Output Output Daisy-Chain In Port PC Port Connectors Console Port... - Page 7 DKVM-16 Step 1 Find a convenient place to place your DKVM-16. Its 19" rack mount form fac- tor makes it mountable on a 19" rack. When mounting to a rack, attach the included brackets to the side panels of the DKVM-16.
- Page 8 Hardware Installation Step 3 Connect the keyboard console to the DKVM-16. If you have an AT type key- board, you will need an AT to PS/2 adapter. Step 4 Connect the mouse console to the DKVM-16. If you have an older mouse with 9 pins, you will need to use the 9 to 5 pin mouse converter that is included with the DKVM-16.
- Page 9 PS/2 mouse port on the back panel of the computer, and the other end to the PC1 PS/2 mouse port on the back panel of the DKVM-16. If there are not enough PS/2 ports on the computer, you can choose a serial port for the mouse connection.
- Page 10 PC1 PS/2 keyboard port on the back panel of the DKVM-16. If your computer has an AT type keyboard port, you will need to use the PS/2 to AT keyboard adapter included with the DKVM-16.
- Page 11 Hardware Installation (Continued) Step 11 Now power up all computers simultaneously. The first computer will be shown on the monitor. You may check to see if the mouse, keyboard, and monitor work after the computer has booted up. If this is OK, use the “Select” button to choose the next computer and verify the functionality in the same manner.
-
Page 12: Using The Dkvm-16
Note: If you are not familiar with the operation of the OSD manual, please do not change the password (i.e. keep the default eight zero value). Otherwise, if you forget your set password, you will need to contact the supplier (D-Link) to have the unit reset. -
Page 13: The Reset Button
DKVM-16. If you add a new DKVM-16 as a slave bank, please use the reset button of the master DKVM-16 to assign a new ID to it. The new slave bank will now appear in the OSD menu. - Page 14 Using the DKVM-16 Hot Key Commands Scroll Scroll Lock Scroll Scroll Lock Note: Bank no. and port no. selection must be made using the numeric keys on the keyboard. Numeric keys on the keypad are not available as a hot key command.
- Page 15 Lock Note: 1. If you have already set up the scan mode command, DKVM-16 will issue one beep to confirm each hop from one PC port to the next. 2. To exit Auto Scan Mode, press any key or the SPACE bar.
-
Page 16: Daisy-Chaining The Dkvm-16
Daisy-Chaining the DKVM-16 Please closely follow the steps below to daisy-chain your DKVM-16 units. You can daisy chain up to 8 DKVM-16s. Step 1 Connect your keyboard, mouse, and monitor to the console port (white color block) of the master KVM bank (bank1). -
Page 17: Hot Plug
PCs. The user can arrange or maintain PCs as follows: A PC can be disconnected and reconnected to the same or different port of the DKVM-16 without having to power it off as long as it is not the master daisy-chain port. -
Page 18: On Screen Display Operation
On Screen Display Operation When you select the On Screen Display Operation manual window using the “Hot Key” function, the following on screen display will appear on your monitor. Bank number PC Name List. Factory de- fault names are listed. You can define your PC name up to 8 characters The sun symbol indicates... -
Page 19: Change Password
On Screen Display Operation CHANGE PASSWORD The Change Password function allows the user to change the password used to access all connected PC systems. The default password is 8 digits, “00000000”. The Enter Password window appears when you select this item and press enter. -
Page 20: Arrow Keys
On Screen Display Operation ARROW KEYS ( You can use the up arrow key “ destination by PC name. After you have selected the PC port, you can press the “ENTER” Key to select the PC port you want immediately. You can also use the “PgUp”... -
Page 21: Troubleshooting
Q: The OSD menu does not display a “ connected and powered up. DKVM-16 updates “ the OSD menu again and it should re-detect all the active channels. Q: When cascading the MASTER unit does not see the slave unit(s). -
Page 22: Keyboard Problems
Do not press any keys on the keyboard while the selected com- puter is booting up. This applies to any PC, whether it is stand- alone or connected to a DKVM-16. Q: The computer boots up correctly, but the keyboard does not work. -
Page 23: Problems With Computers Using Serial Mouse Output
Problems with Computers Using Serial Mouse Output Note: The DKVM-16 has integrated mouse conversion technology. This technology converts the PS/2 mouse signals at the console to serial mouse signals. Q: The comptuer boots up correctly, but the serial mouse port of the PC does not work. -
Page 24: Problems With The Power Supply
Q: The power switch is off or the power adapter is unplugged, but the switch still works. The DKVM-16 draws power from the power adapter and the PC’s PS/2 port. Some PC’s PS/2 port can support enough power for the switch, but some PS/2 ports (such as those on laptops) are unable to supply enough power for the switch. -
Page 25: Specifications
Specifications Computer Connections Display LED Indication Keyboard Mouse Monitor Cascade Cascade Port On Screen Display 19” Rack Mount Cascade (Level) Max. Access Pcs Manual Selection Hot Key Switching Configuration Keyboard State Keyboard Mouse Resolution Bandwidth Enclosure Storage (Celsius) Dimensions Weight (lbs) Power Supply : 16 : 6-pin Mini-DIN Female... -
Page 26: Warranty And Registration
D-Link at an Authorized D-Link Service Office. The replacement Hardware need not be new or have an identical make, model or part. D-Link may in its sole discretion replace the defective Hardware (or any part thereof) with any reconditioned product that D-Link reasonably determines is substantially equivalent (or superior) in all material respects to the defective Hardware. - Page 27 D-Link may reject or return any product that is not packaged and shipped in strict compliance with the foregoing requirements, or for which an RMA number is not visible from the outside of the package. The product owner agrees to pay D-Link’s reasonable handling and return shipping charges for any product...
- Page 28 Product may be reproduced in any form or by any means or used to make any derivative such as translation, transformation, or adaptation without permission from D-Link Corporation/D-Link Systems, Inc., as stipulated by the United States Copyright Act of 1976. Contents are subject to change without prior notice. Copyright D-Link Corporation/D-Link Systems, Inc.
-
Page 29: Contacting Technical Support
Technical Support You can find software updates and user documentation on the D-Link website. D-Link provides free technical support for customers within the United States and within Canada for the duration of the warranty period on this product. U.S. and Canadian customers can contact D-Link Technical Support through our website, or by phone.
Need help?
Do you have a question about the DKVM-16 and is the answer not in the manual?
Questions and answers