D-Link DKVM-2K Quick Installation Manual
2-port kvm switch with built-in cables
Hide thumbs
Also See for DKVM-2K:
- Quick installation manual (79 pages) ,
- Technical specifications (2 pages) ,
- Quick installation manual (8 pages)
Table of Contents
Advertisement
Quick Links
This product works with
all Windows Operating
Systems
Before You Begin
You must have at least the following:
•
PS/2 Keyboard
•
PS/2 Mouse
•
VGA or Higher Monitor
Check Your Package Contents
These are the items included with your purchase:
If any of the above items are missing, please contact your reseller.
©2003 D-Link Systems, Inc. All rights reserved. Trademarks or registered trademarks are the property of their
respective holders. Software and specifi cations subject to change without notice.
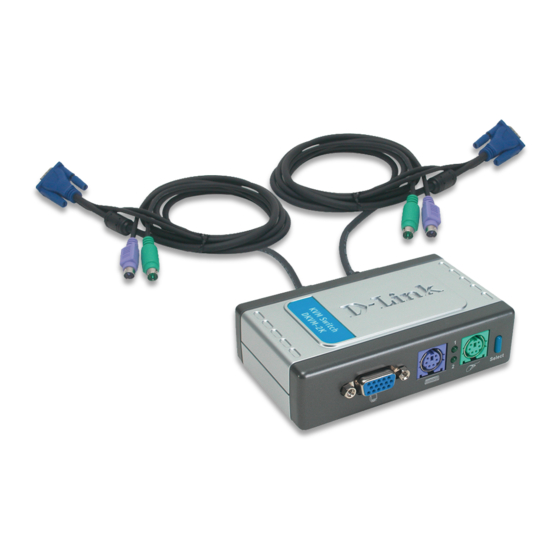
• DKVM-2K KVM Switch with Built-In Cables
• PS/2 / USB converter
1
DKVM-2K
2-Port KVM Switch
with Built-in Cables
Advertisement
Table of Contents

Subscribe to Our Youtube Channel
Related Manuals for D-Link DKVM-2K


Summary of Contents for D-Link DKVM-2K
- Page 1 • PS/2 / USB converter If any of the above items are missing, please contact your reseller. ©2003 D-Link Systems, Inc. All rights reserved. Trademarks or registered trademarks are the property of their respective holders. Software and specifi cations subject to change without notice.
- Page 2 Installing the DKVM-2K Make sure that all your computers are turned OFF before installing the DKVM-2K to avoid mouse and keyboard errors when booting up your computers. Attach your monitor’s HDDB 15 VGA connector to the console port of the DKVM-2K.
- Page 3 Installing the DKVM-2K The following steps below apply to both the computers that you are using with your DKVM-2K. Attach the DKVM-2K‘s built-in monitor cable to the VGA port located on the back of your computer case. Attach the DKVM-2K’s built-in...
- Page 4 Switching with the DKVM-2K The DKVM-2K features a Select Button located on the front panel and keyboard Hot Keys to switch quickly and easily between both your computers. Select Button To enter Hot Key switching mode, press the Scroll Lock key twice. A beep confi rms that the Hot Key mode is activated.
-
Page 5: Troubleshooting Tips
• Make sure that the keyboard is properly connected to the computer and to the DKVM-2K. Check that the keyboard is plugged into the correct PS/2 keyboard port and not the PS/2 mouse port. • Verify that the keyboard works when plugged into the computer directly. You will have to shut down your computer first to do this. -
Page 6: Technical Support
Technical Support You can find software updates and user documentation on the D-Link website. Tech Support for customers within Australia: D-Link Technical Support over the Telephone: 1300-766-868 Monday to Friday 8:00am to 8:00pm EST Saturday 9:00am to 1:00pm EST D-Link Technical Support over the Internet: http://www.dlink.com.au... - Page 7 You can find software updates and user documentation on the D-Link website. Tech Support for customers within South Eastern Asia and Korea: D-Link South Eastern Asia and Korea Technical Support over the Telephone: +65-6895-5355 Monday to Friday 9:00am to 12:30pm, 2:00pm-6:00pm...
- Page 8 Technical Support You can find software updates and user documentation on the D-Link website. Tech Support for customers within India D-Link Technical Support over the Telephone: +91-22-26526741 +91-22-26526696 –ext 161 to 167 Monday to Friday 9:30am to 7:00pm D-Link Technical Support over the Internet: http://ww.dlink.co.in...
- Page 9 Technical Support You can find software updates and user documentation on the D-Link website. D-Link provides free technical support for customers for the duration of the warranty period on this product. Customers can contact D-Link technical support through our web site or by phone.
- Page 10 Technical Support You can find software updates and user documentation on the D-Link website. Tech Support for customers within the U.A.E & North Africa: D-Link Technical Support over the Telephone: (971) 4-391-6480 (U.A.E) Sunday to Wednesday 9:00am to 6:00pm GMT+4 Thursday 9:00am to 1:00pm GMT+4 D-Link Middle East &...
- Page 11 You can find software updates and user documentation on the D-Link website. Tech Support for customers within South Africa and Sub Sahara Region: D-Link South Africa and Sub Sahara Technical Support over the Telephone: +27-12-665-2165 08600 DLINK ( For South Africa only )
- Page 12 Technical Support You can find software updates and user documentation on the D-Link website. Tech Support for Latin America customers: D-Link Technical Support over the followings Telephones: Argentina: 0800-666 1442 Monday to Friday 09:00am to 22:00pm Chile: 800-214 422 Monday to Friday 08:00am to 21:00pm...
-
Page 13: Прежде Чем Начать
• DKVM-2K KVM переключатель со встроенными кабелями • Конвертер PS/2 / USB Если что-то из перечисленного отсутствует, обратитесь к Вашему поставщику. ©2004 D-Link Systems, Inc. Все права зарегистрированы. Торговые марки являются собственностью их владельцев. Программное обеспечение и спецификация продукта могут быть изменены без предупреждения. - Page 14 Установка DKVM-2K Убедитесь, что все компьютеры отключены перед установкой DKVM-2K для избежания возникновения ошибок, связанных с клавиатурой или «мышью» при загрузке компьютеров. Подключите 15-контактный HDDB разъем VGA -кабеля монитора к консольному порту DKVM-2K. Подключите 6-контактный разъем «папа» клавиатуры PS/2 к порту для...
- Page 15 Подключите встроенный в DKVM-2K мониторный кабель к VGA порту, расположенному на задней панели корпуса компьютера. Подключите встроенный в DKVM-2K кабель для клавиатуры к PS/2 порту для клавиатуры, расположенному на задней панели корпуса компьютера. Подключите встроенный в DKVM-2K кабель для мыши...
- Page 16 Переключение с помощью DKVM-2K Быстро и просто переключаться между двумя компьютерами DKVM-2K позволяет с помощью кнопки Select, расположенной на передней панели и с помощью «горячих клавиш» клавиатуры. Кнопка Select Вы также можете использовать клавиатуру для переключения между компьютерами. Нажмите дважды клавишу Scroll Lock, чтобы войти в режим...
-
Page 17: Поиск Неисправностей
Если Ваша мышь не функционирует, не определяется, или возникли ошибки мыши при загрузке, проверьте следующее: • Убедитесь, что мышь правильно подключена к компьютеру и к DKVM-2K. Проверьте, что мышь подключена к порту PS/2 для мыши, а не к порту PS/2 для клавиатуры. -
Page 18: Техническая Поддержка
Техническая поддержка Обновления программного обеспечения и документация доступны на Интернет-сайте D-Link. D-Link предоставляет бесплатную поддержку для клиентов в течение гарантийного срока. Клиенты могут обратиться в группу технической поддержки D-Link по телефону или через Интернет. Техническая поддержка D-Link: (095) 744-00-99 Техническая поддержка через Интернет... -
Page 19: Antes De Empezar
Si falta alguno de estos componentes, por favor contacte con su proveedor. ©2003 D-Link Systems, Inc. Reservados todos los derechos. Las marcas o marcas registradas son propiedad de los respectivos titulares. El software y las especifi caciones pueden ser modifi cados sin previo aviso. - Page 20 Instalar el DKVM-2K Antes de instalar el DKVM-2K, comprobar que todos los ordenadores están APAGADOS, así se evitan errores del ratón o del teclado cuando se reinicien los mismos. Introducir el conector HDDB 15 VGA del monitor en el puerto consola del DKVM-2K.
- Page 21 Conectar el cable del ratón, integrado en el DKVM-2K, en el puerto PS/2 para ratón que se encuentra en el panel trasero del ordenador. Tras haber finalizado la instalación del DKVM-2K, se han Type A de ENCENDER los ordenadores .
- Page 22 Conmutando con el DKVM-2K El DKVM-2K dispone de un botón selector en el panel frontal y de un teclado de teclas de acceso rápido que permiten que la conmutación entre los dos ordenadores sea más rápida y fácil. Botón se- lector También se puede usar el teclado para conmutar entre los ordenadores.
-
Page 23: Consejos Para Solucionar Problemas
• No debe moverse el ratón ni apretar ninguno de los botones del ratón mientras se está cambiando de un PC al otro. • Probar a reiniciar el ratón desconectándolo del DKVM-2K durante 3 segundos y volviéndolo a conectar. Vídeo Si la imagen del monitor no es nítida, hágase lo siguiente:... -
Page 24: Asistencia Técnica
El servicio de soporte técnico tiene presencia en numerosos países de la Región Latino América, y presta asistencia gratuita a todos los clientes de D-Link, en forma telefónica e internet, a través de la casilla soporte@dlink.cl Soporte Técnico Help Desk Argentina: Teléfono: 0800-6661442 Lunes a Viernes 09:00 am a 22:00 pm... - Page 25 Se qualquer dos itens acima estiver faltando, favor contatar o seu revendedor. ©2004 D-Link Systems, Inc. Todos os direitos reservados. As marcas comercias ou marcas comerciais registradas são proprie- dade dos seus respectivos detentores. Os softwares e especifi cações estão sujeitos a mudanças sem prévio aviso.
- Page 26 Instalando o DKVM-2K Certifique-se que todos os seus computadores estejam DESLIGADOS antes de instalar o DKVM-2K para evitar erros de mouse e teclado ao iniciar os seus computadores. Plugue o conector VGA HDDB 15 do seu monitor na porta do console do DKVM-2K.
- Page 27 Conecte o cabo de mouse incorporado do DKVM-2K na porta de mouse PS/2 localizada na parte traseira do gabinete do seu computador. LIGUE todos os seus computadores conectados após Type A concluir a instalação do DKVM-2K.
- Page 28 Comutando com o DKVM-2K O DKVM-2K possui um Botão de Seleção (Select) localizado no painel dianteiro e Hot Keys no teclado para comutar rápida e facilmente entre ambos os seus computadores. Botão Select Você também pode utilizar o seu teclado para comutar entre os seus computadores.
- Page 29 • Certifique-se que o teclado esteja devidamente conectado ao computador e ao DKVM-2K. Verifique se o teclado está conectado à porta de teclado PS/2 correta e não na porta de mouse PS/2. • Verifique se o seu teclado funciona quando conectado diretamente ao computa dor.
-
Page 30: Suporte Técnico
Você pode encontrar atualizações de software e documentação de usuário no site da D-Link Brasil www.dlinkbrasil.com.br. A D-Link fornece suporte técnico gratuito para clientes no Brasil durante o período de vigência da garantia deste produto. Suporte Técnico para clientes no Brasil:... - Page 31 DKVM-2K 本產品與所有Windows 內建纜線的2埠 作業系統共用 KVM交換器 開始之前 必須具備以下條件: • PS/2鍵盤 • PS/2滑鼠 • VGA或更高等級的顯示器 檢查包裝內容 您購買的產品包括以下內容: •內建纜線的DKVM-2K KVM交換器 •PS/2-USB轉換頭(器) 以上物件如有缺失請聯繫您的經銷商。 2004版權所有。D-Link與D-Link商標為友訊科技的商標,其他註冊商標分別隸屬該公司所有。最新規格以原廠通告為準,恕不另行通知.
- Page 32 安裝DKVM-2K 在安裝DKVM-2K之前請確認所有的電腦都處於關機狀態,以避免電腦啓 動時出現滑鼠或鍵盤錯誤。 將監視器的HDDB 15 VGA連接器 與DKVM-2K的螢幕控制埠連接 將鍵盤的6pin PS/2公頭連接器 與DKVM-2K鍵盤埠連接 將滑鼠的6pin PS/2公頭連接器 與DKVM-2K滑鼠埠連接...
- Page 33 安裝DKVM-2K 以下步驟適用於與DKVM-2K共同使用的電腦 將DKVM-2K內建顯示器電纜與 電腦機殼背面的VGA埠相連接 將DKVM-2K內建鍵盤電纜與 電腦機殼背面的PS/2鍵盤埠 相連接 將DKVM-2K內建滑鼠電纜與 電腦機殼背面的PS/2滑鼠埠 相連接 完成DKVM-2K的安裝後,打開所有連接的電腦 Type A...
- Page 34 用DKVM-2K進行切換 DKVM-2K在前面板具有選擇按鈕(Select Button),鍵盤上有熱鍵(Hot Keys), 可以在2台電腦之間快速便捷地進行切換。 Select 按鈕 還可使用鍵盤在2台電腦之間切換。按Scroll Lock鍵2次,進入熱鍵切換模式。 出現嗶聲確認熱鍵模式已啟動。 熱鍵功能表 Scroll Lock + Scroll Lock + 1 : 切換到PC1 Scroll Lock + Scroll Lock + 2 : 切換到PC2 Scroll Lock + Scroll Lock + S : 啟動自動掃描模式。每隔10秒鐘掃描 切換電腦一次。 Scroll Lock + Scroll Lock + ESC : 退出自動掃描模式和熱鍵模式...
- Page 35 閱讀您的主機板的說明,確認電腦中PS/2鍵盤IRQ功能設定已啟動。這步驟可 在多數電腦的BIOS設置中完成。 • 試著使用其他鍵盤 滑鼠 如滑鼠不可使用、未偵測到或在啟動時出現滑鼠錯誤,請檢查以下內容: • 確認滑鼠已正確連接到電腦和DKVM-2K。檢查滑鼠已插入正確的PS/2滑鼠埠 而不是PS/2鍵盤埠。 • 當滑鼠直接連接電腦後,請確認滑鼠工作正常。請先關閉電腦以完成本步操作。 • 閱讀您的主機板的說明,確認電腦中PS/2滑鼠IRQ功能設定已啟動。這步驟可 在多數電腦 的BIOS設置中完成。 • 試著使用其他滑鼠 • 如果在電腦間進行切換時滑鼠的動作是跳動的,試著關閉電腦並重新啟動。 • 確認電腦只安裝了一個滑鼠驅動程式(檢查Windows的config.sys和autoexec.bat 檔案)。 • 如果使用無線或滾輪等特殊滑鼠,請確認使用一般的PS/滑鼠驅動程式。 非標準的PS/2滑鼠可能有超出 PS/2 協定的擴充功能,因而不被DKVM-2K支援。 • 從一台PC切換到另一台PC時,請不要移動或按壓滑鼠按鍵。 • 將滑鼠從DKVM-2K上拔下3秒鐘後重新連接,可重新設定滑鼠。 視訊 • 如果顯示器上的顯示不清楚,請檢查以下內容: • 確認所有的視訊顯示器電纜都已正確連接 • 試著降低顯示器的解析度和更新頻率 • 試著使用較短的視訊電纜...
- Page 36 友冠技術支援 台灣地區用戶可以透過我們的網站,電子郵件或電話與 友冠資訊技術支援人員聯絡。 支援服務時間從 週一到週五,上午8:30 a.m. 到 7:00 p.m Web: http://www.dlinktw.com.tw/ FAQ: http://www.dlinktw.com.tw/support.asp Email: dssqa@dlinktw.com.tw Phone: 0800-002-615 如果您是台灣地區以外的用戶,請參考使用手冊 中記載的D-Link 全球各地分公司的聯絡資訊 取得支援服務。 產品維修與保固相關資訊,請參考友冠資訊網頁說明: http://www.dlinktw.com.tw/suppQuick.asp...
Need help?
Do you have a question about the DKVM-2K and is the answer not in the manual?
Questions and answers