Makita DTW250 Instruction Manual
Hide thumbs
Also See for DTW250:
- Instruction manual (64 pages) ,
- Instruction manual (49 pages) ,
- Instruction manual (49 pages)
Table of Contents
Advertisement
Quick Links
Advertisement
Table of Contents

Related Manuals for Makita DTW250


Summary of Contents for Makita DTW250
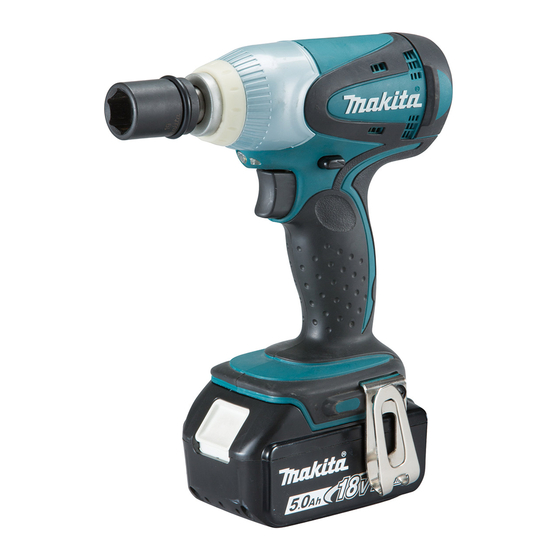
- Page 1 INSTRUCTION MANUAL Cordless Impact Wrench DTW250 DTW251 Read before use.
-
Page 2: Specifications
The typical A-weighted noise level determined accord- off and when it is running idle in addition to the ing to EN62841-2-2: trigger time). Model DTW250 Sound pressure level (L ) : 90 dB (A) Sound power level (L ) : 101 dB (A) -
Page 3: Ec Declaration Of Conformity
Power tool plugs must match the outlet. Never modify mined according to EN62841-2-2: the plug in any way. Do not use any adapter plugs Model DTW250 with earthed (grounded) power tools. Unmodified plugs Work mode : impact tightening of fasteners of the and matching outlets will reduce risk of electric shock. - Page 4 Always wear protective goggles to protect your eyes Battery tool use and care from injury when using power tools.The goggles Recharge only with the charger specified by must comply with ANSI Z87.1 in the USA, EN 166 in the manufacturer. A charger that is suitable for Europe, or AS/NZS 1336 in Australia/New Zealand.
-
Page 5: Functional Description
Makita. Installing the batteries to on the battery cartridge with the groove in the non-compliant products may result in a fire, exces- housing and slip it into place. Always insert it all sive heat, explosion, or leak of electrolyte. the way until it locks in place with a little click. If SAVE THESE INSTRUCTIONS. you can see the red indicator on the upper side of the button, it is not locked completely. Install it fully until the red indicator cannot be seen. If not, it may CAUTION: Only use genuine Makita batteries. accidentally fall out of the tool, causing injury to Use of non-genuine Makita batteries, or batteries that you or someone around you. have been altered, may result in the battery bursting causing fires, personal injury and damage. It will also • Do not use force when installing the battery car- tridge. If the cartridge does not slide in easily, it is void the Makita warranty for the Makita tool and charger. not being inserted correctly. 5 ENGLISH... - Page 6 Battery protection system (Lithium- Indicator lamps Remaining capacity ion battery with star marking) Lighted Blinking 75% to 100% 50% to 75% 25% to 50% 0% to 25% Charge the battery. The battery may have malfunctioned. ► 1 . Star marking Lithium-ion batteries with a star marking are equipped with a protection system. This system automatically NOTE: Depending on the conditions of use and the cuts off power to the tool to extend battery life.
- Page 7 Lighting up the front lamp ASSEMBLY CAUTION: • Always be sure that the tool is switched off and the battery cartridge is removed before carrying out any work on the tool. Selecting correct socket Always use the correct size socket for bolts and nuts. An incorrect size socket will result in inaccurate and inconsistent fastening torque and/or damage to the bolt or nut. Installing or removing socket ► 1 . Lamp CAUTION: •...
-
Page 8: Operation
Hook Standard bolt (kgf cm) (1,632) (1,428) (1,224) (1,020) (816) (612) ► 1 . Hook 2. Screw 3. Groove (408) The hook is convenient for temporarily hanging the tool. (204) This can be installed on either side of the tool. To install the hook, insert it into a groove in the tool housing on either side and then secure it with a screw. -
Page 9: Optional Accessories
• Always be sure that the tool is switched off and the battery cartridge is removed before attempt- ing to perform inspection or maintenance. • Never use gasoline, benzine, thinner, alcohol or the like. Discoloration, deformation or cracks may result. To maintain product SAFETY and RELIABILITY, repairs, carbon brush inspection and replacement, any other maintenance or adjustment should be performed by Makita Authorized or Factory Service Centers, always using Makita replacement parts. 9 ENGLISH... - Page 12 Makita Europe N.V. Jan-Baptist Vinkstraat 2, 3070 Kortenberg, Belgium Makita Corporation 3-11-8, Sumiyoshi-cho, Anjo, Aichi 446-8502 Japan 885257C228 www.makita.com 20180829...
Need help?
Do you have a question about the DTW250 and is the answer not in the manual?
Questions and answers