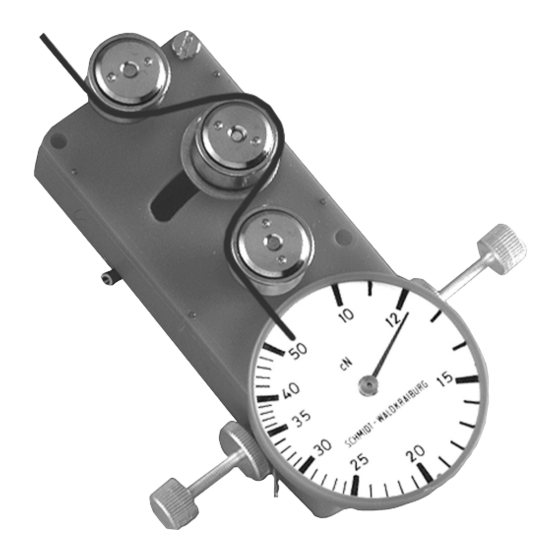
Summary of Contents for Schmidt MK-12
- Page 1 Tension Meter S C H M I D T c o n t r o l i n s t r u m e n t s Edition MK 05.3.E MK Series Model Instruction Manual Valid as of: 01.06.2007 • Please keep the manual for future reference!
-
Page 2: Table Of Contents
Contents 1 Warranty and Liability ....................3 1.1 Notices within the Operating Instructions ............... 3 1.2 Responsibilities of the Operating Company ............3 1.3 Responsibilities of the Personnel ................3 1.4 Informal Safety Measures ..................4 1.5 Training of the Personnel ..................4 1.6 Intended Use ...................... -
Page 3: Warranty And Liability
Warranty: - SCHMIDT tension meters are warranted for 12 months. Parts subject to wear, electronic components and measuring springs are not covered by the warranty. No warranty or liability will be accepted for bodily injury or property damage resulting from one or several of the following causes: - Misuse or abuse of the device. -
Page 4: Informal Safety Measures
The device is intended exclusively to be used as a tension meter. Any other use or any use exceeding this intention will be regarded as misuse. Under no circumstances shall HANS SCHMIDT & Co GmbH be held liable for damage resulting from misuse. The intended use also includes: - Complying with all notices included in the Operating Instructions and observing all inspection and maintenance works. -
Page 5: Available Models
PA: 0.20 mm Ø ** Suitable for 95% of all applications. PA = Polyamide Monofilament. If the material to be measured differs significant from the SCHMIDT calibration material in diameter, rigidity, shape, etc., we recommend calibration using customer supplied material. For this purpose a material sample of about 5 m should be supplied. -
Page 6: Available Optionsair Damping
The ID plate with the serial number as well as the calibration label (optional) are provided on the bottom of the instrument, the SCHMIDT Quality Seal are provided on the surface. -
Page 7: Fastening The Mk Tensionmeter
3.2 Fastening the MK Tensionmeter Mounting hole Two mounting holes are provided for fastening diameter 3.1 mm the tensionmeter on site. For the mounting hole dimensions see the above drawing (fig. 3.2). fig. 3.2 46 mm 3.3 Inserting the Material to be Measured MEASURING GUIDE ROLLERS - Thread the material to be measured... -
Page 8: Min/Max Contacts (Optional Accessory Code D)
3.4 MIN/MAX Contacts (Optional Accessory Code D) LOCKNUTS MIN SETSCREW MAX SETSCREW Soldering tag for cable connection Soldering tag for cable max. 24 V / 2 W connection fig. 3.4 Your MK tensionmeter can be factory-equipped with MIN/MAX tension-detecting contacts which allow you to monitor the tolerance limits for the measured tension. These factory-installed contacts are free from potential. -
Page 9: Verification Of The Mk Calibration
Any difference in process material size and rigidity from the standard material may cause a deviation of the accuracy. In 95 % of all industrial applications the SCHMIDT calibration has been proven to provide the best results and is used for comparative purposes. -
Page 10: Service And Maintenance
The question of finding the right frequency of calibration accuracy verification depends on several different factors: Operating time and load of the SCHMIDT tension meter Tolerance band defined by the customer Changes of the tolerance band compared to previous verifications of calibration Therefore, the interval between verifications must be determined by the user`s Quality Assurance Department based on the user`s experience. -
Page 11: Correspondence
Please indicate in your order whether you require an Inspection Certificate 3.1 according to DIN EN 10204. Service address: HANS SCHMIDT & Co GmbH Schichtstr. 16 D-84478 Waldkraiburg Germany... - Page 12 Yarn Package Durometer and Shore-A Durometer Sample Cutter Balance Moisture Meter Leak Tester Softometer More than 70 years - Worldwide - Hans Schmidt & Co GmbH Mailing address: Phone: e-mail: P. O. B. 1154 int. + 49 / (0)8638 / 9410-0 info@hans-schmidt.com...


Need help?
Do you have a question about the MK-12 and is the answer not in the manual?
Questions and answers