FlowLine EchoSwitch LU74 Series Quick Start Manual
Ultrasonic level switch and transmitter
Hide thumbs
Also See for EchoSwitch LU74 Series:
- Manual (35 pages) ,
- Quick start manual (6 pages) ,
- Quick start manual (12 pages)

Related Manuals for FlowLine EchoSwitch LU74 Series


Summary of Contents for FlowLine EchoSwitch LU74 Series
- Page 1 EchoSwitch® Ultrasonic Level Switch and Transmitter LU74 & LU78 Series Quick Start QS300282 Rev A1 ©2013 Flowline, Inc. All Rights Reserved 10500 Humbolt Street, Los Alamitos, CA 90720 USA Made in USA Tel: 562.598.3015 • Fax: 562.431.8507 • www.flowline.com ...
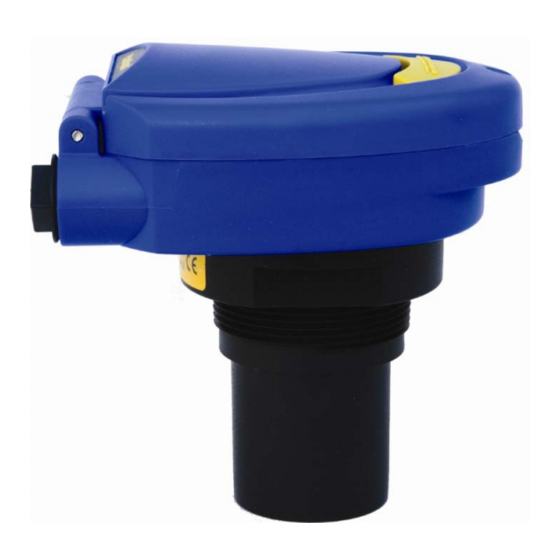
- Page 2 The EchoSwitch® Quick Start provides basic mounting, setup and use instructions for getting the EchoSwitch® up and running quickly. If you have a non‐standard installation or setup requirement that is not addressed here, please refer to the EchoSwitch® Manual or other support documentation located at www.flowline.com. We Do Your Level Best Thank you for purchasing EchoSwitch®. The sensor provides integrated LCD and three ...
- Page 3 Mounting the EchoSwitch® The sensor should always be mounted perpendicular to the liquid surface using the provided Viton® mounting gasket. Insure that there are no restrictions or obstacles in the path of the acoustic signal. For further mounting information, please refer to the EchoSwitch® manual at www.flowline.com. Mounting with a Tank Adapter Select a tank adapter fitting, such as the LM52‐2890. Mounting in Riser As installations with tall, narrow risers can impede ...
- Page 4 IMPORTANT MOUNTING GUIDELINES: 1) Never mount the sensor at an angle. 2) Liquid should never enter the dead band. 3) Mount at least 3” from the side wall. 4) Never mount in a vacuum. 5) Do not obstruct the sensor’s beam width. Mounting with a Stand‐Pipe: A stand‐pipe may be used to dampen turbulence, separate surface foam from the point of measurement or increase performance in heavy vapor. When mounting the sensor in a stand‐pipe, the minimum diameter of the pipe is 3”. Larger diameter pipes can be used. The pipe should be attached with a coupling or tank adapter and reducer bushing. Avoid the use of multiple pipe fittings when possible. An ideal mount would be to select a 3” tank adapter (S x T or S x S) and connect the pipe to the inside slip and use a reducer bushing to attach the sensor (see example below). The pipe length should run the measurement span and the bottom of the pipe should remain submerged at all times to prevent foam from entering the pipe. Cut the bottom end of the pipe at 45° and drill a 1/4” pressure equalization hole within the sensor’s dead band. Locate the stand‐pipe away from pump outlets and/or other sources of substantial turbulence which might cause the liquid in the pipe to oscillate. ...
- Page 5 Wiring the EchoSwitch® The following wiring diagram can be used when wiring to the EchoSwitch® relays. Note: All three relays share the COM terminal. Relay 1 has both a NO and NC terminal while Relays 2 and 3 have just a NO terminal. Note #1 – Isolate power to instrument from power to load (pumps, etc.) as much as possible by running power to the sensor directly from main power source. The following wiring diagrams can be used for the 4‐20 mA output of the EchoSwitch®. Some notes on safety: Where personal safety or significant property damage can occur due to a spill, the installation must have a redundant backup safety system installed. Wiring should always be completed by a licensed electrician. The sensor must be chemically compatible with the application. Design a fail‐safe system for possible sensor and/or power failure. Never use the sensor in classified hazardous environments. ...
-
Page 6: Top-Level Menu
Configuring the Sensor EchoSwitch® can be configured before installation. The switch features non‐volatile memory, so the set points configured before installation will not be lost when the switch is powered down. To start, all you need is the following information: Basic Tank Information o HEIGHT – Distance from the transducer face to the bottom of the tank. o FILL‐H – Maximum fill height of the liquid from the bottom of the tank. Set Points (Relays): o You will need the measured distance from the bottom of the tank to each set point. o Pump and Valve operations will have two set points, one for ON and the other for OFF. ... -
Page 7: Level Menu
Set Units The EchoSwitch® displays information in the following units: inches, feet, centimeters, meters or percentage. The value shown on the display represents the amount of liquid in the tank. 1) Press & hold SELECT for 5 seconds to enter TOP‐ LEVEL MENU. 2) Select UNITS. 3) Select the type of units by pressing SELECT. 4) Select EXIT to return to the TOP‐LEVEL MENU. 5) Select RUN to return to Operational Mode. Set Height and Fill Height This setting customizes the reading for your installation. Follow these instructions to set the height and fill height for your tank: 1) Press & hold SELECT for 5 seconds to enter TOP‐LEVEL MENU. 2) Select TANK. ... - Page 8 Set a High Alarm Relay A high alarm relay will notify you when the tank level reaches a preset high level: 1) Press and hold SELECT for 5 seconds to enter TOP‐ LEVEL MENU. 2) Select RELAY1, RELAY2 or RELAY3. 3) Select ALARM. 4) Select HIGH (SAVED appears). 5) Use the UP and DOWN buttons to set the HIGH (ON) set point for the relay. To enter value, press and hold SELECT for 2 seconds and release. SAVED will display. 6) Select HYSTER (Hysteresis). 7) Use the UP and DOWN buttons to set the HYSTER (OFF) set point. To enter value, press and hold SELECT ...
- Page 9 Fill a Tank with a Pump or Valve The relays can also be used to automatically fill a tank when the level inside drops too low. To set the sensor to automatically fill a tank: Press and hold SELECT for 5 seconds to enter TOP‐LEVEL MENU. Select RELAY1, RELAY2 or RELAY3. Select PUMP or VALVE (SAVED appears). Select FILL (SAVED appears). Select ON. Use the UP and DOWN buttons to set the ON set point for the relay. This is the lower of the two set points. To enter value, press and hold SELECT for 2 seconds and release. SAVED will display. Select OFF. Use ...
- Page 10 Empty a Tank with a Pump or Valve The relays can also be used to automatically empty a tank when the level inside gets too high. To set the sensor to automatically empty a tank: Press and hold SELECT for 5 seconds to enter TOP‐LEVEL MENU. Select RELAY1, RELAY2 or RELAY3. Select PUMP or VALVE (SAVED appears). Select EMPTY (SAVED appears). Select ON. Use the UP and DOWN buttons to set the ON set point for the relay. This is the higher of the two set points. To enter value, press and hold SELECT for 2 seconds and release. SAVED will display. Select OFF. Use ...
- Page 11 4) Select an output option, such as 4mA, 21mA, or HOLD. To enter value, press and hold SELECT for 2 seconds and release. SAVED will display. 5) Select EXIT to return to the TOP‐LEVEL MENU. Troubleshooting If you face any issues not addressed in this Quick Start, please refer to the EchoSwitch® Manual located on Flowline’s website at www.flowline.com. Information on how to set a LOW or HIGH alarm, as well as how to FILL or EMPTY a tank with a pump, can also be found in the EchoSwitch® Manual located on Flowline’s website at www.flowline.com. ...
-
Page 12: Warranty
2) the product has remained unclaimed at Flowline for more than 30 days after Flowline has dutifully requested disposition. This warranty contains the sole express warranty made by Flowline in connection with its products. ALL IMPLIED WARRANTIES, INCLUDING WITHOUT LIMITATION, ...
Need help?
Do you have a question about the EchoSwitch LU74 Series and is the answer not in the manual?
Questions and answers