
Subscribe to Our Youtube Channel
Related Manuals for FlowLine EchoSwitch LU74-5004


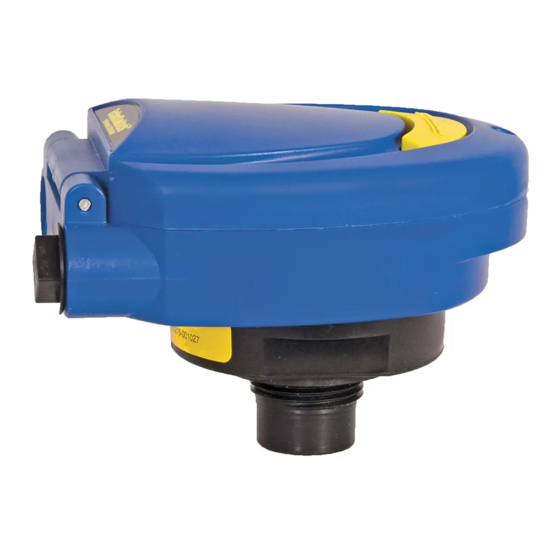
Summary of Contents for FlowLine EchoSwitch LU74-5004
- Page 1 ® EchoSwitch Ultrasonic Level Switch and Transmitter LU74, LU77 & LU78 Series Manual NEMA 4X Enclosure Flowline, Inc. | 10500 Humbolt Street, Los Alamitos, CA 90720 p 562.598.3015 f 562.431.8507 w flowline.com MN300262 Rev B...
-
Page 2: Table Of Contents
How to Turn Off M-PLEX (DUPLEX or TRIPLEX): ................19 How to Time Alternate Relays: ......................20 Electrical: ................................21 Input Power and Relay Connections: ..................... 21 Analog Output (4/20 mA): ........................22 Wiring to Common Flowline Displays/Controllers: ....................23 MN300262 Rev B... - Page 3 Introduction / Table of Contents (continued) Step One Installation: ................................. 24 Mounting Guide: ............................. 24 Installation in Existing Fittings: ....................... 24 Fitting Selection: ............................ 25 Tank Adapter: ..........................25 Riser: ............................25 Flange: ............................26 Side Mount Bracket: ........................26 Stand Pipe: ..........................
-
Page 4: Specifications
Specifications / Dimensions Step Two Range: LU74: 8" to 18.0’ LU77: 4" to 9.8' LU78: 8" to 26.2' (20 cm to 5.5m) (10 cm to 3m) (20 cm to 8m) Repeatability: 0.25" (6.35 mm) Side View LU77 Series Accuracy: ±0.2% of span Loop Output: Isolated, Sinking 12 to 28 VDC... -
Page 5: Safety Precautions
PRODUCT. This manual includes information on the EchoSwitch® series ultrasonic level switch and transmitter from FLOWLINE. Please refer to the part number located on the switch label to verify the exact model configuration, which you have purchased. User’s Responsibility for Safety: FLOWLINE manufactures a broad range of level sensing technologies. -
Page 6: Components
Make a Fail-Safe System: Design a fail-safe system that accommodates the possibility of switch and/or power failure. FLOWLINE recommends the use of redundant backup systems and alarms in addition to the primary system. Adding a redundant high level float switch to the system is a cost effective means to prevent costly tank overflows. -
Page 7: Getting Started
Getting Started Step Four EchoSwitch® can be configured before installation. The switch features non-volatile memory, so the set points configured before installation will not be lost when the switch is powered down. To start, all you need is the following information: ... -
Page 8: Configuration
2. Press SELECT to choose between INCHES, CM (centimeter), FEET, METERS or PERCENT. 3. Select EXIT to return to the TOP-LEVEL MENU. Note: Reading the level of liquid in Percent Flowline recommends that when selecting PERCENT, configure the Height and Fill_H settings before selecting PERCENT in order to span the EchoSwitch®... -
Page 9: How To Configure The Operational Range Of Echoswitch
Configuration (continued) Step Five HOW TO CONFIGURE THE OPERATIONAL RANGE OF ECHOSWITCH® Before starting, take two measurements. 1) Measure the distance from the bottom of the sensor (transducer face) to the bottom of the tank. This will be the HEIGHT setting. 2) Measure the distance from the bottom of the tank to the Maximum Level of Liquid (Full). -
Page 10: How To Set A High Alarm
Configuration (continued) Step Five HOW TO SET A HIGH ALARM Before starting, measure the distance from the bottom of the tank to the High Alarm position (ON) in the tank. In TOP-LEVEL MENU mode, select RELAY1, RELAY2 or RELAY3. Select ALARM. Select HIGH. -
Page 11: How To Set A Low Alarm
Configuration (continued) Step Five HOW TO SET A LOW ALARM Before starting, measure the distance from the bottom of the tank to the Low Alarm position (ON) in the tank. In TOP-LEVEL MENU mode, select RELAY1, RELAY2 or RELAY3. Select ALARM. Select LOW. -
Page 12: How To Set A Pump To Fill
Configuration (continued) Step Five HOW TO SET A PUMP TO FILL Before starting, take two measurements. 1) Measure the distance from the bottom of the tank to the Pump ON position. 2) Measure the distance from the bottom of the tank to the Pump OFF position. Pump ON will be physically lower than the Pump OFF position. -
Page 13: How To Set A Pump To Empty
Configuration (continued) Step Five HOW TO SET A PUMP TO EMPTY Before starting, take two measurements. 1) Measure the distance from the bottom of the tank to the Pump ON position. 2) Measure the distance from the bottom of the tank to the Pump OFF position. Pump ON will be physically higher than the Pump OFF position. -
Page 14: How To Set A Valve To Fill
Configuration (continued) Step Five HOW TO SET A VALVE TO FILL Before starting, take two measurements. 1) Measure the distance from the bottom of the tank to the Valve ON position. 2) Measure the distance from the bottom of the tank to the Valve OFF position. Valve ON will be physically lower than the Valve OFF position. -
Page 15: How To Set A Valve To Empty
Configuration (continued) Step Five HOW TO SET A VALVE TO EMPTY Before starting, take two measurements. 1) Measure the distance from the bottom of the tank to the Valve ON position. 2) Measure the distance from the bottom of the tank to the Valve OFF position. Valve ON will be physically higher than the Valve OFF position. -
Page 16: How To Select Fail-Safe Output / Lost
Configuration (continued) Step Five HOW TO SET RELAY FAIL-SAFE / LOST: In the event the sensor does not receive an echo, the Fail-Safe Output or LOST setting can be set to turn each relay ON, OFF or HOLD (to last state) to achieve the desired fail-safe condition. During fail-safe, the display will read LOST. -
Page 17: How To Duplex Two Relays
Configuration (continued) Step Five HOW TO DUPLEX TWO RELAYS: Duplex enables EchoSwitch® to use two relays to alternate after each cycle while performing a lead-lag operation. To begin, configure two relays in the same mode (ex: two relays are set as PUMPs that FILL or two relays set as PUMPs that EMPTY). -
Page 18: How To Alternate Two Relays
Configuration (continued) Step Five HOW TO ALTERNATE TWO RELAYS: Alternate enables EchoSwitch® to use two relays to alternate after each cycle. The configuration of Alternate is identical to Duplex with the exception of the Backup level is at a setting where the level will never achieve set point. -
Page 19: How To Triplex Three Relays
Configuration (continued) Step Five HOW TO TRIPLEX THREE RELAYS: Triplex enables EchoSwitch® to use three relays to alternate after each cycle while performing a lead lag-lag operation. To begin, configure all three relays in the same mode (ex: all relays are set as PUMPs that FILL or all relays set as PUMPs that EMPTY). -
Page 20: How To Time Alternate Relays
Configuration (continued) Step Five HOW TO TIME ALTERNATE RELAYS: This function is only operational when two or more relays are configured as pumps performing the same function (either filling or emptying). This function is useful when a complete cycle of the pumps cannot be guaranteed such as a continuous inflow to a sump. -
Page 21: Electrical
Electrical Step Six INPUT POWER AND RELAY CONNECTIONS: The EchoSwitch® is powered from 95 to 250 VAC power. Power is applied to the L1 and L2 terminals. Typically, Hot is applied to L1 and Neutral to L2. The Gnd terminal should be connected to a solid earth ground to help shield the sensor from external EMI/RFI interference. -
Page 22: Analog Output (4/20 Ma)
Electrical (continued) Step Six ANALOG OUTPUT (4/20 MA): The analog output of the EchoSwitch® is a sinking 4/20 mA control circuit. The typical way to use this feature is to connect a positive supply to the MA+ input and to sense the current flow out of the MA- output with a sampling resistor as shown in the following diagram. -
Page 23: Wiring To Common Flowline Displays/Controllers
Wiring Step Seven WIRING TO COMMON FLOWLINE DISPLAYS & CONTROLLER: Below is a quick review of wiring to the most common Flowline Displays & Controllers. DataView™ LI55 Series DataLoop™ LI25 Series DataLoop™ LI25 Series Level Controller Level Indicator Level Indicator... -
Page 24: Installation
LM52-2400 LM52-1400 Metal Tanks (LU77 Series Only): Flowline ultrasonic sensors have been optimized for use in non-metallic fittings. 1. For best performance, avoid the use of metallic fittings. a. Use a plastic 2” x 1” reducer bushing, such as the LM52-1400 or a plastic 1” flange, such as the LM52-1850 for metallic tanks. -
Page 25: Fitting Selection
Installation (continued) Step Eight FITTING SELECTION: Check the part number to determine the required fitting mount size and thread type. EchoSwitch® is commonly installed in tank adapters, flanges, brackets or standpipes. Note: Always include the gasket when installing the EchoSwitch®. 1. -
Page 26: Flange
Installation (continued) Step Eight 3. FLANGE (LU77 SERIES): If installing on a flange, select a flange with a thread that is above the plane of the flange, such as the LM52-1850. a. The LU74 & LU78 series works well with Flange installations. b. -
Page 27: Stand Pipe
Installation (continued) Step Eight 5. STAND PIPE: A standpipe maybe used to dampen turbulence or separate surface foam from the point of measurement in the application. a. Pipe can be made of any material. b. Select a minimum 3” ID pipe for the stand pipe. i. -
Page 28: Appendix
Appendix Step Nine TOP-LEVEL MENU DESCRIPTIONS UNITS – Allows end user to select the units for configuration and operation. o Select between Inches, Centimeters, Feet, Meters or Percent. o Press EXIT to return to the TOP-LEVEL MENU. TANK –... - Page 29 Appendix (continued) Step Nine TOP-LEVEL MENU DESCRIPTIONS (CONTINUED) FILL – used to control a pump that fills a tank. Typically, Relay ON is the LOW set point and Relay OFF the HIGH set point. Relay will energize at the low set point (ON) and remain on until the level reaches the high set point (OFF) and will remain off until the level returns to the low set point (ON).
-
Page 30: Safe
Using the UP and DOWN buttons will increase o TEST P – This is a production test feature used by the factory to confirm operation. This mode should only be used when supervised by a Flowline representative. ... -
Page 31: Run
Appendix (continued) Step Nine TOP-LEVEL MENU DESCRIPTIONS (CONTINUED) – Returns the unit to normal measurement and control mode. SETUP: Setup will display setting for all functions of EchoSwitch®. Use this feature to confirm the configuration of the sensor. 1. In TOP-LEVEL MENU, select HELP. 2. -
Page 32: Simulation (Sim-T)
Turn OFF all three relays. 4. TEST P will also list the following settings: 5. Select EXIT to return to TOP-LEVEL MENU. Note: This mode should only be used when supervised by a Flowline representative. MN300262 Rev B... -
Page 33: Troubleshooting
Appendix (continued) Step Nine TROUBLESHOOTING PROBLEM SOLUTION TANK does not appear on Units function is set for PERCENT on EchoSwitch®: When Units is set the main menu for PERCENT, the TANK function is disabled. To re-enable TANK, change units to INCHES, CM, FEET or METERS. Display always jumps to Check the dimensional configuration (Height and Fill-H) of the the LOST condition... -
Page 34: User Settings
Appendix (continued) Step Nine USER SETTINGS: Fill out the chart below and keep as a record of your configuration. Tank Height = Fill-H = Relay #1 Pump Valve Alarm Fill Empty Fill Empty High ON = ON = ON = OFF = OFF = Hysteresis =... -
Page 35: Warranty
PERSON IS AUTHORIZED TO MAKE ANY OTHER WARRANTIES OR REPRESENTATIONS ON BEHALF OF FLOWLINE. This warranty will be interpreted pursuant to the laws of the State of California. If any portion of this warranty is held to be invalid or unenforceable for any reason, such finding will not invalidate any other provision of this warranty.
Need help?
Do you have a question about the EchoSwitch LU74-5004 and is the answer not in the manual?
Questions and answers