
Subscribe to Our Youtube Channel
Related Manuals for Arec MS-650


Summary of Contents for Arec MS-650
- Page 1 MS-650 Media Station User Manual English AREC Inc.© All Rights Reserved 2017. l www.arec.com All information contained in this document is Proprietary...
-
Page 2: Table Of Contents
MS-650 User Manual Table of Contents Chapter 1 Package Accessories Chapter 2 Product Overview 2.1 Host View 2.2 Remote Control Receiver 2.3 Control Panel 2.3.1 Indicators 2.3.2 Button Functions Chapter 3 Wiring and Initial Installation 3.1 Product Connection 3.2 First installation... - Page 3 MS-650 User Manual Table of Contents 6.2.7 Record Typesetting and Video Source 6.2.8 Recording Volume Adjustment 6.2.9 Recording Lens Zoom In/Out 6.2.10 Encode Profile 6.2.11 PPT indexing software 6.3 Playback Tutorial 6.3.1 Local Storage 6.3.2 Live Broadcast 6.3.3 Channel Information 6.3.4 Knowledge Point Search...
-
Page 4: Chapter 1 Package Accessories
Chapter 1 Package Accessories Introduction Featuring a compact and stand-alone design, AREC MS-650 Media Station consists of diverse features and functionality, including multi-signals capturing, recording synchronously, codec, streaming online, multi-channel split screen, live broadcasting, and web-based video switcher, providing complete lecture capture solution. -
Page 5: Chapter 2 Product Overview
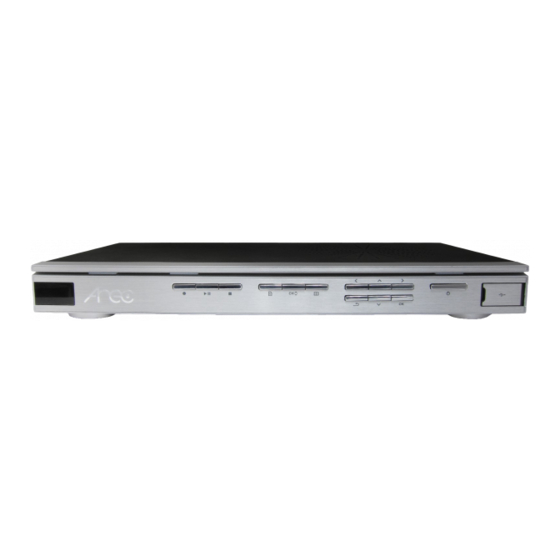
MS-650 User Manual Chapter 2 Product Overview 2.1 Host View Front Back Name Brief introduction Remote Control receiver Remote Control receiving area Led light Bluetooth / Record / Power Function key Record / Play / Pause / Stop / Menu / Channel / Preview Layout... -
Page 6: Remote Control Receiver
MS-650 User Manual 2.2 Remote Control Receiver Please point the remote control to the infrared receiver at the front panel of the product to ensure proper signal reception. The applicable range is between +/- 30 degrees, and the maximum vertical distance is within 10 meters. -
Page 7: Button Functions
MS-650 User Manual 2.3.2 Button Functions There are frequently used control buttons on the front panel of the AREC Media Station. They can be used to turn the product ON and enter the operation menu. Button Icon Name Function Description Power ON/OFF;... -
Page 8: Chapter 3 Wiring And Initial Installation
MS-650 User Manual Chapter 3 Wiring and Initial Installation 3.1 Product Connection AREC AM-500 AREC CI-200 AREC TP-100 projector Wireless Network Camera Auto-Tracking System Microphone Speaker Power Video output VGA / HDMI Audio output Wireless audio receiver Digital I/O Audio input... - Page 9 MS-650 User Manual Name Brief introduction Power Power connection Video input for VGA or HDMI cables. Video input For example: Connected to notebook or document cam. Video output for VGA or HDMI cables. Video output For example: Connected to projector or TV.
-
Page 10: First Installation
MS-650 User Manual 3.2 First installation Product setup Get IP address from About option in Setup item of the host output interface main menu and input it in the Browser page Step 1:Log in System Administration with default user ID admin and password admin. - Page 11 MS-650 User Manual Step 4:Click Discovery Refresh to auto scan web cam and auto tracking cloud connected to host. You may click button to manual add web cam and auto tracking cloud by input specific IP or MAC address. Step 5:Connect to devices Status of refreshed or added device displays symbol " ? ". Click web cam and auto tracking cloud and the device setup page displays.
- Page 12 MS-650 User Manual Step 6:Set up name/video source/tracking source/tracking mode of network image input channel by selecting + icon in image sensor option in sensor setup tab. Click Tool symbol Channel Configuration page and the source setup page displays. Click + symbol to select desired image input web cam for connection.
- Page 13 MS-650 User Manual Step 7:After the sensor is set up successfully, click Apply to display image. You may switch between split display screens with remote controller. Step 8:Set up local storage. It is recommended to install one whole new hard disk for this. Select hard disk interface.Click...
-
Page 14: Chapter 4 Remote Control
MS-650 User Manual Chapter 4 Remote Control Remote control functions described as follows: Icon Name Brief introduction Power Power on / off devices Adjust the output resolution Resolution (1920×1080 / 1280×720 / 1280×1024 / 1024×768) A : Export the storage device... - Page 15 MS-650 User Manual Icon Name Brief introduction Stop Stop video play / Stop video recording and exit Jump to previous course play / Jump to next course Previous / Next play Auto-Tracking Mount (TP-100)adjust zoom in, zoom out and change vision...
-
Page 16: Chapter 5 User Menu
Settings to configure this product, satisfying your smart recording/playback needs. Display Screen Function Description The MS-650 will enter the display screen upon boot up. The first time it is turned ON the screen will be divided into four by default. If the... -
Page 17: Playback
(categorized as videos and images) for the user to browse. 5.1.2 Live Broadcasting Screen Function Description Plays the online lectures currently being recorded by the MS-650 in other classrooms in real-time. This is designed for live-viewing by remote students. -
Page 18: Recording
MS-650 User Manual 5.2 Recording Screen Function Description Use the remote control buttons or control panel buttons to select the recording-related item to execute. 5.2.1 Start Recording Screen Function Description To enable recording mode, first enter the recording typesetting preview screen. -
Page 19: Delete Video
MS-650 User Manual 5.2.3 Delete Video Screen Function Description The lecture video/images recorded on the host hard drive can be deleted here. 5.3 Setting Screen Function Description Select the setting item to execute using the remote control buttons or control panel buttons 5.3.1 Language... -
Page 20: Record Setting
MS-650 User Manual 5.3.2 Record Setting Screen Function Description Set record layout (a total of 9 layouts). 5.3.3 Volume Screen Function Description Adjusts the 4-channel input volume and output volume. Use buttons to select the item to adjust, then press buttons to adjust the volume size. -
Page 21: Streaming
MS-650 User Manual 5.3.5 Streaming Screen Function Description Adjusts whether to enable streaming. The streaming address will be displayed if streaming is enabled for VLC-type streaming playback programs to open. 5.3.6 Resolution Screen Function Description Adjusts the output resolution; available selections include 1920×1080... -
Page 22: About
MS-650 User Manual 5.3.8 About Screen Function Description Displays the host information of MS- 650, manufacturer/ Model/ Firmware Version / IP Address/ Free space remaining on the hard drive. -
Page 23: Chapter 6 Basic Operations
MS-650 simultaneously allows 4-channel high definition channel input, and is able to save and output to use as digital teaching resources. Audio may also be used, allowing the lecturer’s teaching to have both video and audio. -
Page 24: Pane Fill Settings
MS-650 User Manual 6.1.2 Pane Fill Settings Pane Fill style of the channels in every Layout can be adjusted individually. Use the remote control’s button to switch the video pane fill methods (Fit to Height / Fit to Width / Fill / Letter Box / Auto Cut) sequentially. -
Page 25: Video Quality Settings Adjustment
MS-650 User Manual 6.1.4 Video Quality Settings Adjustment Video adjustment allows setting of brightness, contrast, saturation and hue, allowing the color of the output screen to be saturated with brighter contrast, achieving the optimum video image. 1. Use buttons to enter the... -
Page 26: Volume
MS-650 User Manual 6.1.6 Volume HDMI, Line in / Mic, AREC wireless microphone, Output Volume adjustment: 1. Use buttons to enter the Main Menu, the select Volume under the Settings sub-menu, and then use buttons to select and adjust (Figure 1). -
Page 27: Return And Exit
MS-650 User Manual 6.1.8 Return and Exit If you want to return to the previous level and cancel the menu and return to the main split screen, the following instructions can be used. button on and remote control and the button on the front panel can both be used under the Main Menu / Sub-Menu / Dialog box to return to the previous level;... -
Page 28: Start Recording
MS-650 User Manual 6.2.1 Start recording Start recording your courses and activities. 1. Remote controller operation: Press to enter the main menu and to select the recording function. The submenu Start recording displays. Press start recording from the recording preview page. -
Page 29: Recording Operation
MS-650 User Manual 6.2.2 Recording operation How to pause and stop to record. 1. Remote controller operation: Press to pause and to stop recording. 2. Front panel operation: Press to stop recording. 3. Recording template shortcut: Press on your remote controller to select recordingscreen layout. -
Page 30: Delete Video
MS-650 User Manual 6.2.4 Delete Video The menu is categorized according to video and snapshot, making it convenient for you to find the video to delete. This function allows your hard drive to have more space to record new lectures. -
Page 31: Online Director
This director control panel can also perform mount-tracking and the zooming in/out of the camera lens. The recording audio volume, whether from the microphone that the user prepared, the AREC wireless microphone (AM- 500), or even the audio recorded and played back from the lecture, can all be controlled and adjusted here. -
Page 32: Recording Main Screen
MS-650 User Manual 2. How to search for the MS-650 IP address to use with Online Director: Press the button on the remote control, and use the buttons to select Setting, and then use the buttons to select About. 3. Page and Language switching: (1) Login to the Online Director and click on the System Adminstration Page button on the top-right corner, click it with the mouse to switch to the System Adminstration Page login page. -
Page 33: Record Typesetting And Video Source
MS-650 User Manual 6.2.7 Record Typesetting and Video Source The recording typesetting can be controlled during recording; the nine templates defined by the manager can be quickly applied on the layout, or there are six layouts for the controller to apply; use the mouse to control the splitting location of each channel. -
Page 34: Recording Volume Adjustment
1. Mic1 adjusts the volume of channel 1; Mic2 adjusts the volume of channel 2. 2. BT Mic is the volume of the AREC wireless microphone. 3. Volume value (0~50). * Microphone prepared by the user or the video to play during lecture can be connected to channel 1 or 2. - Page 35 MS-650 User Manual : screen becomes smaller, : screen becomes larger. 2. If Auto-Track Mount is connected during channel recording, the directional keys can be used to control the direction of the lens for tracking recording; the button will return the lens to the initial position.
-
Page 36: Encode Profile
(2) Select RTP Multicast to show IP address and connection port. This is used to provide given single PC connection in the same MS-650 LAN. It requires software capable of network streaming. Take example. You may enter IP address and connection port for VLC to play instant recordings. -
Page 37: Ppt Indexing Software
MS-650 User Manual 6.2.11 PPT indexing software Installation and use at the PC end: Software name: AREC_PPT_Indexer_Setup.exe Software location: the AREC product DVD included with your product Installation location: the PC to use this software Installation steps: 1. Click the execution file 2. - Page 38 MS-650 User Manual 5. Open the PPT file to be presented, name of it displays in PPT status page of your software. 6. The recording and playing host starts, the PPT file is now in playback mode, the software auto add headings of PPT file as key note heading during recording.
-
Page 39: Playback Tutorial
MS-650 User Manual 6.3 Playback Tutorial The playback function will list all the recorded lectures or activities and categorize them into pictures and videos. This chapter will give instructions on the various playback functions. 6.3.1 Local Storage Local Storage allows users to view video recorded and stored on the local hard drive, browse information and access the highest quality videos. -
Page 40: Live Broadcast
6.3.2 Live Broadcast The MS-650 Media Station is able to perform real-time live broadcast of the video, the voice and all the digital information on-site. Viewers just have to use the MS-650 Media Station in other classrooms to watch the video site video and information contents at the same time without being restricted by location. -
Page 41: Channel Information
MS-650 User Manual 6.3.3 Channel Information Displays the channel summary information. 1. Press the button to display the video information. 2. Press the button again to display knowledge points; use the buttons to select it. * Please refer to 6.3.5 and 6.3.6 for related instructions. -
Page 42: Knowledge Point Search
MS-650 User Manual 6.3.4 Knowledge Point Search This function allows users to search for important points marked on the video during the recording process while playback the video. This function can be used if you want to jump to a specific important section of the channel. -
Page 43: Table Of Event Icons
MS-650 User Manual 6.4 Table of event icons See table below for event icons for local teaching and teaching display screens during playing. Icon Name Function description Network Disconnected LAN connection failure Network connected LAN connection successfully Auto display screen... - Page 44 Student host lost* Student host lost, check connection. Eject USB export drive Export completed, eject the USB export drive. Live broadcasting courses being recorded by other smart recording and Live Broadcast playing hosts. * MS-650 does not support student host (student tracking).
-
Page 45: Remote Control Function List
MS-650 User Manual 6.5 Remote Control Function List Remote control features that are available in each situations. Name Preview Full Screen Recording Playback Director Admin Power Resolution A:Exit B:Close Screen Icons C:Add Index D:Files Output Record Snapshot Menu Back Preview Layout... - Page 46 MS-650 User Manual Name Preview Full Screen Recording Playback Director Admin Mute Info Prev Index Next Index Record Layout Play Pause Stop Previous / Next Reset Patrol Zoom in Zoom out...
-
Page 47: Chapter 7 Manager Interface
MS-650 User Manual Chapter 7 Manager Interface System Administration is the background setting of this product; it can perform basic system settings and confirm system operations. The sensor setting allows each channel to properly connect with the recorders, and adjusts the recording volume size. Network setting confirms the network connection. Record Setting sets the recording countdown and audio delay and other functions. -
Page 48: System Information
MS-650 User Manual 7.1 System Information The basic settings of this product are controlled here; users can set the device name, system time and change the account password etc. You can manually change the system time or use the automatic update option to change the device time. -
Page 49: Sensor Settings
MS-650 User Manual 3. Changing username and password with Online Director (1) New User: Enter an Online Director user login name that you want. (2) New Password: Enter the Online Director user login password that you want. (3) Confirm Password: Requires you to enter your password again for confirmation. Your password will be... - Page 50 MS-650 User Manual 1. Image sensor: Set up image priority. Click + icon Image sensor tab of Sensor setting menu to set up name/video source/tracking source/tracking mode of image capture input channel. (1) The image capture source is host input terminal video in 1 and 2 with option VGA or HDMI. If only one of the latter is connected the system will detect and auto switch to source of signal.
-
Page 51: Network Camera Connection
(2) Click HDMI1 and HDMI2 sound source adjustment to change HDMI volume. (3) AREC wireless mic volume adjustment: in range between 0-15. (4) Range of volume of sound input are 0-50 except for AREC wireless mic. 7.2.1 Network Camera connection 1. - Page 52 MS-650 User Manual 2. Manual add : (1) Connect webcam to this machine. (2) In Network Camera bar, click to enter its IP address or MAC along with required account ID and password, press the button at lower right corner.
- Page 53 MS-650 User Manual 5. Enter webcam information page: (1) In Discovery page, click desired webcam in list displayed in webcam status bar and the webcam information page displays. (2) Webcam preview page displays after it is connected successfully. Move desired image leftward or rightward to zoom viewing effect.
-
Page 54: Connection To Auto Tracking Mount
MS-650 User Manual 7.2.2 Connection to auto tracking mount 1. Auto search ( refresh ) : (1) Connect auto tracking mount to your product. (2) To search for auto tracking mount : In Sensor settings click Refresh to scan for auto tracking cloud platform. - Page 55 MS-650 User Manual 3. Press Sensor settings to exit to the Sensor settings page. Set up name / video source / tracking source / tracking mode of network image input channel by selecting + icon in image settings page. Channel Configuratrion page, click Tool Symbol and the source setup page displays.
- Page 56 P01, P02, and P03. * See AREC TP-100 auto tracking cloud platform user manual for the compensation mechanism of smart recording and playing host’s support to lost target by auto tracking cloud platform.
-
Page 57: Set Up Student Tracking Mount
7.2.3 Set up student tracking mount 1.Select Student tracking in sensor channel setup mode to set AREC tracking cloud platform to student voicing system. Note: You can set platform of single channel to Student Tracking. 2. Click student tracking cloud platform in search page to enter the setup page. -
Page 58: Network Settings
MS-650 User Manual 7.3 Network settings 1. Auto IP allocation: Click DHCP at top of screen to have IP address auto allocated by routers of LAN being connected. 2. Manual add network: Click manual setup, enter network information ( IP address / subnet mask / default gateway / primary DNS / other DNS ). -
Page 59: Basic Settings
MS-650 User Manual 7.4.1 Basic settings 1. Insert logo: select location of picture file from dropdown menu, press to select desired logo file to insert. 2. Add head / tail to video: insert short video at the beginning and ending of your recording, press to select desired video file to insert. -
Page 60: Storage Settings
MS-650 User Manual 7.4.2 Storage settings 1. Recording mode: Available option is multi-view recording(SPTS). 2. Encode Profile: You may select from 6 recording compression format options available or customize your own one. Profile name Video Resolution/ Bitrate Application description Full HD 1080p/ 6Mbps Dynamic scene and large local hard disk recording. -
Page 61: Streaming Settings
IP address and connection port. This is used to provide given single PC connection in the same MS-650 LAN. It requires software capable of network streaming. a. Take example. You may enter IP address and connection port for VLC to play instant recordings. - Page 62 IP address and connection port. This is used to provide given single PC connection in the same MS-650 LAN. It requires software capable of network streaming. Take example. You may enter IP address and connection port for VLC to play instant recordings. View streaming address from network streaming in the setup item of main menu.
- Page 63 MS-650 User Manual (4) Select Webcasting to input data for Flash-Server. a. Add personal channel at Fengyun live broadcasting web page. Enter IP address given after application to view recordings realtime through predefined channel. b. With channel added in Fengyun live broadcasting web page you may view recordings by selecting desired playback IP address or search desired one by entering keywords in homepage.
-
Page 64: Local Storage Settings
MS-650 User Manual 7.5 Local storage settings Save recording files to external hard disk (eSATA/USB). Connect the disk drive and relevant disk information displays. 1. Disk setup: In Storage device page, click Disk selection at bottom of page, select desired drive, click Apply. -
Page 65: Layout Manager
MS-650 User Manual 7.6 Layout Manager This chapter will describe how to change the default layout of the Display Screen Record Screen, and how to customize layouts, manage and delete customized layouts. 7.6.1 Recording Layout Select a record layout to become the nine layouts used for recording. -
Page 66: Layout List
MS-650 User Manual 7.6.3 Layout List Displays the database and the user-defined layouts; it can perform layout deletion and other management operations. Click on Delete and a prompt will appear; select to delete the layout. 7.6.4 Editor Select template, add custom layout. See below for edit operation : 1. - Page 67 MS-650 User Manual 2. Drag and drop channels to the left in cells of template. 3. You may zoom or move gray frames in template with small triangle symbol at lower right corner. 4. Drag and drop channels to every cell in template.
-
Page 68: Video Manager
MS-650 User Manual 7.7 Video manager 1. Click to browse video information (1) Topic (2) Presenter (3) Category (4) Duration (5) File size (6) Description 2. Press to delete video. - Page 69 MS-650 User Manual 3. Press to download lecture. 4. Press to display Edit Video Information and keynote page. (1) Edit Video Information: ˙Organization: ˙Department: ˙Event’s Date: ˙Semester: ˙Category: ˙Topic: ˙Level: ˙Audience: ˙Room: Press Submit to save settings about video edit information.
-
Page 70: Snapshot Manager
MS-650 User Manual 7.8 Snapshot manager View photo information including data and number of snapshots. 1. Click to display photo information page with options of : (1) Snapshot : Press to scroll through multiple Snapshot. (2) File Name (3) Snapshot Time (4) File size 2. -
Page 71: Intelligent Director
MS-650 User Manual 7.9 Intelligent Director Set up intelligent director and scene selection. 1. Enable intelligent director: Set intelligent director on or off. 2. Intelligent scene: Select scene specific intelligent director scripts from dropdown menu. See below for description on scene channel (sensor) settings and lens movement scrips. - Page 72 MS-650 User Manual Intelligent scene Channel configuration (Sensor Setting) Intelligent director configuration The main script contains parent ( CH3 ) and child ( CH1 ) screen. The following events would trigger lens changes during recording. ˙Switch presentation: trigger the script to switch to full screen ( CH1 ) and back to main script in 10 seconds.
-
Page 73: Event Log
MS-650 User Manual 7.10 Event Log 1. Enable debug mode: Open Event Log and enter debug mode to perform recording. 2. Display event categories: All, admin, director, and user interface. 3. Sort by most recent date; available selections include past month, past two days, past three days. -
Page 74: Chapter 8 Real-Time Remote Interaction
MS-650 User Manual Chapter 8 Real-time Remote Interaction This chapter provides a detailed introduction to the "Real-time Remote Interaction" feature. 8.1 Connection The picture shows the product connection diagram. To different requirements, please make sure the connection of Main classroom-Room X and Remote classroom-Room Y. See... -
Page 75: Main Classroom-Room-X Settings
MS-650 User Manual 8.2 Main classroom-Room-X Settings 8.2.1 Get the IP address 1. Go to Room X and access Media Station. 2. Press the remote control button , use & key to select Setting → About, and get the IP address of Media Station. -
Page 76: Streaming Settings
MS-650 User Manual 8.2.2 Streaming Settings Connect computer to WiFi Router via cable, and follow the below steps: 1. Run browser IE (or Firefox) to URL http://192.168.11.254. 2. In log-in system admin page, please enter the default user and password: User : admin / Password : admin 3. -
Page 77: Remote Classroom-Room-Y Settings
MS-650 User Manual 8.3 Remote classroom-Room-Y Settings 8.3.1 Streaming Settings Go to Room Y and access Media Station. Connect computer to WiFi Router via cable, and follow the below steps: 1. Run browser IE (or Firefox) to URL http://192.168.11.254. 2. In log-in system admin page, please enter the default user and password: User : admin / Password : admin 3. - Page 78 MS-650 User Manual 2. In Main classroom-Room X, press the remote control button ,use & key to select recording layout. 3. In Remote classroom-Room Y, press the remote control button ,use & key to select display layout to see full screen remote video (CH4).
- Page 79 All information contained in this document is Proprietary Made in Taiwan Version:1.10 Date : 2017.8.1 AREC have the right to change or improve product specifications, without obligation to notify any user. Go to www.arec.com get the latest information related to the product or additional information.
Need help?
Do you have a question about the MS-650 and is the answer not in the manual?
Questions and answers