
Related Manuals for Beko WMI 81242


Summary of Contents for Beko WMI 81242
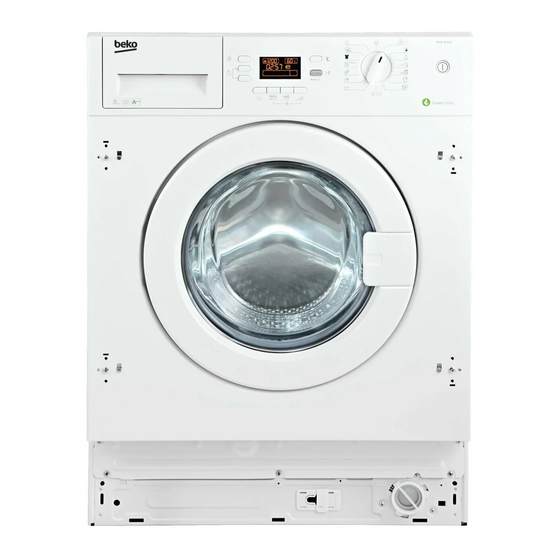
- Page 1 Washing Machine User’s Manual WMI 81242 Document Number= 2820522972_EN/ 08-09-15.(10:14)
- Page 2 This product was manufactured using the latest technology in environmentally friendly conditions.
-
Page 3: Important Instructions For Safety And Environment
1 Important instructions for safety and person (preferably an electrician) or someone designated by the importer in order to avoid possible risks. environment 1.2 Intended use This section contains safety instructions that will help protect • This product has been designed for domestic use. It is not from risk of personal injury or property damage. Failure to suitable for commercial use and it must not be used out follow these instructions shall void any warranty. of its intended use. -
Page 4: Appropriate Installation Location
2 Installation 2. Remove transportation safety bolts by turning them gently. Refer to the nearest Authorised Service Agent for installation 3. Attach the plastic covers supplied in the User Manual bag of the product. To make the product ready for use, review into the holes on the rear panel. (P) the information in the user manual and make sure that the electricity, tap water supply and water drainage systems are appropriate before calling the Authorized Service Agent. If they are not, call a qualified technician and plumber to have any necessary arrangements carried out. Preparation of the location and electrical, tap water and waste water installations at the place of installation is Keep the transportation safety bolts in a safe place to under customer's responsibility. -
Page 5: Connecting To The Drain
points. If any leaks occur, turn off the tap and remove the 1. Loosen the lock nuts on the feet by hand. nut. Retighten the nut carefully after checking the seal. To 2. Adjust the feet until the product stands level and prevent water leakages and damages caused by them, balanced. keep the taps closed when the machine is not in use. 3. Tighten all lock nuts again by hand. 2.5 Connecting to the drain • The end of the drain hose must be directly connected to the wastewater drain or to the washbasin. Your house will be flooded if the hose comes warning out of its housing during water discharge. Moreover, there is risk of scalding due to high washing temperatures! To prevent such situations and to ensure smooth water intake and discharge of the machine, fix the end of the Do not use any tools to loosen the lock nuts. - Page 6 3 Preparation 3.4 Initial use Before starting to use the product, make sure that all 3.1 Sorting the laundry preparations are made in accordance with the instructions in • Sort laundry according to type of fabric, colour, and sections “Important safety instructions” and “Installation”. degree of soiling and allowable water temperature. To prepare the product for washing laundry, perform first • Always obey the instructions given on the garment tags. operation in Drum Cleaning programme. If your product 3.2 Preparing laundry for washing is not equipped with Drum Cleaning programme, perform the Initial Use procedure in accordance with the methods • Laundry items with metal attachments such as, underwired bras, belt buckles or metal buttons will described under “5.2 Cleaning the loading door and the damage the machine. Remove the metal pieces or wash drum” section of the user manual.
-
Page 7: Using Detergent And Softener
(II) Main Wash Compartment The loading door is locked while a programme is running. Before starting the washing Programme, put powder The door can only be opened a while after the programme detergent into the left compartment with number “II”. Use comes to an end. the detergent manufacturer’s measuring cup and follow the In case of misplacing the laundry, noise and warning instructions on the package. Powder bleach/stain remover vibration problems may occur in the machine. must also be put into this compartment. 3.7 Using detergent and softener Put the liquid detergent into the main wash compartment with number “II ” before starting the washing Programme. -
Page 8: Tips For Efficient Washing
Bleaches If you are going to use regular bleach in your machine, it is suggested to select a Programme with pre-wash step and add the bleach at the beginning of the pre-wash without putting detergent into the pre-wash compartment. Alternatively, it is suggested to select a Programme with extra rinsing and add the bleach while the machine takes in water from the detergent drawer in the first rinsing step. Bleach should not be mixed with detergent. Since the bleach may cause irritation on skin, little amounts must be used and rinsed thoroughly. Do not pour bleach directly onto the laundry and do not use it with colour laundry. When using oxygen based bleach, follow the instructions on the package and select a Programme at low temperature. Oxygen based bleach can be used together with the detergent. However, if it is not at the same thickness with the detergent, then it must be added from the compartment number “II” right after the detergent foams with water. -
Page 9: Operating The Product
4 Operating the product 4.1 Control panel 1 - Spin Speed Adjustment button 5 - On / Off button 2 - Display 6 - Delayed Start buttons (+ / -) 3 - Temperature Adjustment button 7 - Auxiliary Function buttons 4 - Programme Selection knob 8 - Start / Pause / Cancel button Dark wash Dark wash Synthetics Cottons Pre-wash Main Rinse Wash Spin Delicate Pet hair Door Ready (Darkcare) (Darkcare) wash removal... - Page 10 4.2 Display symbols 4.5 Main programmes Depending on the type of fabric, use the following main programmes. • Cottons Use this programme for your cotton laundry (such as bed sheets, duvet and pillowcase sets, towels, bathrobes, underwear, etc.). Your laundry will be washed with vigorous washing action for a longer washing cycle. • Synthetics Use this programme to wash your synthetic clothes (shirts, blouses, synthetic/cotton blends, etc.). It washes with a gentle action and has a shorter washing cycle compared to the Cottons programme. For curtains and tulle, use the Synthetic 40˚C programme with prewash and anti-creasing functions selected. As their meshed texture causes excessive foaming, wash the veils/ tulle by putting little amount of detergent into the main a - Spin Speed indicator wash compartment. Do not put detergent in the prewash b - Temperature indicator compartment.
-
Page 11: Special Programmes
• Darkcare 4.8 Temperature selection Use this programme to wash your dark coloured laundry Whenever a new programme is selected, the maximum or the laundry that you do not want it get faded. Washing temperature for the selected programme appears on the is performed with little mechanic action and at low temperature indicator. -
Page 12: Programme And Consumption Table
4.10 Programme and consumption table Auxiliary functions Selectable Programme (°C) temperature range °C Cottons 2.40 1600 • • • • • • 90-Cold Cottons 1.70 1600 • • • • • • 90-Cold Cottons 0.95 1600 • • • • • • 90-Cold BabyProtect 2.10 1600... -
Page 13: Auxiliary Function Selection
4.11 Auxiliary function selection • Anti-Creasing This function creases the clothes lesser when they are being Select the desired auxiliary functions before starting washed. Drum movement is reduced and spinning speed is the programme. Furthermore, you may also select or limited to prevent creasing. In addition, washing is done with cancel auxiliary functions that are suitable to the running a higher water level. programme by pressing the Start / Pause / Cancel button F4 appears on the display when you select this function (d). when the machine is operating. For this, the machine must • Rinse Hold be in a step before the auxiliary function you are going to If you are not going to unload your clothes immediately after select or cancel. the programme completes, you may use rinse hold function Depending on the programme, press a, b, c or d buttons to to keep your laundry in the final rinsing water in order to select the desired auxiliary function. Symbol of the selected prevent them from getting wrinkled when there is no water auxiliary function appears on the display. - Page 14 starts flashing. Spin Appears at the beginning of the final spin step and remains Additional laundry may be loaded during the delayed lit during Spin and Pump special programmes. start period. At the end of the countdown, Delayed Start symbol disappears, washing cycle starts and the time If the machine does not pass to the spinning step, of the selected programme appears on the display. Rinse Hold function might be active or the automatic unbalanced load detection system might be activated Changing the delayed start period due to the unbalanced distribution of the laundry in the If you want to change the time during countdown: machine. Press Start / Pause / Cancel button. “:” sign in the middle of 4.15 Loading door lock the delayed start time on the display stops flashing. Pause There is a locking system on the loading door of the symbol appears. Delayed Start symbol flashes. Start symbol machine that prevents opening of the door in cases when disappears. Set the desired delayed start time by pressing...
-
Page 15: Maintenance And Cleaning
To activate the Child Lock: 4.20 End of programme Press and hold 2 and 4 Auxiliary Function buttons for 3 “End” appears on the display at the end of the programme. seconds. “Con” appears on the display. Symbols of the programme steps remain lit. Auxiliary function, spin speed and temperature that were selected at the beginning of the programme remain selected. 5 Maintenance and cleaning Service life of the product extends and frequently faced problems decrease if cleaned at regular intervals. 5.1 Cleaning the detergent drawer Remove any powder residue buildup in the drawer. To do this; Same phrase will appear on the display if you press any button when Child Lock is enabled. To deactivate the Child Lock: Press and hold 2 and 4 Auxiliary Function buttons for 3 seconds. “COFF” appears on the display. -
Page 16: Cleaning The Body And Control Panel
5.5 Draining remaining water and After every washing make sure that no foreign substance is left in the drum. cleaning the pump filter The filter system in your machine prevents solid items such as buttons, coins and fabric fibers clogging the pump impeller during discharge of washing water. Thus, the water will be discharged without any problem and the service life of the pump will extend. If the machine fails to drain water, the pump filter is clogged. Filter must be cleaned whenever it is clogged or in every 3 months. Water must be drained off first to clean the pump filter. If the holes on the bellow shown in the figure is blocked, In addition, prior to transporting the machine (e.g., when open the holes using a toothpick. moving to another house) and in case of freezing of the water, water may have to be drained completely. - Page 17 Discharging the water when the product has an emergency draining hose: a. Pull the emergency draining hose out from its seat b. Place a large container at the end of the hose. Drain the water into the container by pulling out the plug at the end of the hose. When the container is full, block the inlet of the hose by replacing the plug. After the container is emptied, repeat the above procedure to drain the water in the machine completely. c. When draining of water is finished, close the end by the plug again and fix the hose in its place. d. Turn the pump filter to take it out. Discharging the water when the product does not have an emergency draining hose: a. Place a large container in front of the filter to catch water from the filter.
-
Page 18: Technical Specifications
6 Technical specifications Models (EN) WMI 81242 Maximum dry laundry capacity (kg) Height (cm) Width (cm) Depth (cm) Net weight (±4 kg.) 230 V / 50Hz Electrical input (V/Hz) Total current (A) 2200 Total power (W) 1200 Spin speed (rpm max.) 1.00 Stand-by mode power (W) 0.20 Off-mode power (W) 8811 Main model code • / - Single Water inlet / Double Water inlet • Available Technical specifications may be changed without prior notice to improve the quality of the product. -
Page 19: Troubleshooting
7 Troubleshooting Programme cannot be started or selected. • Washing machine has switched to self protection mode due to a supply problem (line voltage, water pressure, etc.). >>> Press and hold Start / Pause button for 3 seconds to reset the machine to factory settings. (See "Cancelling the programme") Water in the machine. • Some water might have remained in the product due to the quality control processes in the production. >>> This is not a failure; water is not harmful to the machine. -
Page 20: Ръководство За Употреба
Пральна машина Ръководство за употреба WMI 81242 2820522972_BG/ 08-09-15.(10:40) Номер на документа=... - Page 21 1 Важни указания за безопасност • Монтаж и ремонт на уреда трябва да се извършва само от представител на и опазване на околната среда оторизирания сервиз . Производителят Т ози раздел съдържа важни указания, които ще ви не носи отговорност за щети, причинени от помогнат...
- Page 22 1.6 Спазването на Директивата за WEEE Този продукт носи символа за разделно събиране на отпадъчно електрическо и електронно оборудване (WEEE). Това означава, че при рециклиране или разглобяване продуктът трябва да се третира съобразно Директива 2002/96/ EC с цел минимални последствия за...
- Page 23 1. Свържете специалните маркучи, доставени заедно с уреда, към входящите отвори за водно захранване, разположени върху уреда. Червениятмаркуч (вляво) (макс. 90 ºC) е за топлата вода, синият маркуч (вдясно) (макс. 25 ºC) е за студената вода. • За да се избегне вливането на мръсна вода обратно...
-
Page 24: Сортиране На Прането
отговорност за щети по причина на ползване • Не перете цветно и бяло пране заедно. Нови, на уреда без заземяване направено съгласно тъмни дрехи могат да пуснат много боя. Перете местните наредби. ги отделно. • Свързването трябва да е направено в •... - Page 25 3.7 Употреба на перилен Използвайте препарат срещу котлен камък, препарат и омекотител подходящ за перални машини. При използване на пепарат, омекотител, В машината може дае останала малко вода колосан, фабрична боя, белина или препарат в следствие на процедурите по качествен срещу...
- Page 26 (II) Отделение за основно пране Колосване Преди да стартирате перилната програма, сипете • Слагайте течна кола, кола на прах или оцветител в отделението за омекотител както е пра за пране в лявото отделение с номер “II” . Използвайте предоставената от производителя указано...
- Page 27 3.8 Съвети за ефективно изпиране Дрехи Светли и бели на Деликатни/ Цветни Тъмни цвят Вълнени/Коприна (Препоръчителен (Препоръчителен (Препоръчителен (Препоръчителен диапазон на диапазон на диапазон на диапазон на температурата температурата температурата температурата в в зависимост в зависимост в зависимост зависимост от степента от...
-
Page 28: Работа С Уреда
4 Работа с уреда 4.1 Контролен панел 1 - Бутон за настройка на скоростта на 5 - Бутон Вкл / Изкл центофугиране 6 - Бутони за забавяне на старта (+ / -) 2 - Дисплей 7 - Бутони за допълнителни функции 3 - Бутон... - Page 29 4.2 Символи на дисплея Програмите са с ограничение до най-високата скорост на центрофугиране подходяща за съответния вид тъкани. При избора на програма винаги вземайте предвид вида материя, цвета, степента на замърсеност и допустимата температура на водата. Винаги избирайте възможно най-ниската необходима...
-
Page 30: Специални Програми
• BabyProtect (Защита за бебето) Не пускайте програмата с дрехи в пералнята. Използвайте тази програма за пране на бебешки Ако се опитате да направите това, пералнята дрехи и дрехи на алергични хора. По-дългият автоматично разбира, че в нея има нещо и период... - Page 31 Символ икономичност Обозначава енергоспестяващите програми и температури. Символ икономичност не може да бъде избран при програми Интензивно и Хигиенно изпиране тъй като прането се извършва по- продължително и при по-високи температури за да осигури допълнителна хигиена. Респективно, символ икономичност не може да...
- Page 32 4.10 Таблица с програми и консумация допълнителна функция Избираема настройка на Програма (°C) температурата °C Памучни материи 2.40 1600 • • • • • • 90-Студена вода Памучни материи 1.70 1600 • • • • • • 90-Студена вода Памучни материи 0.95 1600 •...
- Page 33 4.11 Избор на допълнителни функции алергична кожа и др.) от минималните остатъци перилен препарат. Изберете желаните допълнителни функции преди На дисплея се изписва F3 при избиране на тази стартиране на програмата. Освен това, може да функция (в). изберете или откажете допълнителните функции, •...
- Page 34 интервали от 30 минути. Предпране Ако допълнителна функция Предпране е Не използвайте течни перилни препарати избрана, символ Предпране се появява на когато ползвате забавяне на старта! Има дисплея, обозначавайки, че стъпка предпране е опасност да направите лекета по дрехите. стартирала. Основно...
-
Page 35: Поддръжка И Почистване
Добавяне или изваждане на пране 4.18 Отказ на програма Натиснете бутона Старт / Пауза / Отказ за Натиснете и задръжте бутон Старт / Пауза / Отказ да превключите машината в режим пауза. за 3 секунди. Символ старт премигва. Символът Индикаторът на съответната програма, в която на... - Page 36 Ако отворите на барабана показани на фигурата са запушени, ги отпушете с помощта на клечка за зъби. Металните чужди вещества ще доведат до петна от ръжда по барабана. Почистете петната по барабана с помощта на почистващи вещества, подходящи за използване върху неръждаема...
- Page 37 5.5. Източване на остатъчна вода и Източване на водата когато уредът е оборудван с маркуч за източване в спешни случаи: почистване на филтъра на помпата Филтриращата система на машината ви предпазва твърдите предмети като копчета, монети и конци да се заклещят в перката на помпата при...
- Page 38 6 Технически спецификации WMI 81242 Модели Максимален капацитет на сушене (кг) Височина (см) Широчина (см) Дълбочина (см) Нетно тегло (±4 кг) Електричество (V/Hz) 230 V / 50Hz Общ ел.поток (A) 2200 Обща мощност (W) 1200 Скорост на центрофугиране (об/мин макс.) Мощност в режим на готовност (W) 1.00 Мощност...
- Page 39 7 Възможни решения на възникнали проблеми Програмата не може да се стартира или да се избере. • Пералнята е преминала в режим на самозащита поради възникнал външен проблем (в електрическото напрежение, водното налягане и т.н.). >>> Натиснете и задръжте бутон Старт/ Пауза за 3 секунди...
- Page 40 www.beko.com...
Need help?
Do you have a question about the WMI 81242 and is the answer not in the manual?
Questions and answers