Table of Contents
Advertisement
Advertisement
Table of Contents

Subscribe to Our Youtube Channel
Related Manuals for Hypertherm SYNC Powermax 65


Summary of Contents for Hypertherm SYNC Powermax 65
- Page 1 Powermax65/85/105 SYNC ™ Operator Manual 810470 – REVISION 3 ENGLISH...
- Page 2 United States and other countries. All other trademarks are the property of their respective holders. Environmental stewardship is one of Hypertherm’s core values, and it is critical to our success and our customers’ success. We are striving to reduce the environmental impact of everything we do. For more information: www.hypertherm.com/environment.
- Page 3 Powermax65/85/105 SYNC Operator Manual 810470 REVISION 3 ENGLISH Original instructions May 2021 Hypertherm, Inc. Hanover, NH 03755 USA www.hypertherm.com...
- Page 4 Mathura Road, New Delhi 110044, India HTJapan.info@hypertherm.com (Main Office Email) 91-11-40521201/ 2/ 3 Tel TechSupportAPAC@hypertherm.com (Technical Service Email) 91-11 40521204 Fax HTIndia.info@hypertherm.com (Main Office Email) TechSupportAPAC@hypertherm.com (Technical Service Email) For training and education resources, go to the Hypertherm Cutting Institute (HCI) online at www.hypertherm.com/hci.
- Page 5 στο www.hypertherm.com/docs. DE (DEUTSCH/GERMAN) HU (MAGYAR/HUNGARIAN) WARNUNG! Bevor Sie ein Hypertherm-Gerät in Betrieb nehmen, lesen Sie VIGYÁZAT! Mielőtt bármilyen Hypertherm berendezést üzemeltetne, bitte die Sicherheitsanweisungen in Ihrer Bedienungsanleitung, das Handbuch olvassa el a biztonsági információkat a termék kézikönyvében, a Biztonsági für Sicherheit und Übereinstimmung (80669C), das Handbuch für Sicherheit...
- Page 6 доступны на нашем веб-сайте. Целый ряд руководств доступны на нескольких языках по ссылке www.hypertherm.com/docs. KO (한국어 /KOREAN) 경고! Hypertherm 장비를 사용하기 전에 제품 설명서와 안전 및 규정 준수 SK (SLOVENČINA/SLOVAK) 설명서(80669C), 워터젯 안전 및 규정 준수 설명서(80943C) 그리고 무선 VÝSTRAHA! Pred použitím akéhokoľvek zariadenia od spoločnosti Hypertherm 주파수...
- Page 7 VI (TI ẾNG VI Ệ T/VIETNAMESE) คํ า เตื อ น! ก อ นการใช ง านอุ ป กรณ ข อง Hypertherm ทั ้ ง หมด โปรดอ า นคํ า แนะนํ า ด า น CẢNH BÁO! Trước khi vận hành bất kỳ thiết bị Hypertherm nào, hãy đọc các hướng dẫn an toàn trong hướng dẫn sử...
-
Page 9: Table Of Contents
Make sure that you have all the system components ................. 22 What to do if components are missing or damaged............... 23 System configurations............................23 Hypertherm plasma power supply ratings..................... 24 Powermax65 SYNC ..........................24 Powermax85 SYNC ..........................26 Powermax105 SYNC ..........................28 Find system specifications on the data plate ................... - Page 10 Contents Cutting specifications ............................35 Recommended cut capacity – hand cutting..................35 Recommended pierce capacity ......................35 Maximum cut speeds (mild steel) ......................35 Gouge capacity ............................36 Set up the plasma power supply........................36 Plasma power supply dimensions and weights ................38 Powermax65 SYNC and Powermax85 SYNC..............
- Page 11 Contents 3 Operate the Plasma System....................63 Make sure that the plasma power supply is connected to gas and power ........... 63 Step 1 – Connect the torch lead ........................64 Step 2 – Connect the work lead and work clamp ..................65 Work lead..............................
- Page 12 Contents Main menu screen........................... 89 Cartridge and Power Supply Data submenu................ 90 System Information submenu ....................91 Service Information submenu ....................92 System Settings submenu ......................93 4 Cut with the Hand Torch ......................95 About the hand torch............................95 Select the correct cutting cartridge........................
- Page 13 Contents Fault codes ................................ 130 Identify fault icons ..........................131 Remove fault code conditions......................132 Operational faults (0-nn-n) ....................132 Internal component faults (1-nn-n, 2-nn-n, 3-nn-n) ............145 Troubleshoot power-related problems with generators .............. 145 See recent fault codes (Power Supply Log screen)..............146 Do a gas test..............................
- Page 14 Contents 810470 Operator Manual Powermax65/85/105 SYNC...
-
Page 15: Electromagnetic Compatibility (Emc)
Introduction Methods of reducing emissions Mains supply Hypertherm’s CE-marked equipment is built in compliance with standard EN60974-10. The equipment should be installed and used in Cutting equipment must be connected to the mains supply according to accordance with the information below to achieve electromagnetic the manufacturer’s recommendations. - Page 16 Electromagnetic Compatibility (EMC) Earthing of the workpiece Where the workpiece is not bonded to earth for electrical safety, nor connected to earth because of its size and position, for example, ship’s hull or building steel work, a connection bonding the workpiece to earth may reduce emissions in some, but not all instances.
-
Page 17: Warranty
Hypertherm not in strict conformity herein and as follows: if Hypertherm is notified of a defect (i) with respect with Hypertherm’s specifications and in cases of designs, processes,... - Page 18 At all times you will have and maintain insurance in such quantities and types, and with coverage sufficient and appropriate to defend and to hold Hypertherm harmless in the event of any cause of action arising from the use of the products.
-
Page 19: Where To Find Information
Powermax65/85/105 SYNC Mechanized Cutting Guide (810480) You can find these documents on the USB memory stick that came with your plasma power supply. Technical documentation is also available at www.hypertherm.com/docs. Technical documentation is current as of the date of its release. - Page 20 Where to Find Information 810470 Operator Manual Powermax65/85/105 SYNC...
-
Page 21: Install And Set Up The Plasma Power Supply
Automatically set the operating mode, output current (A), and gas pressure related to the type of SmartSYNC torch and Hypertherm cartridge that you install Record cartridge information so that you can monitor cartridge life, and be notified when you ... -
Page 22: Make Sure That You Have All The System Components
Install and Set Up the Plasma Power Supply Make sure that you have all the system components 1 Documentation: 3 Region-specific gas inlet fitting • USB memory stick with technical and safety 4 Power cord with no power plug documentation 5 Remote-start pendant (optional –... -
Page 23: What To Do If Components Are Missing Or Damaged
Get a copy of the bill of lading from Hypertherm. Claims for missing or damaged merchandise Speak to your Hypertherm distributor or authorized repair facility, or speak to the nearest Hypertherm office shown in the front of this manual. System configurations The Powermax65 SYNC, Powermax85 SYNC, and Powermax105 SYNC systems are universal plasma power supplies that automatically adjust to operate with various AC voltages. -
Page 24: Hypertherm Plasma Power Supply Ratings
Install and Set Up the Plasma Power Supply Hypertherm plasma power supply ratings Powermax65 SYNC Rated open-circuit voltage (U CSA, 1-phase, 3-phase 296 VDC CSA CE/CCC, 3-phase 270 VDC CE/CCC Output characteristic* Drooping Rated output current (I 20 A – 65 A... - Page 25 Install and Set Up the Plasma Power Supply Gas type Nitrogen ††† Gas quality Clean, dry, oil-free per 99.95% pure 99.98% pure ISO 8573-1 Class 1.4.2 (F5 = 95% nitrogen [N ], 5% Refer to page hydrogen [H Recommended gas inlet flow rates Cutting 210 slpm (450 scfh, 7.5 scfm) at a minimum 5.9 bar (85 psi) Maximum Removal gouging 210 slpm (450 scfh, 7.5 scfm) at a minimum 4.8 bar (70 psi) Maximum Control gouging 210 slpm (450 scfh, 7.5 scfm) at a minimum 4.8 bar (70 psi)
-
Page 26: Powermax85 Sync
Install and Set Up the Plasma Power Supply Powermax85 SYNC Rated open-circuit voltage (U CSA, 1-phase, 3-phase 305 VDC CSA CE/CCC, 3-phase 270 VDC CE/CCC Output characteristic* Drooping Rated output current (I 25 A – 85 A Rated output voltage (U 143 VDC Duty cycle at 40°C (104°F)** CSA 60% at 85 A, 230 V –... - Page 27 Install and Set Up the Plasma Power Supply Gas type Nitrogen ††† Gas quality Clean, dry, oil-free per 99.95% pure 99.98% pure ISO 8573-1 Class 1.4.2 (F5 = 95% nitrogen [N Refer to page 5% hydrogen [H Recommended gas inlet flow rates Cutting 210 slpm (450 scfh, 7.5 scfm) at a minimum 5.9 bar (85 psi) Maximum Removal gouging 210 slpm (450 scfh, 7.5 scfm) at a minimum 4.8 bar (70 psi) Maximum Control gouging 210 slpm (450 scfh, 7.5 scfm) at a minimum 4.8 bar (70 psi)
-
Page 28: Powermax105 Sync
Install and Set Up the Plasma Power Supply Powermax105 SYNC Rated open-circuit voltage (U 200 V – 600 V CSA 300 VDC 230 V – 400 V CE 288 VDC 380 V CCC 286 VDC 400 V CE 286 VDC Output characteristic* Drooping Rated output current (I... - Page 29 Install and Set Up the Plasma Power Supply Power source efficiency at rated maximum output power (CE systems) 230 V – 400 V CE 91.0% 400 V CE 91.9% – Short Circuit Ratio (CE/CCC systems only) – Volts AC rms, 3-phase 230 V – 400 V 400 V 235.4 176.9...
-
Page 30: Find System Specifications On The Data Plate
Find system specifications on the data plate The data plate on the rear of the plasma power supply contains 2 sets of ratings: The HYP ratings are Hypertherm plasma power supply ratings. They show the capability of the system related to Hypertherm’s internal testing. -
Page 31: Find The Part Number For Your System
Install and Set Up the Plasma Power Supply Find the part number for your system The part number for your plasma power supply is near the top of the data plate. Critical raw materials Critical raw material Components that contain more than 1 gram Antimony Torch leads Borate... -
Page 32: Symbols And Marks
Install and Set Up the Plasma Power Supply Symbols and marks Your product may have one or more of the following marks on or near the data plate. Because of differences and conflicts in national regulations, not all marks are applied to every version of a product. S mark The S mark indicates that the power supply and torch are suitable for operations carried out in environments with increased hazard of electrical shock according to IEC 60974-1. -
Page 33: Iec Symbols
Install and Set Up the Plasma Power Supply IEC symbols The following symbols can appear on the data plate, control labels, switches, light-emitting diodes (LEDs), and liquid-crystal display (LCD) screen, if applicable. Direct current (DC) AC input power connection Alternating current (AC) The terminal for the external protective (earth) conductor... -
Page 34: Acoustical Noise Levels
In addition, you can find an Acoustical Noise Data Sheet for your system at www.hypertherm.com/docs. In the search box, enter data sheet. Radio frequency identification (RFID) specifications The Hypertherm RFID near-field wireless communication system contains the following components: A passive RFID tag in the Hypertherm cartridge ... -
Page 35: Cutting Specifications
32 mm (1-1/4 in.) Not applicable 330 mm/min (13 in/min) 508 mm/min (20 in/min) * Maximum cut speeds are the results of Hypertherm’s laboratory testing. Actual cutting speeds can be different related to different cutting applications. Powermax65/85/105 SYNC Operator Manual... -
Page 36: Gouge Capacity
Install and Set Up the Plasma Power Supply Gouge capacity 65 A 85 A 105 A Maximum Removal metal removal rate 4.0 kg/hr (8.8 lb/hr) 8.2 kg/hr (18.2 lb/hr) 8.6 kg/hr (19.1 lb/hr) on mild steel Maximum Control metal removal rate on 2.3 kg/hr (5.1 lb/hr) 4.8 kg/hr (10.6 lb/hr) 7.2 kg/hr (15.9 lb/hr) - Page 37 Install and Set Up the Plasma Power Supply Put the plasma power supply on a stable, level surface before using. The plasma power supply can tip over if set at an angle greater than 10°. >10° Do not put the plasma power supply on its ...
-
Page 38: Plasma Power Supply Dimensions And Weights
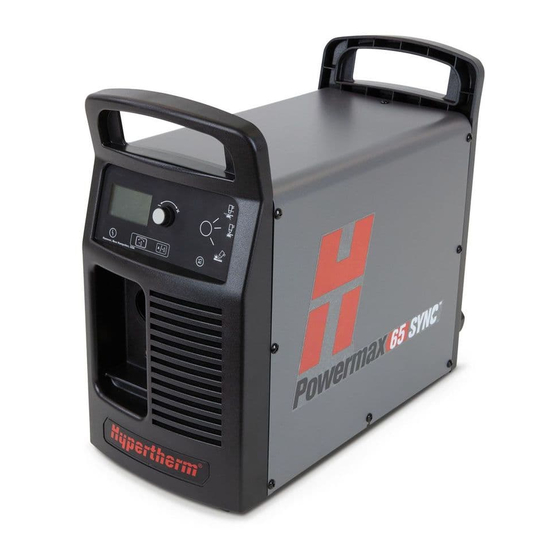
Install and Set Up the Plasma Power Supply Plasma power supply dimensions and weights Powermax65 SYNC and Powermax85 SYNC Figure 1 – Powermax65 SYNC and Powermax85 SYNC dimensions 354 mm (13.9 inches) 430 mm (17 inches) 483 mm 233 mm (19 inches) (9.2 inches) Table 1 –... -
Page 39: Powermax105 Sync
Install and Set Up the Plasma Power Supply Powermax105 SYNC Figure 2 – Powermax105 SYNC dimensions 436 mm (17 inches) 508 mm (20 inches) 592 mm 274 mm (23.3 inches) (10.8 inches) Table 2 – Powermax105 SYNC weight with power cord 200 V –... -
Page 40: Connect To Electrical Power
Use the Hypertherm input current ratings to select conductor sizes for power connection and installation instructions. The Hypertherm ratings are designated HYP on the data plate on the rear of the plasma power supply. Use the higher HYP input current value for installation purposes. Refer to Find system specifications on the data plate on page 30 for a sample data plate. -
Page 41: Requirements For Grounding
The plasma power supply automatically adjusts for correct operation at the current input voltage. You do not have to change or rewire components. But you must do the following: Install the Hypertherm cartridge in the torch. Refer to Step 3 – Install the cartridge ... -
Page 42: Powermax65 Sync
Install and Set Up the Plasma Power Supply The recommended fuse sizes let spikes in input current occur when you stretch the plasma arc. Stretching the plasma arc is common in some applications, such as gouging. Powermax65 SYNC CSA configurations (1-phase) Input voltage at 50 Hz/60 Hz* 200 V –... -
Page 43: Powermax85 Sync
Install and Set Up the Plasma Power Supply Powermax85 SYNC CSA configurations (1-phase) Input voltage at 50 Hz/60 Hz* 200 V – 208 V 230 V – 240 V 480 V Input current at rated output (85 A × 143 VDC = 12.2 kW) 70 A / 68 A 58 A 29 A... -
Page 44: Powermax105 Sync
Install and Set Up the Plasma Power Supply Powermax105 SYNC CSA configurations (3-phase) Input voltage at 50 Hz/60 Hz* 200 V 208 V 240 V 480 V 600 V Input current at rated output 58 A 56 A 49 A 25 A 22 A (105 A x 160 VDC = 16.8 kW) -
Page 45: Prepare The Power Cord And Plug
* Style H07RN-F cord is a harmonized, heavy-duty, flexible, rubber-insulated, black-neoprene-jacketed multi-conductor IEC60245-4 / EN50525 European power cord with CE printed on the cord. The H07RN-F cord used by Hypertherm also has CCC certification to GB/T 5013.4, with CCC printed on the cord. Install the power cord (if necessary) - Page 46 Install and Set Up the Plasma Power Supply Figure 3 – Install a power cord 419 mm (16.5 inches) Ground M5 / #10 terminal ring, approximately 12 mm 65/85 (0.5 inch) long 102 mm 152 mm (4 inches) (6 inches) Strain relief CSA power cord CE/CCC power cord...
-
Page 47: Install A 1-Phase Power Cord (Csa Systems Only) (If Necessary)
Install and Set Up the Plasma Power Supply Install a 1-phase power cord (CSA systems only) (if necessary) You can operate a Powermax65/85 SYNC CSA plasma power supply on 1-phase power, but the Powermax65/85 SYNC CE/CCC plasma power supply is 3-phase only. To operate a Powermax65/85 SYNC CSA plasma power supply on 1-phase power, install a 10 mm (8 AWG) 3-wire power cord. -
Page 48: Powermax65 Sync Systems
Install and Set Up the Plasma Power Supply Powermax65 SYNC systems Table 3 – 65 A CSA < 3 m 3 m – 7.5 m 7.5 m – 15 m 15 m – 30 m 30 m – 45 m Extension cord length (<... -
Page 49: Powermax85 Sync Systems
Install and Set Up the Plasma Power Supply Powermax85 SYNC systems Table 5 – 85 A CSA < 3 m 3 m – 7.5 m 7.5 m – 15 m 15 m – 30 m 30 m – 45 m Extension cord length (<... -
Page 50: Powermax105 Sync Systems
Install and Set Up the Plasma Power Supply Powermax105 SYNC systems Table 7 – 200 V – 600 V CSA < 3 m 3 m – 7.5 m 7.5 m – 15 m 15 m – 30 m 30 m – 45 m Extension cord length (<... -
Page 51: Use A Generator (If Necessary)
Install and Set Up the Plasma Power Supply Use a generator (if necessary) Make sure that you do the following when you use a generator: Only use a generator that meets the plasma power supply’s requirements. Refer to Powermax65 SYNC and Powermax85 SYNC systems on page 52 and Powermax105 SYNC systems on page 53. -
Page 52: Powermax65 Sync And Powermax85 Sync Systems
Install and Set Up the Plasma Power Supply Powermax65 SYNC and Powermax85 SYNC systems Generators used with a Powermax65 SYNC or Powermax85 SYNC must meet the requirements in Table 10 Table Table 10 – Voltage requirements 1-phase: 50 Hz/60 Hz, 230 VAC / 240 VAC* 3-phase: 50 Hz/60 Hz, 200 VAC –... -
Page 53: Powermax105 Sync Systems
Install and Set Up the Plasma Power Supply Powermax105 SYNC systems Generators used with the Powermax105 SYNC must meet the requirements in Table 12 Table Table 12 – Voltage requirements 200 V – 600 V CSA 3-phase, 50 Hz/60 Hz, 200 VAC – 600 VAC 230 V –... -
Page 54: Connect The Gas Supply
Install and Set Up the Plasma Power Supply Connect the gas supply WARNING EXPLOSION HAZARD The filter bowl in the plasma power supply can explode if the gas pressure is more than 9.3 bar (135 psi). Never use more than the maximum gas pressure of 9.3 bar (135 psi). Refer to the figure on page 1. -
Page 55: Gas Supply Source
58. Gas supply source Hypertherm recommends that air compressors supply air that meets the following requirements of ISO Standard 8573-1:2010 Class 1.4.2*: Maximum particle count in 1.0 m • 20,000 at 0.1 microns – 0.5 microns •... -
Page 56: High-Pressure Gas Cylinders
Install and Set Up the Plasma Power Supply Use shop-compressed gas or cylinder-compressed gas. Use a high-pressure regulator on either type of gas supply. The regulator must be able to deliver gas to the air inlet on the plasma power supply at the specified flow rate and specified pressure. - Page 57 Install and Set Up the Plasma Power Supply You can use the following gases to cut with this plasma power supply. Refer to Hypertherm plasma power supply ratings on page 24 for requirements on gas quality. Nitrogen Do NOT use oxygen to cut with Powermax systems ...
-
Page 58: Inlet Gas Pressure Requirements (While Gas Is Flowing)
Speak to the filter manufacturer about gas pressure requirements. Hypertherm recommends that you install an inline pressure gauge at the gas inlet on the back of the plasma power supply. Use this gauge to monitor the gas pressure at the plasma power supply, after all external filtration. -
Page 59: Cutting
Install and Set Up the Plasma Power Supply Cutting Torch lead length 7.6 m (25 ft) 15.2 m (50 ft) 22.9 m (75 ft) Powermax65 SYNC 5.2 bar (75 psi) 5.5 bar (80 psi) 5.9 bar (85 psi) Powermax85 SYNC Powermax105 SYNC 5.5 bar (80 psi) 5.9 bar (85 psi) -
Page 60: Add Additional Gas Filtration (If Necessary)
Install and Set Up the Plasma Power Supply Add additional gas filtration (if necessary) It is extremely important to keep a clean, dry gas line to do the following: Prevent oil, water, dirt, and other contaminants from causing damage to internal ... - Page 61 Install and Set Up the Plasma Power Supply Hypertherm offers the following optional external filter kits: Kit 128647: The Eliminizer moisture removal air filter removes water and dirt from the gas supply. For more information, refer to the Optional Air Filter Kit and Element Replacement Procedure Field Service Bulletin (804180).
- Page 62 Install and Set Up the Plasma Power Supply 810470 Operator Manual Powermax65/85/105 SYNC...
-
Page 63: Operate The Plasma System
Operate the Plasma System Make sure that the plasma power supply is connected to gas and power 1. Connect the gas supply line to the fitting on the back of the plasma power supply. Refer to page For gas supply requirements, refer to Gas supply source on page 55. -
Page 64: Step 1 - Connect The Torch Lead
Operate the Plasma System Step 1 – Connect the torch lead Always set the power switch on the plasma power supply to OFF (O) before you connect or disconnect a torch. To connect a hand torch Red button or machine torch, push the connector into the receptacle on the front of... -
Page 65: Step 2 - Connect The Work Lead And Work Clamp
Operate the Plasma System Step 2 – Connect the work lead and work clamp INCORRECT WORK LEADS CAN CAUSE AN UNSTABLE PLASMA ARC Work leads are approved for specific amperages, lengths, and connectors. Make sure that you use a work lead that is approved for your plasma power supply. Refer to the Powermax65/85/105 SYNC Parts Guide (810490). -
Page 66: Work Clamp
Operate the Plasma System Work clamp Do not attach the work clamp under water. If the plasma power supply is below the work clamp, water can get into the plasma power supply through the work lead and cause severe damage. Do not attach the work clamp to the portion of the workpiece to be cut away. -
Page 67: Lock The Torch
Use this switch to lock the torch when it is not in use, when it is necessary to change the Hypertherm cartridge, or when it is necessary to move the plasma power supply or torch while the plasma power supply is ON. -
Page 68: Install The Cartridge
(X) position. 3. If this is a new torch, remove the vinyl cap from the torch. 4. Install the correct Hypertherm cartridge for your cutting or gouging application. Cutting and piercing with a ... -
Page 69: Step 4 - Set The Power Switch To On (I)
Operate the Plasma System Step 4 – Set the power switch to ON (I) Set the power switch to ON (I). The switch is on the rear panel of the plasma power supply. If the torch-lock switch is set to the green “ready to fire”... -
Page 70: Step 5 - Unlock The Smartsync Torch
Operate the Plasma System Step 5 – Unlock the SmartSYNC torch 1. Move the torch-lock switch to the green “ready to fire” ( ) position. 2. Hand torch: Pull the torch trigger 1 time to get the warning puffs of air. Machine torch: Send a START / STOP command from the CNC to fire a plasma arc. -
Page 71: Fault Code And Led Behavior
When you set the torch-lock switch to the yellow lock (X) position while the plasma power supply stays ON, the LED on the hand torch changes from green to yellow. When you install the Hypertherm cartridge and set the torch-lock switch to the green “ready to fire” ( ) position, the LED on the hand torch stays yellow. -
Page 72: Step 6 - Adjust The Output Current (A) And Operating Mode If Necessary
The plasma power supply automatically sets the output current related to the type of Hypertherm cartridge that you install. For example, when you install a 65 A Hypertherm cartridge, the plasma power supply sets the output current to 65 A. -
Page 73: Step 7 - Use The Smartsync Torch
Adjust the amperage from the hand torch The plasma power supply automatically sets the output current (A) related to the type of Hypertherm cartridge that you install. For example, when you install a 65 A Hypertherm cartridge, the plasma power supply sets the output current to 65 A. -
Page 74: Amperage Settings By Plasma Power Supply And Cartridge
Operate the Plasma System Amperage settings by plasma power supply and cartridge Powermax65 SYNC Cartridge type 45 A 65 A 45 A 65 A 35 A 60 A 25 A 55 A 45 A 35 A 20 A 25 A 20 A Powermax85 SYNC Cartridge type... -
Page 75: Use The Machine Torch
Operate the Plasma System Use the machine torch Use the methods in the Powermax65/85/105 SYNC Mechanized Cutting Guide (810480) to cut and gouge correctly. What occurs during and after cutting Temperature control Postflow – After you complete a cut and release the torch trigger, air continues to flow from the torch to decrease the temperature of the cartridge. -
Page 76: Adjust The Gas Pressure Manually
In automatic gas pressure mode, the plasma power supply automatically sets the gas pressure for optimum cutting related to the operating mode, the torch type, the Hypertherm cartridge type, and the length of the torch lead. But if it is necessary to adjust the gas pressure for a specific application, you can use manual gas pressure mode to do so. -
Page 77: Go Back To Automatic Gas Pressure Mode
Adjust the operating mode manually The plasma power supply automatically sets the operating mode related to the type of Hypertherm cartridge that you install. When you install a Hypertherm cutting cartridge or FineCut ... -
Page 78: Cut Expanded Metal
When you manually set the operating mode, the plasma power supply keeps that setting until you install a different type of Hypertherm cartridge or you install a different torch. Do not set the operating mode when the torch-lock switch is in the yellow lock (X) ... -
Page 79: Monitor Cartridge Data
The following fields show the use data for the installed Hypertherm cartridge: STA – This field shows the total number of pilot arc starts that the Hypertherm cartridge has done in its life. -
Page 80: Show Cartridge Data On The Status Screen
Operate the Plasma System XT – This field shows the cumulative arc transfer time that the Hypertherm cartridge has had in its life, in hours (HH), minutes (MM), and seconds (SS): HH:MM:SS. You can see this same data for the life of the plasma power supply. Refer to... - Page 81 Operate the Plasma System 7. Push to go back to the status screen. The STA and XT fields now show on the screen. Powermax65/85/105 SYNC Operator Manual 810470...
-
Page 82: When To Replace The Cartridge (Fault Code 0-32-N)
The system has a cartridge end-of-life detection feature that tells you when to install a new Hypertherm cartridge. This feature helps to prevent damage to the torch. You can choose to replace the cartridge before it gets to this condition if the cut quality is no longer satisfactory. Refer to the most out of your cartridges on page 107. -
Page 83: Prevent Overheating
Operate the Plasma System Prevent overheating The duty cycle ratings help you to know how to operate a Powermax system without overheating it. Duty cycle – Percentage of time during a 10-minute interval that a plasma arc can stay on without causing the plasma power supply to overheat. -
Page 84: Adjust Brightness And Contrast
Operate the Plasma System Adjust brightness and contrast Do the following to adjust the brightness and contrast of the liquid-crystal display (LCD) screen: 1. Push and hold for 2 seconds to go to the main menu screen. 2. Turn the adjustment knob to go to . -
Page 85: Controls And Indicators On The Plasma Power Supply
In different modes, this screen changes to show different kinds of information about the plasma power supply, SmartSYNC torch, and Hypertherm cartridge. Adjustment knob – Turn this knob to adjust the output current in increments of 1 A. - Page 86 Operating mode button – The plasma power supply automatically sets the mode to Cut mode or Gouge mode related to the type of Hypertherm cartridge that you install. With a Hypertherm cutting cartridge installed, you can push this button to change from Cut mode to Expanded Metal mode.
-
Page 87: Status Screen
Cartridge data – These fields show the total number of pilot arc starts (STA) and the cumulative plasma arc transfer time (XT) for the life of the Hypertherm cartridge that is installed on the torch. These fields do not show by default. Refer to... -
Page 88: Gas Pressure Indicators
Operate the Plasma System Gas pressure indicators For instructions on how to manually change the gas pressure, refer to page Gas pressure bar – This icon shows a visual indicator of the gas pressure when you are in manual gas pressure mode. The midpoint of the vertical bar identifies the automatic pressure setting that is set by the plasma power supply. -
Page 89: Main Menu Screen
Main menu screen Use the main menu screen to go to the 4 submenu screens. Use the submenu screens to see information about the plasma power supply, torch, and Hypertherm cartridge, and to change system settings. 1. To go to the main menu screen, push and hold for 2 seconds. -
Page 90: Cartridge And Power Supply Data Submenu
To go to the Cartridge and Power Supply Data submenu, select on the main menu screen. Cartridge data – Select this icon to see data about the Hypertherm cartridge that is installed on the torch. Refer to Monitor cartridge data on page 79. -
Page 91: System Information Submenu
Operate the Plasma System System Information submenu To go to the System Information submenu, select on the main menu screen. LCD/control PCB information – Select this icon to see service-related information about the firmware on the plasma power supply’s LCD/control PCB. DSP and power PCB information –... -
Page 92: Service Information Submenu
Operate the Plasma System Service Information submenu To go to the Service Information submenu, select on the main menu screen. Power supply fault log – Select this icon to see the 10 most recent fault codes that have occurred on the plasma power supply. Refer to See recent fault codes (Power Supply Log screen) on page 146. -
Page 93: System Settings Submenu
Operate the Plasma System System Settings submenu To go to the System Settings submenu, select on the main menu screen. Brightness and contrast – Select this icon to adjust the brightness and contrast of the LCD screen or to show cartridge data on the status screen. Refer to Adjust brightness and contrast on page 84 or... - Page 94 Operate the Plasma System 810470 Operator Manual Powermax65/85/105 SYNC...
-
Page 95: Cut With The Hand Torch
73) Automatic setting of operating mode, amperage, and gas pressure related to the Hypertherm cartridge that you install, the torch type, and the torch lead length Communication of cartridge information to the plasma power supply, including cartridge ... -
Page 96: Select The Correct Cutting Cartridge
For information about the thicknesses you can cut and pierce with a SmartSYNC hand torch, refer Cutting specifications on page 35. Select the correct cutting cartridge Hypertherm offers the following types of hand-cutting cartridges, which can be used with both the 15° and the 75° SmartSYNC hand torches: Cartridge Type Purpose... -
Page 97: Prepare To Fire The Torch
Cut with the Hand Torch For help installing the cartridge, refer to Step 3 – Install the cartridge page 66. Prepare to fire the torch WARNING INSTANT-ON TORCHES – PLASMA ARC CAN CAUSE INJURY, BURNS Ignition of the plasma arc occurs immediately when you pull the torch trigger. Before changing the cartridge, one of the following steps is necessary. - Page 98 1. Install the correct cartridge. Refer to Step 3 – Install the cartridge on page 66. When you install a Hypertherm cutting cartridge, the system goes to Cut mode. To change the mode from Cut mode to Expanded Metal mode, ...
-
Page 99: Start A Cut From The Edge Of The Workpiece
Cut with the Hand Torch Start a cut from the edge of the workpiece Slag produced during piercing can cause damage to the tip of the cartridge. Start the cut from the edge of the workpiece, when possible, to decrease this damage and to optimize cartridge life. 1. - Page 100 Cut with the Hand Torch 3. Drag the torch lightly across the workpiece to continue with the cut. Keep a smooth, stable pace. 810470 Operator Manual Powermax65/85/105 SYNC...
-
Page 101: Pierce A Workpiece
Cut with the Hand Torch Pierce a workpiece WARNING SPARKS AND HOT METAL CAN INJURE EYES AND BURN SKIN When firing the torch at an angle, sparks and hot metal will spray out from the torch tip. Point the torch away from yourself and others. Always put on correct protective equipment including gloves and eye protection. - Page 102 Cut with the Hand Torch 3. Straight pierce: Pull the torch trigger to start the arc. Rolling pierce: Pull the torch trigger to start the arc while still at an angle to the workpiece, then move the torch up to the perpendicular (90°) position. 4.
-
Page 103: Use A Flushcut Specialty Cartridge
Cut with the Hand Torch Use a FlushCut specialty cartridge FlushCut cartridges can remove lugs, bolts, pad eyes, and other attachments without piercing or damaging the workpiece below. You can also use FlushCut cartridges for metal washing. You can turn the tip of the FlushCut cartridge as necessary to get an angled plasma arc that lets you cut very close to the base material without leaving a large amount of remaining material to grind off. - Page 104 Cut with the Hand Torch To use a FlushCut cartridge, do the following: 1. Loosely install the cartridge and turn the flat side of the tip of the cartridge onto the flat workpiece. 2. Make sure that the flat side of the tip of the cartridge is flush with the flat workpiece. Adjust as necessary.
- Page 105 Cut with the Hand Torch 7. Pull the torch trigger to start the arc. Keep the torch in position until the arc transfers to the vertical workpiece and cuts completely through. The arc has cut completely through when sparks go out the other side of the vertical workpiece. 8.
-
Page 106: Guidelines For Hand Torch Cutting
Cut with the Hand Torch Guidelines for hand torch cutting Drag the torch tip lightly and smoothly across the workpiece to keep a stable cut. Sometimes the torch sticks slightly to the workpiece when you cut with FineCut cartridges. This is not an indication of a problem. Pulling, or dragging, the torch across the cut is easier than pushing it. -
Page 107: Get The Most Out Of Your Cartridges
Cut with the Hand Torch Get the most out of your cartridges How often it is necessary to change the cartridge on your hand torch relates to the following: Gas supply quality It is extremely important to keep the gas supply line clean and dry. Oil, water, vapor, and ... -
Page 108: Signs That A Cartridge Is Near End-Of-Life
During standard hand cutting with Powermax65/85/105 SYNC systems under lab conditions, Hypertherm got 1 to 3 hours of actual “arc on” time. Signs that a cartridge is near end-of-life Usually, the best indication of when to install a new cartridge is when the cut quality is no longer satisfactory. -
Page 109: Hand Torch Components, Dimensions, And Weights
Cut with the Hand Torch Hand torch components, dimensions, and weights Components 1 Amperage-adjustment control 5 Safety trigger 2 Torch-lock switch 6 Strain relief for torch lead 3 Shell 7 Torch lead 4 Cartridge Powermax65/85/105 SYNC Operator Manual 810470... -
Page 110: Dimensions
Cut with the Hand Torch Dimensions 75° torch 260 mm (10.2 inch) 75° 70 mm (2.75 inch) 99 mm (3.9 inch) 32 mm (1.25 inch) 267 mm (10.5 inch) 15° torch 268 mm (10.5 inch) 51 mm (2.0 inch) 15° 68 mm (2.7 inch) 32 mm (1.25 inch) -
Page 111: Gouge With The Hand Torch
Gouge with the Hand Torch Select the correct gouging cartridge Hypertherm offers the following gouging cartridges, which you can use with both the 15° and the 75° SmartSYNC hand torches. The 15° hand torch is designed to point heat away from the operator during heavy gouging. -
Page 112: Gouge With The Hand Torch
Gouge with the Hand Torch Plasma power supplies come with a starter set of Hypertherm cartridges. For a full list of the cutting and gouging cartridges available refer to the Powermax65/85/105 SYNC Parts Guide (810490). The gouging cartridges can also be used on the machine torch. Refer to Gouge with the Machine Torch in the Powermax65/85/105 SYNC Mechanized Cutting Guide (810480). - Page 113 Gouge with the Hand Torch 3. Pull the trigger to get a pilot arc. Transfer the arc to the workpiece. 4. Stretch the arc to 25 mm – 32 mm (1 in. – 1-1/4 in.). 5. Keep this position as you push the plasma arc in the direction of the gouge that you want to create.
-
Page 114: Change The Gouge Contour
Gouge with the Hand Torch Change the gouge contour The width and the depth of the gouge contour are a result of the following factors. Adjust these factors in combination to get the gouge that you want. Figure 6 – Factors that change the gouge contour Angle of the torch Torch center line Turn of the torch... - Page 115 Arc stretch is related to the output current (A) of the plasma power supply. The higher the amperage, the longer that you can stretch the arc. Hypertherm recommends that you keep amperage and arc stretch consistent. The lowest and highest possible amperage setting relates to the plasma power supply ...
- Page 116 Arc stretch is related to the output current (A) of the plasma power supply. The higher the amperage, the longer that you can stretch the arc. Hypertherm recommends that you keep amperage and arc stretch consistent. Keep at least a small distance between the torch tip and the molten metal to increase ...
-
Page 117: Troubleshoot Common Problems
Troubleshoot Common Problems WARNING ELECTRIC SHOCK CAN KILL Disconnect electric power before doing installation or maintenance. You can get a serious electric shock if electric power is not disconnected. Electric shock can seriously injure or kill you. All work that requires removal of the plasma power supply outer cover or panels must be done by a qualified technician. -
Page 118: Start Here: Troubleshooting Checklist
1. Get the serial number for your system from the data plate that is on the rear panel. 2. Speak to your Hypertherm distributor or authorized repair facility. 3. Speak to the nearest Hypertherm office shown in the front of this manual. ... - Page 119 If you are using torch height control (THC), is an ohmic contact ring (428895) installed on the Hypertherm cartridge? Is the ohmic contact ring connected correctly to the THC? Examine the plasma power supply Is the plasma power supply in an upright position on a flat, level surface? Does the plasma power supply have sufficient ventilation (approximately 0.25 m or 10 inch of...
- Page 120 Does the plasma power supply operate as expected? For example, does the plasma power supply not change to the correct operating mode for the Hypertherm cartridge that you installed when you are using a SmartSYNC torch and Hypertherm cartridge? If so, set the plasma power supply back to factory default settings to see if that is a solution to the problem.
- Page 121 168. The mini machine torch does not have a torch-lock switch. Examine the Hypertherm cartridge Is the Hypertherm cartridge worn or damaged? A higher rate of 0-30-0 faults is typical as a cartridge gets near end-of-life. Refer to Signs that a cartridge is near end-of-life on page 108.
- Page 122 Troubleshoot Common Problems Examine the gas supply Examine the whole gas supply line. Are there any signs of contamination, such as from oil, water, or dirt? It is extremely important to keep a clean, dry gas line. Refer to page 126.
-
Page 123: Common Problems
• You install a FineCut hand cutting cartridge. • You set the output current below 40 A for any type of Hypertherm cartridge. The cartridge end-of-life detection feature is different when the system is in basic mode. -
Page 124: Cold Restarts And Quick Restarts
Troubleshoot Common Problems Problem Solution The system changes the • Set the torch-lock switch to the “ready to fire” ( ) position before you output current (A) or the adjust the amperage or operating mode. The system does not keep those operating mode after I set settings while the torch-lock switch is in the yellow lock (X) position. -
Page 125: Examine The Gas Pressure
Troubleshoot Common Problems Examine the gas pressure Inlet gas supply: Incorrect gas pressure can cause problems with cut quality and cut performance. Refer to page 55 page 58 for information on the inlet gas supply requirements for this plasma power supply. For optimum system performance, make sure that the inlet gas pressure stays between 7.6 bar –... -
Page 126: Examine The Gas Quality
Troubleshoot Common Problems Examine the gas quality It is extremely important to keep a clean, dry gas line to prevent oil, water, dirt, and other contaminants from causing damage to internal components. A clean gas line also helps you to get optimal cut quality and consumable life. -
Page 127: Common Cutting And Gouging Problems
• Make sure that the Hypertherm cartridge is installed correctly. hisses, or you lose the • Examine the Hypertherm cartridge. Replace it if it is worn or damaged. A plasma arc. higher rate of 0-30-0 faults is typical as a cartridge gets near end-of-life. - Page 128 Refer to page the torch trigger again. • Examine the Hypertherm cartridge. Replace it if it is worn or damaged. A higher rate of 0-30-0 faults is typical as a cartridge gets near end-of-life. Refer to Signs that a cartridge is near end-of-life...
-
Page 129: Hand Gouging Problems
automatically sets the operating mode to Gouge mode. There is a condition in which the operating mode does not automatically set to Gouge mode even if a Hypertherm gouging cartridge is used. Refer to Smart mode versus basic mode on page 151. -
Page 130: Fault Codes
Troubleshoot Common Problems Problem Solution The gouge does not have • Tilt the torch down so that it is closer to the workpiece. enough width. • Increase the arc stretch (standoff). • Decrease the gouging speed. • Increase output current (A). Refer to Change the gouge contour on page 114. -
Page 131: Identify Fault Icons
Fault – This icon identifies faults that cause the plasma power supply to stop cutting. If you cannot correct the problem, speak to your Hypertherm distributor or authorized repair facility, or speak to the nearest Hypertherm office shown in the front of this manual. -
Page 132: Remove Fault Code Conditions
An operational fault code can be for a notification or for a condition that stops the cutting process. Hypertherm recommends that you do the steps in the following table for all fault codes that occur. Troubleshooting all faults helps you to get optimal cut quality and consumable life. - Page 133 0-11-0 The remote control operating These fault codes do not stop the system from mode is incorrect or not operating. Hypertherm recommends that you do permitted for the installed the following. cartridge. There is a problem with the remote control or The permitted operating the software interface to the system.
- Page 134 Solutions 0-12-1 The gas pressure output is These fault codes do not stop the system from low. operating. Hypertherm recommends that you do the following. 0-12-2 The gas pressure output is • For 0-12-1 faults, increase the inlet gas high.
- Page 135 (A) and the operating mode manually. Also, the system cannot collect data about the Hypertherm cartridge. • Lightly blow air into the cartridge to remove all dust or other contamination. Install the cartridge again.
- Page 136 Troubleshoot Common Problems Fault Fault Fault code icon LEDs Description Solutions 0-19-9 The input power stopped. Or, This fault code stops the system from operating. power PCB hardware Do the following. protection occurred for Yellow • This fault can be the result of electrical components in the plasma noise.
- Page 137 • Make sure that the torch lead is not leaking. Also make sure that it is not kinked or twisted. Yellow • Install a new Hypertherm cartridge. • For mechanized applications, lock out the torch height control. Powermax65/85/105 SYNC Operator Manual...
- Page 138 Examine the gas pressure on page 125 and Examine the gas quality on page 126. • If the Hypertherm cartridge is in good condition and is installed correctly, the torch has possible damage. Speak to your distributor or authorized repair facility.
- Page 139 Yellow (PFC IGBT) is too cold. no longer too hot or too cold. Hypertherm recommends that you operate the system only in This is applicable to CSA and external temperatures between -10°C to 40°C to Powermax105 SYNC (14°F to 104°F).
- Page 140 FastConnect receptacle on the front of the plasma power supply. Do a quick restart. • If the Hypertherm cartridge is in good condition and is installed correctly, the torch has possible damage. Speak to your distributor or authorized repair facility.
- Page 141 Troubleshoot Common Problems Fault Fault Fault code icon LEDs Description Solutions 0-50-2 none The torch-lock switch is set to This fault code identifies a condition in which an additional step is necessary for hand torches the green “ready to fire” ( before the hand torch will fire a plasma arc.
- Page 142 Troubleshoot Common Problems Fault Fault Fault code icon LEDs Description Solutions 0-60-0 An AC input voltage phase This fault code stops the system from operating. loss occurred. Do the following. A cold restart is necessary. Yellow This is applicable only to CE •...
- Page 143 LCD/control PCB and the to cut, but the controls on the front panel are not Yellow DSP PCB. available. Hypertherm recommends that you do the following. • Set the power switch on the plasma power supply to OFF (O). Wait until all the amperage LEDs on the SmartSYNC hand torch go off.
- Page 144 You can continue to cut or gouge, but you must set the output current (A) and the operating mode manually. Cartridge: • Make sure that the Hypertherm cartridge is installed correctly. • Make sure that the green ring inside the cartridge is not broken.
-
Page 145: Internal Component Faults (1-Nn-N, 2-Nn-N, 3-Nn-N)
If you consistently see these fault codes, you can temporarily set the GEN setting to on. This setting is on the Feature Configuration screen (FEATURE CONFIG). Hypertherm recommends that only experienced operators change this setting. This setting decreases the system’s sensitivity to changes in current and voltage from incoming power. -
Page 146: See Recent Fault Codes (Power Supply Log Screen)
Troubleshoot Common Problems See recent fault codes (Power Supply Log screen) Go to the Power Supply Log screen (POWER SUPPLY LOG) to see the 10 most recent internal component faults that have occurred on the plasma power supply. This is a service screen that helps to identify possible damage to components inside the plasma power supply. -
Page 147: Do A Gas Test
Troubleshoot Common Problems Do a gas test Do a gas test to make sure that sufficient gas pressure is coming from the torch. WARNING CHANCE OF BURNS AND CUTS Point the torch away from you before doing a gas test. Always keep hands, clothes, and objects away from the torch tip. -
Page 148: Do A Gas Test In Manual Gas Pressure Mode
Troubleshoot Common Problems 5. Use the gas test screen to compare the plasma power supply’s actual output gas pressure the gas pressure that the system sets to align with the type of cartridge and torch installed. For the system to operate optimally, the output gas pressure must not be lower than the system’s target gas pressure by more than the following quantities:... -
Page 149: Adjust System Settings On The Feature Configuration Screen
Troubleshoot Common Problems Adjust system settings on the Feature Configuration screen Go to the Feature Configuration screen (FEATURE CONFIG) to change system settings. Changing these fields from their default settings is recommended only for experienced operators. Changing one of these fields from the default setting causes the non-default configuration icon (at right) to show on the status screen. - Page 150 130. This field is on by default. Hypertherm recommends that you keep this field on. But you can set it to off if the inlet gas pressure at your work site is not stable or if it stays low enough that you get frequent 0-20-0 faults.
-
Page 151: Smart Mode Versus Basic Mode
151. Smart mode versus basic mode By default the system is in smart mode. Hypertherm recommends that you keep the system in smart mode. But very experienced operators can use basic mode to help with troubleshooting if necessary. To go into basic mode, set the field to BASIC. -
Page 152: Set System Settings To Factory Default
The non-default configuration icon (at right) no longer shows on the status screen. If you have a Hypertherm cartridge on a SmartSYNC torch, the system process icon (at right) shows on the status screen. The system goes back to the factory default settings for the cartridge ... -
Page 153: See System Information
Troubleshoot Common Problems See system information From the menu screens, you can go to the following service screens to see information about your plasma power supply, torch, and cartridge: Cartridge Data screen on page 154 Power Supply Data screen on page 156 ... -
Page 154: Cartridge Data Screen
3. Turn the adjustment knob to scroll down and see the CARTRIDGE DATA 2 screen. P/N – This field shows the part number (nnnnnn) and the version (X) of the Hypertherm cartridge. NAM – This field shows the Hypertherm cartridge type. - Page 155 (@nn). UID – This field shows the unique identification number of the Hypertherm cartridge. STA – This field shows the total number of pilot arc starts that the Hypertherm cartridge has done in its life. XFR – This field shows the total number of arc transfers that the Hypertherm cartridge has done in its life.
-
Page 156: Power Supply Data Screen
Troubleshoot Common Problems Power Supply Data screen Go to the Power Supply Data screen (POWER SUPPLY DATA) to see information about plasma power supply performance and use. 1. Select on the main menu screen. 2. Select to go to the POWER SUPPLY DATA screen. I –... - Page 157 Troubleshoot Common Problems XFR – This field shows the total number of arc transfers the plasma power supply has done in its life. PT – This field shows the cumulative pilot arc time in hours, minutes, and seconds (HH:MM:SS) that the plasma power supply has had in its life. XT –...
-
Page 158: Cartridge History Screen
– This field shows the total number of pilot arc starts for all cartridge types that the plasma power supply has done in its life. – This field shows the total number of Hypertherm cutting cartridge starts that the plasma power supply has done in its life while in Expanded Metal mode. -
Page 159: Lcd/Control Pcb Information Screen
Troubleshoot Common Problems – This field shows the total number of pilot arc starts that the plasma power supply has done while an unrecognized type of cartridge was used. LCD/Control PCB Information screen Go to the LCD/Control PCB Information screen (LCD/CTRL BD INFO) to see service-related information about the firmware on the plasma power supply’s LCD/control PCB. -
Page 160: Dsp Pcb And Power Pcb Information Screen
Troubleshoot Common Problems DSP PCB and Power PCB Information screen Go to the DSP PCB and Power PCB Information screen (DSP&PWR BD INFO) to see service-related information about the plasma power supply’s power PCB and the firmware on the digital signal processing (DSP) PCB. The technical information on this screen is for qualified service technicians to refer to when troubleshooting. -
Page 161: Torch Pcb Information Screen
Troubleshoot Common Problems Torch PCB Information screen Go to the Torch PCB Information screen (TORCH BD INFO) to see service-related information about the SmartSYNC torch that is connected to the plasma power supply. The technical information on this screen is for qualified service technicians to refer to when troubleshooting. The plasma power supply cannot show torch information for a non-SmartSYNC torch. -
Page 162: Radio Frequency (Rf) Data Screen
Troubleshoot Common Problems Radio Frequency (RF) Data screen Go to the Radio Frequency Data screen (RF DATA) to see service-related information about radio frequency (RF) settings and logs. The technical information on this screen is for qualified service technicians to refer to when troubleshooting. 1. -
Page 163: Cut Counters Transfer Screen
Troubleshoot Common Problems Cut Counters Transfer screen Go to the Cut Counters Transfer screen (CUT COUNTERS) to do a transfer of the plasma power supply’s cut counter data before installing a new DSP PCB. This screen is for qualified service technicians. -
Page 164: Cnc Interface Settings Screen
Troubleshoot Common Problems CNC Interface Settings screen Use the CNC Interface Settings screen (CNC INTERFACE) to set parameters for serial communication. This screen is for qualified service technicians. For instructions on how to use this screen, refer to the Powermax65/85/105 SYNC Mechanized Cutting Guide (810480). -
Page 165: Complete Regular Maintenance Tasks
Complete Regular Maintenance Tasks Examine the plasma power supply and torch WARNING ELECTRIC SHOCK CAN KILL Disconnect electric power before doing installation or maintenance. You can get a serious electric shock if electric power is not disconnected. Electric shock can seriously injure or kill you. All work that requires removal of the plasma power supply outer cover or panels must be done by a qualified technician. - Page 166 Complete Regular Maintenance Tasks WARNING RISK OF BURNS AND ELECTRIC SHOCK – USE INSULATED GLOVES Always put on insulated gloves when changing the cartridges. The cartridges get very hot during cutting and can cause severe burns. Touching the cartridges can also cause electric shock if the plasma power supply is ON and the torch-lock switch is not in the yellow lock (X) position.
-
Page 167: Every Use
Complete Regular Maintenance Tasks Every use Plasma power supply Torch Examine the indicator LEDs and correct any fault conditions. Examine the cartridge for correct installation and Refer to Fault codes on page 130. for wear. Refer to Signs that a cartridge is near end-of-life on page 108 and Cartridge... -
Page 168: Every Cartridge Change Or Weekly (Whichever Is More Frequent)
Complete Regular Maintenance Tasks Every cartridge change or weekly (whichever is more frequent) Torch Do a test of the torch-lock switch to make sure that it correctly locks and unlocks the torch. Lock the torch • With the plasma power supply ON, move the torch-lock switch to the yellow lock (X) position. -
Page 169: Every 3 Months
Complete Regular Maintenance Tasks Every 3 months Plasma power supply Torch Examine the power cord and plug. Replace them if they Hand torches: Examine the trigger for damage. are damaged. Refer to the Powermax65/85/105 SYNC Hand and machine torches: Examine the torch body Parts Guide (810490). -
Page 170: Cartridge Maintenance
Complete Regular Maintenance Tasks Cartridge maintenance To help keep a cartridge operating correctly, do the following. For information on cartridge life, refer Get the most out of your cartridges on page 107. Carefully remove molten metal that collects in the castellations of drag-cutting cartridges. -
Page 171: Examine The Air Filter Bowl And Filter Element
Complete Regular Maintenance Tasks Examine the air filter bowl and filter element It is extremely important to keep a clean, dry gas line to do the following: Air filter bowl Prevent oil, water, dirt, and other contaminants from causing damage to internal components. -
Page 172: Examine The Air Filter Bowl And O-Ring
Complete Regular Maintenance Tasks 6. Gently turn and pull the filter element out of the filter bowl. Be careful not to damage the O-ring at the top of the bowl. Examine the air filter bowl and O-ring Example of a dirty air filter bowl DIRTY, OILY AIR CAN CAUSE DAMAGE TO THE AIR FILTER BOWL Synthetic lubricants containing esters that are used in some air compressors can cause damage to the polycarbonates in the air filter bowl. -
Page 173: Examine The Filter Element
Complete Regular Maintenance Tasks Replace the air filter bowl and O-ring as necessary. Refer to the Powermax65/85/105 SYNC Parts Guide (810490). Also refer to Replace the air filter bowl, O-ring, and filter element on page 173. If you use an external filtration system, such as the Eliminizer filter kit, also do a check of that ... -
Page 174: Install The Air Filter Bowl And Filter Element
Complete Regular Maintenance Tasks 5. Put the filter element inside the air filter bowl. Push down on the top plastic fitting until you hear a click. Install the air filter bowl and filter element 1. Vertically align the filter bowl and push it up into the receptacle in the rear panel.
Need help?
Do you have a question about the SYNC Powermax 65 and is the answer not in the manual?
Questions and answers