
Related Manuals for Gaggenau AW250192


Summary of Contents for Gaggenau AW250192
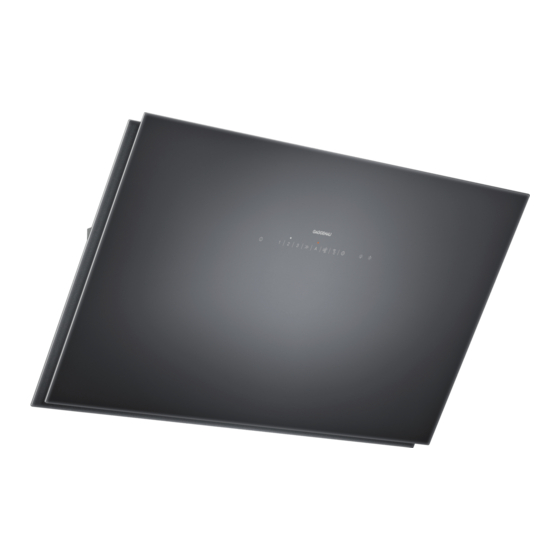
- Page 1 Gaggenau en User manual and installation instructions AW250192, AW251192, AW253192, AW250172, AW251172, AW253172, AW270192, AW271192, AW273192...
-
Page 2: Table Of Contents
en Safety Only use this appliance: Table of contents ¡ For extracting cooking vapour. ¡ In private households and in enclosed spaces in a domestic environment. USER MANUAL ¡ Up to an altitude of max. 2000 m above sea level. Safety .............. 2 Do not use the appliance: Avoiding material damage........ -
Page 3: Safety
Safety en WARNING ‒ Risk of poisoning! WARNING ‒ Risk of fire! Risk of poisoning from flue gases being Fatty deposits in the grease filters may catch drawn back in. Room-air-dependent heat-pro- fire. ducing appliances (e.g. gas, oil, wood or coal- ▶ Never operate the appliance without a operated heaters, continuous flow heaters or grease filter. -
Page 4: Avoiding Material Damage
en Avoiding material damage WARNING ‒ Risk of injury! WARNING ‒ Risk of electric shock! Components inside the appliance may have If the appliance or the power cord is dam- sharp edges. aged, this is dangerous. ▶ Carefully clean the appliance interior. ▶ Never operate a damaged appliance. Items placed on the appliance may fall off. -
Page 5: Environmental Protection And Saving En- Ergy
Environmental protection and saving energy en Painted surfaces are easily damaged. Follow the cleaning instructions. ▶ → "Cleaning the appliance", Page 10 Ensure that the painted surfaces are not scratched. ▶ 3 Environmental protection and saving energy Help protect the environment by using your appliance Adjust the fan speed to the amount of steam pro- in a way that conserves resources and by disposing of duced during cooking. -
Page 6: Familiarising Yourself With Your Appliance
en Familiarising yourself with your appliance 5 Familiarising yourself with your appliance 5.1 Controls You can use the control panel to configure all functions of your appliance and to obtain information about the operating status. Switching the appliance on or off Switching on automatic mode Switching on fan setting 1 Resetting the filter saturation indicator Switching on fan setting 2... -
Page 7: Basic Operation
Basic operation en 6.11 Switching on the lighting 6.18 Setting the saturation indicator The lighting can be switched on and off independently The saturation indicator must be adjusted depending of the ventilation system. on the filter used. Note: Colour temperature settings are available in the Requirement: The appliance is switched off. -
Page 8: Home Connect
en Home Connect 7 Home Connect This appliance is network-capable. Connecting your ap- pliance to a mobile device lets you control its functions via the Home Connect app, adjust its basic settings and monitor its operating status. The Home Connect services are not available in every country. -
Page 9: Hob-Based Hood Control
Hob-based hood control en ¡ Security certificate of the Wi-Fi communication mod- This initial registration prepares the Home Connect ule (to ensure a secure data connection). functions for use and is only required when you want to ¡ The current software and hardware version of your use the Home Connect functions for the first time. - Page 10 en Cleaning and servicing 9.2 Cleaning the appliance 9.4 Removing the grease filter Clean the appliance as specified. This will ensure that WARNING ‒ Risk of injury! the different parts and surfaces of the appliance are Risk of injury when opening and closing the hinges. not damaged by incorrect cleaning or unsuitable clean- Keep your hands away from the hinges.
-
Page 11: Troubleshooting
Troubleshooting en If the grease filter has been inserted incorrectly, Requirement: The grease filters have been removed. carefully push the lock forwards, remove the grease → "Removing the grease filter", Page 10 filter and insert it correctly. Observe the information regarding the cleaning agents. → "Cleaning products", Page 9 Place the grease filters loosely into the dishwasher. -
Page 12: Disposal
en Disposal Fault Cause and troubleshooting The LED lighting Different causes are possible. does not work. Defective LED lights may be replaced by the manufacturer, their customer service or a ▶ qualified technician (electrician) only. Call the after-sales service. ▶ → "Customer Service", Page 12 The button illumina- The control unit is faulty. -
Page 13: Declaration Of Conformity
14 Declaration of Conformity Gaggenau Hausgeräte GmbH hereby declares that the Hereby, Gaggenau Hausgeräte GmbH declares that appliance with Home Connect functionality conforms to the appliance with Home Connect functionality is in the basic requirements and other relevant provisions of compliance with relevant statutory requirements. - Page 14 en Installation instructions Accessory for air extraction mode 15.4 Installation recommendation 15.2 Safety clearances We recommend fitting the appliance such that the Comply with the safety clearances for the appliance. lower edge of the glass screen is in line with the lower edges of the adjacent wall-hung cabinets. Maintain the safety clearances to the hob.
-
Page 15: Installation Instructions
Installation instructions en Risk of poisoning from flue gases being 15.5 Secure installation drawn back in. Follow these safety instructions when in- ▶ If an extractor hood with an open-flued heat stalling the appliance. production source is installed, the power WARNING ‒ Risk of poisoning! supply for the extractor hood must be Risk of poisoning from flue gases being provided with a suitable safety switch. - Page 16 en Installation instructions Grease deposits in the grease filter may catch If the appliance or the power cord is dam- fire. aged, this is dangerous. ▶ Never work with naked flames close to the ▶ Never operate a damaged appliance. appliance (e.g. flambéing). ▶...
- Page 17 Installation instructions en 15.6 Instructions for the electrical 15.8 General information connection Follow these general instructions during the installation. ¡ For the installation, observe the currently valid build- In order to safely connect the appliance to the elec- ing regulations and the regulations of the local elec- trical system, follow these instructions.
- Page 18 en Installation instructions Use a spirit level to align the appliance bracket hori- zontally and screw it firmly in place. Variant A: Flat extractor hood with flue cover Installing the appliance Remove the protective film from the rear. Once the appliance is installed, fully remove the ‒...
- Page 19 Installation instructions en Secure the exhaust pipe to the air pipe connector. Establish the connection to the exhaust air opening. Seal the joints. Installing the flue duct WARNING ‒ Risk of injury! Components inside the appliance may have sharp edges. Wear protective gloves. ▶...
- Page 20 Gaggenau Hausgeräte GmbH Carl-Wery-Straße 34 81739 München GERMANY www.gaggenau.com Valid within Great Britain: Imported to Great Britain by BSH Home Appliances Ltd. Grand Union House Old Wolverton Road Wolverton, Milton Keynes MK12 5PT United Kingdom...
Need help?
Do you have a question about the AW250192 and is the answer not in the manual?
Questions and answers