U-Line SHARK NAVIGATOR LIFT-AWAY H-8831 Quick Start Manual
Hide thumbs
Also See for SHARK NAVIGATOR LIFT-AWAY H-8831:
- User manual (22 pages) ,
- Quick start manual (6 pages)
Table of Contents
Advertisement
Available languages
Available languages
Quick Links
H-8831
SHARK NAVIGATOR
LIFT-AWAY
VACUUM
®
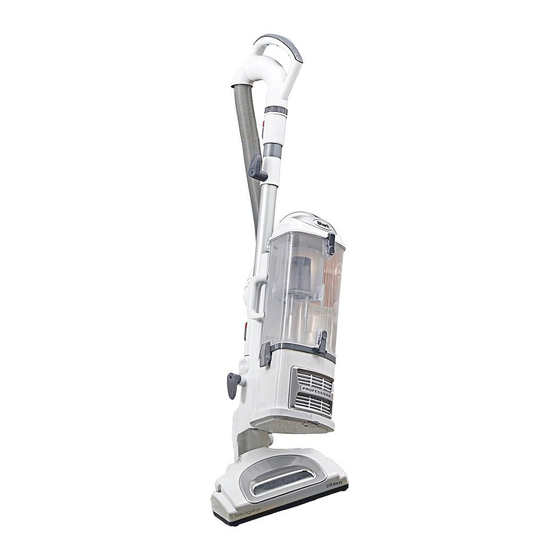
CARTON CONTENTS
Unpack vacuum from the carton and identify the parts
shown. Remove and dispose of the packaging.
A
B
C
F
E
D
G
H
1.
Insert canister into
motorized floor nozzle
until it clicks into place.
(See Figure 1)
PAGE 1 OF 9
1-800-295-5510
uline.com
®
ASSEMBLY
A. Handle with stretch
hose
B. Motorized floor
nozzle
C. Extension wand
D. Accessory holder
E. Portable Lift-Away
®
canister
F. Crevice tool
G. Dusting brush
H. Pet Power brush
Figure 1
Motorized
Floor Nozzle
2. Insert wand into canister
until it clicks into place.
(See Figure 2)
3. Connect handle to wand,
pressing until it clicks into
place. Connect hose to
back of canister until it
clicks into place.
(See Figure 3)
4. Add preferred attachment.
ATTACHMENTS
Dusting Brush
Crevice Tool
Para Español, vea páginas 4-6.
Pour le français, consulter les pages 7-9.
Extension
Wand
Lift-Away
Canister
Accessory
Holder
Pet Power Brush
0820 RH-8831
®
Figure 2
Figure 3
Advertisement
Table of Contents

Related Manuals for U-Line SHARK NAVIGATOR LIFT-AWAY H-8831


Summary of Contents for U-Line SHARK NAVIGATOR LIFT-AWAY H-8831
- Page 1 Para Español, vea páginas 4-6. Pour le français, consulter les pages 7-9. H-8831 1-800-295-5510 uline.com SHARK NAVIGATOR ® LIFT-AWAY VACUUM ® ASSEMBLY CARTON CONTENTS 2. Insert wand into canister Extension until it clicks into place. Wand Unpack vacuum from the carton and identify the parts (See Figure 2) shown.
-
Page 2: Operation
OPERATION FLOOR CLEANING PORTABLE LIFT-AWAY MODE ® Plug in vacuum. Place foot gently on the floor nozzle PLUG IN VACUUM and tilt the handle back. (See Figure 4) Press the Lift-Away button to lift canister off floor ® nozzle. (See Figure 6) Figure 4 Figure 6 Handle... -
Page 3: Cleaning Filters
MAINTENANCE EMPTYING DUST CUP CLEANING FILTERS Pull up on dust cup PRE-MOTOR (FOAM AND FELT) Figure 9 release latch and lift With the dust cup removed, dust cup off canister. Figure 12 take out and rinse foam and Empty dust cup after Dust Cup felt filters with water. -
Page 4: Contenido De La Caja
H-8831 800-295-5510 uline.mx SHARK NAVIGATOR ® LIFT-AWAY ASPIRADORA ® ENSAMBLE CONTENIDO DE LA CAJA 2. Inserte el tubo en el Extensión contenedor hasta que Desempaque la aspiradora de la caja e identifique las haga clic en su lugar. partes que se muestran. Retire y deseche el empaque. (Vea Diagrama 2) Contenedor A. -
Page 5: Limpieza De Pisos
FUNCIONAMIENTO LIMPIEZA DE PISOS MODO PORTÁTIL LIFT-AWAY ® 1. Conecte la aspiradora. Coloque el pie suavemente CONECTE LA ASPIRADORA en la boquilla para piso e incline el asa hacia atrás. Presione el botón Lift-Away para levantar el ® (Vea Diagrama 4) contenedor de la boquilla para piso. -
Page 6: Mantenimiento Del Cepillo Giratorio
MANTENIMIENTO VACIAR RECIPIENTE PARA POLVO LIMPIAR LOS FILTROS 1. Jale el pestillo de MOTOR DELANTERO (ESPUMA Y FIELTRO) Diagrama 9 liberación del Una vez que retire el recipiente para Diagrama 12 Pestillo de recipiente para polvo, retire y polvo y levántelo del Liberación enjuague los filtros de espuma contenedor. -
Page 7: Contenu Du Carton
H-8831 1-800-295-5510 uline.ca SHARK NAVIGATOR LIFT-AWAY – ASPIRATEUR ASSEMBLAGE CONTENU DU CARTON 2. Insérez le tube-rallonge Tube-rallonge dans le boîtier jusqu'à Déballez l'aspirateur et identifiez les pièces illustrées. ce qu'il s'enclenche en Retirez et jetez l'emballage. position. (Voir Figure 2) Boîtier Lift-Away A. -
Page 8: Nettoyage Des Planchers
FONCTIONNEMENT NETTOYAGE DES PLANCHERS MODE PORTATIF LIFT-AWAY Branchez l'aspirateur. Placez doucement le pied sur BRANCHER L'ASPIRATEUR la buse et inclinez la poignée vers l'arrière. 1. Appuyez sur le bouton Lift-Away pour soulever (Voir Figure 4) le boîtier de la buse. (Voir Figure 6) Figure 4 Figure 6 Handle... -
Page 9: Vidange Du Bac À Poussière
ENTRETIEN VIDANGE DU BAC À POUSSIÈRE NETTOYAGE DES FILTRES 1. Tirez sur le loquet PRÉ-MOTEUR (MOUSSE ET FEUTRE) Figure 9 de déverrouillage Après avoir retiré le bac à et soulevez le bac à Figure 12 poussière, retirez et rincez à poussière du boîtier.
Need help?
Do you have a question about the SHARK NAVIGATOR LIFT-AWAY H-8831 and is the answer not in the manual?
Questions and answers