
Subscribe to Our Youtube Channel
Related Manuals for ZANKER KDT10001FB


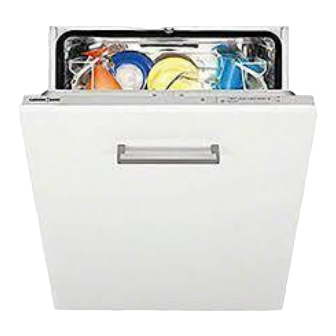
Summary of Contents for ZANKER KDT10001FB
- Page 1 Gebruik‐ Notice d'utili‐ User Manual saanwijzing sation Afwasauto‐ Lave-vais‐ Dishwasher maat selle KDT10001FB...
-
Page 2: Table Of Contents
Inhoudsopgave Veiligheidsinformatie Dagelijks gebruik Veiligheidsvoorschriften Aanwijzingen en tips Bedieningspaneel Onderhoud en reiniging programma’s Probleemoplossing Instellingen Technische informatie Voordat u het apparaat voor de eerste keer gebruikt Wijzigingen voorbehouden. Veiligheidsinformatie Lees zorgvuldig de meegeleverde instructies voor installatie en gebruik van het apparaat. De fabrikant is niet verantwoordelijk voor letsel en schade veroorzaakt door een foutieve installatie. -
Page 3: Veiligheidsvoorschriften
De waterdruk (minimaal en maximaal) moet liggen tussen 0.5 (0.05) / 8 • (0.8) bar (Mpa) Houd rekening met het maximale aantal 12 plaatsen. • Als de voedingskabel beschadigd is, moet de fabrikant, een erkende • serviceverlener of een gekwalificeerd persoon deze vervangen teneinde gevaarlijke situaties te voorkomen. -
Page 4: Bedieningspaneel
• Plaats geen ontvlambare producten of items die vochtig zijn door ontvlambare producten in, bij of op het apparaat. Servicedienst • Contact opnemen met de klantenservice voor reparatie van het apparaat. Wij raden uitsluitend het gebruik van originele onderdelen aan. •... -
Page 5: Programma's
programma’s Programma Mate van vervuil- Programmafasen Verbruiksgegevens Type belading Program- Energie- Water maduur (kWh) (min) • Voorspoelen Normaal bevuild 1.02 • Wassen 50 °C Serviesgoed en • Spoelgangen bestek • Drogen • Voorspoelen Sterk bevuild 130 - 150 1.3 - 1.4 13 - 15 •... - Page 6 Druk, als het bedieningspaneel niet deze stand weergeeft, op de functie Reset. Gebruikersmodus Terwijl het apparaat in de programmakeuzemodus staat: 1. Houd de programmaknop ingedrukt tot het indicatielampje gaat knipperen en het indicatielampje In de gebruikersmodus kan het volgende worden gewijzigd: •...
-
Page 7: Voordat U Het Apparaat Voor De Eerste Keer Gebruikt
1. Druk als het apparaat in de gebruikersmodus staat binnen 5 seconden op de programmaknop: Het indicatielampje brandt en het indicatielampje gaat knipperen. 2. Wacht tot het lampje dooft. Het indicatielampje is uit. Het geluidssignaal is uit. 3. Druk op programmatoets om de instelling te wijzigen. Het -lampje brandt. - Page 8 • Vul het zoutreservoir als het 4. Voeg vaatwasmiddel toe. zoutindicatielampje brandt. 5. U dient het juiste programma in te stellen en te • Zorg ervoor dat er glansspoelmiddel in het starten voor het type lading en de mate van glansmiddeldoseerbakje zit.
-
Page 9: Aanwijzingen En Tips
Als u het apparaat binnen een paar minuten na afloop van het wasprogramma niet uitschakelt, gaan alle indicatielampjes uit. Dit helpt het energieverbruik te verminderen. Aanwijzingen en tips Algemeen erg hard water raden we het gebruik aan van enkelvoudig vaatwasmiddel (poeder, gel, tabletten De volgende tips zorgen voor optimale schoonmaak- en zonder extra functies), glansmiddel en zout apart droogresultaten en helpen ook het milieu te... -
Page 10: Onderhoud En Reiniging
• Leg lichte voorwerpen in het bovenrek. Zorg ervoor • Het programma van toepassing is op het type lading dat de voorwerpen niet verschuiven. en de mate van bevuiling. • Zorg er voor dat de sproeiarmen vrij kunnen • De juiste hoeveelheid afwasmiddel is gebruikt. ronddraaien voordat u een programma start. -
Page 11: Probleemoplossing
• Gebruik geen schuurmiddelen, schuursponsjes of het apparaat. Om dit te voorkomen raden we aan oplosmiddelen. minstens 2 keer per maand progamma's met een lange duur te gebruiken. De binnenkant van de machine reinigen • Om de prestaties van uw apparaat op en top te houden raden we u aan iedere maand een specifiek •... -
Page 12: Technische Informatie
De was- en droogresultaten zijn niet naar tevredenheid Probleem Mogelijke oplossing • De vrijgegeven hoeveelheid glansmiddel is te hoog. Zet de dosering Witte strepen of een blauwe waas op van het glansmiddel op een lagere stand. glazen en serviesgoed • Er is te veel vaatwasmiddel gebruikt. - Page 13 MILIEUBESCHERMING met het symbool niet weg met het huishoudelijk Recycle de materialen met het symbool . Gooi de afval. Breng het product naar het milieustation bij u in verpakking in een geschikte verzamelcontainer om het de buurt of neem contact op met de gemeente. te recyclen.
-
Page 14: Safety Information
Contents Safety information Daily use Safety instructions Hints and tips Control panel Care and cleaning Programmes Troubleshooting Settings Technical information Before first use Subject to change without notice. Safety information Before the installation and use of the appliance, carefully read the supplied instructions. -
Page 15: Safety Instructions
If the supply cord is damaged, it must be replaced by the manufacturer, its • Authorised Service Centre or similarly qualified persons in order to avoid a hazard. Put knives and cutlery with sharp points in the cutlery basket with the •... -
Page 16: Control Panel
• When you contact the Authorised Service Centre, ensure that you have the following information that • Do not sit or stand on the open door. is available on the rating plate. • Dishwasher detergents are dangerous. Obey the Model : safety instructions on the detergent packaging. -
Page 17: Programmes
Programmes Programme Degree of soil Programme phases Consumption values Type of load Duration Energy Water (min) (kWh) • Prewash Normal soil 1.02 • Wash 50 °C Crockery and cut- • Rinses lery • • Prewash Heavy soil 130 - 150 1.3 - 1.4 13 - 15 •... - Page 18 User mode While the appliance is in programme selection mode: 1. Press and hold programme button until the indicator starts to flash and the indicator is on. In user mode can be changed: • The level of the water softener according to the water hardness. •...
-
Page 19: Before First Use
2. Wait until the indicator goes off. The indicator is off. The acoustic signal is off. 3. Press programme button to change the setting. The indicator is on. The acoustic signal is on. 4. Press on/off button to confirm the setting. Before first use 1. - Page 20 • Make sure that there is rinse aid in the rinse aid 5. Set and start the correct programme for the type of dispenser. load and the degree of soil. 3. Load the baskets. 4. Add the detergent. Adding detergent If the programme has a prewash phase, put a small quantity of detergent also in compartment B.
-
Page 21: Hints And Tips
Hints and tips General • If you use multi-tablets you can select the Multitab option (if available). This option increases the The following hints will ensure optimal cleaning and cleaning and drying results with the use of multi- drying results in daily use and also help to protect the tablets. -
Page 22: Care And Cleaning
• The position of the items in the baskets is correct. 2. First remove items from the lower basket, then from • The programme is applicable for the type of load the upper basket. and for the degree of soil. At the end of the programme water can •... -
Page 23: Troubleshooting
recommend to run long duration programmes at cleaning product for dishwashers. Follow carefully least 2 times per month. the instructions on the packaging of the product. • To maintain the performance of your appliance at its best, we recommend to use monthly a specific Troubleshooting If the appliance does not start or it stops during With some problems the end indicator flashes... -
Page 24: Technical Information
Problem Possible solution • The released quantity of rinse aid is not sufficient. Adjust the rinse aid There are stains and dry water drops selector to a higher position. on glasses and dishes. • The quality of the rinse aid can be the cause. •... -
Page 25: Consignes De Sécurité
Table des matières Consignes de sécurité Utilisation quotidienne Instructions de sécurité Conseils Bandeau de commande Entretien et nettoyage Programmes Dépannage Réglages Caractéristiques techniques Avant la première utilisation Sous réserve de modifications. Consignes de sécurité Avant d'installer et d'utiliser cet appareil, lisez soigneusement les instructions fournies. -
Page 26: Instructions De Sécurité
La pression de l'eau en fonctionnement (minimale et maximale) doit se • situer entre 0.5 (0.05) / 8 (0.8) bar (Mpa) Respectez le nombre maximum de 12 couverts. • Si le câble d'alimentation est endommagé, il doit être remplacé par le •... -
Page 27: Bandeau De Commande
• Avant d'utiliser l'appareil pour la première fois, • De la vapeur chaude peut s'échapper de l'appareil si assurez-vous de l'absence de fuites. vous ouvrez la porte pendant le déroulement d'un • Le tuyau d'arrivée d'eau comporte une vanne de programme. -
Page 28: Programmes
Voyant du réservoir de sel régénérant. Ce voyant est toujours éteint pendant le déroulement du programme. Programmes Programme Degré de salis- Phases du pro- Valeurs de consommation sure gramme Type de vaisselle Durée Consom- (min) mation électrique (kWh) • Prélavage Normalement sale 1.02 •... -
Page 29: Réglages
Réglages Mode Programmation L'appareil est en mode Programmation lorsque tous les voyants de programme sont allumés. Lorsque l'appareil est en mode Programmation, il est possible de sélectionner un programme et d'entrer en mode Utilisateur. Si le bandeau de commande ne montre pas cette condition, utilisez la fonction Reset. Mode Utilisateur Lorsque l'appareil est en mode Programmation : 1. -
Page 30: Avant La Première Utilisation
Degrés alle- Degrés français mmol/l Degrés Clarke Niveau de l'adou- mands (°fH) cisseur d'eau (°dH) 43 - 46 76 - 83 7.6 - 8.3 53 - 57 37 - 42 65 - 75 6.5 - 7.5 46 - 52 29 - 36 51 - 64 5.1 - 6.4 36 - 45... -
Page 31: Utilisation Quotidienne
Ajout du sel régénérant Avant la première utilisation, versez un litre d'eau dans le réservoir de sel régénérant. De l'eau et du sel peuvent sortir du réservoir de sel régénérant lorsque vous le remplissez. Risque de corrosion. Afin d'éviter cela, après avoir rempli le réservoir de sel régénérant, démarrez un programme. Ajout du liquide de rinçage Le liquide de rinçage permet de sécher la vaisselle sans laisser de traînées ni de taches. -
Page 32: Conseils
Ajout de pastilles de détergent multifonctions • Ne remplissez pas le réservoir de sel régénérant ni le distributeur de liquide de rinçage. • Réglez l'adoucisseur d'eau au niveau minimal. • Réglez le distributeur de liquide de rinçage sur le niveau le plus faible. Réglage et départ d'un programme Départ d'un programme 1. - Page 33 Adoucisseur d'eau 2. Assurez-vous que le réservoir de sel régénérant et le distributeur de liquide de rinçage sont pleins. L'adoucisseur d'eau élimine les minéraux contenus 3. Lancez le programme le plus court avec une phase dans l'eau, susceptibles de nuire aux résultats de de rinçage.
-
Page 34: Entretien Et Nettoyage
Entretien et nettoyage AVERTISSEMENT! Avant toute Les filtres sales et les bras d'aspersion opération d'entretien, éteignez l'appareil obstrués diminuent les résultats de et débranchez la fiche de la prise lavage. Contrôlez-les régulièrement et secteur. nettoyez-les si nécessaire. Nettoyage des filtres •... -
Page 35: Dépannage
Dépannage Si l'appareil ne démarre pas ou s'arrête en cours de Dans certains cas, le voyant de fin clignote pour fonctionnement, avant de contacter le service après- indiquer un dysfonctionnement. vente, vérifiez d'abord si vous ne pouvez pas résoudre le problème vous même à l'aide des informations du tableau. -
Page 36: Caractéristiques Techniques
Les résultats de lavage et de séchage ne sont pas satisfaisants Problème Solution possible • La quantité de liquide de rinçage libérée est trop importante. Placez le Traînées blanchâtres ou pellicules sélecteur de dosage du liquide de rinçage sur un niveau plus faible. bleuâtres sur les verres et la vaisselle. - Page 37 EN MATIÈRE DE PROTECTION DE L'ENVIRONNEMENT symbole avec les ordures ménagères. Emmenez un Recyclez les matériaux portant le symbole tel produit dans votre centre local de recyclage ou Déposez les emballages dans les conteneurs prévus à contactez vos services municipaux. cet effet.
- Page 40 www.electrolux.com/shop 156969811-A-502014...
Need help?
Do you have a question about the KDT10001FB and is the answer not in the manual?
Questions and answers