
Subscribe to Our Youtube Channel
Related Manuals for HOMEDEPOT Merra CFN-1054


Summary of Contents for HOMEDEPOT Merra CFN-1054
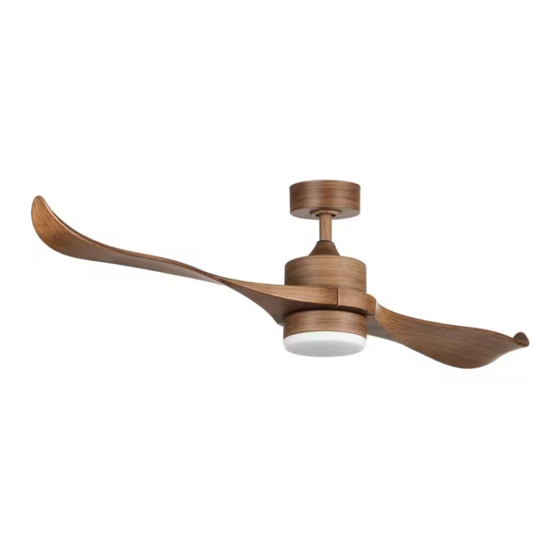
- Page 1 V20210254 CFN-1054 Instruction Manual Read Completely Before Installation & Use and Keep for Future Reference...
-
Page 2: Table Of Contents
TABLE OF CONTENTS Introduction ·························································································· 1 Package Contents ················································································· 2 Safety Information·················································································· 3 Preparation ·························································································· 4 Initial Installation ··················································································· 5 Downrod Mounting ················································································ 6 Circuit Connections ··············································································· 7 Receiver Installation ·············································································· 8 Blade Installation ··················································································· 8 Light Installation ··················································································· 9 Color Temperature Adjustment ·································································... -
Page 3: Package Contents
PACKAGE CONTENTS Ceiling Mounting Bracket Downrod Coupling Cover Fan Motor Assembly Fan Blades (×2) Canopy Canopy Cover STOP Lamp Shade LED Light Kit Light Plate Remote Control Receiver Blade Bolts (×2) Spring Washers (×4) Mounting Screws (×4) Wire Nuts (×10) Balance Kit Flat Washers (×4) Star Washers (×4) -
Page 4: Safety Information
SAFETY INFORMATION Warning! 1. To reduce the risk of electric shock, ensure electricity has been turned off at the circuit breaker or fuse box before beginning. 2. All wiring must be in accordance with national and local electrical codes. Electrical installation should be performed by a qualified licensed electrician. -
Page 5: Preparation
PREPARATION 1. Turn Off Your Power Begin installation by removing fuses or turning off circuit breakers to the wiring you will be using. Use your compatible UL listed outlet box if you already have one installed. Failure to disconnect the power supply prior to installation may result in serious injury or death. -
Page 6: Initial Installation
INITIAL INSTALLATION Outlet Box Washers Ceiling Mounting Bracket Hook Mounting Screws/Bolts 120V Wires Pass the 120V supply wires through the center hole in the ceiling mounting bracket. Secure the bracket to the outlet box with the provided mounting screws or bolts and spring or star washers. -
Page 7: Downrod Mounting
DOWNROD MOUNTING Downrod Clip Canopy Downrod Canopy Cover Coupling Cover Bolts Clip Step 1. Remove the pin Step 2. Carefully place the Step 3. Install the downrod and clip from the downrod. canopy, canopy cover, and onto the yoke, aligning the Loosen the two pre-in- coupling cover onto the holes, inserting the pin... -
Page 8: Circuit Connections
CIRCUIT CONNECTIONS Again, ensure that the power has been cut before working with the wiring. Use the wire nuts provided Registration Slot with your fan. Ensure there are no loose wires or connections, and secure connectors with electrical tape. Step 1. Insert the receiver into the tray with the receiver facing the ceiling. -
Page 9: Receiver Installation
RECEIVER INSTALLATION Outlet Box Ceiling Mounting Bracket Mounting Screws/Bolts Receiver Canopy Insert the receiver into the tray with the receiver facing the ceiling. For best results, make sure the white antenna on the end of the receiver remains extended and not tangled with any of the electrical wires. -
Page 10: Light Installation
LIGHT INSTALLATION Step 1. Remove the pre-installed bolts on the fan motor assembly. Wire Connectors Light Plate Bolts Step 2. Feed the wire connectors through the middle of the light plate. Install the light plate onto motor assembly and secure it by replacing and retightening the bolts. -
Page 11: Remote Control Operation
REMOTE CONTROL OPERATION Install the remote control holder onto any wall or suitable flat surface using the two steel screws. Upon first use, connect the remote control to its receiver in the fan by pressing the emitter's "LI" and "Hi" button for 3 seconds. There should be a beep to announce that the remote has successfully connected to its receiver. -
Page 12: Troubleshooting
TROUBLESHOOTING Potential Problems Common Solutions Check fuses and/or circuit breakers and reset if needed. Cut off power to the fan and check its internal electrical connections. Fan blades Replace the remote control’s batteries. don't rotate Check that the fan cover is correctly placed and no bolt interfere with the movement of the blades.
Need help?
Do you have a question about the Merra CFN-1054 and is the answer not in the manual?
Questions and answers