
Subscribe to Our Youtube Channel
Related Manuals for Sauder Craft Table 421417


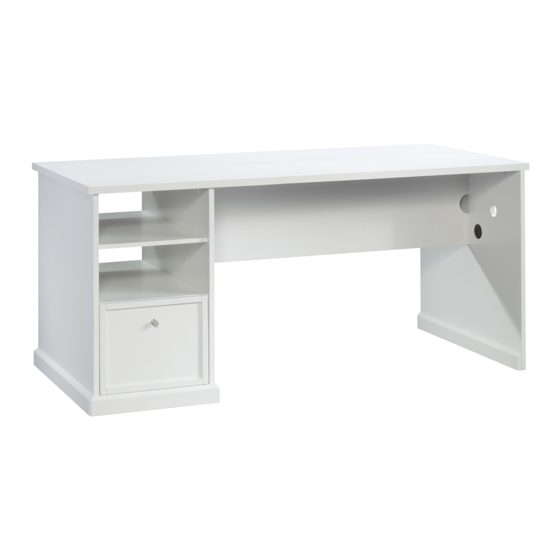
Summary of Contents for Sauder Craft Table 421417
- Page 1 Craft Table NOTE: THIS INSTRUCTION BOOKLET CONTAINS IMPORTANT SAFETY INFORMATION. PLEASE READ AND KEEP FOR FUTURE REFERENCE. English pg 1-20 Français pg 21-24 Español pg 25-28...
- Page 2 Table of Contents Assembly Tools Required Part Identifi cation No. 2 Phillips Screwdriver Tip Shown Actual Size Hardware Identifi cation Assembly Steps 5-20 Short Screwdriver Français 21-24 Español 25-28 Skip the power trip. This time. Safety 29-30 Warranty Page 2...
- Page 3 Now you know Part Identifi cation our ABCs. å While not all parts are labeled, some of the parts will have a label or an inked letter on the edge to help distinguish similar parts from each other. Use this part identifi cation to help identify similar parts. RIGHT END (1) LONG BASE MOLDING (2) DRAWER BACK (2)
- Page 4 Hardware Identifi cation å Screws are shown actual size. You may receive extra hardware with your unit. HIDDEN CAM - 47 CAM SCREW - 47 EXTENSION RAIL - 4 EXTENSION SLIDE - 4 (EXTENSION SET SHOWN SEPARATED) KNOB - 2 WOOD DOWEL - 1 CAM COVER CARD - 5 RIGHT FILE GLIDE - 2...
- Page 5 Step 1 Push forty-seven HIDDEN CAMS (3) into the ENDS (A å and B), UPRIGHT (C), SHELVES (E), BACK (F), BRACES (I), LEFT DRAWER SIDES (K and M). Arrow Arrow (47 used) Arrow Arrow Arrow Arrow Arrow Hole The arrow in the HIDDEN CAM must point toward the hole in the edge of the board.
- Page 6 Step 2 Turn forty-fi ve CAM SCREWS (4) into the ENDS (A and B), å UPRIGHT (C), TOP (P), SHORT BASE MOLDINGS (H), and DRAWER FRONTS (O). NOTE: Two CAMS SCREWS will be used in step 11. å Page 6...
- Page 7 Step 3 Fasten the RAIL EXTENSIONS (J) to the LEFT END (B) å and UPRIGHT (C). Use eight SILVER 13/16" FLAT HEAD Remember: SCREWS (14). Righty tighty. Lefty loosey. Fasten the LONG BASE MOLDINGS (G) to the LEFT å END (B) and UPRIGHT (C). Use six SILVER 1-3/16" PAN HEAD SCREWS (12).
- Page 8 Step 4 Separate the EXTENSION SLIDES (2) from the EXTENSION RAILS (1) as å shown in the upper diagram below. Be prepared, the parts are greasy. Fasten the EXTENSION RAILS (1) to the LEFT END (B) and UPRIGHT (C). å Use eight SILVER 1/2"...
- Page 9 Step 5 Fasten the SHELVES (E) to the UPRIGHT (C). Tighten six å HIDDEN CAMS. D E N H I D i t h f a c S u r w i t h f a c e C A M S u r D E N H I D...
- Page 10 Step 6 Fasten the BRACES (I) to the UPRIGHT (C). Tighten four å HIDDEN CAMS. Finished edge Finished edge Surface with HIDDEN CAMS Page 10...
- Page 11 Step 7 You will need a short screwdriver in this step. å Fasten the LEFT END (B) to the SHELVES (E) and å BRACES (I). Tighten ten HIDDEN CAMS. Short Screwdriver Page 11...
- Page 12 Step 8 Fasten the SHORT BASE MOLDINGS (H) to the UPRIGHT (C) å and LEFT END (B). Tighten four HIDDEN CAMS. Flat edge Side Step: Make nachos. (Optional, but recommended.) Flat edge Page 12...
- Page 13 Step 9 Fasten the BACK (F) to the RIGHT END (A). Tighten two å HIDDEN CAMS. i t h f a c S u r D E N H I D Notch These edges must be even. Page 13...
- Page 14 Step 10 Stand your unit upright. å Turn two CAM SCREWS (4) into the UPRIGHT (C). å Fasten the BACK (F) to the UPRIGHT (C). Tighten two å HIDDEN CAMS. S u r f a c H I D D E N i t h Page 14...
- Page 15 Step 11 Turn and remove the large nut from the female end of å the ELECTRICAL CORD (10) as shown to the right. Female end of ELECTRIC CORD Next thread the male end of the cord through the hole in å...
- Page 16 Step 12 U n fi n i s h s u r f a c Groove Fasten one each of the DRAWER SIDE (K and M) to a Slide the DRAWER BOTTOM (N) into the grooves å å DRAWER FRONT (O). Tighten four HIDDEN CAMS. in the DRAWER SIDES (K and M) and DRAWER FRONT (O).
- Page 17 Step 13 Fasten two EXTENSION SLIDES (2) to the DRAWER SIDES (K and M). Use four SILVER 1/2"FLAT HEAD SCREWS (15). å Push a LEFT FILE GLIDE (9) onto the top edge of a LEFT DRAWER SIDE (K) and a RIGHT FILE GLIDE (8) onto the top å...
- Page 18 Step 14 With someone's help, carefully set the 421414 Hutch on to å the TOP (P). Fasten four METAL BRACKETS (18) to the holes on the å underside of the TOP (P). Use four 11/16” PAN HEAD SCREWS (17). Fasten the METAL BRACKETS on the TOP (P) å...
- Page 19 Step 15 With someone's help, carefully set the 421416 Organizer å Hutch on to the TOP (P). Fasten four METAL BRACKETS (18) to the holes on the å underside of the TOP (P). Use four 11/16” PAN HEAD SCREWS (17). Fasten the METAL BRACKETS on the TOP (P) å...
- Page 20 Step 16 Peel a CAM COVER from the CAM COVER CARD (7) and å stick one onto each visible HIDDEN CAM. To insert the drawers into your unit, line up the å EXTENSION SLIDES on the drawers with the EXTENSION RAILS on the unit and push the drawers into the unit until they are fully inserted.
- Page 21 Table pour travaux d’ a rtisanat Utilisez les instructions d’ a ssemblage en français avec les schémas étape par étape du manuel d’instruction en anglais. Chaque étape en français correspond à la même étape en anglais. La pièce devant être attachée à l’élément est représentée en gris sur les schémas de chaque étape pour plus de précision.
- Page 22 ÉTAPE 1 ÉTAPE 5 Enfoncer quarante-sept EXCENTRIQUES ESCAMOTABLES (3) Fixer les TABLETTES (E) au MONTANT (C). Serrer six dans les EXTRÉMITÉS (A et B), le MONTANT (C), les EXCENTRIQUES ESCAMOTABLES. TABLETTES (E), l'ARRIÈRE (F), les ENTRETOISES (I) et les CÔTÉS GAUCHES DE TIROIR (K et M).
- Page 23 ÉTAPE 8 ÉTAPE 11 Fixer les MOULURES DE SOCLE COURTES (H) au Tourner et retirer le gros écrou de l’extrémité femelle du CORDON MONTANT (C) et à l'EXTRÉMITÉ GAUCHE (B). Serrer quatre ÉLECTRIQUE (10) comma l’indique le schéma sur la droite. EXCENTRIQUES ESCAMOTABLES.
- Page 24 ÉTAPE 13 ÉTAPE 16 Fixer deux COULISSES D'EXTENSION (2) aux CÔTÉS DE TIROIR (K Décoller un CACHE D'EXCENTRIQUE de la CARTE DE CACHE et M). Utiliser quatre VIS TÊTE PLATE 13 mm ARGENTÉES (15). D'EXCENTRIQUE (7) et les coller sur chaque EXCENTRIQUE ESCAMOTABLE visible.
- Page 25 Mesa de artesanía Use estas instrucciones de ensamblaje en español junto con las fi guras paso-a-paso provistas en el folleto inglés. Cada paso en español corresponde al mismo paso en inglés. Se destacan las fi guras de cada paso con una tonalidad oscura para mostrar precisamente cual parte se debe montar a la unidad.
- Page 26 PASO 1 PASO 4 Empuje cuarenta y siete EXCÉNTRICOS ESCONDIDOS (3) dentro Separe las CORREDERAS DE EXTENSIÓN (2) de los RIELES DE de los EXTREMOS (A y B), del PARAL (C), de los ESTANTES (E), del EXTENSIÓN (1) como se muestra en el diagrama superior más DORSO (F), de las RIOSTRAS (I) y de los LADOS IZQUIERDOS abajo.
- Page 27 PASO 7 PASO 11 Usted puede necesitar la utilización un destornillador corto para Gire y retire la tuerca grande del extremo hembra del CABLE este paso. ELÉCTRICO (10) como se indica a la derecha. Fije el EXTREMO IZQUIERDO (B) a los ESTANTES (E) y a las Luego pase el extremo macho del cable a través del orifi...
- Page 28 PASO 13 PASO 16 Fije dos CORREDERAS DE EXTENSIÓN (2) a los LADOS DE Separe una CUBIERTA DE EXCÉNTRICO de la TARJETA CON CAJÓN (K y M). Utilice cuatro TORNILLOS PLATEADOS DE CUBIERTAS DE EXCÉNTRICO (7) y aplique las sobre cada CABEZA PERDIDA de 13 mm (15).
- Page 29 WARNING Please use your furniture correctly and safely. Improper use can cause safety hazards, or damage to your furniture or household items. Carefully read the following chart. Look out for: What can happen: How to avoid the problem: • Overloaded shelves or drawers. •...
- Page 30 ADVERTENCIA Por favor use el mobiliario correcta y seguramente. El mal uso puede causar riesgos de seguridad o daño a las unidades o artículos domésticos. Cuidadosamente lea la tabla a continuación. Esté alerto de: Puede ocurrir: Evitar el problema: • Estantes o cajones sobrecargados. •...
- Page 31 5-YEAR LIMITED WARRANTY 1. We provides limited warranty coverage to the original purchaser of this product for 4. This Warranty applies only to warranted defects that fi rst arise and are reported a period of fi ve years from the date of purchase against defects in materials or to within the warranty coverage period.
Need help?
Do you have a question about the Craft Table 421417 and is the answer not in the manual?
Questions and answers