Advertisement
Quick Links
sauder.com
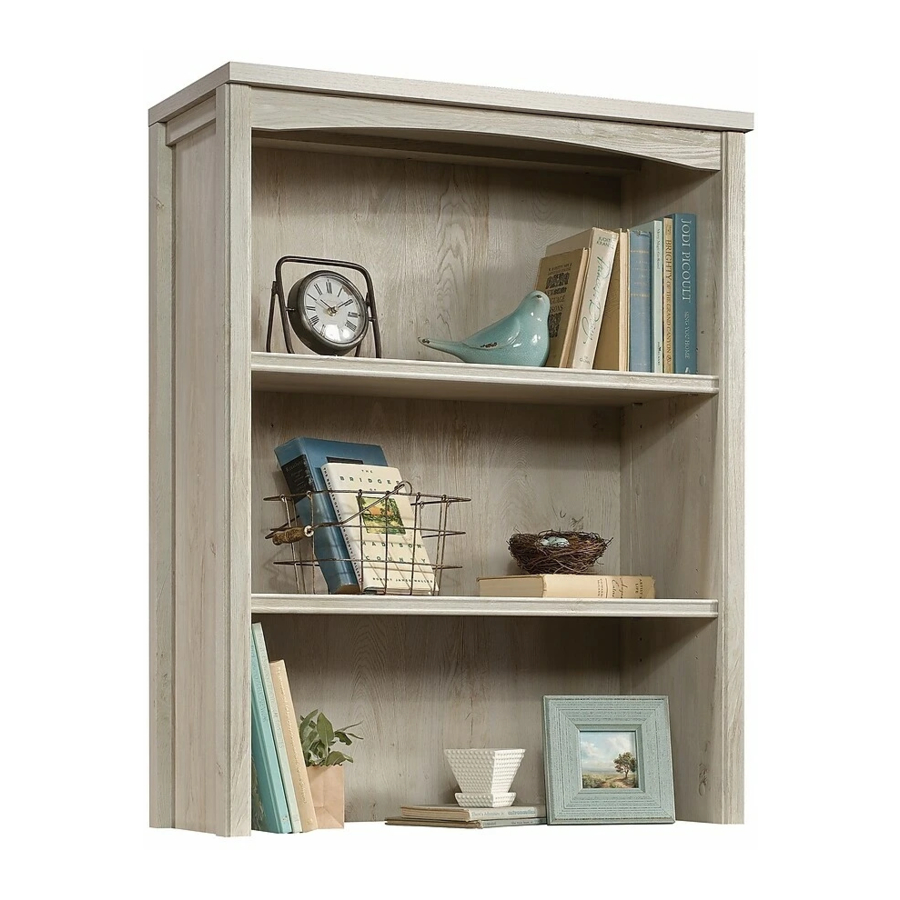
Hutch
Costa Collection | Model 419961
Need help? Visit Sauder.com to view video assembly tips or chat with a live rep.
Prefer the phone? Call 1-800-523-3987.
Share your journey!
For things 'n such.
NOTE: THIS INSTRUCTION
BOOKLET CONTAINS IMPORTANT
SAFETY INFORMATION.
PLEASE READ AND KEEP FOR
FUTURE REFERENCE.
English pg 1-23
Français pg 24-26
Español pg 27-29
Lot # 395001
09/27/16
Purchased: __________________
Be sure to give us a ring before
making any returns. 1-800-523-3987
Advertisement

Related Manuals for Sauder Costa 419961


Summary of Contents for Sauder Costa 419961
- Page 1 Costa Collection | Model 419961 NOTE: THIS INSTRUCTION BOOKLET CONTAINS IMPORTANT SAFETY INFORMATION. Need help? Visit Sauder.com to view video assembly tips or chat with a live rep. PLEASE READ AND KEEP FOR FUTURE REFERENCE. Prefer the phone? Call 1-800-523-3987.
- Page 2 No. 2 Phillips Screwdriver Tip Shown Actual Size Hardware Identifi cation Assembly Steps 5-23 Hammer Not actual size Français 24-26 Español 27-29 Nail holder (provided) Safety Warranty Electric drill with 3/16" bit (ONLY in indicated step) Page 2 419961 www.sauder.com/services...
- Page 3 Use this part identifi cation to help identify similar parts. END (2) ADJUSTABLE SHELF (2) BRACE (1) FRONT LEG (2) ADJUSTABLE SHELF MOLDING (2) RIGHT REAR LEG (1) END MOLDING (2) BACK (1) TOP (1) VALANCE (1) LEFT REAR LEG (1) www.sauder.com/services 419961 Page 3...
- Page 4 NAIL - 12 CAM COVER - 16 METAL PIN - 8 RUBBER SLEEVE - 8 BLACK 9/16" LARGE HEAD SCREW - 4 BLACK 2-1/4" FLAT HEAD SCREW - 1 BLACK 9/16" FLAT HEAD SCREW - 4 Page 4 419961 www.sauder.com/services...
- Page 5 Assemble your unit on a carpeted fl oor or on the empty å carton to avoid scratching your unit or the fl oor. To begin assembly, push a SAUDER TWIST-LOCK® å FASTENER (12F) into the large holes in the ENDS (A) and VALANCE (D).
- Page 6 Push twenty-four HIDDEN CAMS (1F) into the edges of the å ENDS (A), BRACE (I), and ADJUSTABLE SHELVES (E). Arrow (24 used) Arrow Arrow Arrow Hole Hole The arrow in the HIDDEN CAM must point toward the hole in the edge of the board. Page 6 419961 www.sauder.com/services...
- Page 7 Step 3 Turn twenty CAM SCREWS (8F) into the LEGS (B, H, and J) å and SHELF MOLDINGS (F). (20 used) Remember: Righty tighty. Lefty loosey. www.sauder.com/services 419961 Page 7...
- Page 8 Shoulder These edges should be even. Apply pressure with your hands as you guide the MOLDINGS over the SCREWS and onto the ENDS. BLACK 9/16" FLAT HEAD SCREW Shoulder (4 used in this step) Page 8 419961 www.sauder.com/services...
- Page 9 Fasten the LEGS (B and J) to an END (A). Tighten six HIDDEN CAMS. å Edge with TWIST-LOCK® FASTENERS S u r f a c i t h H I D D E N These surfaces should be even. This END (A) will become the right END (A). www.sauder.com/services 419961 Page 9...
- Page 10 This END (A) will become the left END (A). S u r f a c i t h H I D D E N These surfaces Edge with should be even. TWIST-LOCK® FASTENERS Page 10 419961 www.sauder.com/services...
- Page 11 Step 7 Fasten the left END (A) to the TOP (K). Tighten two å TWIST-LOCK® FASTENERS. How to use the SAUDER TWIST-LOCK ® FASTENER Fasten the VALANCE (D) to the TOP (K). Tighten two å 1. Insert the dowel end of the FASTENER into the hole of the TWIST-LOCK®...
- Page 12 Push a WOOD DOWEL (15F) into the RIGHT REAR LEG (J). å Fasten the BRACE (I) to the RIGHT REAR LEG (J). Tighten å the HIDDEN CAM. NOTE: Be sure the WOOD DOWEL inserts into the edge å of the BRACE. Page 12 419961 www.sauder.com/services...
- Page 13 Fasten the BRACE (I) to the LEFT REAR LEG (H) . Tighten å the HIDDEN CAM. NOTE: Be sure the WOOD DOWEL inserts into the edge å of the BRACE. For support, place packing foam and magazines here. www.sauder.com/services 419961 Page 13...
- Page 14 REAR LEG. The CAM SCREWS should be closer to this edge. Lower edge of REAR LEG View shown without the LEFT END for clarity. For support, place packing foam and magazines here. Page 14 419961 www.sauder.com/services...
- Page 15 Off set edge nail Nail slot holder 2" Bead Bead Lower edge 2" Bead Lower edge (3 used) NAIL BLACK 9/16" LARGE HEAD SCREW (12 used in this step) (3 used in this step) www.sauder.com/services 419961 Page 15...
- Page 16 Base and the 420040 Lateral File. Go to step 13 if your 419960 Library Base or the 420040 å Lateral File is assembled. Go to step 14 if your 419960 Library Base or the 420040 å Lateral File is not assembled. Page 16 419961 www.sauder.com/services...
- Page 17 BACK EDGE OF TOP å templates only if your 419960 Library Base or the 420040 Lateral File is assembled. Cut out the two å templates along the dashed lines and go LEFT TEMPLATE RIGHT TEMPLATE to step 15. www.sauder.com/services 419961 Page 17...
- Page 18 This page was intentionally left blank. Cette page a été intentionnellement laissée vierge. Esta página fue dejada en blanco intencionalmente. Page 18 419961 www.sauder.com/services...
- Page 19 Drill through these two small holes. Drill through these two small holes. Drill through these two small holes. Drill through these two small holes. www.sauder.com/services 419961 Page 19...
- Page 20 LEFT TEMPLATE Drill through these four LEFT TEMPLATE outside edge. circles farthest away from the outside edge. Drill through the two circles closest to the outside edge. RIGHT TEMPLATE RIGHT TEMPLATE Page 20 419961 www.sauder.com/services...
- Page 21 With the help of another person, carefully lift your HUTCH å and place it over the CAM SCREWS (8F). Tighten four HIDDEN CAMS. Pro Tip: Lift with your legs. And, you know, your arms. (4 used) www.sauder.com/services 419961 Page 21...
- Page 22 FLAT HEAD SCREW (26S) into a stud in your wall. BLACK 2-1/4" FLAT HEAD SCREW (1 used into a stud in your wall) BLACK 9/16" LARGE HEAD SCREW (1 used into the top of your unit) Page 22 419961 www.sauder.com/services...
- Page 23 This completes assembly. Clean with a damp cloth. Wipe dry. å And to celebrate, why not share your success story? No load 25 lbs. 25 lbs. (8 used) (16 used) To cover HIDDEN CAMS www.sauder.com/services 419961 Page 23...
- Page 24 QUANTITÉ d’ a chat de cet élément et conserver le livret pour future référence. EXTRÉMITÉ ..............2 EXCENTRIQUE ESCAMOTABLE ....24 Pour contacter Sauder PIED AVANT..............2 VIS D'EXCENTRIQUE ..........24 en ce qui concerne cet MOULURE D’EXTRÉMITÉ ........2 12F FIXATION TWIST-LOCK® ........6 élément, faire référence au numéro de lot et...
- Page 25 Fixer le LAMBREQUIN (D) au DESSUS (K). Serrer deux FIXATIONS TWIST-LOCK®. Pour commencer l'assemblage, enfoncer une FIXATION TWIST- LOCK® SAUDER (12F) dans les gros trous des EXTRÉMITÉS (A) et Utilisation de la FIXATION TWIST-LOCK® SAUDER LAMBREQUIN (D). 1. Insérer l'extrémité fi letée de la FIXATION dans le trou de la pièce attenante.
- Page 26 420040, ouvrir la boîte, localiser le DESSUS et le placer sur de la mousse d’emballage ou des magazines à plat sur le sol. À l'aide d'une perceuse et d'un foret de 5 mm, fi nir de percer complètement les trous indiqués. Page 26 419961 www.sauder.com/services...
- Page 27 EXCÉNTRICO ESCONDIDO ......24 et conserver le livret pour future référence. PATA DELANTERA ............2 BIELA DE EXCÉNTRICO ........24 Pour contacter Sauder MOLDURA DE EXTREMO ........2 12F SUJETADOR TWIST-LOCK®........6 en ce qui concerne cet CORNISA ................1 15F PASADOR DE MADERA .........2 élément, faire référence...
- Page 28 Fije la CORNISA (D) al PANEL SUPERIOR (K). Apriete dos SUJETADORES TWIST-LOCK®. Para comenzar el ensamblaje, empuje un SUJETADOR TWIST- LOCK® SAUDER (12F) dentro de los agujeros grandes de los Cómo utilizar el SUJETADOR TWIST-LOCK® SAUDER EXTREMOS (A) y de la CORNISA (D).
- Page 29 NOTA: Por favor, lea las páginas de atrás del folleto de instrucciones en cuanto a importante información de seguridad. Esto completa el ensamblaje. Limpiar con un trapo húmedo. Seque con un paño. www.sauder.com/services 419961 Page 29...
- Page 30 El soportar un televisor. diseñadas para soportar un televisor. peso y la ubicación del tubo de imagen tienden a causar la inestabilidad de televisores y por eso tendrán la tendencia a inclinarse hacia adelante. Page 30 419961 www.sauder.com/services...
- Page 31 GARANTIE LIMITÉE DE 5 ANS 1. Sauder Woodworking Co. (Sauder®) off re une couverture de garantie limitée à l’ a cheteur 4. La présente garantie ne s’ a pplique qu’ a ux défauts garantis qui se produisent pour initial du présent produit pendant une période de cinq ans à...
- Page 32 Dear Valued Customer: So, how did it go? Thanks so much for choosing Sauder® furniture. I hope the Set a world record for speed? purchase and assembly process was a positive experience Feeling good about yourself? and you feel good about the furniture you just built. If you Nice.
Need help?
Do you have a question about the Costa 419961 and is the answer not in the manual?
Questions and answers