Table of Contents
Advertisement
Quick Links
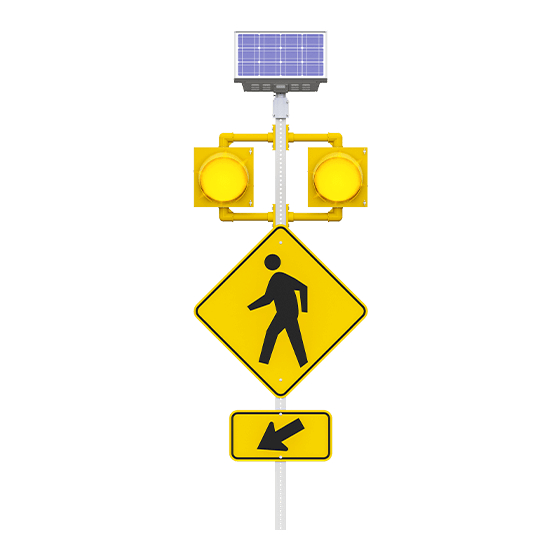
OWNER'S MANUAL
Solar-Powered LED Pedestrian Crosswalk
Flashing Beacon - Model R820
© July 13, 2006, Carmanah Technologies Inc.
www.carmanah.com
Technical Support:
customerservice@carmanah.com
Toll Free in North America: 1-877-722-8877
International: +1 (250) 380-0052 | Fax: +1 (250) 389-0040
R820 - 36983
Advertisement
Table of Contents

Subscribe to Our Youtube Channel
Related Manuals for Carmanah R820


Summary of Contents for Carmanah R820
- Page 1 OWNER’S MANUAL Solar-Powered LED Pedestrian Crosswalk Flashing Beacon - Model R820 © July 13, 2006, Carmanah Technologies Inc. www.carmanah.com Technical Support: customerservice@carmanah.com Toll Free in North America: 1-877-722-8877 International: +1 (250) 380-0052 | Fax: +1 (250) 389-0040 R820 - 36983...
-
Page 3: Table Of Contents
Battery Connection, Customized Flash Duration and Timer Delay .....10 R820 C ......12 REPARING OMPONENTS FOR IELD NSTALLATION 3.4.1 Using a New Pole, Wiring the R820 Button ..........13 R820 ..........13 NSTALLING THE ON A OLE OR 3.5.1 Selecting the Poles ..................13 3.5.2... -
Page 4: Introduction
5 years. WARNING: The R820 is a warning beacon and is intended to be used as a supplemental emphasis to warning signs located at uncontrolled marked crosswalks, as specified in the 2003 Manual of Uniform Traffic Control Devices, Chapter 4K . -
Page 5: Component Identification
6. Pole (not included) 7. Push-Button Mounting Plate 8. Push-Button 9. Push-Button sign 10. Sign (not included) 11. Top Brackets (optional) 12. Bottom Brackets (optional) Carmanah Technologies Inc. Copyright © 2006 Document number: MAN_ROAD R820 Owner's Manual 36983_vB Last revised: November 7, 2006... -
Page 6: Configuration & Installation Instructions
Preparing the Pole Mount 3.1.3 The R820 lights are mounted on a pole that will be most likely be affixed to a base with the necessary mounting hardware. If concrete foundations will be used, concrete bases will need to be poured before the installation of the system. See Figure 2. -
Page 7: Configuring The Solar Engine Prior To Installation
Configuring the Solar Engine Prior to Installation R820 solar roadway beacons should be configured before being installed at the selected location. This is especially important when installing multiple R820 units as the job can be divided between shop and field time. -
Page 8: Temporarily Connecting System Pieces To Configure System
The channel chosen for each system must be the same in each unit of that system. Five channel switches give the possibility of 32 unique channels as shown in Figure 9, below. Each R820 system is shipped set to a factory default of one Primary and one or more Secondary, all at Channel 0. -
Page 9: Configuring The Flash Duration And Timer Delay
The customer can select the length of time the lights should flash after each button press and an optional delay time between uses. This is done in the first five (5) minutes following power-up of Carmanah Technologies Inc. Copyright © 2006 Document number: MAN_ROAD R820 Owner's Manual 36983_vB Last revised: November 7, 2006... -
Page 10: Factory Flash And Timer Delay Settings
Each of the R820 units in a crosswalk installation must be configured individually, with the same settings. After product configuration is completed, the settings are stored in non-volatile memory. - Page 11 Note: If two units with different user parameter settings are utilized in the same system, the unit that has its button pressed will determine the duration and delay for both units. Carmanah Technologies Inc. Copyright © 2006 Document number: MAN_ROAD R820 Owner's Manual 36983_vB Last revised: November 7, 2006...
-
Page 12: Preparing R820 Components For Field Installation
4. Disconnect the button and the signal heads and carefully recoil the wires exiting the mounting tee located on the bottom of the Solar Engine. 5. The R820 Solar Engine is now ready for installation on the pole. Figure 15: Solar Engine Assembly... -
Page 13: Using A New Pole, Wiring The R820 Button
Using a New Pole, Wiring the R820 Button 3.4.1 If a new pole will be used in the installation, the holes for the R820 button hardware can be drilled while the poles are in the shop prior to field installation. Follow the instructions provided in section 3.5.2 to mount the button plate. -
Page 14: Mount The Solar Engine
Mount the Solar Engine 3.5.3 Two installers without the use of a bucket truck can complete the final step in the installation of the R820. Note: If you are using a 4” OD pole, you will need longer bolts than those provided. -
Page 15: Install The Signal Heads
5. Tighten the bolts inside the signal heads. 6. Attach the crosswalk signs to the poles. Figure 29: Signal Head Figure 30: Bottom Brackets Carmanah Technologies Inc. Copyright © 2006 Document number: MAN_ROAD R820 Owner's Manual 36983_vB Last revised: November 7, 2006... -
Page 16: System Maintenance
4.1. Troubleshooting There are two faults that may occur with the R820 that will prevent the light from flashing: 1. Check the battery connection and the LED array connection to ensure that the connectors are fully inserted. -
Page 17: Service And Product Information
Service Before contacting Carmanah’s customer service department, please have the serial number of the Model R820 available, a brief description of the problem, as well as all details of the installation. Carmanah products are covered by a standard 3-year pro-rated warranty. A warranty card is supplied with each unit. -
Page 18: Appendix A: Product Specifications
Injection Molded UV stabilized polycarbonate Switch Die-cast aluminum with a 2” ADA compliant polycarbonate button Trademark and Patents Pending US Patent No. 6,573,659 Carmanah Technologies Inc. Copyright © 2006 Document number: MAN_ROAD R820 Owner's Manual 36983_vB Last revised: November 7, 2006...
Need help?
Do you have a question about the R820 and is the answer not in the manual?
Questions and answers