
Related Manuals for Renkforce Pro 6


Summary of Contents for Renkforce Pro 6
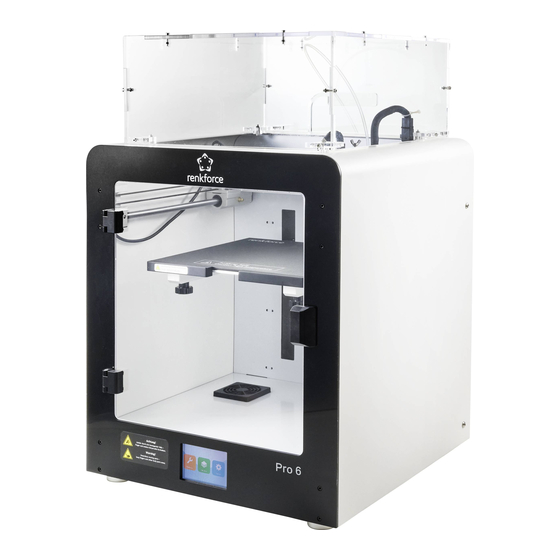
- Page 1 User Manual 3D Printer Pro 6 Easy solution of 3D model creation Item No. 2356116 Please read the User Manual before using this product.
- Page 2 Professional, Intelligent, Multi-function Pro 6...
-
Page 3: Table Of Contents
3.4.3 Software setting- Windows & Mac ..............................................29 ® 3.4.4 Load configuration file - Windows ..............................................31 ® 3.5 Print from “renkforce 3D setup” ................................................32 d. Print 3D model ......................................................33 4.1 Printing ........................................................33 4.2 Removal of the finished prints ................................................34 Troubleshooting ......................................................39 Disposal ........................................................41... -
Page 4: Accessories List
a. Accessories list 1.1 Accessories list Picture Name Qty. Unit Power cable 4GB USB Flash disk Magnetic mate Full Metal Build platform Z sensor calibration tool Ejector rod-1.8*150 mm Hex wrench-6.0 mm Allen Driver within 1.5/2/2.5/3 mm dia. Filament spool holder Small needle 0.3*75 mm Filament tube Tweezer... -
Page 5: Product Introduction
b. Product introduction 2.1 Appearance introduction Touch Screen USB Slot Build Platform Inductive sensor of auto-leveling Mainboard Cooling Fan Power socket and switch ④ ③ ② ⑤ ① ⑥... -
Page 6: Introduction Of Extruder
2.2 Introduction of extruder ⑨ ⑧ ⑥ ⑩ ⑦ ⑤ ④ ③ ② ① Nozzle Heat block Heater and NTC Heat break throat Heatsink Extruder fan Object fan Cover of extruder The leverage Inductive sensor of auto-leveling 2.3 Introduction of Build Platform ④... -
Page 7: Technology Specification
2.4 Technology Specification Operating voltage: 100 - 240 V/AC, 50/60 Hz Power consumption: max.320 W Fuse: F10AL, 250 V Production process: Fused filament fabrication (FFF) Model size (W*H*D): max. 200*200*200 mm Printing layer resolution: 0.05-0.3 mm Print speed: 20-100 mm/s Print format: GOODE Nozzle (ф):... -
Page 8: Preparation Before Printing
c. Preparation before printing 3.1 Menu preview System/Tool/Print − The touch screen is on when the power supply is connected and turn on the device. − You can touch the screen for operation. − Don't touch the screen with the sharp object. System Tool Print... - Page 9 Tool/Manual interface The user can manually reset or perform the print bed and extruder position. Manual Automatic reset Print bed move backward Print bed move upward Unload filament Z-offset calibration button X axis move to the left X axis move to the right Load filament Print bed move downward Back to the previous menu...
- Page 10 Tool/Preheating interface The user can control the temperature of extruder and build platform by touching preheat icon. Preheat Press and start heating Current temperature Temperature decrease The preset temperature/ Temperature The target temperature Print bed temperature 27/0 Temperature increase Bed Temp Heatbed Extruder temperature 28/0...
- Page 11 Tool/Filament loading/Unloading Filament Press and start heating The preset temperature/ Current temperature The target temperature Stop Temperature Filament loading 28/0 Stop Filament unloading Unload Load Extruder Back to the previous menu Return...
- Page 12 Tool/Air fan The user can control on/off also cooling fan air volume of the extruder fan and object fan. Air volume Air volume decrease on/off increase Extruder fan E1(%) Extruder fan in % Object fan B(%) Object fan in % Back to previous menu...
- Page 13 Tool/Levelling The user can calibrate the build platform by the menu of level. Refer to 3.2 for detailed instructions. Level The user can click emergency stop icon to turn off all motors in case of emergency. Stop Printing menu Select the file to start printing. Print Body-MINI.gcode Body-MINI.gcode...
- Page 14 Print Menu Printing process Stop printing Nozzle temperature 191/190 Build platform temperature Print speed 51/50 100mm/s mm/s Pause printing 04h07m 03h06m Printed time Remain print time Printer parameter adjustment K1-07-11.gcode...
- Page 15 The user can adjust the print parameter by the tool menu. Print speed percentage Object fan E1(%): (%): mm/s Build platform temperature (℃): Flow compensation (%): Nozzle temperature (℃): Back to the previous menu...
-
Page 16: The Calibration Of Build Platform
3.2 The calibration of build platform Don’t adjust 4 screws under the print bed unless necessary,and it is must to following 3.2.3 when we adjust 4screws, or there ★ is the damage to the extruder. 3.2.1 The build platform has been calibrated and well levelled out of the factory, but some deviation will be occurred during transportation, so it is better that the user can do the build platform levelling before printing. - Page 17 Filament Manual Stop Leveling Preheating LED light System Print Tool Sound Return Enter into “Tool”-“Preheating” 52/52 27/52 28/0 28/0 Wait until the temperature of the print bed is up to the pre-set value, in this case it is 52 °C.
-
Page 18: Z-Offset Calibration
Filament Stop Manual Leveling Preheating LED light Sound Return Enter into "Tool"--"Leveling" to run the auto-leveling and finish the steps. If we can’t get good print results,we can do the Z-offset calibration as 3.2.2. ★ 3.2.2 Z-offset Calibration Filament Stop Manual Leveling Preheating... - Page 19 27/52 52/52 28/0 28/0 Wait until the temperature of the print bed is up to the pre-set value, in this case it is 52 °C. Filament Manual Stop Leveling Preheating LED light 0.1mm 1mm 10mm Sound Return Enter into “Manual” and press “Home” icon, when the extruder will move to the zero position.
- Page 20 0.1mm 10mm Turn on Z-offset calibration function and put one A4 paper between the nozzle and the print bed. 0.1mm 10mm 0.1mm 10mm Make sure we do the Z-offset calibration under the distance setting of 0.1 mm to avoide any ★...
- Page 21 Filament Stop Manual This reset the Z-zero position,con Leveling Preheating LED light tinue? Confirm Cancel Sound Return Press “confirm”. Enter into “Tool”--”Leveling” to do the auto-leveling and finish Z-offset calibration. 3.2.3 If there is big deviation on the print bed leveling, it is the must to follow 3.2.3 to do manual leveling at first.
- Page 22 b) Turn on Z-offset button, and put one A4 paper between the nozzle and the print bed,lift up the print bed by pressing icon until there is slight resistance. 0.1mm 10mm 0.1mm 10mm c) Press emergency stop icon. Filament Manual Stop Preheating Leveling...
-
Page 23: Consumable Loading/Unloading
3.3 Consumable loading/unloading 3.3.1 Installation of the spool holder and the filament tube. 2. Cut the filament with an angle and keep Insert the filament into the tube Slide the filament forward gently it straight, with which the filament can go until approximately 5 cm is visible at until the filament is slowly fed into the smooth though the filament run out sensor. -
Page 24: Consumable Loading Of The Extruder
3.3.2 Consumable loading of the extruder Tool Filament 1. Enter tool menu and click filament icon. When it comes to preset temperature, click E1, the user can load the filament into feed inlet, which will feed automatically. Temperature 28/0 Stop ... -
Page 25: Consumable Unloading Of The Extruder
3.3.3 Consumable unloading of the extruder Enter tool menu and click filament icon Filament Tool Temperature When it comes to the preset temperature, click Stop 28/0 Click on the temperature E1, the feed motor begins to unload automatically, Load Extruder Unload... -
Page 26: Generation Of Printing Files
3.4 Generation of printing files 3.4.1 a) Setup of the Software-Windows ® 3. Click “Browse>”, to select the Installation disk. 1. Click "Next >" . 2. Click “I accept” . 4. Click “Next >” . 5. Click “Next >” . 6. - Page 27 b) Setup of the Software-Mac 1. Double click the icon. 2. Double click the icon. 3. Software processing.
-
Page 28: Start Software- Windows ® & Mac
After installation, the“Configuration Wizard”,which will guide you through the set up process of the 3D printer, appears 1. Click “Get started”. 2. Click “Agree”. 3. Click “Next”. 6. select “Custom” . Pro 6 4. Click “Next”. 5. Click “ ”. 7. Fill in the printer name “renkforce Pro 6” . -
Page 29: Software Setting- Windows ® & Mac
9. Finish. 8. Input parameters as shown. 3.4.3 Software setting- Windows & Mac ® After starting the software, import related parameters of the printer... - Page 30 ” . 3. select “Manage Profiles…”. 2. Click “ ” . 7. Click “Activate” . Pro 6 Pro 6 5. Click “OK” . 6. Select “Pro 6” . 4. Click “Import” select Pro 6 this file in USB flash disk.
-
Page 31: Load Configuration File - Windows
3.4.4 Load configuration file - Windows ® In order to ease the process of setting parameters for different materials (Wood/ Elastic/Copper/PLA), you can load pre-configured material configuration files from the USB flash disk. 2. select “Manage 3. Click “Import” select the file in USB flash 1. -
Page 32: Print From "Renkforce 3D Setup
3.5 Print from “renkforce 3D setup” 1. Click “Next >”. 2. Click “I Agree”. 3. Click “Next >”. 7. Click “Pro 6”. 4. Click “Next >”. 5. Click “Install”. 6. Click “Next >”. 8. Click “Add Printer”. -
Page 33: Print 3D Model
d. Print 3D model 4.1 Printing 1. Save the “.gcode” files in USB Flash disk. 2. Insert USB Flash disk into printers and select the files to print. 3. The printers will print 3D model automatically, it will give you voice alarm when the printing has finished and enter “standby”... -
Page 34: Removal Of The Finished Prints
4.2 Removal of the finished prints 1. When the printing is finished, the user can take out the magnetic mate as the build platform cools. 2. Remove the finished prints from the magnetic mate by hand, no any tools needed.Now the user finish the printing and get what they want. - Page 35 Cleaning and maintenance Never use aggressive detergents, rubbing alcohol or other chemical zsolutions, as these could damage the casing or even impair the functioning of the product. Never submerge the product in water. Danger of burns! Do not touch the hot nozzle directly with bare hands. Clean the device •...
- Page 36 c) Clean the inside of the extruder Heat up the nozzle to the preset temperature, press the filament leverage, and push down the ejector rod through the heatsink then pull up and down repeatedly until the heatsink & metaltube is clean and the impurity comes out. Temperature Stop Filament...
- Page 37 • Loosen 2 screws of the Z sensor on the right to make sure the Z sensor can be pull up and down. Then calibrate the height between the Z sensor and nozzle with the tool until both of their lower surface are in close contact with the upper surface of the tool, when we can press the sensor wire to fix it and fasten 2screws of the Z sensor to finish the calibration.
- Page 38 g) Unload filament Ensure the nozzle temperature reaches 170 °C or above. Enter tool menu and click filament icon Tool Filament Temperature When it comes to the preset temperature, click 28/0 Stop Click on the temperature E1, the feed motor begins to unload automatically, Load Extruder Unload...
-
Page 39: Troubleshooting
Troubleshooting Problem Possible Solution Check the connection of the mains line. The 3D printer does not work after Check the mains socket. Is it properly supplied with current? switching on. The display remain dark. Check the mains fuse(for details refer to chapter “f) Replace fuse” on page 37. Remove the USB flash disk and insert it again. - Page 40 Problem Possible Solution Wrong data of ".gcode" files. Printings stops during the process. Poor connect between USB flash disk and 3D printer. Nozzle temperature is too low. Increase nozzle temperature. There are residues on the print bed that prevent adhesion of the object. Clean the print bed.
-
Page 41: Disposal
Problem Possible Solution Clean the inside of the nozzle, for details refer to “b. Clean the nozzle” on page 35 . Nozzle is clogged. Clean the extruder,for details refer to “c) Clean the inside of the extruder” on page 36. Replace the extruder unit (available under item no. -
Page 42: Caution Illustration
Caution illustration Achtung heiß / Caution Don’t touch the heat bed during preheating or printing. high temperature Don’t touch the print head during preheating or printing. Achtung heiß/ Caution high temperature Achtung! Gefahr durch sich bewegende Teile – Finger und andere Körperteile fernhalten. Don’t put hands inside during machine operating.
Need help?
Do you have a question about the Pro 6 and is the answer not in the manual?
Questions and answers