
Related Manuals for Grundfos LC 110


Summary of Contents for Grundfos LC 110
- Page 1 GRUNDFOS INSTRUCTIONS LC 110, LCD 110 Installation and operating instructions LCD 110 LC 110...
- Page 2 Declaration of Conformity Konformitätserklärung We, Grundfos, declare under our sole responsibility that the products Wir, Grundfos, erklären in alleiniger Verantwortung, dass die Produkte LC/LCD 107, LC/LCD 108, LC/LCD 109 and LC/LCD 110, to which this LC/LCD 107, LC/LCD 108, LC/LCD 109 und LC/LCD 110, auf die sich declaration relates, are in conformity with these Council directives on the diese Erklärung bezieht, mit den folgenden Richtlinien des Rates zur...
- Page 3 LC 110, LCD 110 Installation and operating instructions Montage- und Betriebsanleitung Monterings- og driftsinstruktion...
-
Page 4: Table Of Contents
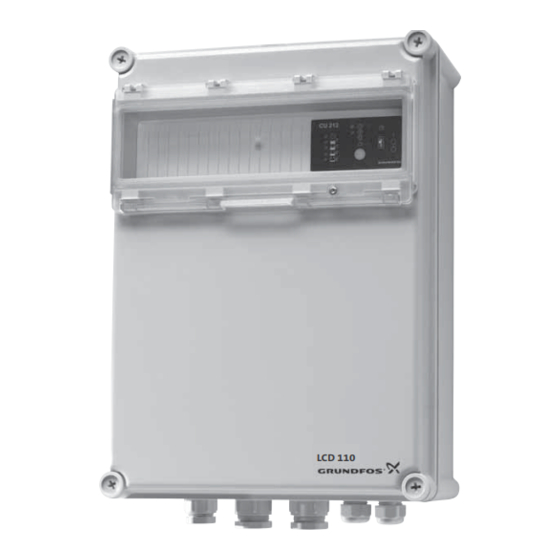
Applications Variants 1. General – LC 110 Location and mounting The LC 110 controller is designed for the control of pumps in Location wastewater, water supply and drainage systems. Mounting of LC 110 Type key:... -
Page 5: Location And Mounting
–30 °C to +50 °C. (11-12, 22, 32 and 42). Enclosure class: IP 65. Terminal block with: When installed outdoors, the LC 110 must be placed in a protec- tive shed or cupboard. • input for the motor PTC resistor/thermal switch (T11-T21), The LC 110 must not be exposed to direct sunlight. -
Page 6: Systems With 2 Levels (3 Electrodes)
Before making any connections in the LC 110 or work on pumps, pits, etc., it must be ensured that the elec- tricity supply has been switched off and that it cannot be accidentally switched on. -
Page 7: Control Panel
• Switches 5, 6 and 7, stop delay: 3.3 Control panel When the DIP switch setting is changed, the controller must Systems with 2 levels (3 electrodes), page 97. be switched off for at least 1 minute! Figure 4 shows the control panel of the CU 213 module. The stop delay is the time from the stop signal is given until the pump is stopped. -
Page 8: Battery Back-Up Functions
3.4 Battery back-up functions The table below shows the situations which may occur if the nor- mal electricity supply to the LC 110 fails and a back-up battery is Systems with 2 levels (3 electrodes), page 97. connected: If a back-up battery for CU 213 (accessory for certain variants) is = the indicator light is off. -
Page 9: Systems With 3 Levels (4 Electrodes)
• selection of automatic restarting (switch 10). tions. Before making any connections in the LC 110 or work on pumps, pits, etc., it must be ensured that the elec- tricity supply has been switched off and that it cannot be accidentally switched on. -
Page 10: Control Panel
• Switches 5, 6 and 7, stop delay: 4.3 Control panel When the DIP switch setting is changed, the controller must Systems with 3 levels (4 electrodes), page 98. be switched off for at least 1 minute! Figure 6 shows the control panel of the CU 213 module. The stop delay is the time from the stop signal is given until the pump is stopped. -
Page 11: Battery Back-Up Functions
4.4 Battery back-up functions The table below shows the situations which may occur if the normal electricity supply to the LC 110 fails and a back-up battery Systems with 3 levels (4 electrodes), page 98. is connected: If a back-up battery for CU 213 (accessory for certain variants) is = the indicator light is off. -
Page 12: Systems With 4 Levels (5 Electrodes)
Before making any connections in the LC 110 or work on pumps, pits, etc., it must be ensured that the elec- tricity supply has been switched off and that it cannot be accidentally switched on. -
Page 13: Control Panel
• Switches 5, 6 and 7, stop delay: 5.3 Control panel When the DIP switch setting is changed, the controller must Systems with 4 levels (5 electrodes), page 99. be switched off for at least 1 minute! Figure 8 shows the control panel of the CU 213 module. The stop delay is the time from the stop signal is given until the pump is stopped. -
Page 14: Battery Back-Up Functions
5.4 Battery back-up functions The table below shows the situations which may occur if the nor- mal electricity supply to the LC 110 fails and a back-up battery is Systems with 4 levels (5 electrodes), page 99. connected: If a back-up battery for CU 213 (accessory for certain variants) is = the indicator light is off. -
Page 15: Start-Up
During normal application and operation, the LC 110 controller is maintenance-free. However, it is advisable to carry out minor checks of the LC 110 controller, pump pits, tanks, pumps, etc. at suitable intervals. These checks should be carried out by authorized personnel. -
Page 16: Fault Finding Chart
Before making any connections in the LC 110 or work on pumps, pits, etc., it must be ensured that the electricity supply has been switched off and that it cannot be accidentally switched on. -
Page 17: General - Lcd 110
11. General – LCD 110 12. Location and mounting The LCD 110 controller is designed for the control of pumps in Before starting any work on pumps used to pump liq- wastewater systems. uids which could be constituted as being hazardous Type key: to health, thorough cleaning/venting of pumps, pits, etc. -
Page 18: Systems For Parallel Operation With
Figure 10 shows the terminals listed under positions 2 and 3. 13. Systems for parallel operation with 3 levels (4 electrodes) Description (see also page 100): The pumps are controlled by the liquid level in the pit. • When the electrode, pos. 1, registers liquid, the first pump is started. -
Page 19: Setting
13.2 Setting • Switch 4, starting delay and automatic test run (only in the case of battery back-up): Systems for parallel operation with 3 levels (4 electrodes), When the DIP switch setting is changed, the controller must page 100. be switched off for at least 1 minute! The module CU 214 has a 10-pole DIP switch in the bottom right corner, see fig. -
Page 20: Control Panel
13.3 Control panel 13.4 Battery back-up functions Systems for parallel operation with 3 levels (4 electrodes), Systems for parallel operation with 3 levels (4 electrodes), page 100. page 100. Figure 12 shows the control panel of the CU 214 module. If a back-up battery for CU 214 (accessory for certain variants) is installed, the following functions will be carried out if the normal 2 3 4... -
Page 21: Reset Button And On-Off-Auto Selector Switch
13.5 Reset button and ON-OFF-AUTO selector switch Systems for parallel operation with 3 levels (4 electrodes), page 100. The reset button is a push-button for manual resetting of alarm signals to external alarm devices and the built-in buzzer (i.e. not for resetting of the alarm memory as this is reset by means of the ON-OFF-AUTO selector switch, see position OFF ( )). -
Page 22: Systems For Parallel Operation With 4 Levels (5 Electrodes)
14. Systems for parallel operation with 14.2 Setting 4 levels (5 electrodes) Systems for parallel operation with 4 levels (5 electrodes), page 101. Description (see also page 101): The module CU 214 has a 10-pole DIP switch in the bottom right The pumps are controlled by the liquid level in the pit. -
Page 23: Control Panel
• Switches 5, 6 and 7, stop delay: 14.3 Control panel When the DIP switch setting is changed, the controller must Systems for parallel operation with 4 levels (5 electrodes), be switched off for at least 1 minute! page 101. Figure 14 shows the control panel of the CU 214 module. -
Page 24: Battery Back-Up Functions
14.4 Battery back-up functions The table below shows the situations which may occur if the nor- mal electricity supply to the LCD 110 fails and a back-up battery Systems for parallel operation with 4 levels (5 electrodes), is connected: page 101. = the indicator light is off. -
Page 25: Systems For 100% Standby Operation With 4 Levels (5 Electrodes)
15. Systems for 100 % standby operation with 15.2 Setting 4 levels (5 electrodes) Systems for 100% standby operation with 4 levels (5 electrodes), page 102. Description (see also page 102): The module CU 214 has a 10-pole DIP switch in the bottom right The pumps are controlled by the liquid level in the pit. -
Page 26: Control Panel
• Switch 4, starting delay and automatic test run 15.3 Control panel (only in the case of battery back-up): Systems for 100% standby operation with 4 levels (5 electrodes), When the DIP switch setting is changed, the controller must page 102. be switched off for at least 1 minute! Figure 16 shows the control panel of the CU 214 module. -
Page 27: Battery Back-Up Functions
15.4 Battery back-up functions The table below shows the situations which may occur if the nor- mal electricity supply to the LCD 110 fails and a back-up battery Systems for 100% standby operation with 4 levels (5 electrodes), is connected: page 102. -
Page 28: Systems For Full-Control Operation With 4 Levels (5 Electrodes)
16. Systems for full-control operation with 16.2 Setting 4 levels (5 electrodes) Systems for full-control operation with 4 levels (5 electrodes), page 103. Description (see also page 103): The module CU 214 has a 10-pole DIP switch in the bottom right The pumps are controlled by the liquid level in the pit. -
Page 29: Control Panel
• Switches 5, 6 and 7, stop delay: 16.3 Control panel When the DIP switch setting is changed, the controller must Systems for full-control operation with 4 levels (5 electrodes), be switched off for at least 1 minute! page 103. Figure 18 shows the control panel of the CU 214 module. -
Page 30: Battery Back-Up Functions
16.4 Battery back-up functions The table below shows the situation which may occur if the nor- mal electricity supply to the LCD 110 fails and a back-up battery Systems for full-control operation with 4 levels (5 electrodes), is connected: page 103. = the indicator light is off. -
Page 31: Start-Up
17. Start-up 19. Technical data – LCD 110 Voltage variants, nominal voltages Before starting any work on pumps used to pump liq- • 1 x 230 V. uids which could be constituted as being hazardous to health, thorough cleaning/venting of pumps, pits, •... -
Page 32: Fault Finding Chart
2. In case such waste collection service does not exist or cannot handle the materials used in the product, please deliver the product or any hazardous materials from it to your nearest Grundfos company or service workshop. Subject to alterations. - Page 33 Fig. A1 max. 230V max. 2A LC 110 Ext. ref. L2 L3 (T3) (T2) (T1) (T2) (T3) L N PE L1 L2L3...
- Page 34 Fig. B1 max. 230V max. 2A 1 2 3 4 5 6 7 8 9 10 LC 110 Ext. ref. L2 L3 (T1) (T3) (T2) (T3) (T2) L N PE L1 L2L3...
- Page 35 Fig. C1 max. 230V max. 2A 1 2 3 4 5 6 7 8 9 10 LC 110 Ext. ref. L2 L3 (T1) (T3) (T2) (T3) (T2) L N PE L1 L2L3...
- Page 36 Fig. D1 max. 230V max. 2A 1 2 3 4 5 6 7 8 9 10 LC 110 Ext. ref. L1 L2 L3 L N PE T12 T22 T12 T22...
- Page 37 Fig. E1 max. 230V max. 2A 1 2 3 4 5 6 7 8 9 10 LCD 110 Ext. ref. L1 L2 L3 L N PE T12 T22 T12 T22...
- Page 38 Fig. F1 max. 230V max. 2A 1 2 3 4 5 6 7 8 9 10 LCD 110 Ext. ref. L1 L2 L3 L N PE T12 T22 T12 T22...
- Page 39 Fig. G1 max. 230V max. 2A 1 2 3 4 5 6 7 8 9 10 LCD 110 Ext. ref. L N PE L1 L2 L3 T12 T22 T12 T22...
- Page 40 Tél.: +32-3-870 7300 20th km. Athinon-Markopoulou Av. Turkey Télécopie: +32-3-870 7301 P.O. Box 71 New Zealand GRUNDFOS POMPA San. ve Tic. Ltd. Sti. GR-19002 Peania GRUNDFOS Pumps NZ Ltd. Gebze Organize Sanayi Bölgesi Belorussia Phone: +0030-210-66 83 400 17 Beatrice Tinsley Crescent Представительство...
- Page 41 Thinking ahead makes it possible Innovation is the essence 96843438 0610 The name Grundfos, the Grundfos logo, and the payoff Be–Think–Innovate are registrated trademarks Repl. 96843438 0608 owned by Grundfos Management A/S or Grundfos A/S, Denmark. All rights reserved worldwide. www.grundfos.com...
Need help?
Do you have a question about the LC 110 and is the answer not in the manual?
Questions and answers