
Related Manuals for AEG SKE81226ZF


Summary of Contents for AEG SKE81226ZF
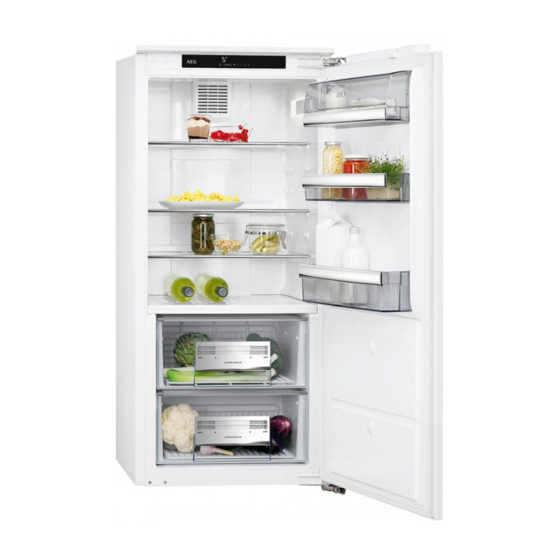
- Page 1 SKE81226ZF User Manual Refrigerator Manual de instrucciones Frigorífico USER MANUAL...
-
Page 2: Table Of Contents
10. TECHNICAL DATA................... 14 FOR PERFECT RESULTS Thank you for choosing this AEG product. We have created it to give you impeccable performance for many years, with innovative technologies that help make life simpler – features you might not find on ordinary appliances. Please spend a few minutes reading to get the very best from it. - Page 3 ENGLISH instructions in a safe and accessible location for future reference. 1.1 Children and vulnerable people safety This appliance can be used by children aged from 8 • years and above and persons with reduced physical, sensory or mental capabilities or lack of experience and knowledge if they have been given supervision or instruction concerning the use of the appliance in a safe way and understand the hazards involved.
-
Page 4: Safety Instructions
WARNING: Do not damage the refrigerant circuit. • WARNING: Do not use electrical appliances inside the • food storage compartments of the appliance, unless they are of the type recommended by the manufacturer. Do not use water spray and steam to clean the •... - Page 5 ENGLISH • The appliance must be earthed. • Do not touch the compressor or the • Make sure that the parameters on the condenser. They are hot. rating plate are compatible with the 2.4 Internal lighting electrical ratings of the mains power supply.
-
Page 6: Installation
• The refrigerant circuit and the how to discard the appliance insulation materials of this appliance correctly. are ozone-friendly. • Do not cause damage to the part of • The insulation foam contains the cooling unit that is near the heat flammable gas. -
Page 7: Operation
ENGLISH 4. OPERATION 4.1 Control Panel Display Mode Temperature warmer button ON/OFF Temperature colder button It is possible to change predefined sound and temperature colder button for a few of buttons by pressing together Mode seconds. Change is reversible. 4.2 Display A. -
Page 8: Daily Use
1. Press Mode until the corresponding in the refrigerator. icon appears. The DrinksChill indicator flashes. 1. Press the Mode until the The Timer shows the set value (30 corresponding icon appears. minutes) for a few seconds. -
Page 9: Hints And Tips
ENGLISH 2. Reposition as required. Do not move the glass shelf above the vegetable drawer to ensure correct air circulation. 5.3 Movable shelves The walls of the refrigerator are equipped with a series of runners so that the shelves can be positioned as desired. 6. -
Page 10: Care And Cleaning
7. CARE AND CLEANING 2. Regularly check the door seals and WARNING! wipe them clean to ensure they are Refer to Safety chapters. clean and free from debris. 3. Rinse and dry thoroughly. 7.1 General warnings 4. If accessible, clean the condenser... - Page 11 ENGLISH 8.1 What to do if... Problem Possible cause Solution The appliance does not op‐ The appliance is switched Switch on the appliance. erate. off. The mains plug is not con‐ Connect the mains plug to the nected to the mains socket mains socket correctly.
-
Page 12: Noises
Problem Possible cause Solution Water flows inside the refrig‐ Food products prevent the Make sure that food products erator. water to flow into the water do not touch the rear plate. collector. Temperature cannot be set. The "Coolmatic function" is Switch off "Coolmatic function"... - Page 13 ENGLISH HISSS! BRRR SSSRRR! SSSRRR! HISSS! HISSS! BLUBB! CRACK! CRACK! BLUBB!
-
Page 14: Technical Data
10. TECHNICAL DATA 10.1 Technical data Voltage 230 - 240 V Dimensions of the recess Frequency 50 Hz Height 1225 mm The technical information is situated in the rating plate, on the external or Width 560 mm internal side of the appliance and on the... -
Page 15: Información Sobre Seguridad
9. RUIDOS......................27 10. DATOS TÉCNICOS..................28 PARA OBTENER RESULTADOS PERFECTOS Gracias por escoger este producto AEG. Este artículo ha sido creado para ofrecer un rendimiento impecable durante muchos años, con innovadoras tecnologías que facilitarán su vida y prestaciones que probablemente no encuentre en electrodomésticos corrientes. - Page 16 Conserve siempre estas instrucciones en lugar seguro y accesible para futuras consultas. 1.1 Seguridad de niños y personas vulnerables Este aparato puede ser utilizado por niños de 8 años • en adelante y personas cuyas capacidades físicas, sensoriales o mentales estén disminuidas o que...
-
Page 17: Instrucciones De Seguridad
ESPAÑOL ADVERTENCIA: No utilice dispositivos mecánicos ni • medios artificiales para acelerar el proceso de descongelación, excepto los recomendados por el fabricante. ADVERTENCIA: No dañe el circuito del refrigerante. • ADVERTENCIA: No utilice dispositivos eléctricos • dentro de los compartimientos para alimentos del aparato, salvo si son del tipo recomendado por el fabricante. - Page 18 2.2 Conexión eléctrica natural con alto grado de compatibilidad medioambiental. Tenga cuidado para no ADVERTENCIA! dañar el circuito de refrigerante que Riesgo de incendios y contiene isobutano. descargas eléctricas. • No cambie las especificaciones de este aparato. ADVERTENCIA! • No utilice otros aparatos eléctricos Al colocar el producto, (como máquinas de hacer helados)
-
Page 19: Instalación
ESPAÑOL una persona cualificada debe realizar • Desconecte el aparato de la red. el mantenimiento y la recarga de la • Corte el cable de conexión a la red y unidad. deséchelo. • Examine periódicamente el desagüe • Retire la puerta para evitar que los del aparato y límpielo si fuera niños y las mascotas queden necesario. -
Page 20: Funcionamiento
3.3 Conexión eléctrica min. 5 cm • Antes de conectar el aparato, 200 cm compruebe que el voltaje y la frecuencia indicados en la placa de datos técnicos se corresponden con el suministro de la vivienda. • El aparato debe conectarse a tierra. - Page 21 ESPAÑOL 4.2 Pantalla A. Indicador del temporizador B. Función Coolmatic C. Indicador de temperatura D. Indicador de alarma E. Función ChildLock F. Función DrinksChill 4.3 Encendido 4.6 Función Coolmatic 1. Conecte el enchufe a la toma de Si necesita introducir una gran cantidad corriente.
-
Page 22: Uso Diario
útil por ejemplo para Para apagar la función, repita el recetas en las que deben enfriarse los procedimiento hasta que DrinksChill se alimentos durante un tiempo apague. determinado. El tiempo puede modificarse 1. Pulse Mode hasta que aparezca el en cualquier momento icono correspondiente. -
Page 23: Consejos
ESPAÑOL No coloque el estante de vidrio por encima del cajón de verduras para no impedir la correcta circulación del aire. 6. CONSEJOS 6.1 Sonidos de 6.3 Consejos para la funcionamiento normal refrigeración de alimentos frescos Los ruidos siguientes son normales durante el funcionamiento: •... -
Page 24: Mantenimiento Y Limpieza
7. MANTENIMIENTO Y LIMPIEZA 3. Aclare y seque a fondo. ADVERTENCIA! 4. Si se puede acceder, limpie el Consulte los capítulos sobre condensador y el compresor de la seguridad. parte posterior del aparato con un cepillo. 7.1 Advertencias generales Así... - Page 25 ESPAÑOL 8.1 Qué hacer si... Problema Posible causa Solución El aparato no funciona. El aparato está apagado. Encienda el electrodoméstico. El aparato no está correc‐ Enchufe el aparato correcta‐ tamente enchufado a la to‐ mente a la toma de corriente. ma de corriente.
- Page 26 Problema Posible causa Solución El compresor no se pone en Esto es normal y no signifi‐ El compresor se pone en mar‐ marcha inmediatamente ca que exista un error. cha después de un cierto tiem‐ después de pulsar "Coolma‐...
-
Page 27: Ruidos
ESPAÑOL El dispositivo de iluminación solo debe 2. Si es necesario, ajuste la puerta. ser sustituido por el servicio técnico. Consulte las instrucciones de Póngase en contacto con el servicio montaje. técnico. 3. Si es necesario, cambie las juntas defectuosas. Póngase en contacto 8.3 Cierre de la puerta con el servicio técnico autorizado. -
Page 28: Datos Técnicos
BLUBB! BLUBB! CRACK! CRACK! 10. DATOS TÉCNICOS 10.1 Datos técnicos Voltaje 230 - 240 V Medidas del hueco Frecuencia 50 Hz Alto 1225 mm La información técnica se encuentra en la placa de datos técnicos situada en el Ancho... - Page 32 www.aeg.com/shop...
Need help?
Do you have a question about the SKE81226ZF and is the answer not in the manual?
Questions and answers