
Related Manuals for AEG SKE818D1DS


Summary of Contents for AEG SKE818D1DS
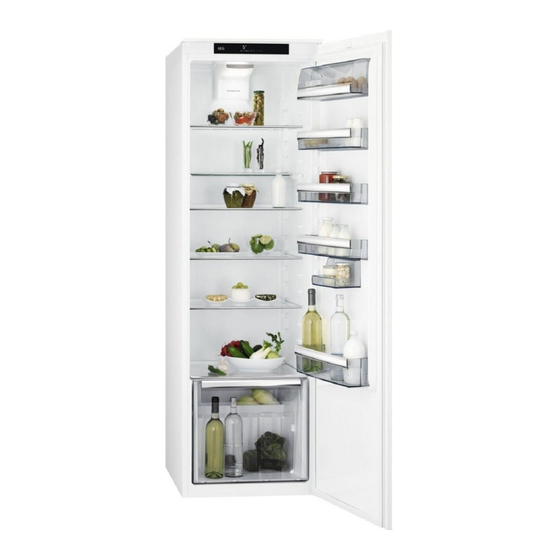
- Page 1 SKE818D1DS User Manual Refrigerator Manual de instrucciones Frigorífico USER MANUAL...
-
Page 2: Table Of Contents
11. INFORMATION FOR TEST INSTITUTES............18 FOR PERFECT RESULTS Thank you for choosing this AEG product. We have created it to give you impeccable performance for many years, with innovative technologies that help make life simpler – features you might not find on ordinary appliances. Please spend a few minutes reading to get the very best from it. - Page 3 ENGLISH instructions in a safe and accessible location for future reference. 1.1 Children and vulnerable people safety This appliance can be used by children aged from 8 • years and above and persons with reduced physical, sensory or mental capabilities or lack of experience and knowledge if they have been given supervision or instruction concerning the use of the appliance in a safe way and understand the hazards involved.
-
Page 4: Safety Instructions
– refrigerator, so that it is not in contact with or drip onto other food. WARNING: Keep ventilation openings, in the • appliance enclosure or in the built-in structure, clear of obstruction. - Page 5 ENGLISH • Before carrying out any operations on access to the mains plug after the the appliance (e.g. reversing the installation. door), remove the plug from the • Do not pull the mains cable to power socket. disconnect the appliance. Always pull •...
-
Page 6: Installation
2.5 Care and cleaning door hinges, trays and baskets. Please note that some of these spare WARNING! parts are only available to Risk of injury or damage to professional repairers, and that not all the appliance. spare parts are relevant for all models. - Page 7 ENGLISH 3.1 Dimensions ² the height, width and depth of the appliance including the handle, plus the Overall dimensions ¹ space necessary for free circulation of the cooling air 1772 Overall space required in use ³ H3 (A+B) 1816 ¹ the height, width and depth of the appliance without the handle and feet 1071 Space required in use ²...
- Page 8 3.2 Location separate earth in compliance with current regulations, consulting a To ensure appliance's best functionality, qualified electrician. you should not install the appliance in the • The manufacturer declines all nearby of the heat source (oven, stoves, responsibility if the above safety radiators, cookers or hobs) or in a place precautions are not observed.
-
Page 9: Control Panel
ENGLISH 4. CONTROL PANEL Display Mode Temperature warmer button ON/OFF Temperature colder button It is possible to change predefined sound and temperature colder button for a few of buttons by pressing together Mode seconds. Change is reversible. 4.1 Display A. Timer indicator B. - Page 10 To switch off the function repeat the shopping, we suggest activating the procedure until the DYNAMICAIR Coolmatic function to chill the products indicator goes off. more rapidly and to avoid warming the...
-
Page 11: Daily Use
ENGLISH The alarm stops after closing the door. It is possible to change the During the alarm, the sound can be time at any time during the muted by pressing any button. countdown and at the end by pressing the Temperature If you do not press any colder button and the button, the sound switches... - Page 12 1. Pull out the drawer and lift it up. 2. Place the rear part of the drawer (1) on the rails. 2. Push the rails inside the cabinet to avoid damage to the appliance when 3. Keep the front of the drawer (2) lifted closing the door.
-
Page 13: Hints And Tips
ENGLISH 6. HINTS AND TIPS 6.1 Hints for energy saving • It is recommended to defrost the food inside the fridge. • Most efficient use of energy is • Do not insert hot food inside the ensured in the configuration with the appliance. -
Page 14: Troubleshooting
It is important to periodically clean the... - Page 15 ENGLISH Problem Possible cause Solution There is no voltage in the Connect a different electrical mains socket. appliance to the mains sock‐ et. Contact a qualified elec‐ trician. The appliance is noisy. The appliance is not suppor‐ Check if the appliance ted properly.
- Page 16 Problem Possible cause Solution The lamp is defective. Contact the nearest Author‐ ized Service Centre. There is too much frost and The door is not closed cor‐ Refer to "Closing the door" ice. rectly. section. The gasket is deformed or Refer to "Closing the door"...
- Page 17 ENGLISH Problem Possible cause Solution Temperature cannot be set. The "Coolmatic function" is Switch off "Coolmatic func‐ switched on. tion" manually, or wait until the function deactivates au‐ tomatically to set the temper‐ ature. Refer to "Coolmatic function" section. The temperature in the appli‐ The temperature is not set Set a higher/lower tempera‐...
-
Page 18: Noises
3. If necessary, replace the defective door gaskets. Contact the Authorised Service Centre. 9. NOISES SSSRRR! BRRR! CLICK! HISSS! BLUBB! 10. TECHNICAL DATA The technical information is situated in It is also possible to find the same the rating plate on the internal side of the information in EPREL using the link https://eprel.ec.europa.eu and the model... - Page 19 ENGLISH Manual at Chapter 3. Please contact the manufacturer for any other further information, including loading plans. 12. ENVIRONMENTAL CONCERNS appliances marked with the symbol Recycle materials with the symbol with the household waste. Return the Put the packaging in relevant containers product to your local recycling facility or to recycle it.
-
Page 20: Información Sobre Seguridad
11. INFORMACIÓN PARA LOS INSTITUTOS DE PRUEBAS....... 37 PARA OBTENER RESULTADOS PERFECTOS Gracias por escoger este producto AEG. Este artículo ha sido creado para ofrecer un rendimiento impecable durante muchos años, con innovadoras tecnologías que facilitarán su vida y prestaciones que probablemente no encuentre en electrodomésticos corrientes. - Page 21 ESPAÑOL resultado de una instalación o un uso incorrectos. Conserve siempre estas instrucciones en lugar seguro y accesible para futuras consultas. 1.1 Seguridad de niños y personas vulnerables Este aparato puede ser utilizado por niños de 8 años • en adelante y personas cuyas capacidades físicas, sensoriales o mentales estén disminuidas o que carezcan de la experiencia y conocimientos suficientes para manejarlo, siempre que cuenten con...
- Page 22 – tiempo; limpie regularmente las superficies que pueden – entrar en contacto con los alimentos y los sistemas de drenaje accesibles; guarde la carne y el pescado crudos en recipientes –...
-
Page 23: Instrucciones De Seguridad
ESPAÑOL 2. INSTRUCCIONES DE SEGURIDAD 2.1 Instalación ADVERTENCIA! Al colocar el producto, ADVERTENCIA! asegúrese de que el cable Sólo un técnico cualificado de alimentación no queda puede instalar el aparato. atrapado o doblado. • Retire todo el embalaje. ADVERTENCIA! • No instale ni utilice un aparato No utilice adaptadores de dañado. - Page 24 • No cambie las especificaciones de • Examine periódicamente el desagüe este aparato. del aparato y límpielo si fuera • No utilice otros aparatos eléctricos necesario. Si el desagüe se bloquea, (como máquinas de hacer helados) el agua descongelada se acumulará...
-
Page 25: Instalación
ESPAÑOL 3. INSTALACIÓN ADVERTENCIA! ADVERTENCIA! Consulte los capítulos sobre Fije el aparato de acuerdo seguridad. con las instrucciones de instalación para evitar el riesgo de inestabilidad. ADVERTENCIA! Consulte el documento de instrucciones de instalación para instalar su aparato. 3.1 Dimensiones Dimensiones generales ¹... - Page 26 Puede que en algún Espacio necesario en uso ² momento sea necesario desenchufar el aparato de la toma de corriente. por lo que el enchufe debe quedar ² la altura, anchura y profundidad del accesible tras la instalación aparato, incluyendo la manija, más el del aparato.
-
Page 27: Panel De Mandos
ESPAÑOL 3.5 Cambio del sentido de PRECAUCIÓN! apertura de la puerta En todas las fases del cambio de sentido de la Consulte el documento separado con puerta, proteja la puerta de instrucciones de instalación y de arañazos con un material inversión de la puerta. - Page 28 4.4 Regulación de la El indicador Holiday parpadea. El indicador de temperatura muestra la temperatura temperatura programada. 2. Pulse OK para confirmar. Ajuste la temperatura del aparato Aparece el indicador Holiday. pulsando los reguladores de temperatura. Este modo se apaga...
-
Page 29: Uso Diario
ESPAÑOL Para activar la función ChildLock, repita Para apagar la función, repita el el procedimiento hasta que el indicador procedimiento hasta que DrinksChill se ChildLock se apague. apague. El tiempo puede modificarse 4.9 Función DrinksChill en cualquier momento durante la cuenta atrás y al La función DrinksChill debe utilizarse para ajustar una alarma acústica a la finalizar, pulsando los... - Page 30 Este modelo cuenta con una caja de almacenamiento variable que se puede deslizar lateralmente. 5.2 Estantes móviles Las paredes del frigorífico cuentan con una serie de guías para colocar los estantes del modo que se prefiera. Este aparato también está equipado con un estante que consta de dos partes.
-
Page 31: Consejos
ESPAÑOL 2. Coloque la parte trasera del cajón (1) alimentos con rapidez y mantiene una sobre los rieles. temperatura más uniforme dentro del compartimento. Este dispositivo se activa automáticamente cuando es necesario. 3. Mantenga la parte delantera del cajón (2) levantada mientras empuja el cajón hacia dentro. -
Page 32: Mantenimiento Y Limpieza
+4°C. sobre el cajón de las verduras. Una temperatura más alta en el Almacene la carne durante un interior del aparato puede reducir la máximo de 1-2 días. -
Page 33: Solución De Problemas
ESPAÑOL 1. Limpie el interior y los accesorios con agua templada y un jabón neutro. 2. Revise y limpie periódicamente las juntas de la puerta para mantenerlas limpias y sin restos. 3. Aclare y seque a fondo. 7.3 Descongelación del frigorífico La escarcha se elimina automáticamente del evaporador del compartimento... - Page 34 Problema Posible causa Solución La alarma audible o visual El armario se ha encendido Consulte "Alarma de puerta está activada. hace poco. abierta" o "Alarma de tempe‐ ratura alta". La temperatura del aparato Consulte "Alarma de puerta es demasiado alta.
- Page 35 ESPAÑOL Problema Posible causa Solución Los alimentos no están bien Envuelva mejor los produc‐ envueltos. tos. La temperatura se ha ajusta‐ Consulte el capítulo "Panel do incorrectamente. de control". El aparato está completa‐ Seleccione una temperatura mente cargado y ajustado a más alta.
- Page 36 Problema Posible causa Solución La temperatura del aparato La temperatura no se ha Seleccione una temperatura es demasiado baja/alta. ajustado correctamente. más alta/más baja. La puerta no está bien cerra‐ Consulte la sección "Cierre de la puerta". La temperatura de los pro‐...
-
Page 37: Ruidos
ESPAÑOL 9. RUIDOS SSSRRR! BRRR! CLICK! HISSS! BLUBB! 10. DATOS TÉCNICOS La información técnica se encuentra en También puede encontrar la misma la placa de datos técnicos en el lado información en EPREL utilizando el https://eprel.ec.europa.eu y el interior izquierdo del aparato y en la enlace etiqueta de energía. - Page 38 12. ASPECTOS MEDIOAMBIENTALES electrónicos. No deseche los aparatos Recicle los materiales con el símbolo marcados con el símbolo junto con los Coloque el material de embalaje en los residuos domésticos.
- Page 40 www.aeg.com/shop...
Need help?
Do you have a question about the SKE818D1DS and is the answer not in the manual?
Questions and answers