AEG SKE818E9ZC User Manual
Hide thumbs
Also See for SKE818E9ZC:
- User manual (44 pages) ,
- User manual (44 pages) ,
- User manual (32 pages)

Related Manuals for AEG SKE818E9ZC


Summary of Contents for AEG SKE818E9ZC
- Page 1 SKE818E9ZC User Manual Refrigerator Istruzioni per l’uso Frigorifero USER MANUAL...
-
Page 2: Table Of Contents
12. ENVIRONMENTAL CONCERNS..............20 FOR PERFECT RESULTS Thank you for choosing this AEG product. We have created it to give you impeccable performance for many years, with innovative technologies that help make life simpler – features you might not find on ordinary appliances. Please spend a few minutes reading to get the very best from it. - Page 3 ENGLISH of incorrect installation or usage. Always keep the instructions in a safe and accessible location for future reference. 1.1 Children and vulnerable people safety This appliance can be used by children aged from 8 • years and above and persons with reduced physical, sensory or mental capabilities or lack of experience and knowledge if they have been given supervision or instruction concerning the use of the appliance in a...
-
Page 4: Safety Instructions
– with food and accessible drainage systems; store raw meat and fish in suitable containers in the – refrigerator, so that it is not in contact with or drip onto other food. - Page 5 ENGLISH • At first installation or after reversing • The mains cable must stay below the the door wait at least 4 hours before level of the mains plug. connecting the appliance to the power • Connect the mains plug to the mains supply.
-
Page 6: Installation
• The following spare parts will be conditions in household appliances, available for 7 years after the model such as temperature, vibration, has been discontinued: thermostats, humidity, or are intended to signal temperature sensors, printed circuit... - Page 7 ENGLISH 3.1 Dimensions Overall dimensions ¹ Space required in use ² 1769 1780 ¹ the height, width and depth of the ² the height, width and depth of the appliance without the handle appliance including the handle, plus the space necessary for free circulation of the cooling air Space required in use ²...
- Page 8 Overall space required in use ³ • The appliance must be earthed. The power supply cable plug is provided with a contact for this purpose. If the 1085 domestic power supply socket is not earthed, connect the appliance to a ³...
-
Page 9: Control Panel
ENGLISH 4. CONTROL PANEL Display Mode Temperature warmer button ON/OFF Temperature colder button It is possible to change predefined sound and temperature colder button for a few of buttons by pressing together Mode seconds. Change is reversible. 4.1 Display A. Timer indicator B. - Page 10 Coolmatic function to chill the products The ChildLock indicator flashes. more rapidly and to avoid warming the 2. Press OK to confirm. other food which is already in the The ChildLock indicator is shown. refrigerator. To deactivate the ChildLock function, repeat the procedure until the ChildLock 1.
-
Page 11: Daily Use
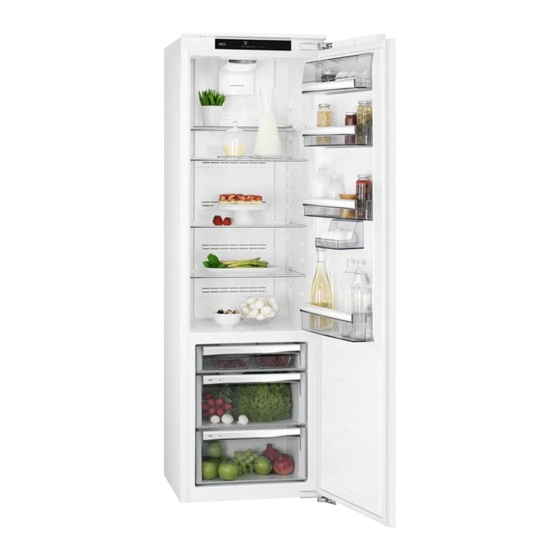
ENGLISH 5. DAILY USE 2. Slide it into the lower rail and under CAUTION! the second half. This refrigerating appliance is not suitable for freezing foodstuffs. 5.1 Positioning the door shelves To permit storage of food packages of various sizes, the door shelves can be placed at different heights. -
Page 12: Hints And Tips
12 hours and check if it is OK (A). If it is still not OK (B), adjust the setting control to a colder setting. The drawers marked with water drop symbols: can be used according to the desired storage conditions independently of each other with lower or higher humidity. - Page 13 ENGLISH a temperature less than or equal to shelf above the vegetable drawer. +4°C. Store meat for at most 1-2 days. Higher temperature setting inside the • Fruit and vegetables: clean thoroughly appliance may lead to shorter shelf (eliminate the soil) and place in a life of food.
- Page 14 Type of food Air humidity adjustment Storage time Artichokes, cauliflower, up to 21 days “humid” chicory, iceberg lettuce, en‐ dive, lamb’s lettuce, lettuce, leeks, radicchio Broccoli, Chinese leaves, up to 14 days “humid” kale, cabbage, radishes, Savoy cabbage Peas, kohlrabi up to 10 days “humid”...
-
Page 15: Care And Cleaning
ENGLISH made prior to the final storage in the • All food stored in a LongFresh fridge. compartment should be taken out of • Any type of food, fruit, vegetable or the drawers roughly 15 - 30 min animal food shall always be packed or before consumption, particularly fruit wrapped up before storage. - Page 16 8.1 What to do if... Problem Possible cause Solution The appliance does not op‐ The appliance is switched Switch on the appliance. erate. off. The mains plug is not con‐ Connect the mains plug to nected to the mains socket the mains socket correctly.
- Page 17 ENGLISH Problem Possible cause Solution Door does not open easily. You attempted to re-open Wait a few seconds between the door immediately after closing and re-opening of closing. the door. The lamp does not work. The lamp is in stand-by Close and open the door.
- Page 18 Problem Possible cause Solution Temperature cannot be set. The "Coolmatic function" is Switch off "Coolmatic func‐ switched on. tion" manually, or wait until the function deactivates au‐ tomatically to set the temper‐ ature. Refer to "Coolmatic function" section. The temperature in the appli‐...
-
Page 19: Noises
ENGLISH Only service is allowed to replace the 2. If necessary, adjust the door. Refer lighting device. Contact your Authorised to installation instructions. Service Centre. 3. If necessary, replace the defective door gaskets. Contact the Authorised 8.3 Closing the door Service Centre. -
Page 20: Information For Test Institutes
11. INFORMATION FOR TEST INSTITUTES Installation and preparation of the clearances shall be as stated in this User appliance for any EcoDesign verification Manual at Chapter 3. Please contact the shall be compliant with EN 62552. manufacturer for any other further Ventilation requirements, recess information, including loading plans. -
Page 21: Informazioni Di Sicurezza
12. CONSIDERAZIONI SULL'AMBIENTE.............. 41 PER RISULTATI PERFETTI Grazie per aver scelto di acquistare questo prodotto AEG. Lo abbiamo creato per fornirvi prestazioni impeccabili per molti anni, grazie a tecnologie innovative che vi semplificheranno la vita - funzioni che non troverete sulle normali apparecchiature. - Page 22 Conservare sempre le istruzioni in un luogo sicuro e accessibile per poterle consultare in futuro. 1.1 Sicurezza dei bambini e delle persone vulnerabili Quest’apparecchiatura può essere usata da bambini a •...
- Page 23 ITALIANO in agriturismi e altre sistemazioni simili in cui tale utilizzo non superi i livelli di utilizzo domestico (medi). Per evitare la contaminazione degli alimenti rispettare • le seguenti istruzioni: non aprire la porta per lunghi periodi; – pulire regolarmente le superfici che possono venire –...
-
Page 24: Istruzioni Di Sicurezza
Se il cavo di alimentazione è danneggiato, deve • essere sostituito dal produttore, da un tecnico autorizzato o da una persona qualificata per evitare situazioni di pericolo. 2. ISTRUZIONI DI SICUREZZA 2.1 Installazione • Quando si sposta l’apparecchiatura, sollevarla dal bordo anteriore, così da AVVERTENZA! non graffiare il pavimento. - Page 25 ITALIANO dell'installazione. Verificare che la • Per quanto riguarda la lampada o le spina di alimentazione rimanga lampade all'interno di questo prodotto accessibile dopo l'installazione. e le lampade di ricambio vendute • Non tirare il cavo di alimentazione per separatamente: Queste lampade scollegare l’apparecchiatura.
-
Page 26: Installazione
• Rimuovere la porta per evitare che tutti i pezzi di ricambio sono rilevanti bambini e animali domestici per tutti i modelli. rimangano chiusi all’interno • Le guarnizioni per porte saranno dell’apparecchiatura. - Page 27 ITALIANO 3.1 Dimensioni Dimensioni complessive ¹ Spazio necessario durante l’uso ² 1769 1780 ¹ l’altezza, la larghezza e la profondità ² l’altezza, la larghezza e la profondità dell’apparecchiatura senza l’impugnatura dell’apparecchio, compresa la maniglia, più lo spazio necessario per la libera circolazione dell’aria di raffreddamento Spazio necessario durante l’uso ²...
- Page 28 3.3 Collegamento elettrico Spazio complessivo necessario duran‐ • Prima di inserire la spina, verificare te l’uso ³ che la tensione e la frequenza riportate sulla targhetta di identificazione corrispondano a quelle 1085 dell'impianto domestico. • L'apparecchiatura deve disporre di ³...
-
Page 29: Pannello Dei Comandi
ITALIANO ATTENZIONE! In ogni fase di inversione della porta proteggere il pavimento da graffi con un materiale resistente. 4. PANNELLO DEI COMANDI Display Mode Tasto Temperatura più calda ON/OFF Tasto Temperatura più fredda È possibile modificare le impostazioni tasto temperatura più fresca per pochi audio predefinite dei tasti premendo secondi. - Page 30 • +4 °C per il frigorifero Le impostazioni da 1 a 3 sono adatte per L’intervallo di temperatura può variare tra pesce e carne. 2° C e 8 °C per il frigorifero. Le impostazioni 4 e 5 sono adatte per Le spie della temperatura mostrano la frutta e verdura.
-
Page 31: Utilizzo Quotidiano
ITALIANO Per disattivare la funzione, ripetere la l'allarme acustico e la spia allarme procedura fino allo spegnimento della lampeggia. spia DrinksChill. L'allarme si arresta dopo la chiusura della porta. Durante l'allarme, il segnale È possibile modificare l'ora acustico può essere disattivato in qualsiasi momento premendo qualsiasi tasto. - Page 32 Questo livello di umidità viene Per garantire una corretta raggiunto quando entrambi i circolazione dell'aria, non dispositivi di scorrimento vengono spostare il ripiano di vetro impostati sulla posizione e le posto sopra il cassetto delle aperture di ventilazione sono verdure.
-
Page 33: Consigli E Suggerimenti Utili
ITALIANO La ventola funziona solo quando la porta viene chiusa. 6. CONSIGLI E SUGGERIMENTI UTILI 6.1 Consigli per il risparmio • Coprire il cibo con un imballaggio per preservarne la freschezza e l’aroma. energetico • Utilizzare sempre contenitori chiusi per liquidi e per alimenti, per evitare •... - Page 34 • Le verdure come pomodori, patate, • Fare sempre riferimento alla data di cipolle e aglio non devono essere scadenza dei prodotti per sapere per conservate in frigorifero. quanto tempo conservarli. • Burro e formaggio: riporli in un 6.4 Suggerimenti per la...
- Page 35 ITALIANO Tipo di cibo Regolazione dell'umidità Tempo di conservazione dell'aria Mele (non sensibili al fred‐ fino a 20 giorni “umido” do), cotogne Albicocche, ciliegie fino a 14 giorni “umido” Susine selvatiche, uva fino a 10 giorni “umido” More, ribes fino a 8 giorni “umido”...
-
Page 36: Pulizia E Cura
7. PULIZIA E CURA 2. Ispezionare regolarmente le AVVERTENZA! guarnizioni della porta ed eliminare Fare riferimento ai capitoli con un panno umido tracce di sporco sulla sicurezza. e residui. 3. Risciacquare e asciugare 7.1 Pulizia dell'interno accuratamente. Prima di utilizzare l'apparecchiatura per 7.3 Sbrinamento del... - Page 37 ITALIANO Problema Causa possibile Soluzione La presa elettrica non ha Collegare un’apparecchiatu‐ tensione. ra elettrica diversa alla presa di alimentazione. Contattare un elettricista qualificato. L’apparecchiatura è rumoro‐ L’apparecchiatura non è Controllare che l'apparec‐ supportata correttamente. chiatura abbia una posizione stabile. L'allarme acustico o visivo è...
- Page 38 Problema Causa possibile Soluzione La lampadina non funziona. La lampadina è in modalità Chiudere e aprire la porta. stand-by. La lampadina è difettosa. Contattare il Centro di Assi‐ stenza Autorizzato più vici‐ C’è una quantità eccessiva La porta non è chiusa corret‐...
- Page 39 ITALIANO Problema Causa possibile Soluzione Non è possibile impostare la La "funzione Coolmatic" è Disattivare manualmente la temperatura. attiva. "funzione Coolmatic" oppure attendere finché la funzione si disattiva automaticamente per impostare la temperatu‐ ra. Vedere la sezione "fun‐ zione Coolmatic". La temperatura all’interno La temperatura non è...
-
Page 40: Rumori
Contattare un Centro Assistenza Se il suggerimento non da i autorizzato. risultati auspicati, contattare il Centro di Assistenza 8.3 Chiusura della porta Autorizzato più vicino. 1. Pulire le guarnizioni della porta. 8.2 Sostituzione della 2. Se necessario, regolare la porta. -
Page 41: Informazioni Per Gli Istituti Di Test
ITALIANO e il numero di prodotto che si trovano Per informazioni dettagliate sull’etichetta sulla targhetta dell’apparecchiatura. energetica, vedere il sito www.theenergylabel.eu . 11. INFORMAZIONI PER GLI ISTITUTI DI TEST L'installazione e la preparazione devono essere conformi a quanto dell'apparecchiatura per qualsiasi verifica indicato nel presente manuale d’uso al di EcoDesign devono essere conformi capitolo 3. - Page 44 www.aeg.com/shop...
Need help?
Do you have a question about the SKE818E9ZC and is the answer not in the manual?
Questions and answers