Table of Contents
Advertisement
Available languages
Available languages
Quick Links
Advertisement
Table of Contents

Related Manuals for Weston 36-3601-W


Summary of Contents for Weston 36-3601-W
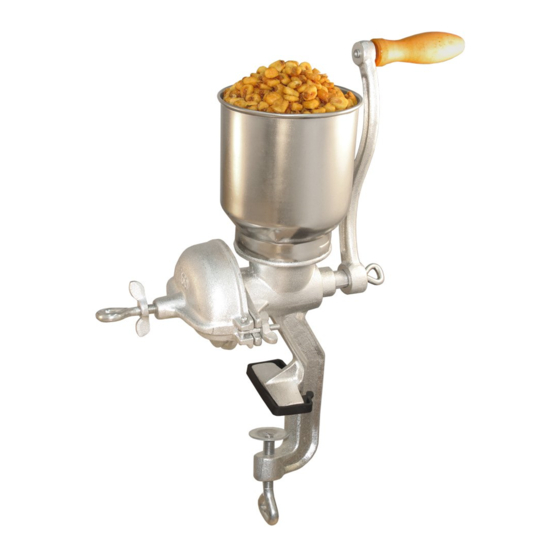
- Page 1 manual GRAIN & CORN MILL...
-
Page 2: Table Of Contents
NOTA IMPORTANTE ANTES DEL USO INSTRUCCIONES DE ENSAMBLADO 12-13 INSTRUCCIONES PARA MOLER ADJUSTE DEL MOLIDO CONSEJOS PARA UNA OPERACIÓN FÁCIL INFORMACIÓN DE GARANTÍA WESTON PRÉCAUTIONS IMPORTANTES DESCIPTION DE LA PIÈCE REMARQUE IMPORTANTE À LIRE AVANT UTILISATION INSTRUCTIONS D’ASSEMBLAGE 20-21 INSTRUCTIONS POUR MOUDRE RÉGLAGE POUR MOUDRE... -
Page 3: Important Safeguards
IMPORTANT SAFEGUARDS When using electrical appliances, basic safety precautions should always be followed to reduce the risk of fire, electric shock, and/or injury to persons, including the following: 1. KEEP FINGERS CLEAR of the Auger and Grinding Plate at all times. NEVER reach into any Mill inlet. -
Page 4: Component List
If any components of this unit are broken, the unit does not operate properly or you need a replacement instruction manual, visit us on the web at WestonBrands.com 1-800-814-4895 Or call Weston Brands, LLC Toll Free at Monday thru Friday 8:00am-5:00pm ET. Outside the U.S. call 1-216-901-6801... -
Page 5: Important Note Prior To Use
IMPORTANT NOTE PRIOR TO USE A protective coating is applied to this unit prior to shipment. This coating protects the unit in shipment and during it’s shelf life. It is very important to thoroughly clean the unit before using it, especially around the edges or areas that have been soldered or welded. - Page 6 5. Align the knob on the Auger FIGURE C Assembly with the hole in the Shield Assembly. Place the Shield Shield Assembly Assembly onto the Main Body. FIGURE C 6. Rotate the Rotating Thumbscrews (one is located on each side of the Shield Assembly) into the slots in the Main Body.
-
Page 7: Grinding Instructions
GRINDING INSTRUCTIONS FIGURE F 1. Fill the Hopper with the material you intend to grind. 2. Position a bowl or plate under the Mill to catch the material as it is FIGURE F being ground. 3. Slowly turn the Handle clockwise. ADJUSTING THE GRIND Depending on the type of material that is being ground and your personal... -
Page 8: Warranty Information
ONE-YEAR LIMITED WARRANTY This warranty applies to products purchased and used in the U.S. and Canada. This is the only express warranty for this product and is in lieu of any other warranty or condition. This product is warranted to be free from defects in material and workmanship for a period of one (1) year from the date of original purchase. - Page 9 manual MOLINO PARA GRANOS Y MAÍZ...
-
Page 10: Salvaguardias Importantes
SALVAGUARDIAS IMPORTANTES Cuando utilice artefactos eléctricos, siempre deben seguirse precauciones de seguridad básicas a fin de reducir el riesgo de incendio, descarga eléctrica, y/o lesiones a personas, incluyendo las siguientes: 1. MANTENGA LOS DEDOS LEJOS del tornillo sinfín y de la placa de molido en todo momento. -
Page 11: Lista De Componentes
Web en WestonBrands.com 1-800-814-4895 O llame a Weston Brands, LLC larga distancia sin costo De lunes a viernes, de 8:00 am a 5:00 pm tiempo del ET. Fuera de Estados Unidos llame al 1-216-901-6801... -
Page 12: Nota Importante Antes Del Uso
NOTA IMPORTANTE ANTES DEL USO Antes del envío, se aplica un recubrimiento protector a esta unidad. Este recubrimiento protege la unidad durante el envío y la vida útil del producto. Es muy importante limpiar la unidad con cuidado antes de usarla, especialmente en los bordes y las áreas que han sido estañadas o soldadas. - Page 13 5. Alinee la perilla del conjunto del FIGURA C Conjunto de la tornillo sinfín con el agujero en el pantalla conjunto de la pantalla. Coloque el conjunto de la pantalla sobre el FIGURA C cuerpo principal. 6. Gire los tornillos de mano giratorios (se encuentran uno a cada lado del conjunto de la pantalla) dentro de las ranuras en el cuerpo...
-
Page 14: Instrucciones Para Moler
INSTRUCCIONES PARA MOLER FIGURA F 1. Llene la tolva con el material que vaya a moler. 2. Coloque un cuenco o un plato bajo el molino para recibir el material a medida FIGURA F que se muele. 3. Gire lentamente el mango en el sentido de las manecillas del reloj. -
Page 16: Información De Garantía Weston
Grupo HB PS, S.A. de C.V. Monte Elbruz No. 124 – 401 Col. Polanco V Sección, Miguel Hidalgo Ciudad de México, C.P. 11560 GARANTÍA PARA PRODUCTOS COMPRADOS EN MÉXICO PRODUCTO: MARCA: MODELO: Grupo HB PS, S.A. de C.V. cuenta con Centros de Servicio autorizados. Por favor consulte en la lista anexa el nombre y dirección de los establecimientos en la República Mexicana en dónde usted podrá... - Page 17 manuel MOULIN POUR GRAINS ET MAÏZ...
-
Page 18: Précautions Importantes
PRÉCAUTIONS IMPORTANTES Pour utiliser un appareil électroménager, vous devez toujours prendre des mesures élémentaires de sécurité pour réduire le risque d'incendie, d'électrocution et/ou de blessure corporelle, en particulier les mesures suivantes: 1. TOUJOURS TENIR LES DOIGTS À L’ÉCART de la vis sans fin et de la plaque de broyage. -
Page 19: Desciption De La Pièce
N’hésitez pas à visiter notre site Web WestonBrands.com/support si un composant est cassé, l’outil fonctionne mal, ou pour commander un nouveau mode d’emploi. WestonBrands.com 1-800-814-4895 Veuillez appeler Weston Brands, LLC au numéro sans frais : Du lundi au vendredi: de 8h00 à 17h00 ET. En dehors des États-Unis, veuillez appeler le 1-216-901-6801... -
Page 20: Remarque Importante À Lire Avant Utilisation
REMARQUE IMPORTANTE À LIRE AVANT UTILISATION Un revêtement protecteur est appliqué à l’appareil avant son expédition. Le revêtement protège l’appareil lors de l’expédition et pendant sa durée de conservation. Il est très important de nettoyer soigneusement l’appareil avant de l’utiliser, en particulier autour des arêtes ou des zones soudées ou brasées. - Page 21 5. Aligner le bouton sur la vis FIGURE C sans fin au trou dans l’ensemble protecteur. Placer l’ensemble Ensemble protecteur protecteur sur le corps principal. FIGURE C 6. Tourner les vis moletées tournant (une sur chaque côté de l’ensemble protecteur) dans les fentes du corps principal.
-
Page 22: Instructions Pour Moudre
INSTRUCTIONS POUR MOUDRE FIGURE F 1.Remplir le bol des produits alimentaires à broyer. 2. Placer un récipient ou un plat sous le moulin pour attraper les produits à mesure qu’ils sont moulus/broyés. FIGURE F 3. Tourner lentement la manivelle dans le sens horaire. -
Page 23: Information Sur La Garantie
GARANTIE LIMITÉE D’UN AN Cette garantie s’applique aux produits achetés et utilisés aux États-Unis et au Canada. Il s’agit de l’unique garantie explicite pour ce produit et elle remplace toute autre garantie ou condition. Ce produit est garanti comme étant exempt de tout vice matériel ou de main-d’œuvre pendant une période d’un (1) an à... - Page 24 Para todas aquellas preguntas referentes al uso del producto, partes faltantes, daño del producto, dificultad o activación de la garantía, comuníquese con el equipo de servicio al cliente de weston Brands: desde las 8:00 am hasta las 5:00 pm ET, de lunes a viernes Customer.Service@WestonBrands.com...
Need help?
Do you have a question about the 36-3601-W and is the answer not in the manual?
Questions and answers