Table of Contents
Advertisement
PROOFER &
RETARDER/PROOFER
MODELS
PW1E
PW1S
PW2E
PW2S
PW3S
RPW1S
RPW2E
RPW2S
Model Number:
Serial Number:
Date of Installation:
Baxter Mfg, a Division of ITW FEG, LLC • 19220 State Route 162 East • Orting, WA 98360-9236
___________
___________
___________
Phone: (360) 893-5554 • Fax: (360) 893-1337
www.baxtermfg.com
Operator
Manual
FORM 36756 (Feb. 2019)
Advertisement
Table of Contents

Subscribe to Our Youtube Channel
Related Manuals for baxter PW1E


Summary of Contents for baxter PW1E
- Page 1 Model Number: ___________ Serial Number: ___________ ___________ Date of Installation: Baxter Mfg, a Division of ITW FEG, LLC • 19220 State Route 162 East • Orting, WA 98360-9236 Phone: (360) 893-5554 • Fax: (360) 893-1337 FORM 36756 (Feb. 2019) www.baxtermfg.com...
-
Page 2: Table Of Contents
TABLE OF CONTENTS GENERAL ..............................3 INSTALLATION ............................3 OPERATION ............................4 Proofing .............................. 4 Retarding ............................4 Advanced Controls - Standard Proofer ....................5 Advanced Controls - Retarder/Proofer ....................7 Operating parameter setup ....................... 14 Customized Operation ........................16 Select Proofer Model VIA Bootloader .................... -
Page 3: General
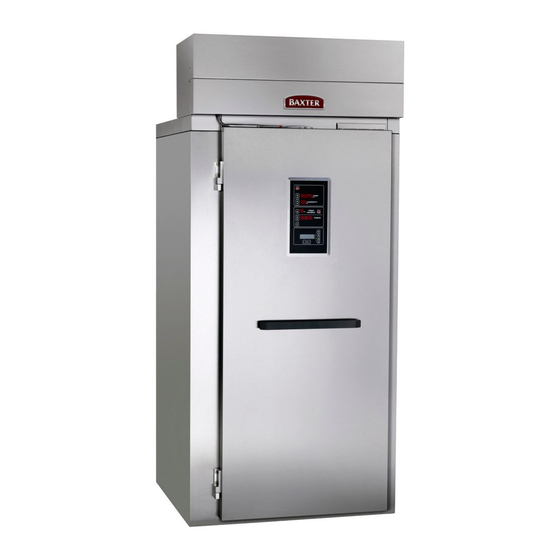
OPERATION AND CARE OF PROOFERS & RETARDER/PROOFERS SAVE THESE INSTRUCTIONS GENERAL The Proofer and Retarder/Proofer cabinets proof racks of dough products under controlled temperatures and humidity prior to baking. There are several to choose from. The standard proofers are equipped to proof dough only. -
Page 4: Operation
OPERATION The following pages cover the operation procedures for the various control options of the Proofer and Retarder/Proofer cabinets. The control panels come in two configurations: standard proofer and retarder/proofer. PROOFING Controlled temperature and humidity in the proofer promotes yeast fermentation, which generates gas and causes the dough to rise. -
Page 5: Advanced Controls - Standard Proofer
ADVANCED CONTROLS - STANDARD PROOFER PROOF MODE ON/OFF - Press to start/stop the proof mode. TEMP UP or DOWN ARROW - Press to set the temperature. T E M P W I N D O W - Displays the current TEMP temperature. - Page 6 Proof The proof feature allows thawed dough to rise by gradually increasing the temperature and humidity of the dough. 1. Press the ON/OFF button to start the proof mode. The ON/OFF Indicator Light is lit. 2. Enter the desired temperature by pressing the UP or DOWN arrow next to the TEMP window.
-
Page 7: Advanced Controls - Retarder/Proofer
ADVANCED CONTROLS - RETARDER/PROOFER The Retarder/Proofer has several options to choose from the control panel. • Manual Proof Operation • Manual Retard Operation • Automatic Retard and Proof Operation START-UP: ON/OFF - Turn on/off the setup mode. TEMPERATURE UP or DOWN ARROW - Press to set the temperature level. - Page 8 Proof • Press the "PROOFER" operation arrow button (Fig. 2). • Enter the desired temperature (65°F - 115°F) by pressing up or down arrow button (Fig. 3). • Enter the desired humidity (25% - 95%) by pressing up or down arrow button. •...
- Page 9 Retard • Press the "RETARDER" operation arrow button (Fig. 2). • Enter the desired temperature (34°F - 50°F) by pressing up or down arrow button. • Enter the desired time for timer. (If it is timed out, beeper is pulsed and timer number flashes.) NOTE: Retard operation does not offer humidity control.
- Page 10 RETARDER/ PROOFER (Auto Mode) This operation will put Retard and Proof in one operation. The automatic Retard/Proof operation can be programmed for either a single day or seven days. (See chart for the parameter value setup.) After one operation cycle (Retard and Proof) is finished, the unit now runs Proofer mode. To resume the next day program, the operator must go to RETARDER/PROOFER Mode and press "Start/Retard/Proofer"...
- Page 11 If time is correct, then press NEXT button or arrow button. If time is not correct, select the "Set CLOCK?" arrow button to Curent Time 8:58 am change time (Fig. 10). Set CLOCK? > Press here to edit time. [NEXT] Fig.
- Page 12 Follow the LCD instructions to setup the Retard temperature. Press the Up or Down arrow button to select desired temperature (Fig. 14 and Fig. 15). See ABOVE for RETARDING SET TEMP Sunday Program [EXIT] [NEXT] Fig. 14 See ABOVE for RETARDING SET TEMP Sunday Program...
- Page 13 The next screen shows the program for the second day after the NEXT button is pressed (Fig. 18). Monday Program is ACTIVE (will proof) INACTIVATE Program > Press here to activate or [EXIT] [NEXT] deactivate the program. Fig. 18 Again, the LCD displays a choice of the next day program by activating or deactivating the program button. To skip the next day, the next day program must be inactive.
-
Page 14: Operating Parameter Setup
OPERATING PARAMETER SETUP • Press and hold the TIMER NUMBER arrow button. • Press ON/OFF button. (Fig. 20). NOTE: If timer keys are not available the parameter setup can be accessed pressing simultaneously the HUMIDITY UP button and the ON/OFF button. Fig. - Page 15 Definitions and Default Values for Retarder Proofer /* P0 Software Version Number /* P1 Fahrenheit or Celsius /* P2 Temp Offset for Calib. Min. 0 Max. 30, 15 is zero offset /* P3 Hum Offset for Calib. Min. 0 Max. 30, 15 is zero offset /* P4 Minimum Temp for Proof 65°F...
-
Page 16: Customized Operation
CUSTOMIZED OPERATION TEMP The Proofer and the Retarder/Proofer controls have the capability of being customized to fit your own personal needs using the setup mode. NOTE: Before entering the setup mode, read all the instructions to make sure you are completely clear %HUMIDITY on what to do. -
Page 17: Select Proofer Model Via Bootloader
Setup Hints • During Rest Period, the unit does not heat, cool or circulate air; this allows the dough to rest. • During Recovery Time, the unit slowly heats up and adds humidity, bringing the unit to the preset temperature and humidity and into the proof stage of the automatic retard/proof process. SELECT PROOFER MODEL VIA BOOTLOADER The proofer model is set at the factory. -
Page 18: Update The Proofer Firmware Via Bootloader
UPDATE THE PROOFER FIRMWARE VIA BOOTLOADER 1. Load the firmware file named proofer.bin onto a FAT formatted flash drive. 2. Turn off the Proofer with the ON/OFF button. 3. Insert the flash drive into the proofer’s USB socket (Fig. 24). 4. -
Page 19: Control Board Power Up
CONTROL BOARD POWER UP Each time power is applied to the control board, the bootloader is launched. The bootloader looks at the flash configuration to choose which of the three configuration modes to use. During the boot up process, the configuration mode number 1, 2, or 3 is displayed in the HUMIDITY display for several seconds. -
Page 20: Maintenance
MAINTENANCE Disconnect the electrical power to the unit and follow lockout / tagout procedures. Every 6 months have authorized service personnel check air duct, drain, heater plate, spray nozzle and refrigeration coils (if applicable). LIGHT BULBS Replace light bulb(s) with 40-watt incandescent appliance-type bulb(s) ONLY. SHUT DOWN 1.
Need help?
Do you have a question about the PW1E and is the answer not in the manual?
Questions and answers