Table of Contents
Advertisement
Quick Links
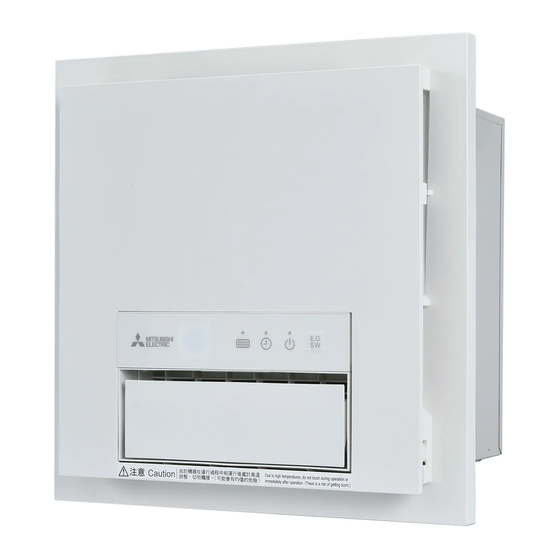
Bathroom Thermo Ventilator / 浴室換氣暖風機
MODEL / 型號
V-251BZ-HK
Installation Manual / 安裝手冊
Contents / 目錄
1. Safety Precautions / 安全須知 ..........................................................................................2
3. Selecting Installation Position / 選擇安裝位置 ..................................................................5
4. Method of Installation / 安裝方法 ......................................................................................7
5. Checks after Installation / 安裝後檢查 ........................................................................... 12
6. Trial Operation / 運轉試驗.............................................................................................. 12
7. Checking and Changing Initial Values / 檢查和變更初始值 ........................................... 14
8. Explanations to the Customer / 向客戶介紹 .................................................................. 14
9. Troubleshooting / 故障排除............................................................................................ 15
■ Correct installation is essential to achieve full performance and
functionality of this product and to ensure safety. Carefully read
this Installation Manual before installation.
■ This product is for domestic use. Do not use it for commercial
applications.
■ In the event of any conflict between the English and Traditional
Chinese, the English version shall prevail.
[ 220 V single-phase / 220 V 單相 ]
For Dealers and Contractor / 經銷商和承包商專用
■ 正確安裝對於實現本產品的完整效能與功能
以及確保安全性至關重要。安裝前請仔細閱
讀本安裝手冊。
■ 本產品僅供家用。請勿將其用於商業用途。
■ 若英文版與繁體中文版之間有任何衝突,以
英文版為準。
1901876H20301
Page / 頁次
Advertisement
Table of Contents

Related Manuals for Mitsubishi Electric V-251BZ-HK


Summary of Contents for Mitsubishi Electric V-251BZ-HK
-
Page 1: Table Of Contents
1901876H20301 Bathroom Thermo Ventilator / 浴室換氣暖風機 MODEL / 型號 V-251BZ-HK [ 220 V single-phase / 220 V 單相 ] Installation Manual / 安裝手冊 For Dealers and Contractor / 經銷商和承包商專用 Contents / 目錄 Page / 頁次 1. Safety Precautions / 安全須知 ..................2 2. Names and Dimensions of Parts (Dimensional Drawings) / 部件名稱和尺寸(尺寸圖) ..4 3. Selecting Installation Position / 選擇安裝位置 ..............5 4. Method of Installation / 安裝方法 ..................7 5. Checks after Installation / 安裝後檢查 ................12 6. Trial Operation / 運轉試驗.................... -
Page 2: Safety Precautions / 安全須知
1. Safety Precautions / 安全須知 The table below classifies the degree of danger The symbols used in this manual and on the main from incorrectly handling or using the product. unit indicate the following meanings. 下表對產品不當處理或使用的危險程度進行了分類。 本手冊和主機上使用的符號表示以下含義。 Incorrect handling or use Prohibited The product must be grounded Warning... - Page 3 Warning / 警告 Use a 220 V AC single-phase power supply. 使用220 V AC單相電源。 Using a power supply other than 220 V AC single-phase may 使用220 V AC單相電源以外的電源 cause fire or electric shock. 可能造成火災或觸電。 Electrical work and main unit installation must be performed 電氣作業及主機安裝必須由符合資 safely and reliably by qualified personnel certified by the 質的機電工程署(EMSD)認證人員以 Electrical and Mechanical Services Department (EMSD).
-
Page 4: Names And Dimensions Of Parts (Dimensional Drawings) / 部件名稱和尺寸(尺寸圖)
Names and Dimensions of Parts (Dimensional Drawings) 部件名稱和尺寸(尺寸圖) ■ Panel open ■ Wireless remote controller Fall-prevention fixture Duct connection port 面板打開 遙控器 防掉落鐵片 管道連接口 Fixing clip Inlet Panel base Main unit 固定夾 Baffle plate 進風口 面板底座 主機 導風板 Remote controller case mounting screws 遙控底座安裝螺絲 Inlet 進風口 Filter 濾網... -
Page 5: Selecting Installation Position / 選擇安裝位置
3. Selecting Installation Position / 選擇安裝位置 ■ The product is for bathroom ceiling installation - Bathroom fitted with a steam sauna (could only. cause a malfunction) ■ 本產品僅適用於浴室天花板安裝。 - 配備蒸汽桑拿裝置的浴室(可能造成故障) ■ Standard supported size is a bathroom with a - Slanted ceiling (could cause a malfunction. floor area of 2.9 m Condensed water drips from the panel.) ■... - Page 6 3. Selecting Installation Position / 選擇安裝位置 (continued / 續) [Electrical work / 電氣作業] - Take note of the following. (Could reduce the air - Ensure the power cable and control switch volume or increase noise) connection cable have a spare length of - 請注意以下事項。(可能導致風量減小或噪音增大) around 2 m to allow the main unit to be ・...
-
Page 7: Method Of Installation / 安裝方法
4. Method of Installation / 安裝方法 Installation procedure / 安裝步驟 務必使用專用的懸掛支撐框架 (P-251TW-HK)。 (1) Fix commercial anchor bolts (M8 or M10) to the Preparations for installation / 安裝準備 installation position beforehand. 1. M ake a mounting hole in the bathroom ceiling board. (1) 事先將市售的地腳螺栓(M8或M10)固定在安裝位置。 1. 在浴室天花板上打一個安裝孔。 (2) Assemble the suspension support frame and insert 2. I nstall the suspension support frame. it in the mounting hole from inside the bathroom. Suspend the suspension support frame from the 2. 安裝懸掛支撐框架。 anchor bolts using commercial washers and nuts. 3. C arry out wiring. (Refer to the Installation Manual of the suspension 3. 進行布線。 support frame (P-251TW-HK) for its assembly) ↓... - Page 8 4. Method of Installation / 安裝方法 (continued / 續) 2. Carry out ducting. - 擰緊固定懸掛支架的螺母,並檢查懸掛支撐框架的凸緣 是否與天花板緊密接觸。如果凸緣未與天花板緊密接觸 2. 進行配管。 (框架搖晃),將會在主機和天花板之間產生間隙。 (1) Insert the duct firmly into the duct connection port - Be sure to fix the nuts securely. and tape around it to ensure air cannot leak. - 務必牢牢固定螺母。 (1) 將管道牢牢插入管道連接口,並用膠帶纏繞確保空 3. Carry out wiring. 氣不會洩漏。 3. 進行布線。 (2) Suspend the duct from the ceiling so that it does Wire the power cable (VVF cable: ø2 mm x 3 cores).
- Page 9 Note / 備註 (3) Attach the panel base to the main unit using the four panel mounting screws (4 x 10) supplied. - Check that the protruding parts of the main unit (3) 使用隨附的四個面板安裝螺絲(4 x 10)將面板底座安 are fit into the holes of the duct connection port 裝到主機上。 catch. (If the protruding parts are not fit into the holes, the connection could be insufficient and Main unit could cause air leakage)
- Page 10 4. Method of Installation / 安裝方法 (continued / 續) Wiring diagram / 配線圖 3 Electrical work / 電氣作業 Parts shown in thick lines must be installed by a qualified person certified by EMSD. 以粗線條顯示的部件必須由符合資質的機電工程署 Warning / 警告 (EMSD)認證人員進行安裝。 Main unit Do not connect the product to the power 主機...
- Page 11 Note / 備註 2. Install the remote controller case using - Secure the power cable to the voltage side and the two remote controller case mounting earth side with screws as shown in the diagram. screws (4 x 16) supplied. - 用螺絲將電源線的電壓側和接地側如圖所示固定。...
-
Page 12: Checks After Installation / 安裝後檢查
5. Checks after Installation / 安裝後檢查 Check the following items before trial operation. Be sure to put a tick mark in the corresponding tick box □. Perform trial operation after making these checks. 運轉試驗前請檢查以下項目。 務必在相應的勾選框中打上勾號□。 請先進行這些檢查,然後再執行運轉試驗。 (1) Product installation check / 產品安裝檢查 Reference page / 參考頁次... - Page 13 3 Operation checks / 運轉檢查 Check the operation according to the table below. After checking the operation, hold down the button for at least 3 seconds to fully stop the product, and then turn off the circuit breaker. 根據下表檢查運轉。檢查運轉後,按住 按鈕至少3秒以完全停止產品,然後關閉斷路器。 Operating mode Operation Display Description □ 運轉模式 操作 描述 顯示器 Check that ventilation occurs at the Press the button. 24-hour inlet on the main unit panel. □ ventilation 按 按鈕。 檢查主機面板上的進風口是否換氣。 24小時換氣 Check that ventilation occurs at the Press the button. inlet on the main unit panel. (The air The function toggles each volume for 24-hour ventilation is the time the button is pressed. Ventilation same as for low ventilation) □ 換氣...
-
Page 14: Checking And Changing Initial Values / 檢查和變更初始值
7. Checking and Changing Initial Values / 檢查和變更初始值 Refer to the Instruction Manual. 請參閱使用說明書。 8. Explanations to the Customer / 向客戶介紹 ● If the customer is unavailable, the explanations can be made to the person who placed the order (the owner, etc.) or manager. ● Explain the correct method of use according to the separate Instruction Manual. Emphasize the importance of following the "Safety Precautions" section, which describes important safety- related information. ● After installation, hand this Installation Manual to the customer. Also hand the supplied Instruction Manual and display stickers to the customer. ● 若客戶無法在場,應向下訂單的人員(物主等)或經理進行介紹。 ● 根據單獨的使用說明書介紹正確的使用方法。 強調遵循「安全須知」部分的重要性,該部分說明重要的安全相關資訊。 ● 安裝完成後,將本安裝手冊交給客戶。此外,請將隨附的使用說明書和顯示貼紙交給客戶。... -
Page 15: Troubleshooting / 故障排除
9. Troubleshooting / 故障排除 Perform an inspection if any of the following symptoms occurs. Turn off the circuit breaker in the distribution board before starting the inspections. 若出現以下任何現象,請執行檢查。在開始檢查之前,請關閉配電板中的斷路器。 Symptom / 現象 Cause and Remedy / 原因和改進措施 Inspect the circuit breaker. An independent circuit breaker with 16 A Is power supplied to the main unit? or greater capacity is required. 主機是否通電? 檢查斷路器。 No operation 需要一個容量為16 A或以上的獨立斷路器。 不運轉 Starting operation and switching operation functions can take about 40 This is not a malfunction. seconds. 這不是故障。 開始運轉和切換運轉功能大約需要40秒。 Cooling operation continues for about Operation does not stop This is not a malfunction. 15 seconds after heater operation stops. 無法停止運轉 這不是故障。 加熱器運轉停止後,涼風運轉持續約15秒。 It takes too long to start operation Switching the air flow path or cooling the or switch operation functions This is not a malfunction. main unit can take about 40 seconds. 等很長時間才會開始運轉或切 這不是故障。 切換氣流路徑或主機冷卻大約需要40秒。 換運轉功能... - Page 16 MITSUBISHI ELECTRIC CORPORATION NAKATSUGAWA WORKS 1-3 Komaba-cho, Nakatsugawa-city Gifu-pref. 508-8666, Japan 三菱電機株式会社 中津川製作所 〒508-8666 岐阜県中津川市駒場町1番3号 原產國: 日本 製造商: 三菱電機株式會社...