Advertisement
Quick Links
sauder.com
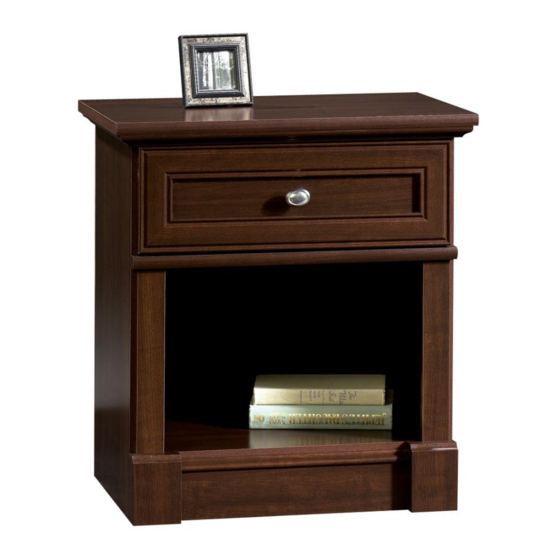
Night Stand
Palladia Collection | Model 411835
Need help? Visit Sauder.com to view video assembly tips or chat with a live rep.
Prefer the phone? Call 1-800-523-3987.
Share your journey!
WARNING
CHOKING HAZARD - Small Parts
Not for children under 3 years.
Adult assembly required.
NOTE: THIS INSTRUCTION
BOOKLET CONTAINS IMPORTANT
SAFETY INFORMATION.
PLEASE READ AND KEEP FOR
FUTURE REFERENCE.
English pg 1-19
Français pg 20-22
Español pg 23-25
Lot # 366058
11/04/14
Purchased: __________________
Be sure to give us a ring before
making any returns. 1-800-523-3987
Advertisement

Related Manuals for Sauder Palladia 411835


Summary of Contents for Sauder Palladia 411835
- Page 1 Palladia Collection | Model 411835 NOTE: THIS INSTRUCTION BOOKLET CONTAINS IMPORTANT SAFETY INFORMATION. Need help? Visit Sauder.com to view video assembly tips or chat with a live rep. PLEASE READ AND KEEP FOR FUTURE REFERENCE. Prefer the phone? Call 1-800-523-3987.
- Page 2 Assembly Tools Required Part Identifi cation No. 2 Phillips Screwdriver Tip Shown Actual Size Hardware Identifi cation Assembly Steps 5-19 Hammer Not actual size Français 20-22 Español 23-25 Skip the power trip. Safety This time. Warranty Page 2 411835 www.sauder.com/services...
- Page 3 TOP (1) BRACE (1) MOLDING (1) BOTTOM (1) BASE (1) BOTTOM MOLDING (1) RIGHT DRAWER SIDE (1) DRAWER FRONT (1) PLINTH (2) LEFT DRAWER SIDE (1) FRONT MOLDING (1) DRAWER BACK (1) RIGHT MOLDING (1) D621 www.sauder.com/services 411835 Page 3...
- Page 4 BLACK 1-1/8" PAN HEAD SCREW - 8 EE BLACK 9/16" LARGE HEAD SCREW - 16 BROWN 7/16" LARGE HEAD SCREW - 8 SILVER 1/2" MACHINE SCREW - 1 GOLD 5/16" FLAT HEAD SCREW - 8 NAIL - 24 Page 4 411835 www.sauder.com/services...
- Page 5 fl oor. Scan this QR code or go to this address: http://qr.sauder.com/?ID=1607 To begin assembly, push a SAUDER TWIST-LOCK® å to watch a video on how to assemble your unit. FASTENER (W) into the large holes in the ENDS (A2 and B2).
- Page 6 å in the MOLDINGS (L, M, and N). Use your hammer to tap the MOLDING CONNECTORS (AA) into the notches in the MOLDINGS. Flat end Flat end Unfi nished surface Unfi nished surface Unfi nished surface Page 6 411835 www.sauder.com/services...
- Page 7 MOLDINGS to the TOP (C). Use six BLACK 1-1/4" FLAT Remember: HEAD SCREWS (CC). Righty tighty. Lefty loosey. NOTE: Do not overtighten the SCREWS into the TOP. å BLACK 1-1/4" FLAT HEAD SCREW (6 used in this step) Rounded edge www.sauder.com/services 411835 Page 7...
- Page 8 (4 used for the CABINET RAILS) BLACK 9/16" LARGE HEAD SCREW (2 used in this step) Glide end (6 used) Edge with TWIST-LOCK® FASTENER Edge with BROWN 7/16" LARGE HEAD SCREW TWIST-LOCK® (4 used in this step) FASTENER Page 8 411835 www.sauder.com/services...
- Page 9 Step 5 Fasten the BOTTOM (D) to the ENDS (A2 and B2). å ® How to use the SAUDER TWIST-LOCK FASTENER Tighten four TWIST-LOCK® FASTENERS. 1. Insert the dowel end of the FASTENER into the hole of the adjoining part.
- Page 10 Fasten the ENDS (A2 and B2) to the MOLDINGS (M and N) å on the TOP (C). Tighten four TWIST-LOCK® FASTENERS. Fasten the PLINTHS (R2) to the ENDS (A2 and B2). Tighten å two TWIST-LOCK® FASTENERS. Rounded edge Curved edge These surfaces should be even. Page 10 411835 www.sauder.com/services...
- Page 11 BROWN 7/16" LARGE HEAD SCREW LARGE HEAD SCREWS (EE). (4 used for the END MOLDINGS) Locator hole BLACK 9/16" LARGE HEAD SCREW (2 used for the MOLDING) Locator hole The END MOLDINGS will set in from the edge. www.sauder.com/services 411835 Page 11...
- Page 12 NOTE: Be sure the three BRACKETS are even with the å recommended.) long edges of the BRACE. The BRACKETS on the short edges will overhang the BRACE. BLACK 9/16" LARGE HEAD SCREW (5 used in this step) Page 12 411835 www.sauder.com/services...
- Page 13 Step 9 Fasten the BRACE (F) to the ENDS (A2 and B2) and å BOTTOM (D). Use fi ve BLACK 9/16" LARGE HEAD SCREWS (EE). BLACK 9/16" LARGE HEAD SCREW (5 used in this step) www.sauder.com/services 411835 Page 13...
- Page 14 BRACE (F). Use four BLACK 1-1/8" PAN HEAD SCREWS (DD). Fasten the PLINTHS (R2) to the BRACE (F). Use four BLACK å 1-1/8" PAN HEAD SCREWS (DD). The holes are closer BLACK 1-1/8" PAN HEAD SCREW to this long edge. (8 used in this step) Page 14 411835 www.sauder.com/services...
- Page 15 "square". Fasten the BACK (E) to your unit using the NAILS (II). å These holes are farther from the corner. NAIL (24 used in this step) www.sauder.com/services 411835 Page 15...
- Page 16 With the palm of your hand, tap the DRAWER BOTTOM down into the groove. D621 f a c s u r n i s h U n fi Be sure the DRAWER BOTTOM inserts into the DRAWER FRONT groove. Page 16 411835 www.sauder.com/services...
- Page 17 HEAD SCREWS (30S). Start each screw a few turns before completely tightening any of them. BLACK 1-9/16" FLAT HEAD SCREW (4 used in this step) Be sure the DRAWER BOTTOM inserts into the DRAWER BACK groove. www.sauder.com/services 411835 Page 17...
- Page 18 Fasten the KNOB (BB) to the DRAWER FRONT (H). Use a å SILVER 1/2" MACHINE SCREW (FF). Glide end SILVER 1/2" MACHINE SCREW (1 used for the KNOB) Glide end GOLD 5/16" FLAT HEAD SCREW (4 used for the DRAWER SLIDES) Page 18 411835 www.sauder.com/services...
- Page 19 NOTE: Please read the back pages of the instruction booklet for important safety information. å This completes assembly. Clean with your favorite furniture polish or a damp cloth. Wipe dry. å And to celebrate, why not share your success story? 40 lbs. 15 lbs. 40 lbs. www.sauder.com/services 411835 Page 19...
- Page 20 EXTRÉMITÉ DROITE ..........1 35AA GLISSIÈRE D'ÉLÉMENT UNIVERSELLE ..2 pour future référence. EXTRÉMITÉ GAUCHE ..........1 35AC COULISSE DROITE DE TIROIR ......1 Pour contacter Sauder en ce qui concerne cet DESSUS................1 35AD COULISSE GAUCHE DE TIROIR ......1 élément, faire référence DESSOUS ................1 FIXATION TWIST-LOCK®...
- Page 21 éviter d'endommager l'élément ou le sol. FIXATIONS TWIST-LOCK®. Pour commencer l'assemblage, enfoncer une FIXATION TWIST-LOCK® SAUDER (W) dans les gros trous des ÉTAPE 7 EXTRÉMITÉS (A2 et B2). Répéter cette étape pour le DESSOUS (D). Avec précaution, retourner l'élément sur son dessus.
- Page 22 Ceci complète l'assemblage. Pour nettoyer, utiliser l'encaustique pour meubles préférée ou un chiff on humide. Essuyer. ÉTAPE 13 Fixer l'ARRIÈRE DE TIROIR (D69) aux CÔTÉS DE TIROIR (D40 et D41). Utiliser quatre VIS TÊTE PLATE 40 mm NOIRES (30S). Page 22 411835 www.sauder.com/services...
- Page 23 35AA RIEL UNIVERSAL DE GABINETE ....2 et conserver le livret pour future référence. EXTREMO IZQUIERDO ..........1 35AC CORREDERA DERECHA DECAJÓN....1 Pour contacter Sauder PANEL SUPERIOR ............1 35AD CORREDERA IZQUIERDA DE CAJÓN ..1 en ce qui concerne cet FONDO .................1 SUJETADOR TWIST-LOCK® ......10 élément, faire référence...
- Page 24 Fije las BASES (R2) a los EXTREMOS (A2 y B2). Apriete dos Para comenzar el ensamblaje, empuje un SUJETADOR SUJETADORES TWIST-LOCK®. TWIST-LOCK® SAUDER (W) dentro de los agujeros grandes de los EXTREMOS (A2 y B2). Repita este paso para el FONDO (D). PASO 7...
- Page 25 Seque con un paño. PASO 13 Fije el DORSO DE CAJÓN (D69) a los LADOS DE CAJÓN (D40 y D41). Utilice cuatro TORNILLOS NEGROS DE CABEZA PERDIDA de 40 mm (30S). www.sauder.com/services 411835 Page 25...
- Page 26 Además, el peso y la ubicación del tubo de imagen tienden a causar la inestabilidad de televisores y son propensos a inclinarse hacia adelante. Page 26 411835 www.sauder.com/services...
- Page 27 à compter de la date d'achat la première fois et qui sont signalés à Sauder dans les limites de couverture de la contre tout défaut de matériaux ou de fabrication des composantes de mobilier Sauder.
- Page 28 Dear Valued Customer: So, how did it go? Thanks so much for choosing Sauder® furniture. I hope the Set a world record for speed? purchase and assembly process was a positive experience Feeling good about yourself? and you feel good about the furniture you just built. If you Nice.
Need help?
Do you have a question about the Palladia 411835 and is the answer not in the manual?
Questions and answers