
Related Manuals for EEG iCap HD492


Summary of Contents for EEG iCap HD492
- Page 1 HD492 iCap™ Encoder EEG Enterprises, Inc. 586 Main Street Farmingdale, New York 11735 TEL: (516) 293-7472 FAX: (516) 293-7417 Copyright © EEG Enterprises, Inc. 2021 All rights reserved.
- Page 2 [This page left intentionally blank] Copyright © 2021 EEG Enterprises, Inc. All Rights Reserved.
-
Page 3: Table Of Contents
GPIO Pinout / Wiring Detail RS-232 / RS-422 Connection Detail Encoder Specs Developer Features Encoder Command Concept Startup Settings Command Reference The revision date for this manual is June 2, 2021. Copyright © 2021 EEG Enterprises, Inc. All Rights Reserved. - Page 4 [This page left intentionally blank] Copyright © 2021 EEG Enterprises, Inc. All Rights Reserved.
-
Page 5: Introduction
✔ iCap connectivity for secure real-time captioning over a standard broadband connection without the use of dial-up phone lines or external audio couplers. ✔ Connectivity to EEG’s Cloud-hosted Automatic Captioning service, Lexi. ✔ Encoding of caption data sourced from previously encoded video sources, two RS232 serial ports, or a dial-up modem (optional) ✔... -
Page 6: Encoder Setup
To send test captions navigate to Utilities > Test Captions > Enable > On and a stream of test caption text should appear on the output of your encoder. Note that video input is required to send test captions. Copyright © 2021 EEG Enterprises, Inc. All Rights Reserved. -
Page 7: Setting Audio Levels
Selects whether the iCap™ stereo mix is being created from channels 1 & 2 or channels 3 & 4 within the selected Audio Group. Applies only when embedded audio input AND stereo audio mix are selected. Copyright © 2021 EEG Enterprises, Inc. All Rights Reserved. -
Page 8: Accessing Your Encoder's Web Interface
Setting Date & Time The Date and Time can be set by selecting Date/Time from the side menu on the web interface. Figure 1: Date/Time Settings on the Encoder Web Interface Copyright © 2021 EEG Enterprises, Inc. All Rights Reserved. -
Page 9: Updating Your Encoder
Some updates will require a power-cycle before they take effect; in this case, the encoder will power down automatically once the update is complete. Copyright © 2021 EEG Enterprises, Inc. All Rights Reserved. -
Page 10: Icap Setup And Testing
For sections that require you to access the iCap admin site – iCap Admin credentials are supplied by EEG at the time of encoder purchase/rental along with your unique access code and is accessed at https://www.eegicap.com/iCapAdmin. - Page 11 ✔ ONLY “share” your Access Code with your caption service provider in the iCap Admin site. Your access code may already be shared with them in iCap Admin if you provided the information to EEG as part of your order. This can be verified in iCap Admin.
- Page 12 ● Alternatively, you can view the “Clone” logs section which will show all binary commands sent - also indicating captions are coming through the connection. Copyright © 2021 EEG Enterprises, Inc. All Rights Reserved.
- Page 13 Logs tab. Next, select either the encoder name or access code you want to see history for. Once you’ve selected the desired encoder, an event log will appear that you can view to see all activity on your encoder. Figure 5: iCap Admin Logs Tab Copyright © 2021 EEG Enterprises, Inc. All Rights Reserved.
-
Page 14: Lexi Setup And Testing
Lexi Setup and Testing If you did not indicate interest in Lexi at the purchase of your encoder, please contact EEG technical support at 516-293-7472 to obtain the necessary iCap and Lexi / EEG Cloud credentials. Also, be sure your HD492 is properly setup on your network prior to setting up Lexi (instructions on Page 3). - Page 15 2. Configure Lexi on Your Encoder ✔ Select the Lexi module from the left hand menu of the web interface. Enter your EEG Cloud Username and Password along with your encoder’s Access Code. If this information has not been pre-configured prior to shipment, noted in the paperwork that came with your encoder, or provided to you via e-mail by EEG Support contact us at 516-293-7472 to setup your Lexi account and obtain this information.
- Page 16 Lexi to start up again. Monitor Service When selected, GPO 2 will be active when Lexi is captioning to the selected With GPO 2 access code, and will be inactive otherwise. Copyright © 2021 EEG Enterprises, Inc. All Rights Reserved.
-
Page 17: Other Live Captioning Methods
Customized settings are sticky after power cycles. Modem will automatically take priority when active so that the prompter can be overridden as desired. Figure 8: Serial Port Settings in the Web Interface Copyright © 2021 EEG Enterprises, Inc. All Rights Reserved. -
Page 18: Common Applications
GPI switch and require a diagram of the GPIO Pinout – see the GPIO pinout / wiring detail found in the Hardware Reference section of the manual Figure 9: GPI Settings Found in “Main” Section of the Encoder Web Interface Copyright © 2021 EEG Enterprises, Inc. All Rights Reserved. -
Page 19: Ccmatch™ Zero Delay Caption Syncing (Ccmatch Module)
CCMatch on the left side menu and select it. If you are prompted for a license key, the feature is not installed and can be purchased by contacting the EEG sales team. -
Page 20: Scoreboard Interface For Stadiums (Caption Text Server Module)
Text Server on the left side menu and select it. If you are prompted for a license key, the feature is not installed and can be purchased by contacting the EEG sales team. To access closed caption data from the encoder unit with the Scoreboard Interface installed, utilize a TCP/IP socket interface configured with the following settings. -
Page 21: Timed Playout Of Caption Files (Ccplay Module)
CCPlay on the left side menu and select it. If you are prompted for an access key, the feature is not installed and can be purchased by contacting the EEG sales team. To import caption files into CCPlay, go to the CCPlay tab on the encoder’s web interface. Then, click on the “Upload”... -
Page 22: Record / Store As-Run Caption Data (Ccrecord Module)
CCRecord on the left side menu and select it. If you are prompted for a license key, the feature is not installed and can be purchased by contacting the EEG sales team. The recording in and out times for CCRecord files are triggered in real time through one of four GPI switches. The switch number is configurable, to provide maximum flexibility with a variety of encoder module configurations. -
Page 23: Caption Uplink To Streaming Media Servers (Streaming Module)
Streaming on the left side menu and select it. If you are prompted for a license key, the feature is not installed and can be purchased by contacting the EEG sales team. While the HTTP Streaming Uplink module is active, all closed captions through the encoder will be passed to the streaming server. -
Page 24: Cloning Live Data To Additional Encoders (Clone Module)
Clone on the left side menu and select it. If you are prompted for a license key, the feature is not installed and can be purchased by contacting the EEG sales team. The master encoder must have the Clone port optional software installed, and then set up through the Clone section of the web interface. -
Page 25: Scte-104 Trigger Insertion (Scte-104 Module)
SCTE104 Trigger Insertion on the left side menu and select it. If you are prompted for a license key, the feature is not installed and can be purchased by contacting the EEG sales team. SCTE-104 messages can either be authored using a built-in preset editor and triggered via GPI (see Figure 13), or can be sent from an external source using the SCTE-104 network protocol over TCP/IP. -
Page 26: Comcc Backup / Redundancy (Comcc Module)
ComCC on the left side menu and select it. If you are prompted for a license key, the feature is not installed and can be purchased by contacting the EEG sales team. Figure 17: ComCC Settings on the Web Interface Copyright ©... -
Page 27: Afd Insertion (Afd Module)
AFD on the left side menu and select it. If you are prompted for a license key, the feature is not installed and can be purchased by contacting the EEG sales team. This feature is ideal for complex broadcast environments requiring continuous AFD data on programming, commercials and interstitials, and more. -
Page 28: Xds Insertion (Xds Module)
CTA-708 compliant HD broadcasts. XDS insertion is typically controlled through a serial connection to an automation server and is compatible with Imagine/Harris, Snell, and EEG’s XDS Xpress solution. XDS data packets can be loaded into the Encoder’s queue with one simple command, and be held for any specified time period. -
Page 29: Additional Features
If you see “Failed: Insert USB Disk”, wait a few seconds and try again. For questions about analyzing your VANC data. Please contact our support team at 516-293-7472 or support@eegent.com Copyright © 2021 EEG Enterprises, Inc. All Rights Reserved. -
Page 30: Vanc Readahead
Black 1080i Video Generation on/off by navigating to Utilities > Generate 1080i from the front panel LCD. When the feature is active a “Gen: 1080i60” indicator will display on the front panel LCD home screen. Copyright © 2021 EEG Enterprises, Inc. All Rights Reserved. -
Page 31: Hardware Reference
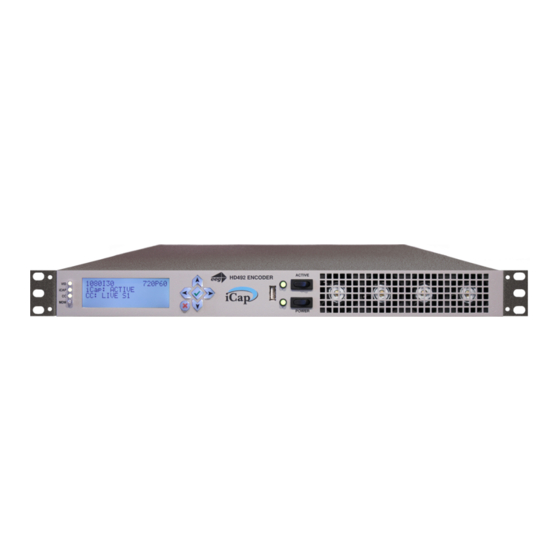
The LCD Screen provides access to the unit’s front panel configuration menu. Status information is displayed when the menu is not in use. Press the “check mark” button to enter the menu at any time. Copyright © 2021 EEG Enterprises, Inc. All Rights Reserved. -
Page 32: Rear Panel
Applications section for more complicated bridging options. Modem Standard RJ-11 port. Connect to a phone line to enable dial-up captioning. Modem A is installed in the unit; Modem B is an add-on option. Copyright © 2021 EEG Enterprises, Inc. All Rights Reserved. - Page 33 If using AES digital audio, an AES pair of PCM encoded audio at 48kHz should be used. iCap uses the audio input to send encrypted IP transmission to your caption service provider. Copyright © 2021 EEG Enterprises, Inc. All Rights Reserved.
-
Page 34: Gpio Pinout / Wiring Detail
1,3,5,7,9,11,13,15 Ground ✔ GPO Pin Assignments The GPOs use the lower 16-pin connector. Pins Output 1, 2 3, 4 5, 6 7, 8 9, 10 11, 12 13, 14 15, 16 Copyright © 2021 EEG Enterprises, Inc. All Rights Reserved. - Page 35 GPO-4 to close when your encoder is receiving real-time caption data for CC1/S1 through iCap™, and open when the iCap connection is idle. Other GPOs: No functionality currently defined Copyright © 2021 EEG Enterprises, Inc. All Rights Reserved.
-
Page 36: Rs-232 / Rs-422 Connection Detail
Both Serial ports 1 and 2 use DB-9 connectors. Only serial port 1 supports RS-422 and RS-422 Sony. See the following pin assignments: RS-232 Protocol Master HD492 Ground Ground RS-422 Master HD492 Ground Ground RS-422 Sony Master HD492 Ground Ground Copyright © 2021 EEG Enterprises, Inc. All Rights Reserved. - Page 37 “null modem” cable MAY NOT be used for this purpose since it will reverse the connections of pins 2 and 3. Null Modem cable may be used only when the intent is to connect two encoders together via the serial port (see Cloning on page 17). Copyright © 2021 EEG Enterprises, Inc. All Rights Reserved.
-
Page 38: Encoder Specs
19” rack mount x 1 RU x 16.5” deep ELECTRICAL Power Supply 115/230V AC 50/60Hz Power Consumption In-rush: 370mA, 39 W, 43 VA, 0.37 PF Normal: 250mA, 28 W, 31 VA, 0.91 PF Copyright © 2021 EEG Enterprises, Inc. All Rights Reserved. -
Page 39: Developer Features
RS-232: Commands may be entered through an RS-232 connection to your encoder. Default settings on the encoder allow entry through RS-232 right out of the box. Figure 9: Command Terminal on the Encoder Web Interface Copyright © 2021 EEG Enterprises, Inc. All Rights Reserved. -
Page 40: Startup Settings
When you have entered commands for all the settings that you want to make sticky, click Update Startup Settings. The configuration changes will take the next time the encoder starts up. Figure 10: Startup Settings on the Encoder Web Interface Copyright © 2021 EEG Enterprises, Inc. All Rights Reserved. -
Page 41: Command Reference
<CTRL+A>P 105 00.30.00 4844 <ENTER> XDS Packet: Load Default XDS Packet <CTRL+A>P LPacket Duration Content [Holdoff] <ENTER> Sample XDS entries <CTRL+A>P L105 –1 4840 <ENTER> Load NVM XDS packet <CTRL+A>w <CTRL+A>P Packet -1 Content <ENTER> Copyright © 2021 EEG Enterprises, Inc. All Rights Reserved. - Page 42 <CTRL+A>O <ENTER> Modem Status <CTRL+A>+ [Modem] <ENTER> Recovery Status <CTRL+A>A <ENTER> SD Video Presence <CTRL+A>b <ENTER> Report Switch Setting <CTRL+A>S <ENTER> Monitor Line 21 <CTRL+A>5 [Channel] [I/O] <ENTER> End Monitoring <CTRL+C> Copyright © 2021 EEG Enterprises, Inc. All Rights Reserved.
Need help?
Do you have a question about the iCap HD492 and is the answer not in the manual?
Questions and answers