
Related Manuals for Sharp DV-RW270S


Summary of Contents for Sharp DV-RW270S
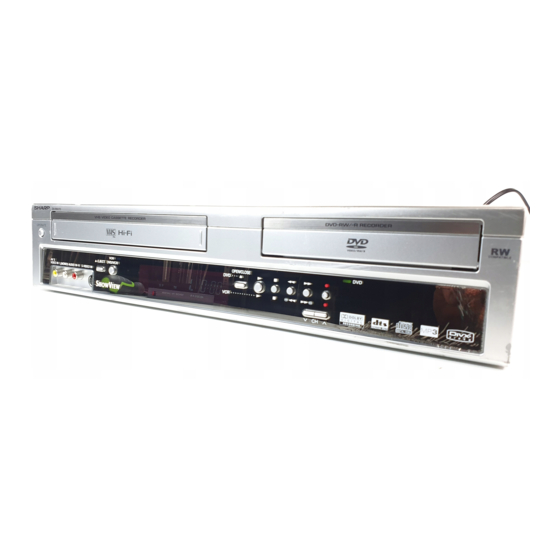
- Page 1 VIDEO-/DVD-RECORDER- KOMBIGER€T VCR/DVD RECORDER COMBINATION DV-RW270S BEDIENUNGSANLEITUNG OPERATION MANUAL DIGITAL VIDEO...
-
Page 3: Safety Information
OPERATION MANUAL ENGLISH SAFETY INFORMATION Power Cord Protection Note: To avoid any malfunctions of the VCR/DVD, and to This VCR/DVD can be used only where the power protect against electric shock, fire or personal injury, supply is AC 230V, 50Hz. It cannot be used please observe the following. -
Page 4: Table Of Contents
Contents AV3 INPUT ............24 Before using your unit Setting the audio ............. 25 DRC ..............25 SAFETY INFORMATION .......... 1 VIRTUAL SURROUND (Spatializer N-2-2 ) ..25 Precautions ............... 4 EXTERNAL AUDIO INPUT ........25 Accessories ............... 5 NICAM ..............25 Features .............. - Page 5 Contents Tape playback Dubbing Loading and unloading a cassette tape ....45 Dubbing a tape onto a disc ........77 Cassette tape playback ........... 46 Dubbing a disc onto a tape ........78 Special playback ............. 47 Dubbing using other equipment ......79 Picture search ............
-
Page 6: Precautions
Precautions Precautions Important Warning Please read this page carefully before attempting to operate your VCR/DVD. Follow Instructions – All operating and maintenance Damage Requiring Service – Disconnect this prod- instructions should be followed and warnings adhered uct from the wall socket and all power sources includ- ing batteries, and refer servicing to qualified service personnel under the following conditions: Cleaning –... -
Page 7: Accessories
Precautions Copyright * Audio-visual material may consist of copyrighted works which must not be recorded without the authority of the owner of the copyright. Please refer to relevant laws in your country. * This product incorporates copyright protection technology that is protected by method claims of certain U.S. patents and other intellectual property rights owned by Macrovision Corporation and other rights owners. -
Page 8: Features
Features Not only can you playback and record video tapes, but One-touch Timer Recording (OTR) you can also playback DVD discs or make recordings using DVD-RW/DVD-R discs with this unit. In addition, you can edit the programs you have recorded. The One-touch Timer Recording feature provides a simple and convenient way to make a timed recording. -
Page 9: Disc
Disc Handling discs Region management information This unit is designed and manufactured to support the Removing the Disc from its case region management information that is recorded on a DVD disc. If the region number written on the DVD disc Ensure you hold the disc by its edges not to touch the does not correspond to the region number of this unit, surface of the disc. -
Page 10: Discs On Which Video Can Be Recorded
Disc Discs on which video can be re- VR mode • This mode is only available for DVD-RW discs. corded • In this mode, the discs can be recorded and edited To record video on this unit, use the disc types listed repeatedly. -
Page 11: Disc Playback In Other Players
Disc When recording in VR mode One-time recording is set to 1 title (1 chapter). However, if you stop recording temporarily or erase scenes by editing, the chapter will automatically be partitioned. The interval between chapters can be specified. (See page 26.) When recording in Video mode One-time recording is set to 1 title. -
Page 12: Parts And Functions
Parts and functions Front FF (Fast Forward) button Disc tray REC/OTR button VCR indicator Cassette Loading Slot PLAY button DVD indicator Display window CHANNEL buttons OPERATE button REW (Rewind) button DVD/VCR button STOP button AUDIO (L/R)/VIDEO EJECT button IN (AV3) jacks OPEN/CLOSE button DVD S-VIDEO IN (AV3) jack Rear... -
Page 13: Display Window
Parts and functions Display window " Display Description Lights during video tape playback. Video tape is temporarily stopped. Lights during video tape recording. Progressive scanning mode. Timer recording display. XP/SP/LP/SLP 4 DVD recording modes. XP, SP, LP or SLP can be selected in turn by pressing the REC MODE/SPEED repeatedly. SP/LP 2 VCR recording modes. -
Page 14: Remote Control
Remote control Page OPERATE Turns power on/off. 17,18 EJECT Ejects the cassette tapes. OPEN/CLOSE Opens or Closes the tray. DVD/VCR Switches to operation between VCR and DVD. 29, 46, 77, 78 Direct channel selection of TV. 51, 53 Setting input. 19, 33, 75 Entering a password. - Page 15 Remote control How to install the batteries Use micro batteries type R-03 (“AAA” size, UM/SUM-4, HP-16 or similar). These batteries are offered as carbon / zinc-type or as alkaline-type. You may use both, but do not mix types. The alkaline type lasts longer compared to the carbon / zinc type but is more expensive. Note: Flat, weak batteries will leak.
-
Page 16: Basic Connections
Basic connections Connect your VCR/DVD to your main antenna and TV set as shown in the illustration. When you have finished making these connections, connect your VCR/DVD to the mains power supply (230V / 50Hz). Antenna Antenna-Input To Scart socket DECODER/EXTERNAL Scart Socket (AV2) TV Scart socket (AV1) VCR/DVD... -
Page 17: Playback Connection
Playback connection Connecting to a Satellite Receiver If a Satellite Receiver is used, we recommend using the following configuration: Satellite Antenna VCR/DVD Satellite Receiver SCART-cable (supplied) SCART-cable (not supplied) To record from a Satellite Receiver, press INPUT SELECT on the remote control of the VCR/DVD. “A1”... - Page 18 Playback connection Connecting to a Stereo Amplifier with Audio Output If your VCR/DVD is connected to a stereo amplifier, the video soundtrack can output through the loudspeakers of a stereo system. SCART-cable (supplied) To SCART input VCR/DVD Stereo Amplifier TV Scart socket (AV1) Audio (L) Output To Audio (L) Input Audio (R) Output...
-
Page 19: Automatic Tv Tuning And Clock Setting
Automatic TV tuning and clock setting Plug your unit into the mains supply. The unit will start to automatically tune in and set the correct time and date. When auto tuning is complete, you must switch the TV to it's AV channel. AUTOMATIC SETUP IS ONLY AVAILABLE WHEN YOU PLUG THE UNIT IN FOR THE FIRST TIME. -
Page 20: Setup Menu
SETUP MENU The SETUP MENU consists of several menus where Press to select the required submenu and you can make various settings concerning lan- press ENTER. guage, audio functions, and images control. In The screen for the selected submenu will appear. addition, this menu includes settings for clock, channel and other items that can be set. -
Page 21: Setting The Language
Setting the language You can choose the language of the menu screen, Selectable languages: DVD menu, DVD audio and subtitles. ENGLISH, FRANCAIS, ESPANOL, DEUTSCH, ITALIANO Preparation: The language you have selected will play if it is re- • Turn ON the TV and switch the TV to it’s AV channel corded on the disc. -
Page 22: Setting The Parental Control
Setting the parental control Some discs are specified as not suitable for chil- NOTES: dren. This unit can prevent playback of such discs. • The selected level will apply to operations executed after this procedure. Preparation: • The unit cannot restrict playback of some discs. •... -
Page 23: Setting The Clock
Setting the clock / Setting the disc Your VCR/DVD is fitted with a 24 hour clock. You can format, protect, or finalise a disc. You must set the date and time for timer record- ings. Preparation: • Turn ON the TV and switch the TV to it’s AV channel Preparation: (this may be labelled EXT / AUX etc.) •... -
Page 24: New Disc Format
Setting the disc NEW DISC FORMAT NOTES: • During finalisation the cursor will move repeatedly. If you insert a blank DVD-RW, the disc is automatically When finalisation is complete, “FINALISING COM- formatted. PLETED PRESS ENTER” will appear on screen. If you use a DVD-RW (Ver.1.1, Ver.1.1 CPRM support or Press ENTER, to finish the finalising process. -
Page 25: Other (System Setup)
Other (SYSTEM SETUP) / Setting the screen You can turn the display window and screen dis- This section describes settings about the screen. play “ON” or “OFF”. Preparation: Preparation: • Turn ON the TV and switch the TV to it’s AV channel •... -
Page 26: Still Mode
Setting the screen STILL MODE DVD OUTPUT You can select the type of DVD still picture image You can select the output signal of DVD playback pic- displayed on the TV screen. ture to the TV screen. Select DVD OUTPUT and select Select “STILL MODE”... -
Page 27: Setting The Audio
Setting the audio / Setting the recording This section describes audio settings. NICAM This unit is capable of NICAM stereo. You can select Preparation: the NICAM mode as follows (see page 61 for NICAM • Turn ON the TV and switch the TV to it’s AV channel recording and playback). -
Page 28: Auto Chapter
Setting the recording / Setting the other AUTO CHAPTER You can set the switching interval between played back images in the slide show mode. And, you can You can automatically make chapter marks on the DVD ® display the registration code of DivX VOD. -
Page 29: Setting The Channel
Setting the channel This VCR/DVD has a built-in tuner to receive TV Select “CH” and press ENTER. Then select the broadcast transmissions. Before you record a TV- skipping channel position number (29) by pressing Broadcast, you must set and preset all available CH M M M M M / ? ? ? ? ? and press ENTER. -
Page 30: Replace Tv Station Positions
Setting a channel Replace TV station positions Select “TUNING” (tuning scale) and press ENTER. You can replace the channel positions as you like. Example: Replace the TV station No. 6 with position No. 2. SKIP Select “CH TUNING” and press ENTER. DECODER MOVE TUNING... -
Page 31: Playback Procedure
Playback procedure Preparation: • Turn ON the TV and switch the TV to it’s AV channel (this may be labelled EXT / AUX etc.) • Press DVD/VCR to select DVD mode. (The DVD indicator will light.) Press OPEN/CLOSE. The disc tray will open. Place a disc onto the tray. -
Page 32: Playback By Selecting A Title
Playback by selecting a title Preparation: • Turn ON the TV and switch the TV to it’s AV channel (this may be When playing back a recorded labelled EXT / AUX etc.) disc, you can display the title • Load a recorded DVD. menu and select the title to be •... -
Page 33: Checking Media Information
Checking media information Preparation: • Turn ON the TV and switch the TV to it’s AV channel (this may be Various information on the loaded labelled EXT / AUX etc.) disc can be displayed on the TV • Load the disc. screen. -
Page 34: Special Playback
Special playback Fast forward playback Press SEARCH during normal playback. NOTE: There may be a slight de- Each press of SEARCH will increase the speed of the search lay between pressing the button (x1.5), (x12), (x24), (x60). and the function activation. The speed of the search has only 2 steps (x6, x16) on a CD. -
Page 35: Commercial Skip
Commercial skip / Locating a specific scene Commercial skip Use this function to skip commercials while you playback. Press CM SKIP during playback. The time jumps to a point approx. 30 seconds later and playback re- sumes. NOTE: With some DVD-Video, the Commercial skip operation may not work. Locating a specific scene Specify the time recorded on the disc, chapter or title to playback. -
Page 36: Repeat Playback
Repeat playback One touch repeat This feature can be used to repeat the last 10 seconds of viewed material on a DVD disc - then normal playback will continue. Press ONE TOUCH REPEAT during playback. The playback returns to a point 10 seconds earlier, then resumes play- ing. -
Page 37: Title Selection
Title selection / DVD menu Title selection Two or more titles are recorded on some discs. If the title menu is recorded on the disc, you can select the desired title. Press TITLE MENU/TOP MENU. The title menu appears on the screen. •... -
Page 38: Changing Angles
Changing angles / Zooming / Subtitles Changing angles When playing back a disc recorded with multi-angle facility, you can change the angle that you are viewing the scene from. Press ANGLE/COUNTER RESET during playback. The current angle will appear. ANGLE 1/3 Press ANGLE/COUNTER RESET repeatedly until the desired angle is selected. -
Page 39: Changing Soundtrack Language
Changing soundtrack language / Karaoke playback Changing soundtrack language You can select the language when you play a multilingual disc. Press AUDIO/AUDIO SELECT during playback. The current soundtrack language will appear. AUDIO 1/8 ENG Dolby Digital Press AUDIO/AUDIO SELECT repeatedly until the desired lan- guage is selected. -
Page 40: Various Operations On Cd
Various operations on CD Preparation: • Turn ON the TV and switch the TV to it’s AV channel (this may be This section describes the TRACK labelled EXT / AUX etc.) INFO screen where music CDs can • Load the music CD. be played back using the various •... - Page 41 Various operations on CD Random playback Press to select “RANDOM PLAY” from the menu list and press ENTER. The order of music tracks is randomly changed. Press PLAY. Music is played back in random order. To cancel random playback, select “RANDOM PLAY” from the menu list again, and press ENTER.
-
Page 42: Mp3/Wma/Jpeg/Divx
® MP3/WMA/JPEG/DivX playback Preparation: • Turn ON the TV and switch the TV to it’s AV channel (this may be MP3/WMA files can be played labelled EXT / AUX etc.) back. Also, you can display JPEG/ ® • Load the disc storing MP3, WMA, JPEG or DivX ®... - Page 43 ® MP3/WMA/JPEG/DivX playback Playing back MP3/WMA files Press to select a MP3/WMA file. • If the disc includes more than 10 files, you can move to the next or previous page. (See page 38.) BROWSER w01.wma w02.wma w03.wma w04.mp3 w05.wma w06.wma w07.mp3 w08.wma...
- Page 44 ® MP3/WMA/JPEG/DivX playback Playing back JPEG files Press to select a JPEG file. • If the disc includes more than 10 files, you can move to the next or previous page. (See page 38.) BROWSER /popArt Alfred Ia Guigne.jpg Alone.jpg Ambassadeurs-Aristide_Bruant.jp Arlstide Bruant.jpg At_the_Moulin_Rouge.jpg...
- Page 45 ® MP3/WMA/JPEG/DivX playback ® Playing back DivX video files ® Press to select DivX file. • If the disc includes more than 10 files, you can move to the next or previous page. (See page 38.) BROWSER Video01.divx Video02.divx Video03.divx Video04.divx Video05.divx Video06.divx...
-
Page 46: Progressive Scan
Progressive scan Preparation: • Connect to a TV equipped with component jacks which support the progressive video input. The unit supports the progressive • Turn ON the TV and switch the TV to it's component input channel. scanning system as well as the con- •... -
Page 47: Loading And Unloading A Cassette Tape
Loading and unloading a cassette tape Use only video cassette tapes marked Loading Insert the cassette tape with its labeled side facing up and the erase prevention tab positioned at your left. An Push the center of the tape until it is automatically in- inverted cassette tape cannot be inserted. -
Page 48: Cassette Tape Playback
Cassette tape playback Preparation: • Turn ON the TV and switch the TV to it’s AV channel (this may be labelled EXT / AUX etc.) • Press DVD/VCR to select VCR mode. (The VCR indicator will light.) Load a prerecorded tape (When loading a cassette tape without the erase prevention tab, playback will start automatically). -
Page 49: Special Playback
Special playback Repeat playback When the tape reaches the end of playback, the tape Picture search will automatically rewind to the beginning and playback Reverse picture search function will resume. Press REW x 1 or x 2 during the playback. Press PLAY MODE/REPEAT. -
Page 50: Zero Return Function
ZERO RETURN function / Video index search system Press DISPLAY. The counter display shows the tape run- 8 : 47 MON ZERO RETURN function ning time during playback or recording. This function makes tape rewinding (or forwarding) stop at 00 : 04 : 38 SP the counter “00:00:00”... -
Page 51: Recording
Read this before recording onto a disc Types of disc This section explains important infor- You can use DVD-RW and DVD-R discs to record video. mation on recording to a disc. Read the information carefully before re- DVD-RW discs cording. •... -
Page 52: Disc Remaining Time
Read this before recording onto a disc Disc remaining time NOTES: • Fast motion scenes may appear as VR mode a matrix of larger blocks because of characteristics on the digital • Recording is possible as long as there is available space on the video compression. -
Page 53: Recording A Tv Program
Recording a TV program Preparation: • Turn ON the TV and switch the TV to it’s AV channel (this may be You can record programs you watch labelled EXT / AUX etc.) on TV onto video tapes or DVDs. • Load a recordable DVD or video tape into the unit. •... - Page 54 Recording a TV program To stop recording Press STOP to stop recording. NOTE: When STOP is pressed during recording, recording does not stop immediately and may continue for as long as 1 minute maximum. While this process, “PROCESSING PLEASE WAIT” will appear on the screen. To temporarily stop recording Press PAUSE/STILL to avoid recording unwanted material.
-
Page 55: One-Touch Timer Recording (Otr)
One-touch Timer Recording (OTR) Preparation: • Turn ON the TV and switch the TV to it’s AV channel (this may be The One-touch Timer Recording labelled EXT / AUX etc.) feature provides a simple and con- • Load a recordable DVD or video tape into the unit. venient way to make a timed re- •... -
Page 56: Show View ® Programming System
® programming system Preparation: • Turn ON the TV and select it’s AV channel (this may be labelled system is a timer EXT / AUX etc.) programming system which • Load a recordable DVD or video tape into the unit. simplifies timer recording •... - Page 57 ® programming system Press to highlight TUNER CH NO., then enter the corre- sponding tuner channel number. • Select a tuner channel number in the same way as you selected the guide channel number. • You can also select one of the external inputs (AV1, AV2 or AV3) instead of a channel number if some channels are received via an external receiver.
- Page 58 ® programming system Press to select “TYPE”. Here you can set whether you want to record the program ONCE, DAILY or WEEKLY. If you want to change it, press ENTER then use the buttons to select, then press ENTER again. ShowView ShowView# 1 2 3 4 5 6 7 8 9...
- Page 59 ® programming system Select “OK” and press ENTER. The TIMER REC SET screen appears and you should see the new timer recording in the list. SETUP MENU TIMER REC SET VPS/ DATE START MODE 27/09(SAT) 01:35 02:35 MON-SAT 15:00 16:00 17:00 18:00 28/09(SUN)
-
Page 60: Timer Recording
Timer recording Setting timer recording The timer recording system allows Preparation: you to select the date, time and • Turn ON the TV and switch the TV to it’s AV channel (this may be channel and record the wanted pro- labelled EXT / AUX etc.) grams. - Page 61 Timer recording Press to select “TYPE” and press ENTER. Press to select “ONCE” from the list and press ENTER. SETUP MENU TIMER REC SET VPS/ TYPE ONCE START MODE ONCE DATE (DD/MM) 11,08,03(--) EVERY SUN START 02:17 EVERY MON EVERY TUE 03:17 EVERY WED EVERY THU...
- Page 62 Timer recording SETUP MENU TIMER REC SET VPS/ TYPE ONCE MODE DATE (DD/MM) 20/11(THU) START 20:00 23:00 REC TO REC MODE VPS/PDC SELECT ENTER ENTER RETURN BACK SETUP Select “OK” and press ENTER. The timer program is set and the TIMER REC SET screen appears again. When you enter the other program for the timer recording, re- peat the steps 3 to 12.
-
Page 63: Stereo Recording And Playback
Stereo recording and playback German A2 stereo sound reception: This VCR/DVD is capable of recording Stereo program indication sound from a Hi-Fi system. The It will be displayed for approx. 4 recording will be performed seconds when stereo programs STEREO automatically. -
Page 64: Editing The Disc
Editing the disc This section explains how to edit Title menu the recorded contents on DVD- When the content is recorded, a title name that includes the date, time, RWs. However, the items that you channel number and other information is created automatically. can edit vary with the recording The title menu can be used when you playback after confirming the formats. -
Page 65: Editing A Playlist
Editing a playlist Preparation: • Turn ON the TV and switch the TV to it’s AV channel (this may be You can create and edit the playlist labelled EXT / AUX etc.) based on the original title. • Load the recorded DVD-RW (VR). •... -
Page 66: Changing A Title Name
Editing a playlist Changing a title name Press TITLE MENU/TOP MENU to display the title menu. Select the playlist where you want to change the title name. • Press to select the playlist. • Press to display the editing menu of the playlist. •... -
Page 67: Erasing A Scene (Edit Title)
Editing a playlist Erasing a scene (Edit title) You can erase an unnecessary scene from the created playlist. When you want to erase the scene from the playlist, the scene is not erased from the original title. Press TITLE MENU/TOP MENU to display the title menu. Select the playlist where a scene you want to erase is included. - Page 68 Editing a playlist Press to select “SET START” at the start point of the scene that you want to erase and press ENTER. (To set the start point, search the start point whilst “SET START” is selected). A still image of the start point appears in the bottom left screen. EDIT TITLE NAME Family...
-
Page 69: Combining The Title
Editing a playlist Combining the title You can create a playlist by combining several original titles or playlists. To combine titles, it is necessary to create a playlist first. By combining the titles in the playlist, a playlist where several titles are combined is created. -
Page 70: Erasing A Playlist
Editing a playlist Erasing a playlist You can erase the created playlist. If you erase the playlist, the original title will not be erased. Press TITLE MENU/TOP MENU to display the title menu. Select the playlist that you want to erase. •... -
Page 71: Editing An Original Title
Editing an original title Preparation: • Turn ON the TV and switch the TV to it’s AV channel (this may be In VR mode, you can edit various labelled EXT / AUX etc.) items, whereas in Video mode, • Load the recorded disc. you can only edit the title names. -
Page 72: Combining Chapters
Editing an original title When you have selected the scene you want to add a chapter mark, press ENTER. The playback is paused and the position of the added chapter mark appears green. ADD CHAPTER MARK NAME 23/11/2005 08:41 CHAPTER LENGTH 00:03:08/00:30:17 The added chapter mark If you want to continue to add chapter mark, repeat step 5. -
Page 73: Changing An Original Title Name
Editing an original title COMBINE CHAPTERS NAME 23/11/2005 08:41 CHAPTER LENGTH 00:02:03/00:30:17 SELECT TITLE ENTER ENTER RETURN BACK MENU Press SKIP to select the chapter marks to be erased. Press ENTER. The chapter marks are erased and 2 chapters are combined into 1 chapter. -
Page 74: Erasing A Scene (Edit Title)
Editing an original title Erasing a scene (Edit title) You can erase an unnecessary scene from the original title. You can erace the scene after checking the title. You cannot restore the erased scene. When you erase a scene, you can increase the disc space. Press TITLE MENU/TOP MENU to display the title menu. -
Page 75: Erasing An Original Title
Editing an original title Erasing an original title You can erase the original title. Erase the original title after checking its title. The erased title cannot be restored. When you erase the titles, you can increase the disc space. Press TITLE MENU/TOP MENU to display the title menu. Select the original title you want to erase. -
Page 76: Changing A Disc Name
Changing a disc name Preparation: • Turn ON the TV and switch the TV to it’s AV channel (this may be You can change a disc name from labelled EXT / AUX etc.) the title menu. • Load the recorded DVD disc. •... -
Page 77: Using The Keyboard Screen
Changing a disc name Character input 2 Example: Explained here is the procedure when you Using the keyboard screen input “F” and “J”. This section explains the function of the keyboard Press the numeric keys continuously and select screen and how to input characters. The disc name and the character to be input. - Page 78 Changing a disc name Erasing a character Press to select the type of letters in the list below and press ENTER. You can erase the input character. Erasing method 1 Auto caps: Determines uppercase and lower- case automatically. Press to select “Back”. Upper: Inputs all with uppercase letters.
-
Page 79: Dubbing A Tape Onto A Disc
Dubbing a tape onto a disc Preparation: • Turn ON the TV and switch the TV to it’s AV channel (this may be You can record video or audio on labelled EXT / AUX etc.) a video tape onto a disc. •... -
Page 80: Dubbing A Disc Onto A Tape
Dubbing a disc onto a tape Preparation: • Turn ON the TV and switch the TV to it’s AV channel (this may be You can record both video and labelled EXT / AUX etc.) audio from a disc to a video tape. •... -
Page 81: Dubbing Using Other Equipment
Dubbing using other equipment When a video is recorded using this unit Preparation: You can connect another VCR or • Turn ON the TV and switch the TV to it’s AV channel (this may be camcorder for dubbing. Typical connection: When using this labelled EXT / AUX etc.) unit as a recording device. - Page 82 Dubbing using other equipment Playback unit connection. The playback unit can be a camcorder or a video recorder. Check each unit’s operation manual for playback operation. A copy protected video or DVD disc cannot be copied. Dubbing using an A/V-cable (or S-Video cable) (not supplied) To playback unit Press INPUT SELECT on the remote con- trol repeatedly until A3 appears on the front...
-
Page 83: Glossary
Glossary A-B Repeat Playback DVD menu Playback that repeats between two set points, A and Menu recorded on a DVD-Video that enables the user to select subtitles language, soundtrack language, etc. angle Recorded onto some DVD discs are scenes which finalise have been simultaneously shot from a number of dif- Operation that enables discs recorded or edited with... - Page 84 Glossary VR mode Linear PCM is a signal recording format used for This recording format is the basic DVD-RW record- music CDs. ing format, and lets you enjoy the various editing func- The sound on music CDs is recorded at 44.1kHz with tions available with this unit.
-
Page 85: Language Code List
Language code list Enter the appropriate code number for the initial settings “DVD MENU”, “AUDIO” and/or “SUBTITLE” (see page 19). Language Code Language Code Language Code Language Code Abkhazian 1530 Latin Sindhi 1112 Estonian 2211 2914 Singhalese 1111 Afar 1531 Basque 2232 Latvian, Lettish... -
Page 86: Problems And Troubleshooting
Problems and troubleshooting SYMPTOMS POSSIBLE SOLUTIONS PAGE VCR/DVD • Make sure the power cord is plugged in. – • Try another AC outlet. – VCR/DVD does not operate. • Power is off, check fuse or circuit breaker. – • Unplug unit, then plug it back in. –... -
Page 87: Video Head Cleaning
Problems and troubleshooting / Video head cleaning SYMPTOMS POSSIBLE SOLUTIONS PAGE • The erase prevention tab of the video cassette is broken off. TV recording does not work. 45, 51 • The unit is in the external input mode. • The time is not set correctly. Timer recording does not work. -
Page 88: Error/Warning Message List
Error/Warning message list ERROR/WARNING MESSAGE CAUSE POSSIBLE SOLUTIONS PAGE Power ON The power was shut down without completing the termination process due to a power failure or dis- SYSTEM ERROR Wait until the message disappears. connection of the AC cord plug. (Abnormal termi- PLEASE WAIT nation) SYSTEM ERROR... -
Page 89: Specifications
Specifications GENERAL Power supply: AC 230V 50Hz Power consumption: Operation: 31W Standby: 5.5W (if display window is off.) Weight: 5 kg Dimensions: Width : 430 mm Height : 89.5 mm Depth : 309 mm Operating temperature: 5°C to 35°C Operating humidity: Less than 80% RH Input Level: SCART-socket: Video : 1 Vp-p, 75 ohms... - Page 90 If the product is used for business purposes and you want to discard it: Please contact your SHARP dealer who will inform you about the take-back of the product. You might be charged for the costs arising from take-back and recycling.
- Page 91 SHARP CORPORATION Gedruckt in Malaysia Printed in Malaysia J2H30121A SH 05/05...
- Page 92 This file has been downloaded from: www.UsersManualGuide.com User Manual and User Guide for many equipments like mobile phones, photo cameras, monther board, monitors, software, tv, dvd, and othes.. Manual users, user manuals, user guide manual, owners manual, instruction manual, manual owner, manual owner's, manual guide, manual operation, operating manual, user's manual, operating instructions, manual operators, manual operator, manual product, documentation manual, user maintenance, brochure, user reference, pdf manual Downloaded from:...
Need help?
Do you have a question about the DV-RW270S and is the answer not in the manual?
Questions and answers