Advertisement
English
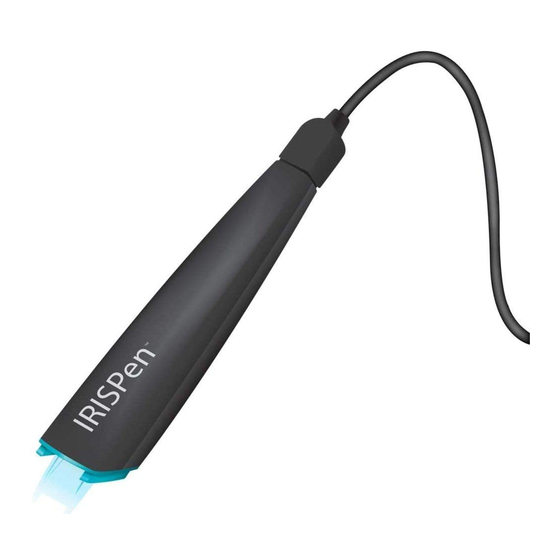
This Quick User Guide helps you get started with the IRISPen™ Express 7.
The descriptions in this guide are based on the Windows® 7 Operating System. All information is subject to
change without prior notice.
For more information about the IRISPen™ features, refer to the application's Help file, or to
www.irislink.com/support/userguides.
1. Introduction
IRISPen™ Express 7 is a handy pen scanner that allows you to scan lines of text into any word processing or text
editing applications. With IRISPen™ Express 7 you can also scan lines as images, to scan mathematical formulas
for instance.
Note that with IRISPen™ Express 7 you scan one line at a time. IRISPen™ Express 7 supports 33 languages.
2. Installation and Activation
2.1 Installation
Important: make sure you have the required administration rights on your computer to do the installation.
1. Insert the IRISPen™ disc in the CD‐ROM drive of the computer.
The setup menu is displayed automatically. (If the menu does
not start run setup.exe from the disc.)
2. Click Install. Then follow the on‐screen instructions.
3. Click Finish to complete the installation.
2.2 Activation
When the installation is completed, you are prompted to activate the application.
1. Click Next in the screen that appears.
2. Enter the serial number, and click Activate.
Note: you need an internet connection to do the activation.
Note: you find the serial number on the back of the CD‐ROM sleeve.
3. Click Finish to close the Activation Wizard.
English
Advertisement
Table of Contents

Related Manuals for IRIS IRISPen Express 7


Summary of Contents for IRIS IRISPen Express 7
- Page 1 English English This Quick User Guide helps you get started with the IRISPen™ Express 7. The descriptions in this guide are based on the Windows® 7 Operating System. All information is subject to change without prior notice. For more information about the IRISPen™ features, refer to the application's Help file, or to www.irislink.com/support/userguides. 1. Introduction IRISPen™ Express 7 is a handy pen scanner that allows you to scan lines of text into any word processing or text editing applications. With IRISPen™ Express 7 you can also scan lines as images, to scan mathematical formulas for instance. Note that with IRISPen™ Express 7 you scan one line at a time. IRISPen™ Express 7 supports 33 languages. 2. Installation and Activation 2.1 Installation Important: make sure you have the required administration rights on your computer to do the installation. 1. Insert the IRISPen™ disc in the CD‐ROM drive of the computer. The setup menu is displayed automatically. (If the menu does not start run setup.exe from the disc.) 2. Click Install. Then follow the on‐screen instructions. 3. Click Finish to complete the installation. 2.2 Activation When the installation is completed, you are prompted to activate the application. 1. Click Next in the screen that appears. 2. Enter the serial number, and click Activate. Note: you need an internet connection to do the activation. Note: you find the serial number on the back of the CD‐ROM sleeve. 3. Click Finish to close the Activation Wizard. ...
- Page 2 English English 3. Getting Started with the IRISPen™ Step 1: Connect the IRISPen™ Plug in the IRISPen™ in a free USB port (USB 2.0 or higher). If the driver is installed successfully, a balloon message appears in the System Tray. Step 2: Start the application Double‐click the IRISPen™ 7 shortcut on the Desktop. When you start IRISPen™ 7 for the first time, a Welcome screen appears to help you on your way. Step 3: Watch the Tutorial In the Welcome screen, click Next to start the Tutorial. The Tutorial shows you how to scan. Step 4: Select the Scan Direction When you have watched the Tutorial, click Next to choose the Scan Direction. The direction in which you scan depends on whether you are right‐handed or left‐handed. Therefore, you need to select the scanning hand. To change the scanning hand later on in the IRISPen™ ribbon: 1. Click the settings icon in the bottom right corner. 2. Click the Personalizing tab. 3. Select the scanning hand. ‐ Select Right hand to scan lines from left to right. ‐ Select Left hand to scan lines from right to left. Step 5: Practice your Scanning Click Next to display the Practice screen. Here you can practice your scanning and see what the results look like. 1. In the ribbon, select the language of your documents. 2. Click and slide the IRISPen™ over a line of text and check the results. Tip: in this screen you can watch the Tutorial again, and also a Demo. When you are done practicing you can do some actual scanning.
- Page 3 English English 4. Scanning Text into Applications 1. In the IRISPen™ ribbon, click the tab Scan to Doc / App. Important: • Make sure the IRISPen™ is plugged in in a USB port. If it is not plugged in, a small cross is displayed on the IRISPen™ icon in the System Tray. • Make sure the correct document language is still selected. (See Step 5.) 2. Open the application in which you want to scan. Note that the application must be text‐compatible. E.g. Microsoft Word. 3. Click and slide the IRISPen™ over the lines of text you want to scan. The recognized text appears in the application. If the scanning was not performed correctly, animated scanning tips appear on screen. Notes: By default, IRISPen™ adds a space after each scan, and adds new scans on the same line in your application until the line is full. To start a scan on a new line: • Click and slide the IRISPen™ over a line of text. • At the end of the line, click again with the IRISPen™. The cursor now moves to the line below. To modify the default settings, click the settings icon. Then click the Separators tab and select the separators you want to apply. Tips: • Lines can either be scanned as text or as image. Select Image when scanning mathematical formulas for instance. • To hear the text read out loud after scanning, select Say out loud. • To scan numbers only, select numeral scanning: 123 ... • To scan single words, instead of full text lines, select Single word. Place the scanner well in front of each word to start the scanning, and also end the scanning well after each word.
- Page 4 English English Scanning Tips The following scanning tips help improve the scanning quality. • Make sure that both sharp ends of the scanner tip always touch the page during scanning. • Scan one line of text at a time. Make sure the line is approximately in the middle of the two scanner tips. • Avoid scanning too slowly. Slide the IRISPen™ smoothly, in a fluid motion. • Avoid applying excessive pressure. Otherwise, the scanning may result in jerky, uneven motions. Troubleshooting Should you experience issues when using the IRISPen™ Express 7: • Consult the Troubleshooting section in the interface . • Click the question marks in the interface to access the Help file. • Contact the I.R.I.S. support section at www.irislink.com/support/IRISPen7.
Need help?
Do you have a question about the IRISPen Express 7 and is the answer not in the manual?
Questions and answers