Autonics ARIO Series Instruction Manual
Field network devices
Hide thumbs
Also See for ARIO Series:
- Module manual (35 pages) ,
- Manual (25 pages) ,
- Product manual (12 pages)
Table of Contents
Advertisement
Quick Links
Advertisement
Table of Contents

Related Manuals for Autonics ARIO Series


Summary of Contents for Autonics ARIO Series
- Page 1 Field Network Devices ARIO Series MOO-ARIOS-V1.1-2007US Thank you for purchasing an Autonics product. This user manual contains information about the product and its proper use, and should be kept in a place where it will be easy to access. www.autonics.com...
- Page 2 © Copyright Reserved Autonics Co., Ltd.
- Page 3 © Copyright Reserved Autonics Co., Ltd.
- Page 4 Preface Preface Thank you for purchasing Autonics product. Please familiarize yourself with the information contained in the Safety Considerations section before using this product. This user manual contains information about the porduct and its proper use, and should be kept in a place where it will be easy to access.
-
Page 5: Instruction Manual Guide
The manual's content may vary depending on changes to the product's software and other unforeseen developments within Autonics, and is subject to change without prior notice. Upgrade notice is provided through our homepage. We contrived to describe this manual more easily and correctly. However, if there are any corrections or questions, please notify us these on our website ©... -
Page 6: Instruction Manual Symbols
Failure to follow instructions can result in serious injury or death. Failure to follow instructions can lead to a minor injury or product damage. An example of the concerned feature’s use. ※1 Annotation mark. © Copyright Reserved Autonics Co., Ltd. -
Page 7: Safety Considerations
Do not cut off power or disconnect connectors (or terminals) while operating the unit. Failure to follow this instruction may result in fire or product damage. ※ The specifications and dimensions of this manual are subject to change without any notice © Copyright Reserved Autonics Co., Ltd. -
Page 8: Caution During Use
For removing the terminal, body or base, do not operate units for a long time without it. This unit may be used in the following environments. ① Indoors ② Altitude max. 2,000m ③ Pollution degree 2 ④ Installation category II © Copyright Reserved Autonics Co., Ltd. -
Page 9: Table Of Contents
Base-Body disassembly & assembly ..................24 DIN rail-Base disassembly & assembly .................. 24 Operation ........................25 Workflow ............................ 25 Monitoring ..........................26 DAQMaster functions ....................... 27 Appendix ......................... 28 10.1 Glossary ............................28 viii © Copyright Reserved Autonics Co., Ltd. -
Page 10: Reference Manuals
You can use module setting, real-time control of input/output signal, and monitoring/diagnosis DAQMaster function (except ARIO-C-PN and ARIO-C-PB) via DAQMaster. Also, the virtual mode and user manual recommended sorting provides an arrangement the coupler and modules. © Copyright Reserved Autonics Co., Ltd. -
Page 11: Overview
Improved user convenience with DAQMaster, a device integration management program - Module settings, real-time control of input/output signal, monitoring, and diagnosis function - Product selection and placement through virtual mode, offering recommended sorting © Copyright Reserved Autonics Co., Ltd. -
Page 12: Ario System
Beware of that when you install the product or the Hot-swap condition. End plate (sold separately) Main featues: Fixing the unit mounted on the DIN rail (recommended installation height: ≤ 15mm) © Copyright Reserved Autonics Co., Ltd. -
Page 13: System Power Supply And Distribution
External ABUS power circuit – I/O power supply with external input – Non-insulated External control circuit (external) control circuit (internal) BUS power supply – (internal) control Inner BUS power circuit –Inner control circuit circuit © Copyright Reserved Autonics Co., Ltd. -
Page 14: Installation
Install an air exhaust fan in the top. To minimize the interference and impact of products, wire, and peripheral devices, be sure to install the ARIO to meet installation distance. © Copyright Reserved Autonics Co., Ltd. -
Page 15: Installation Positions
Prepare a non-conductive flat head (−) screw driver (tip width: ≤ 3 mm) and the layout of the unit with an intended configuration. Unit: mm, install the DIN rail that meets the sizes below. © Copyright Reserved Autonics Co., Ltd. - Page 16 The position of the DIN rail fixing device (Rail Lock) is like the figure below. 1st Hook the prepared screwdriver to the bottom Rail Lock of the coupler and pull it down. 2nd Place the top Rail Lock of the coupler on the DIN rail. © Copyright Reserved Autonics Co., Ltd.
- Page 17 4th Mount the end module on the side of the last module. 5th Push up all Rail Locks using the screwdriver to mount the unit. ※ You can attach the End plate (sold separately) to the unit's left and right side to fix it firmly. © Copyright Reserved Autonics Co., Ltd.
- Page 18 If another module is connected at the right side of the module to be removed, the base may not be removed. ARIO series must be removed as the reverse of installation order: End plate → End module → Module → Coupler.
-
Page 19: Wiring
It is recommended to use a hub or switch hub (available for collision, load balancing, etc.) Use a hub when extending the communication cable. Install ferrite cores approx. 10cm away from the power, I/O terminals and communication Install ferrite cores connectors to protect against environmental noise. © Copyright Reserved Autonics Co., Ltd. -
Page 20: Install Ferrite Core
Length of connection: 8 to 12 mm (rated length: 10 mm) Wire gauge: AWG 22 - 16 (rated gauge: AWG 18) Current: Max. 2,000mA (1 terminal) Voltage: Max. 230VAC (1 terminal) © Copyright Reserved Autonics Co., Ltd. -
Page 21: Wire Ferrule Specifications
Connecting: Push the wire ferrule to the direction ①. Removing: Put a non-conductive flat head (−) screwdriver (tip width: ≤ 3mm) to the direction ② at the groove on the terminal. Pull the cable to the direction ③. © Copyright Reserved Autonics Co., Ltd. -
Page 22: Earthing And Shielding
Ground the product through the housing frame (e.g., case) when the DIN rail mounting. The grounding structure is provided by the spring contacts with metal elastic structure located on the bottom of the base. The grounding structure is shown in the figure below. Side view © Copyright Reserved Autonics Co., Ltd. -
Page 23: Shield Connecting System
- I/O cable: Use shield clamp for the digital, analog and special modules 6.3 Possible shielding connection Take the effective shielding as follows. Be sure not to configure the closed circuit. Improper shielding connection may cause noise. © Copyright Reserved Autonics Co., Ltd. -
Page 24: Maintenance
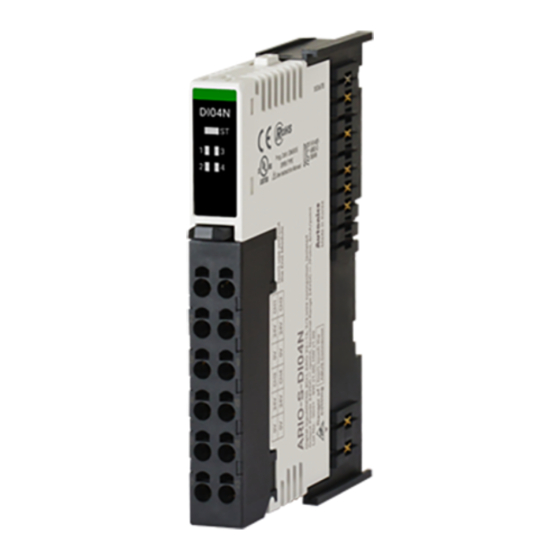
3. Base: Part that connects the communication (ABUS) and power of the coupler and module ※ The base of IO and power module has a different shape. Beware of that when you install the product or under the Hot-swap condition. © Copyright Reserved Autonics Co., Ltd. -
Page 25: Body-Terminal Disassembly & Assembly
Remove the terminal and body and then pull the Rail Lock of the base down. Remove the base from the DIN rail. Assembly: Insert new base on the DIN rail. For more information, see “4.4 DIN rail mounting/removing.” © Copyright Reserved Autonics Co., Ltd. -
Page 26: Operation
Read memory map is available in the monitoring mode During the operation, replacing the components (terminal and body) is Hot-swap available for the maintenance and restoring the settings automatically. Exception Processing state that the product detects an abnormal situation. © Copyright Reserved Autonics Co., Ltd. -
Page 27: Monitoring
Under the field network is operating, DAQMaster can arbitrarily read the information Monitoring surveillance Sequence of the memory map from the coupler Without field network, DAQMaster can arbitrarily modify the information of the Monitoring control Sequence memory map from the coupler © Copyright Reserved Autonics Co., Ltd. -
Page 28: Daqmaster Functions
Check the communication address of the connected modules I/O monitor Check or set the I/O signal of the connected modules You can configure a virtual ARIO system without the product connection. Virtual mode User-friendly ‘Recommended sorting’ function © Copyright Reserved Autonics Co., Ltd. -
Page 29: Appendix
Sold separately to connect the main part of ARIO product and external signal cable. Connector (EtherNet connector, ARIO terminal, D-SUB 9PIN connector, etc.) One of the assembled components in ARIO series, providing a combination of signal and power cable to Terminal receive signals and power. - Page 30 * Dimensions or specifications on this manual are subject to change and some models may be discontinued without notice...
Need help?
Do you have a question about the ARIO Series and is the answer not in the manual?
Questions and answers