
Related Manuals for Zanussi ZPCNA4K1


Summary of Contents for Zanussi ZPCNA4K1
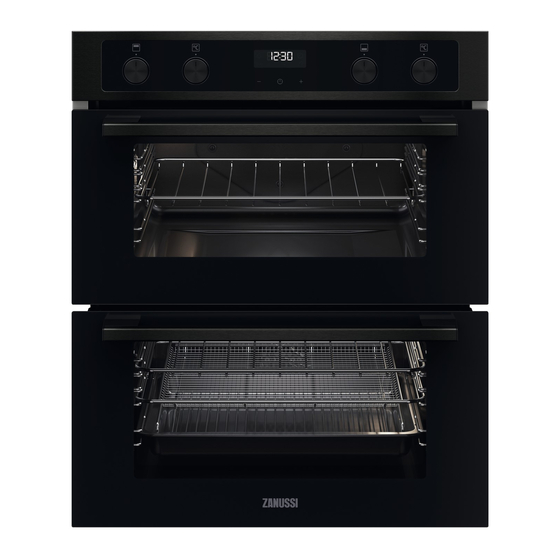
- Page 1 User Manual GETTING STARTED? EASY. ZPCNA4K1 ZPCNA4X1 EN User Manual Built-Under Double Oven...
-
Page 2: Safety Information
VISIT OUR WEBSITE TO: Get usage advice, brochures, trouble shooter, service and repair information: www.zanussi.com/support SAFETY INFORMATION Before the installation and use of the appliance, carefully read the supplied instructions. The manufacturer is not responsible for any injuries or damage that are the result of incorrect installation or usage. -
Page 3: Safety Instructions
Disconnect the appliance from the power supply before • carrying out any maintenance. If the mains power supply cable is damaged, it must be • replaced by the manufacturer, its Authorised Service Centre or similarly qualified persons to avoid an electrical hazard. The control panel must be connected to specified heating unit •... -
Page 4: Electrical Connection
• If the mains socket is loose, do not connect the Cabinet width 600-605 mm mains plug. • Do not pull the mains cable to disconnect the Cabinet depth 550 mm appliance. Always pull the mains plug. Height of the front of 715 mm •... -
Page 5: Internal Lighting
– do not put water directly into the hot • If you use an oven spray, follow the safety appliance. instructions on its packaging. – do not keep moist dishes and food in the • Do not clean the catalytic enamel with appliance after you finish the cooking. -
Page 6: Product Description
PRODUCT DESCRIPTION GENERAL OVERVIEW Knob for the top oven functions Knob for the top oven temperature Temperature indicator / symbol for the top oven Display Knob for the main oven functions Temperature indicator / symbol for the main oven Knob for the main oven temperature Heating element Lamp Shelf support, removable... -
Page 7: Before First Use
A. Clock functions B. Timer BEFORE FIRST USE WARNING! Refer to Safety chapters. BEFORE FIRST USE The oven can emit an odour and smoke during preheating. Make sure that the room is ventilated. Preheat both ovens. Heat up one oven at a time. Step 1 Step 2 Step 3... -
Page 8: Main Oven Functions
Heating function Application To bake and roast food on one shelf position. Conventional Cooking To brown bread, cakes and pastries. To finish cooked dishes. Top Heat To bake cakes with crispy bottom and to preserve food. Bottom Heat To grill thin pieces of food and to toast bread. Grill To grill thin pieces of food in large quantities and to toast bread. -
Page 9: Clock Functions
Heating function Application This function is designed to save energy during cooking. When you use this function, the temperature in the cavity may differ from the set temperature. The heating power may be reduced. For more information refer to "Daily Use" chap- Moist Baking ter, Notes on: Moist Baking. - Page 10 How to change: Time of Day Step 1 - press repeatedly to change the time of day. - starts to flash. Step 2 - press to set the time. After approximately 5 sec., the flashing stops and the display shows the time. How to set: Duration Step 1 Set an oven function and the temperature.
-
Page 11: Using The Accessories
How to set: Time Delay Step 6 Press: At the set time the signal sounds and the oven turns off. Step 7 Press any button to stop the signal. Step 8 Turn the knobs to the off position. How to set: Minute Minder Step 1 - press repeatedly. -
Page 12: Trivet And Grill- / Roasting Pan
Wire shelf: Push the shelf between the guide bars of the shelf support. Deep pan: Push the tray between the guide bars of the shelf support. Wire shelf, Deep pan: Push the tray between the guide bars of the shelf support and the wire shelf on the guide bars above. -
Page 13: Additional Functions
Roasting larger pieces of meat or poultry Grilling and toasting thin pieces of food in on one shelf position. large quantities. Make sure the supports of the wire shelf point Make sure the supports of the wire shelf point down. ADDITIONAL FUNCTIONS COOLING FAN If you turn off the oven, the cooling fan can continue... - Page 14 Baking results Possible cause Remedy The cake sinks and be- The oven temperature is too Next time set slightly lower oven comes soggy or streaky. high. temperature. The oven temperature is too Next time set a longer baking time high and the baking time is and lower oven temperature.
- Page 15 Food Temperature (°C) Time (min) Shelf position - Chicken 160 - 180 75 - 90 Fish 170 - 190 20 - 30 Fish Pie (Potato Topped) 190 - 200 20 - 30 Fruit Pies, Crumbles 190 - 200 30 - 50 Milk Puddings 150 - 170 90 - 120...
- Page 16 Real cooking (°C) (min) time (min) Sweet rolls, baking tray or drip- 35 - 45 16 pieces ping pan Swiss roll baking tray or drip- 30 - 40 ping pan Brownie baking tray or drip- 35 - 45 ping pan Sponge flan flan base tin on wire 30 - 40...
-
Page 17: Roasting Tables - Main Oven
Real cooking (°C) (min) time (min) Vegetarian pizza pan on wire 40 - 50 omelette shelf Mediterra- baking tray or drip- 40 - 50 nean vegeta- ping pan bles, 0.7 kg TIPS ON ROASTING Turn the roast after 1/2 - 2/3 of the cooking time. Use heat-resistant ovenware. - Page 18 Veal Food Quantity Temperature (°C) Time (min) Shelf position Roast veal 160 - 180 90 - 120 Knuckle of veal 1.5 - 2 160 - 180 120 - 150 Lamb Food Quantity Temperature (°C) Time (min) Shelf position Leg of lamb, 1 - 1.5 150 - 170 75 - 120...
- Page 19 For grilling in the top oven adjust the shelf position CAUTION! Always grill with the oven to suit different thicknesses of food. door closed. Always set the pan to collect the fat into the first shelf position. Grill only flat pieces of meat or fish. Always preheat the empty oven with the grill functions for 5 minutes.
-
Page 20: Defrost - Main Oven
Time (min) Food Temperature (°C) Shelf position 1st side 2nd side Whole Fish, 500 210 - 230 15 - 30 15 - 30 3 / 4 - 1000 g DEFROST - MAIN OVEN Do not cover the food with a bowl or a plate, as this can extend the defrost time. -
Page 21: Care And Cleaning
CARE AND CLEANING WARNING! Refer to Safety chapters. NOTES ON CLEANING Clean the front of the oven with a soft cloth with warm water and a mild detergent. Use a cleaning solution to clean metal surfaces. Clean stains with a mild detergent. Do not apply it on the catalytic surfaces. Cleaning Agents Clean the cavity after each use. - Page 22 HOW TO USE: CATALYTIC CLEANING Spots or discolouration of the catalytic coating have no effect on the cleaning. The cavity is coated with catalytic enamel. It absorbs fat during catalysis. Before the catalytic cleaning Turn off the oven and wait until Remove all accessories and re- Clean the oven floor and the it is cold.
- Page 23 Step 3 Close the oven door to the first opening position (approximate- ly 45° angle). Hold the door with one hand on each side and pull it away from the oven at an upwards angle. Put the door with the outer side down on a soft cloth on a stable sur- face.
-
Page 24: Troubleshooting
Product number (PNC) ......... Serial number (S.N.) ......... ENERGY EFFICIENCY PRODUCT INFORMATION AND PRODUCT INFORMATION SHEET* Supplier's name Zanussi ZPCNA4K1 944171741 Model identification ZPCNA4X1 944171731 Top oven: 106.8 Energy Efficiency Index Main oven: 95.9 Top oven: A Energy efficiency class... -
Page 25: Energy Saving
Electricity Top oven: 42 l Volume Main oven: 45 l Type of oven Built-Under Oven ZPCNA4K1 45.0 kg Mass ZPCNA4X1 47.2 kg * For European Union according to EU Regulations 65/2014 and 66/2014. For Republic of Belarus according to STB 2478-2017, Appendix G; STB 2477-2017, Annexes A and For Ukraine according to 568/32020. - Page 28 WWW.ZANUSSI.COM/SHOP...
Need help?
Do you have a question about the ZPCNA4K1 and is the answer not in the manual?
Questions and answers