
Related Manuals for Zanussi ZPCNA4K1


Summary of Contents for Zanussi ZPCNA4K1
- Page 1 User Manual GETTING STARTED? EASY. ZPCNA4K1 ZPCNA4X1 EN User Manual Built-Under Double Oven...
-
Page 2: Table Of Contents
VISIT OUR WEBSITE TO: Get usage advice, brochures, trouble shooter, service and repair information: www.zanussi.com/support Subject to change without notice. CONTENTS 1. SAFETY INFORMATION....................2 2. SAFETY INSTRUCTIONS....................4 3. PRODUCT DESCRIPTION..................... 7 4. CONTROL PANEL......................7 5. BEFORE FIRST USE......................8 6. - Page 3 be kept away from the appliance unless continuously supervised. Children should be supervised to ensure that they do not • play with the appliance. Keep all packaging away from children and dispose of it • appropriately. WARNING: The appliance and its accessible parts become •...
-
Page 4: Safety Instructions
WARNING: Ensure that the appliance is switched off before • replacing the lamp to avoid the possibility of electric shock. WARNING: The appliance and its accessible parts become • hot during use. Care should be taken to avoid touching heating elements or the surface of the appliance cavity. Always use oven gloves to remove or insert accessories or •... - Page 5 2.3 Use Ventilation opening mini‐ 600x20 mm mum size. Opening placed WARNING! on the bottom rear side Risk of injury, burns and electric shock or explosion. Mounting screws 3.5x25 mm • Do not change the specification of this 2.2 Electrical connection appliance.
- Page 6 • Always cook with the appliance door These lamps are intended to withstand closed. extreme physical conditions in household appliances, such as temperature, 2.4 Care and cleaning vibration, humidity, or are intended to signal information about the operational status of the appliance. They are not WARNING! intended to be used in other applications Risk of injury, fire, or damage to...
-
Page 7: Product Description
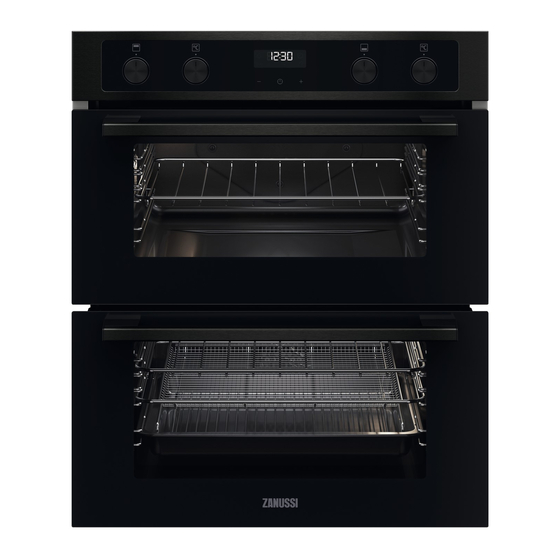
3. PRODUCT DESCRIPTION 3.1 General overview Knob for the top oven functions Knob for the top oven temperature Temperature indicator / symbol for the top oven Display Knob for the main oven functions Temperature indicator / symbol for the main oven Knob for the main oven temperature Heating element Lamp... -
Page 8: Before First Use
4.3 Display A. Clock functions B. Timer The display works only with the main oven. 5. BEFORE FIRST USE WARNING! Refer to Safety chapters. 5.1 Before first use The oven can emit an odour and smoke during preheating. Make sure that the room is ventilated. - Page 9 6.1 How to set: Heating function Step 2 Turn the control knob to select the tem‐ perature. Step 1 Turn the knob for the heating functions Step 3 When the cooking ends, turn the knobs to select a heating function. to the off position to turn off the oven.
-
Page 10: Clock Functions
Heating function Application To roast large meat joints or poultry with bones on one shelf position. To make gratins and to brown. Turbo Grilling To grill thin pieces of food and to toast bread. Grill This function is designed to save energy during cooking. When you use this function, the temperature in the cavity may differ from the set temperature. -
Page 11: Using The Accessories
How to change: Time of Day Step 1 - press repeatedly to change the time of day. - starts to flash. Step 2 - press to set the time. After approximately 5 sec., the flashing stops and the display shows the time. How to set: Duration Step 1 Set an oven function and the temperature. - Page 12 Wire shelf: Push the shelf between the guide bars of the shelf support. Deep pan: Push the tray between the guide bars of the shelf support. Wire shelf, Deep pan: Push the tray between the guide bars of the shelf support and the wire shelf on the guide bars above.
-
Page 13: Additional Functions
Step 2 Put the deep pan on the recommended shelf position. Roasting larger pieces of meat or poultry on one Grilling and toasting thin pieces of food in large shelf position. quantities. Make sure the supports of the wire shelf point up. Make sure the supports of the wire shelf point down. - Page 14 Baking results Possible cause Remedy The cake sinks and becomes The oven temperature is too high. Next time set slightly lower oven tempera‐ soggy or streaky. ture. The oven temperature is too high Next time set a longer baking time and and the baking time is too short.
- Page 15 Food Temperature (°C) Time (min) Shelf position Milk Puddings 150 - 170 90 - 120 Pasta, Lasagne etc. 170 - 180 40 - 50 Pastry: - Choux 180 - 190 30 - 40 - Eclairs, Profiteroles 180 - 190 30 - 40 - Flaky / Puff Pies 210 - 220 30 - 40...
- Page 16 (°C) Real cooking (min) time (min) Victoria sand‐ baking dish on wire shelf 45 - 55 wich Poached fish, 0.3 baking tray or dripping 30 - 40 Whole fish, 0.2 baking tray or dripping 25 - 35 Fish fillet, 0.3 kg pizza pan on wire shelf 30 - 40 Poached meat,...
- Page 17 10.7 Roasting tables - Main oven Beef Food Quantity Temperature Time (min) Shelf position (°C) Roast beef or fillet: rare, per cm of thickness 190 - 200 5 - 6 preheat the empty oven Roast beef or fillet: medi‐ per cm of thickness 180 - 190 6 - 8 um, preheat the empty...
- Page 18 Poultry Food Quantity Temperature (°C) Time (min) Shelf position Poultry pieces 0.2 - 0.25 each 200 - 220 35 - 50 Half chicken 0.4 - 0.5 each 190 - 210 35 - 50 Poultry 1 - 1.5 190 - 210 45 - 75 Duck 1.5 - 2...
- Page 19 Food Time (min) - Rare 4 - 6 - Medium 6 - 8 - Well Done 12 - 15 Grilling - Main oven Food Temperature (°C) Time (min) Shelf position 1st side 2nd side Roast beef 210 - 230 30 - 40 30 - 40 Filet of beef 20 - 30...
-
Page 20: Care And Cleaning
French fries, frozen Croquettes French fries, fresh Apply 1 tablespoon of oil. Spring rolls, frozen Potato wedges, frozen Roasted vegetables, Apply 1 tablespoon of oil. fresh Potato wedges, fresh Apply 1 tablespoon of oil. Potato patties 11. CARE AND CLEANING WARNING! Refer to Safety chapters. - Page 21 Step 1 Turn off the oven and wait until it is cold. Step 2 Pull the front of the shelf support away from the side wall. Step 3 Pull the rear end of the shelf support away from the side wall and remove Step 4 Install the shelf supports in the oppo‐...
- Page 22 Step 1 Fully open the door. Step 2 Lift and press the clamping levers (A) on the two door hinges. Step 3 Close the oven door to the first opening position (approximately 45° angle). Hold the door with one hand on each side and pull it away from the oven at an upwards angle.
-
Page 23: Troubleshooting
Before you replace the lamp: Step 1 Step 2 Step 3 Turn off the oven. Wait until the Disconnect the oven from the Put a cloth on the bottom of the cav‐ oven is cold. mains. ity. Back lamp Step 1 Turn the glass cover to remove it. -
Page 24: Energy Efficiency
13. ENERGY EFFICIENCY 13.1 Product Information Sheet according to UK Ecodesign and Energy Labelling Regulations Supplier's name Zanussi ZPCNA4K1 944171741 Model identification ZPCNA4X1 944171731 Top oven: 106.8 Energy Efficiency Index Main oven: 95.9 Top oven: A Energy efficiency class Main oven: A Top oven: 0.78... -
Page 25: Environmental Concerns
Moist Baking When you use this function the lamp is off. Function designed to save energy during cooking. 14. ENVIRONMENTAL CONCERNS appliances marked with the symbol with Recycle materials with the symbol . Put the household waste. Return the product to the packaging in relevant containers to your local recycling facility or contact your recycle it. - Page 28 WWW.ZANUSSI.COM/SHOP...
Need help?
Do you have a question about the ZPCNA4K1 and is the answer not in the manual?
Questions and answers