APsystems ECU-R Installation & User Manual
Energy communication unit
Hide thumbs
Also See for ECU-R:
- Quick installation manual (28 pages) ,
- Installation & user manual (23 pages) ,
- Quick start manual (8 pages)

Related Manuals for APsystems ECU-R


Summary of Contents for APsystems ECU-R
- Page 1 Installation / User Manual APsystems Energy Communication Unit ECU-R © All Rights Reserved Please scan this QR code to download our APPs or click the link below: http://q-r.to/1OrC...
-
Page 2: Table Of Contents
3.3 Installation ......................6 3.4 Cable Connection....................7 3.5 Internet Connection...................9 4. ECU-R User Interface........................10 4.1 Commissioning the ECU-R................10 4.2 Enter microinverters UID (serial numbers) into the ECU-R....11 4.3 Historical ID......................12 4.4 Delete UID......................12 4.5 Grid Profile......................13 4.6 Time management................... 14 4.7 ECU Network Settings..................14... -
Page 3: Introduction
Internet database in real time. Through the APsystems Energy Monitoring and Analysis (EMA) software, the ECU-R gives you precise analysis of each microinverter and PV module in your solar installation powered by APsystems. -
Page 4: Interface Explanation
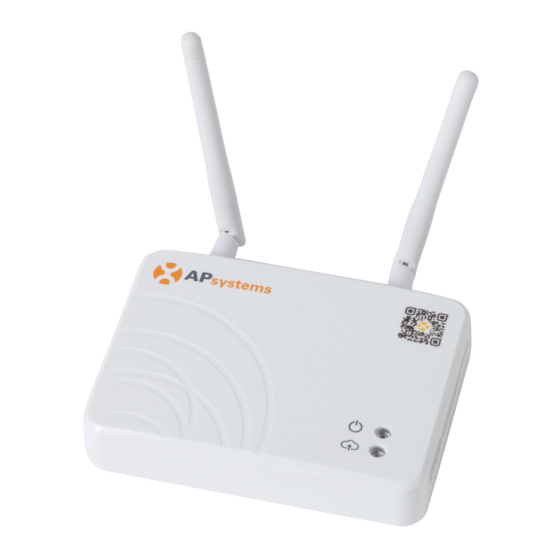
Wireless or Ethernet network. Only 4G Dongle supplied by APsystems are compatible with our ECU-R. AP button: in case there is need to activate the ECU-R hotspot (see later in the document) Figure 2 APsystems ECU-R Installation/User Manual... -
Page 5: Reset
2. Interface Explanation 2.2 Reset Press the Reset button for a minimum of three seconds: the ECU-R will automatically return to the default settings. 2.3 Power Connection Port The power connection port connects power through the power adapter. 2.4 RJ45 Ethernet Network Port The ECU-R allows the user to communicate with the EMA server via Ethernet cable. -
Page 6: Led1
LED2 will be ON (green light) when the ECU is exchanging data with the EMA server. When you haven’t entered microinverters UID into the ECU-R, or The ECU cannot connect to the EMA server, LED2 is OFF. APsystems ECU-R Installation/User Manual... -
Page 7: Hardware Installation
APsystems, but can be purchased at any electrical/PV shop. 3.3 Installation Using a Wall Mount When mounting the ECU-R to a wall, make sure to select a cool, dry indoor location. Depending on the wall surface you are mounting the ECU-R to, use... -
Page 8: Cable Connection
2) if the HECU-R is not mounted on a wall mount, you can put it anywhere on a flat surface or furniture, close to a power outlet. 3.4 Cable Connection 1) ECU-R outside of a cabinet (wall mounted or not) Connect the adapter to the power connection port at the back of the ECU-R. - Page 9 ECU antennas must be left outside of the cabinet, even if the cabinet is made of plastic. Please make sure the extension antennas are Wifi 2.4GHz with SMA connectors male/female. These extension antennas are not supplied by APsystems, but can be purchased at any electrical/PV shop. APsystems ECU-R Installation/User Manual...
-
Page 10: Internet Connection
3. Hardware Installation 3.5 Internet Connection There are two different approaches to connect the ECU-R to the Internet: Option 1: Direct LAN cable connection. Make sure the LAN cable is connected to the network port on the back of the ECU-R. -
Page 11: Ecu-R User Interface
Make sure you have downloaded the EMA Manager APP on your smartphone or tablet. Make sure the ECU-R hotspot is activated (if not, press the AP button for a few second). Open Settings > Wi-Fi in your smartphone or tablet. -
Page 12: Enter Microinverters Uid (Serial Numbers) Into The Ecu-R
4. ECU-R User Interface 4.2 Enter microinverters UID (serial numbers) into the ECU-R Click “Workspace”, select “ID Management”, input the microinverters UID (serial number: 12 digits starting with a 4, a 5, a 7 or a 8) manually or scan the UID with your smartphone or tablet scanner. -
Page 13: Historical Id
Note: when deleting, please press also “Sync”. Otherwise the microinverter will not be removed from the ECU-R. Once the microinverters UID have been successfully entered into the ECU-R, you need to select grid profile and define the adequate time zone of your ECU. APsystems ECU-R Installation/User Manual... -
Page 14: Grid Profile
4. ECU-R User Interface 4.5 Grid Profile From the work space, select “Grid profile”. First select country and then the city. If you select the wrong grid profile, the microinverters may not start or may not produce as per optimal performance. -
Page 15: Time Management
4. ECU-R User Interface 4.6 Time management From the workspace, please select menu “ECU Date Settings” manual set-up, click “Date”, “Time” and “Timezone” to modify. Automated set-up: Click “Time quick setting”: the APP will synchronise on the time and time zone as per smartphone or tablet settings. - Page 16 4. ECU-R User Interface When your smartphone or tablet is connected to the ECU hotspot again, you can open the ECU APP home page and check the internet connection status. The first bullet (with ECU UID) is green when the smartphone/tablet is properly connected to the ECU hotspot.
- Page 17 ECU’s wired network setting has 2 options: automatically obtain an IP address: the router will give an IP address to the ECU-R automatically (preferred method) . use a fixed IP address. In that case, you need to enter enter IP address, subnet mask, default gateway, Preferred DNS server and Alternate DNS server.
-
Page 18: Checking The Commissioning Of The Ecu-R
4. ECU-R User Interface 4.8 Checking the commissioning of the ECU-R Once the ECU-R has been commissioned, installer can check status on the home page of the ECU APP: Several infos are displayed - Systems info (ECU UID, serial number) -
Page 19: Module
4. ECU-R User Interface Status of connectivity The traffic light (on the left) in front of the ECU UID shows connectivity status between smartphone or tablet and ECU hotspot: Smartphone or tablet is connected to the ECU hotspot. -
Page 20: Data
4. ECU-R User Interface 4.10 Data In this Menu, you can view the detailed data at system level: -Per day -Per month 4.11 Inverter Connection Progress This menu shows the connection progress and communication quality between microinverter ECU,... -
Page 21: Automatic System Check
4.13 ECU AP Settings This menu can be used if you would like to change the default password of the ECU-R hotspot. Please connect to the ECU hostpot first, open the menu “ECU APP settings” and change the password at your convenience. -
Page 22: Do-It-Yourself Registration
4. ECU-R User Interface 4.14 Do-It-Yourself(DIY) Registration This menu is only for DIY installers: it will allow DIY installer to create their EMA account by themselves. They can later on access to their account via the EMA APP. ... -
Page 23: Technical Data
Specifications subject to change without notice. Please ensure you are using the most recent update found at www.APsystems.com. This device complies with part 15 of the FCC Rules. Operation is subject to the following two conditions: (1) This device may not cause harmful interference, and (2) this device must accept any interference received, including interference that may cause undesired operation. - Page 24 2 hours and can lead to death. Keep new and used batteries away from children. If you think batteries might have been swallowed or placed inside any part of the body, seek immediate medical attention. APsystems ECU-R Installation/User Manual...
-
Page 25: Contact Information
Cypresbaan 7, 2908 LT,Capelle aan den Ijssel The Netherlands Tel: +31-10-2582670 Mail: info.emea@APsystems.com APsystems Mexico AV. Lazaro Cardenas 2850-5º Piso, Colonia Jardines del Bosque C.P. 44520, Guadalajara, Jalisco Tel:52 (33) -3188-4604 01 800 890 6030 Mail: info.latam@APsystems.com APsystems ECU-R Installation/User Manual...
Need help?
Do you have a question about the ECU-R and is the answer not in the manual?
Questions and answers