APsystems ECU-R Installation & User Manual
Apsystems energy communication unit
Hide thumbs
Also See for ECU-R:
- Quick installation manual (28 pages) ,
- Installation & user manual (25 pages) ,
- Quick start manual (8 pages)

Related Manuals for APsystems ECU-R


Summary of Contents for APsystems ECU-R
- Page 1 Installation / User Manual APsystems Energy Communication Unit ECU-R © All Rights Reserved Please use mobile browser to scan the QR codes to download APP. Or click the link to download the app: http://q-r.to/1OrC...
-
Page 2: Table Of Contents
3.2 Selecting an Installation Location for the ECU-R........6 3.3 Installation ......................6 3.4 Cable Connection....................7 3.5 Internet Connection...................9 4. ECU-R User Interface........................10 4.1 Connecting to the ECU-R via the Local Wireless........10 4.2 Add UID....................... 11 4.3 Historical ID......................11 4.4 Delete UID......................11 4.5 Homepage......................12 4.6 Module......................... -
Page 3: Introduction
APsystems inverter APsystems Energy Communication Unit (ECU-R) ECU-R is part of the system and is the data link to the inverter. APsystems APP (EMA APP) Based on android and iOS. ... -
Page 4: Interface Explanation
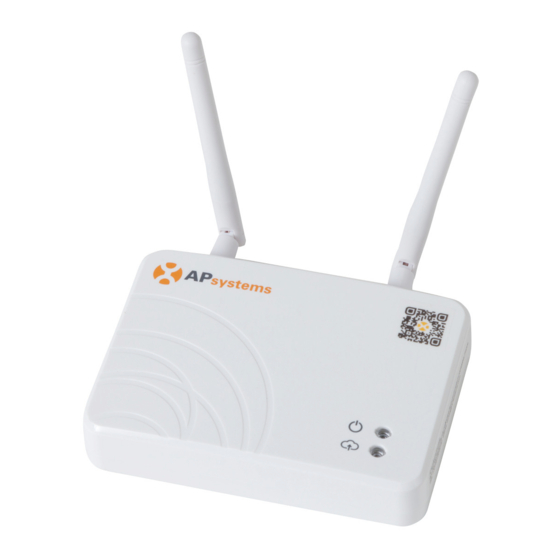
RJ45 Signal (Only for Australia) Figure 2 2.2 Reset Press the Reset button for three seconds or longer, and the ECU-R will automatically return to the default settings. The wireless password will be changed to “88888888”. APsystems ECU-R Installation/User Manual... -
Page 5: Power Connection Port
Wi-Fi connection between ECU-R and router. 2.7 USB port The USB interface is reserved. 2.8 AP Press the AP button to turn on AP. Then the ECU-R can be scanned by phone. ECU-R will turn off it automatically in one hour. APsystems ECU-R Installation/User Manual... -
Page 6: Led1
2. Interface Explanation LED1 LED2 Figure 3 2.10 LED1 LED1 will be on When the ECU-R works well. 2.11 LED2 LED2 will be on When the ECU-R connects to the sever. APsystems ECU-R Installation/User Manual... -
Page 7: Hardware Installation
3.3 Installation Using a Wall Mount When mounting the ECU-R to a wall, make sure to select a cool, dry indoor location. Depending on the wall surface you are mounting the ECU-R to, use... -
Page 8: Cable Connection
1) Using a Wall Mount Connect the adapter to the power connection port on the top of the ECU-R. Figure 5 The antennas used for ZigBee port and WI-FI port are exactly the same type, no need to distinguish. APsystems ECU-R Installation/User Manual... - Page 9 Do not put the antenna inside a metal box, that will block the signal. If ECU-R is placed in distribution box or the roof is metal, please use this long cable antennas, and put them outside the box or on roof.
-
Page 10: Internet Connection
3. Hardware Installation 3.5 Internet Connection There are two different approaches to connecting the ECU-R to the Internet: Option 1: Direct LAN cable connection. Make sure the LAN cable is connected to the network port on the bottom of the ECU-R. -
Page 11: Ecu-R User Interface
4.1 Connecting to the ECU-R via the Local Wireless Open Wi-Fi setting in your smartphone, select ECU-R hotspot. Connecting to the ECU-R via the Local Wireless, the default password is “88888888”. Open the EMA Manager. ... -
Page 12: Add Uid
Select the desired history ID and click “Restore”, these IDs will be added in the ID list. 4.4 Delete UID Select the UIDs, click “Delete” then click “Sync”. The UIDs selected are deleted on the ECU-R. APsystems ECU-R Installation/User Manual... -
Page 13: Homepage
4. ECU-R User Interface 4.5 Homepage On the home page, installer can visualize: -Systems info of ECU ID -The number of connected inverters communicating with the ECU / total number of inverters installed -Today’s power output -Total power output since installation -CO₂... - Page 14 4. ECU-R User Interface On the module page, installer can visualize the performance of inverters connected to the ECU. According to different models of inverter, each inverter would have the corresponding panels displaying the real time power. (even if some DC channels are not connected on purpose, the ECU_APP...
-
Page 15: Data
4. ECU-R User Interface 4.7 Data In this page, you can view the detailed data on ECU level: -Per day -Per month If with metering functions activated and CTs (current transformers) in place, you can also visualize PV production, house-hold consumption and grid import/export data on meter level. -
Page 16: Workspace
4. ECU-R User Interface 4.8 Workspace Click “Workspace”. In this View, you can manage the ECU’s system information. 4.8.1 Manage IDs Please refer to 5.2 to add UID. 4.8.2 Grid Profile User needs to select grid profile when installing the system. -
Page 17: Ecu Network Settings
4. ECU-R User Interface 4.8.4 ECU Network Settings 4.8.4.1 WLAN The page will show up ECU’s wireless connection status. Swipe down the screen, the available SSID would show up. Click the SSID and enter the password. The ECU would restart after sending the password. -
Page 18: Ecu Ap Settings
ECU’s wired network setting has 2 options: automatically obtain an IP address or use a fixed IP address. Obtaining an IP address automatically means the router would distribute IP to ECU-R automatically. When use fixed IP, please enter IP address, Subnet mask, Default gateway, Preferred DNS server and Alternate DNS server. -
Page 19: Time Management
4. ECU-R User Interface 4.8.6 Time management Enter the page, the time and time zone of ECU-R shall be displayed on the right side of the page. Click “Date”, “Time” or “Timezone” to modify. Click “Time quick setting”, APP will set the date and time of the phone for ECU, user doesn't need to set date and time manually. -
Page 20: Do-It-Yourself Registration
4. ECU-R User Interface 4.8.8 Do-It-Yourself Registration Make sure the ECU has entered the inverter ID correctly. Connect your phone to internet instead of to the ECU. Then enter the information and click “Sync EMA”. Items with * are necessary. -
Page 21: Technical Data
GB/T17799 Specifications subject to change without notice. Please ensure you are using the most recent update found at www.APsystems.com. This device complies with part 15 of the FCC Rules. Operation is subject to the following two conditions: (1) This device may not cause harmful interference, and (2) this device must accept any interference received, including interference that may cause undesired operation. - Page 22 2 hours and can lead to death. Keep new and used batteries away from children. If you think batteries might have been swallowed or placed inside any part of the body, seek immediate medical attention. APsystems ECU-R Installation/User Manual...
-
Page 23: Contact Information
APsystems America 600 Ericksen Ave NE, Suite 200 Seattle, WA 98110 Tel: 844-666-7035 Mail: info@APsystems.com APsystems Europe Rue des Monts dor ZAC de Folliouses Sud-Les Echets 01700 Miribel, France Tel: +33-481 65 60 40 Mail: emea@APsystems.com APsystems ECU-R Installation/User Manual...
Need help?
Do you have a question about the ECU-R and is the answer not in the manual?
Questions and answers